Regardless of the reason why you want to password protect a WordPress site, one thing you need to know right off the bat is that there is quite a lot of ground to cover.
There are many options to explore and choose from, whether you want to add password protection to an entire WordPress site or you need to password protect a WordPress page.
And perhaps more importantly, you will need to explore the way the choices you make in terms of website security impact the performance of your website.
Table of Contents
- How to Password Protect a WordPress Website?
- How to Password Protect a WordPress Page, Post, or Product?
- How to Password Protect a Part of a WordPress Post?
- How to Password Protect Post Categories?
- How to Password Protect Product Categories?
- How to Password Protect a Directory?
Heads up 1: Whether you are password protecting your entire WordPress site, a category, or a single page, you need to be aware of the fact that this can cause search engine indexing issues. Search engines are unable to access, crawl, and analyze the password-protected pages of your website. That can affect the rankings of these pages.
Heads up 2: If you are creating a membership site, adding password protection is not going to be the right choice to create a paywall that will allow you to offer the content solely to your subscribers.
This entails a more advanced process and can be usually done with a special membership plugin. While password protecting your WordPress site may seem like a good idea, it will not bring the right results.
How to Password Protect a WordPress Website?
Depending on your level of skill and dedication to your project, there are several options available to enable password protection on your WordPress site. You can use plugins, which make things incredibly easy for you, but are somewhat taxing with your website’s resources, or you can do everything manually.
The latter option will most likely be as effective as using a plugin, without eating up too much of your resources, but will certainly take a lot more time and will require some technical knowledge.
Password Protect a WordPress Site Using a Plugin
By far the best choice when it comes to ease of use, time savings, and user-friendliness is, of course, using WordPress plugins.
Here are some of the best WordPress plugins to password protect your entire site and what recommends them as the top choices.
Password Protected
Cost: Free version + starting $29.99 / year for premium version
Rating: 4.6
Active installations: 300,000+
Password Protected is a WordPress plugin that comes with a huge variety of security features. It has a free version and a plethora of advanced features available in the premium version, and the number of installations and the user rating tell a great story about its effectiveness.
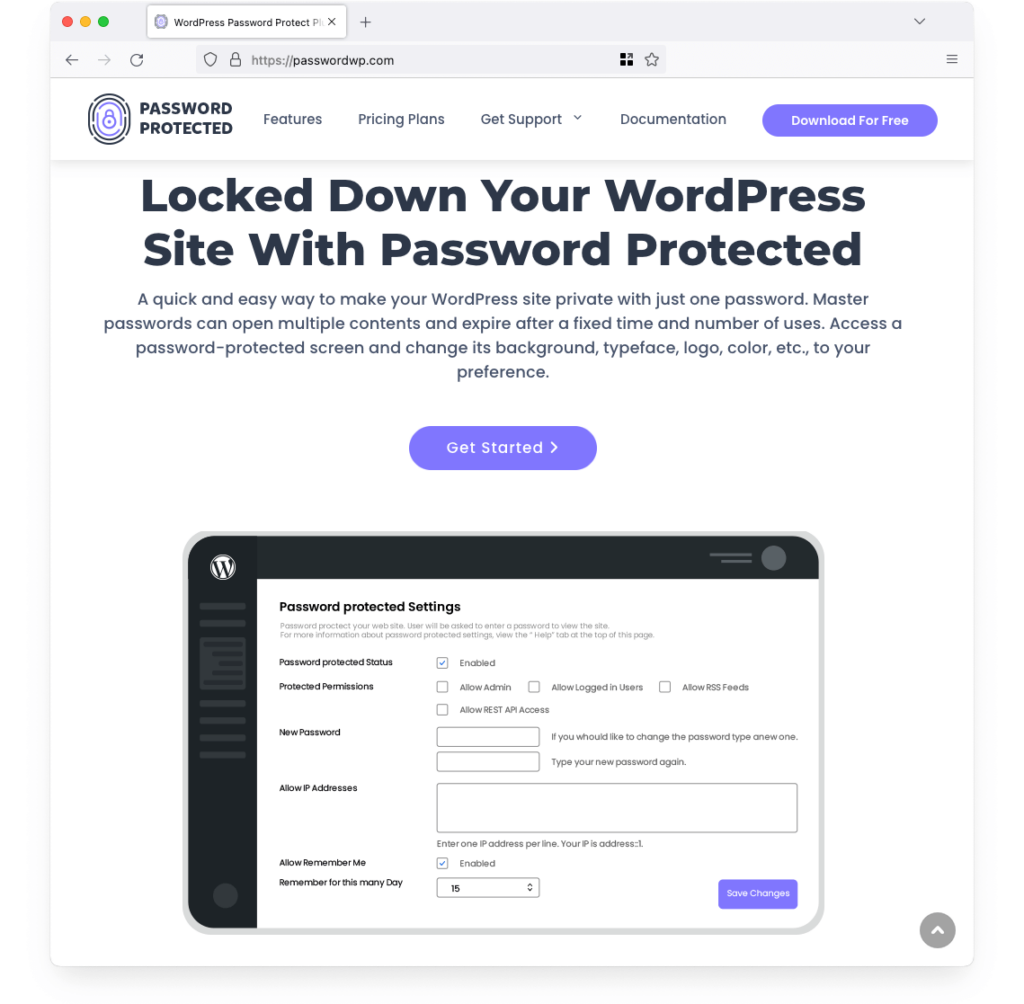
Here are some of the most important features you should know about:
- Single Password Protection. With Password Protected, you can take advantage of the fact that your entire WordPress site can be locked down with a single password. That way, only authorized users can access your restricted content, whether that means your entire WordPress site or just certain pages or categories.
- Multiple Passwords Management. If you want to use multiple passwords to protect your content, Password Protected offers you all the support you need. You can easily manage all your passwords, create new ones, or modify the existing ones with minimum effort.
- Activity Logs. Monitoring all login attempts and other password usage-related KPIs is going to be an important part of keeping your website secure. This feature is going to stand between you and possible security breaches if you keep an eye on everything that is constantly changing on your website.
- Limited Login Attempts. To protect your WordPress site against brute force attacks through which hackers use certain algorithms to “guess” the passwords protecting your entire website, Password Protected includes a feature that limits failed login attempts.
There are many other features for you to discover if you decide to use Password Protected as your plugin of choice to password protect your WordPress website. And if you need to protect more than one website, Password Protected offers separate packages for multiple websites.
PPWP
Cost: Free version + starting $169.9 / year for premium version
Rating: 4.7
Active installations: 30,000+
Another plugin that is definitely worth its salt is PPWP. Deemed as an invaluable addition for any WordPress user who needs to password protect parts of a website, this plugin comes as a great all-around solution for your needs.
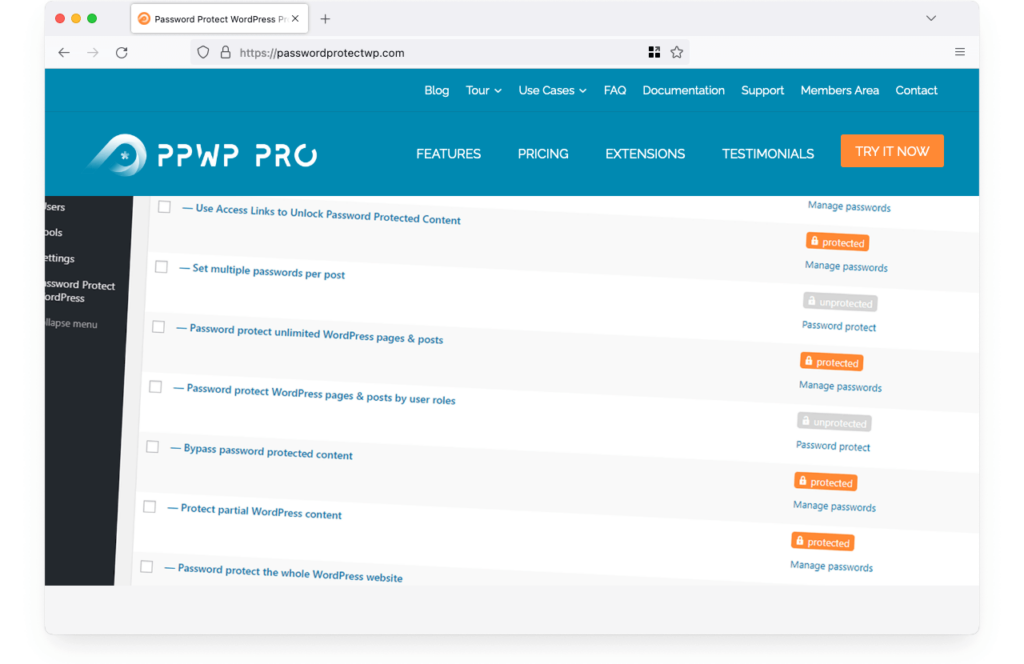
Let’s have a look at some of the most relevant features that could make PPWP – WordPress Password Protect Page the best solution for your WordPress website.
- Post Type Protection. The easiest and most convenient option to activate is the post type protection, which allows you to specify which types of content you want to protect.
- Cookie Expiration. Set a specific timeframe during which your visitors will be allowed to view the restricted content after inserting the password.
- Role whitelisting. Through this, you will allow access to certain posts or categories to specific users or types of users. Here is who you can allow access to: Nobody, Admin users, Specific posts’ authors, Logged in users, Custom roles.
- Child pages and private pages. Automatically password-protect all child pages whenever you set a password for a parent page. On top of this, if you want to increase the protection of a private page, you can turn it into a password protected page
- Advanced features. On top of these generic options, there are also quite a lot of advanced features you will be able to take advantage of. Using shortcodes to create teaser content, creating master passwords, and creating very specific protection rules for posts and categories are just a few of the options available.
Passster
Cost: Free version + starting $79.99 / year for premium version
Rating: 4.3
Active installations: 10,000+
Another great plugin you can use to password protect WordPress content, Passster is also available for free and as a premium tool. It comes with a great variety of features, whether you are looking to add password protection for your entire WordPress site or just for certain parts of it.
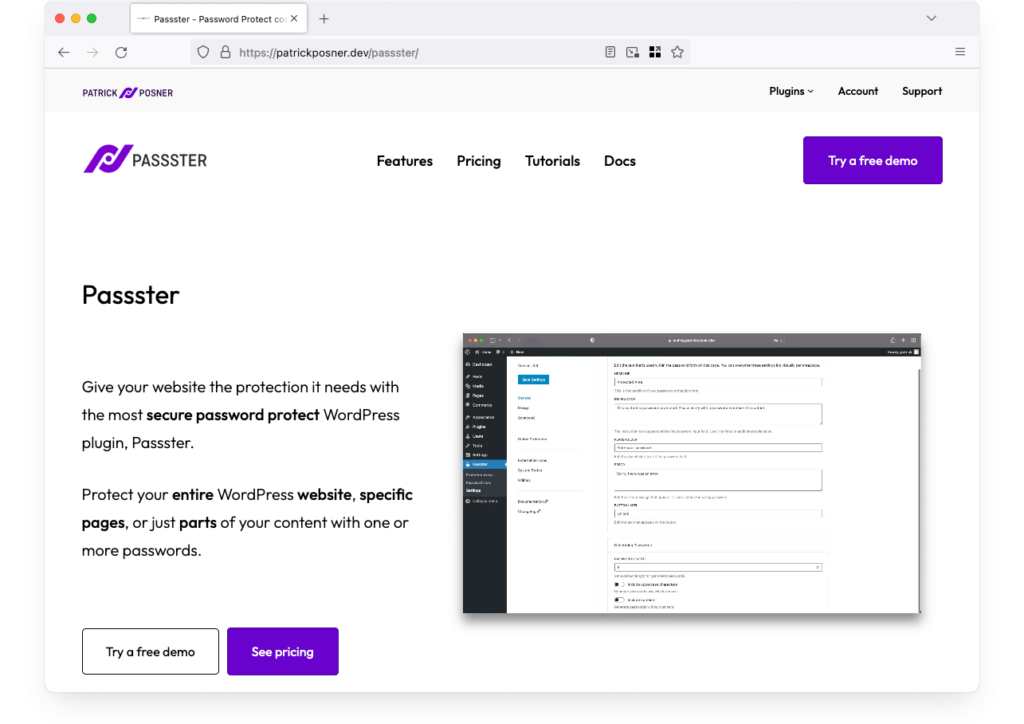
Here are some of the most important features you should keep in mind.
- Area protection. With Passster, you will be able to easily create custom areas on your website with shortcodes, which you can then password protect depending on your particular needs.
- Secure passwords. The premium version will allow you to create extremely safe passwords, which can also be configured to expire however often you need them to. You can create one-time passwords or passwords that expire after a predefined amount of time.
- Global protection. You can use Passster to activate global protection for your whole WordPress site, which will get each user redirected to the login page whenever they are trying to access password-protected content.
Password Protect your WordPress Site Using HTTP Authentication
This type of password protection needs to be set up at the web hosting level. Nowadays, many web hosting providers offer the option to activate HTTP authentication in just one click, regardless of your CMS.
One important aspect to keep in mind is that the procedure differs from one hosting provider to another, which means you will need to look for tutorials for each specific hosting provider to learn the exact steps.
While we strongly encourage you to only use this option during the development stages of your website, you should know that using HTTP authentication is a safe and secure option if you want to password protect your website.
If you will need to set things up manually, you should keep in mind that the setup process is considerably more complicated, especially if you want to set things up in a way that only restricts access to part of your website.
Another important aspect to remember is that this option is particularly taxing with search engines indexing.
For these reasons, using HTTP authentication to password protect your WordPress website is an option we recommend for advanced users only and generally only during the development stages.
How to Password Protect a WordPress Page, Post, or Product?
Adding password protection only to certain parts of your website can be a little more challenging, but will certainly allow you to have more control over the experience you offer your visitors.
You can restrict access to certain pages, posts, and products and only allow users to see them if they have the password you set up.
Manual Option
Since WordPress offers this option as an inherent option, the best way to approach password-protecting individual pages, posts, or products is to get it done manually.
Here are the steps you should follow.
- Log in to your WordPress dashboard with an administrator account
- Access the “Posts” menu, then select “All Posts”
- Click “Edit” on the individual post you want to password protect
- Access the “Visibilty” menu by clicking on “Public” and change the visibility option to “Password protected”
- Enter your desired password
- Publish the changes
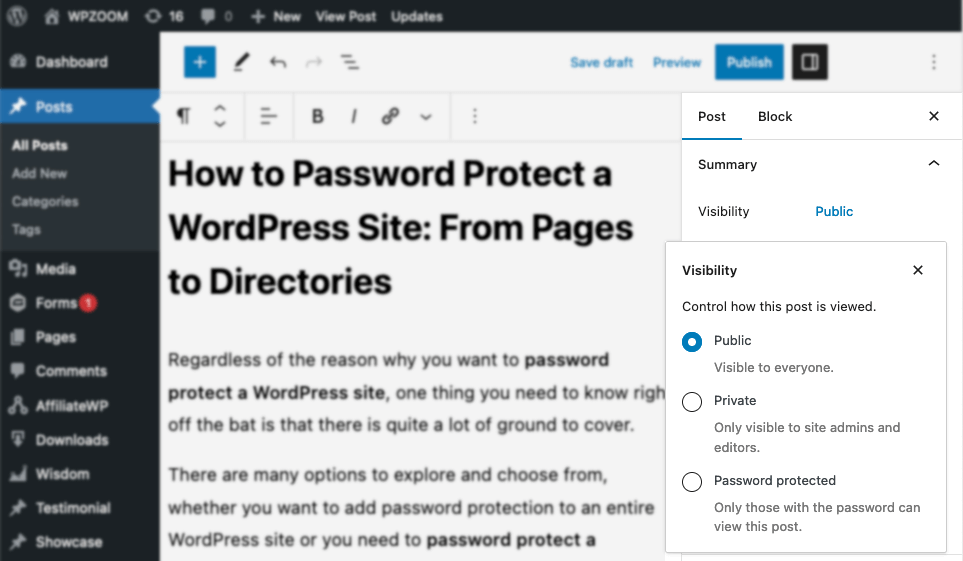
The same process should be followed if you want to get this done with pages or products.
After publishing the post (page or product), a password form will appear in place of the content. Inputting the correct password will display the content.
Using a Plugin
Most password protection plugins offer the option to restrict access to individual WordPress posts, pages, or products. Whether you decide to choose one of the plugins we presented above or a different tool of your choice, the process is generally going to be a smooth and simple one.
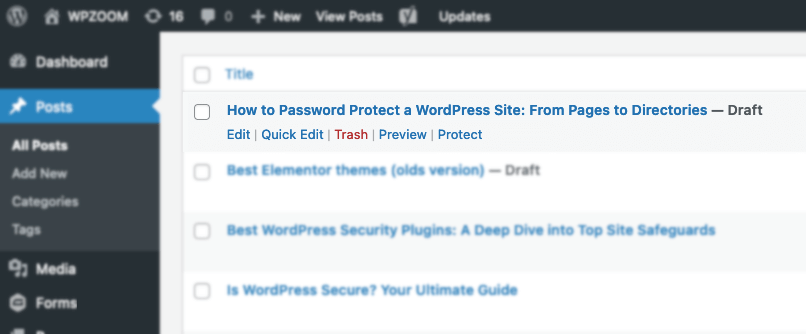
For example, if you decide to use PPWP for your password protection needs, you will need to follow these steps:
- Download, install and activate the PPWP plugin.
- Go to Pages or Posts menu.
- Hover over a page or post title.
- Click on “Protect”.
How to Password Protect a Part of a WordPress Post?
Password-protecting a part of a WordPress post or page is a very powerful tool you can use. Offering this type of teaser can increase your number of subscribers and therefore the value of your website’s following.
This can be done manually through a process that involves adding some custom code to your theme’s functions.php file and manually configuring the excerpts for each individual WordPress post. A much more user-friendly and efficient course of action is choosing to use a dedicated plugin.
Our recommendation for this particular task is to use PPWP.
If you decide to create content teasers with PPWP, the process is a simple and straightforward one that will take very little effort and almost no technical knowledge.
Simply wrap the section you need to protect with the shortcode below:
[ppwp passwords= "password1 password2"] Your content [/ppwp]
PPWP has a step-by-step tutorial you can check for more details.
How to Password Protect Post Categories?
While adding password protection for each individual page, post, or product may be a great solution for some, things can get a little more complicated if the number of pages on your website becomes higher.
That is when password protecting entire categories becomes a more efficient and simple option. If you split the content on your website in categories and decide which ones to password protect and which ones will remain widely available, things will be easier to manage for you, but also for your visitors.
Simply use a dedicated plugin, which will generally also come with additional features. The two most efficient ones for this particular task are below:
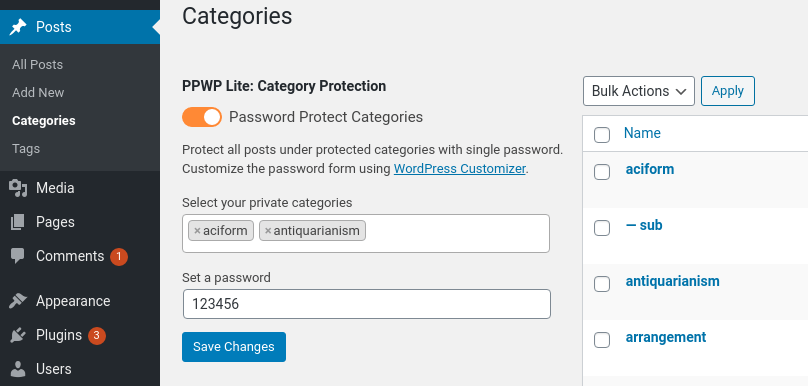
Here is how you can password protect a category with PPWP:
- Download, install and activate the PPWP plugin
- Go to Posts -> Categoies
- Enable “Password Protect Categories” option
- Select the categories you want to protect
- Set the desired password to unlock all these categories
- Save changes
How to Password Protect Product Categories?
If you have an eCommerce site, you might want to password protect certain product categories.
You can do this to offer access to certain products only to your top customers or to limit access to some product categories to a handful of your users that meet the criteria you decide.
You can use the Barn2 Password Protected Categories plugin for a seamless experience that requires no technical knowledge whatsoever.
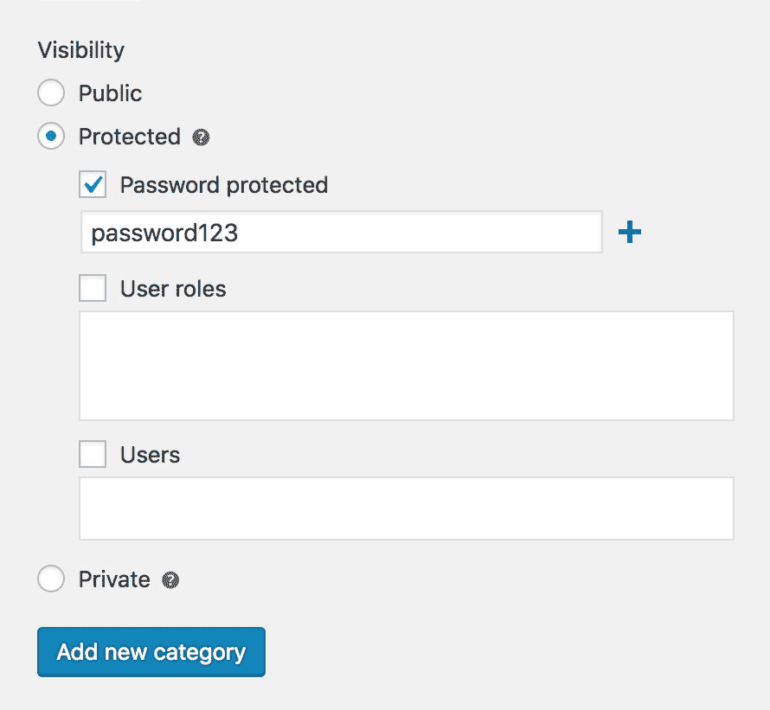
- Go to “Products” → “Product Categories”.
- Add a new category or edit an existing one.
- In the “Visibility” section, choose “Protected”.
- Tick the “Password protected” checkbox.
- Add a password.
How to Password Protect a Directory?
Adding password protection to individual WordPress directories is a very efficient security measure you can use. This adds an extra layer of security to your most important entry point to your website.
There are several ways you can get this done. Here are the most important ones you should know about.
1. Using a Security Plugin
Dedicated security plugins for WordPress sometimes offer the option to manually add password protection to certain folders or directories of your WordPress website.
Using a dedicated plugin for extra security has several advantages for you, from extra safety measures included to ease of use.
These plugins do come with certain costs, which can range from actual funds you will need to pay in order to access premium features to the performance of your website if your resources are limited.
2. Using Directory Privacy
This is probably the safest and easiest way to create password protection at a folder or directory level for your WordPress site.
Directory privacy can be set up at the hosting provider’s level. You just need to access cPanel or the equivalent system offered by your hosting provider.
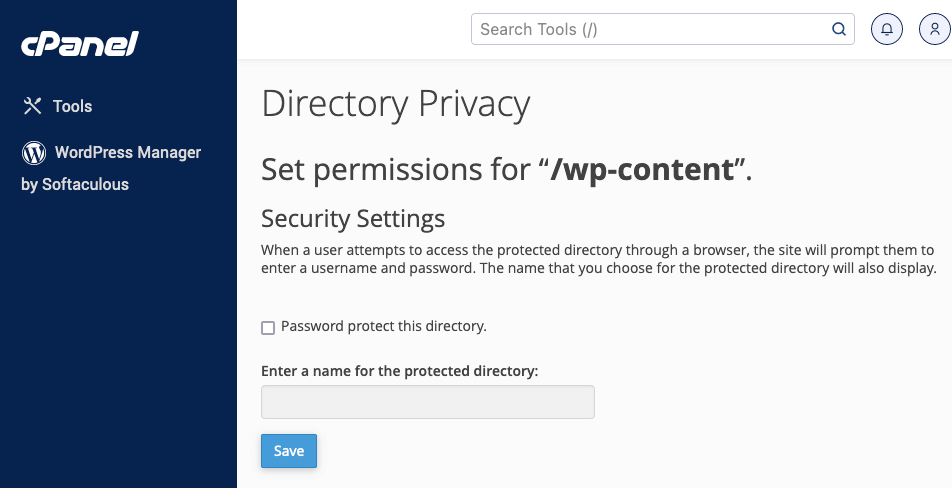
In cPanel:
- Go to “Directory Privacy” from the “Files” section.
- You will see all the different folders or directories that make up your website. Here, you will be able to find any folder you might be looking to password protect.
- Click the “Edit” button and you will be taken to a new screen where you will have the option to add password protection to this folder.
FAQ
Why Password Protect WordPress?
There are many reasons why you would want your WordPress site to be password protected. The most important reason would have to do with the security of your site. Another good reason for having password protected websites or categories from a website is to offer certain parts of your content to specific users. Third of all, password protection can be a useful tool when you need to restrict access to pages that are still under construction.
Private Page vs. Password Protected Page. What Is the Difference?
The difference between a private page and a password protected page is that the private one is only visible to editors and administrators and won’t appear in any feeds or menus. A Password protected page will act like a regular page but will require users to enter a password in order to access it.
Conclusion
Now you should have all the relevant information to password protect WordPress, regardless of the specific task you have in mind. Let’s go over everything once again.
- If you want to password protect your entire WordPress website: you can use HTTP authentication if you’re an experienced user, or dedicated plugins for a more convenient solution
- If you need to password protect WordPress posts, pages or categories: use dedicated plugins, or do it manually from the WordPress privacy options
- If you want to password protect WordPress categories: use plugins
- If you need extra security and need to password protect WordPress directories: use security plugins for WordPress or do it manually from the hosting provider’s dashboard

