Select Deactivate, followed by Apply. If the error message goes away, you know that one of your plugins was at fault, and you can follow the process described above to test them one by one.
Deactivate WordPress plugins via FTP
If you’re unable to access your WordPress dashboard, you can also deactivate your plugins by connecting to your site’s server via FTP using an FTP client such as FileZilla.
Not sure what FTP is? Themeisle has a good introduction to FTP for WordPress users.
Once you’ve connected to your server, here’s what to do:
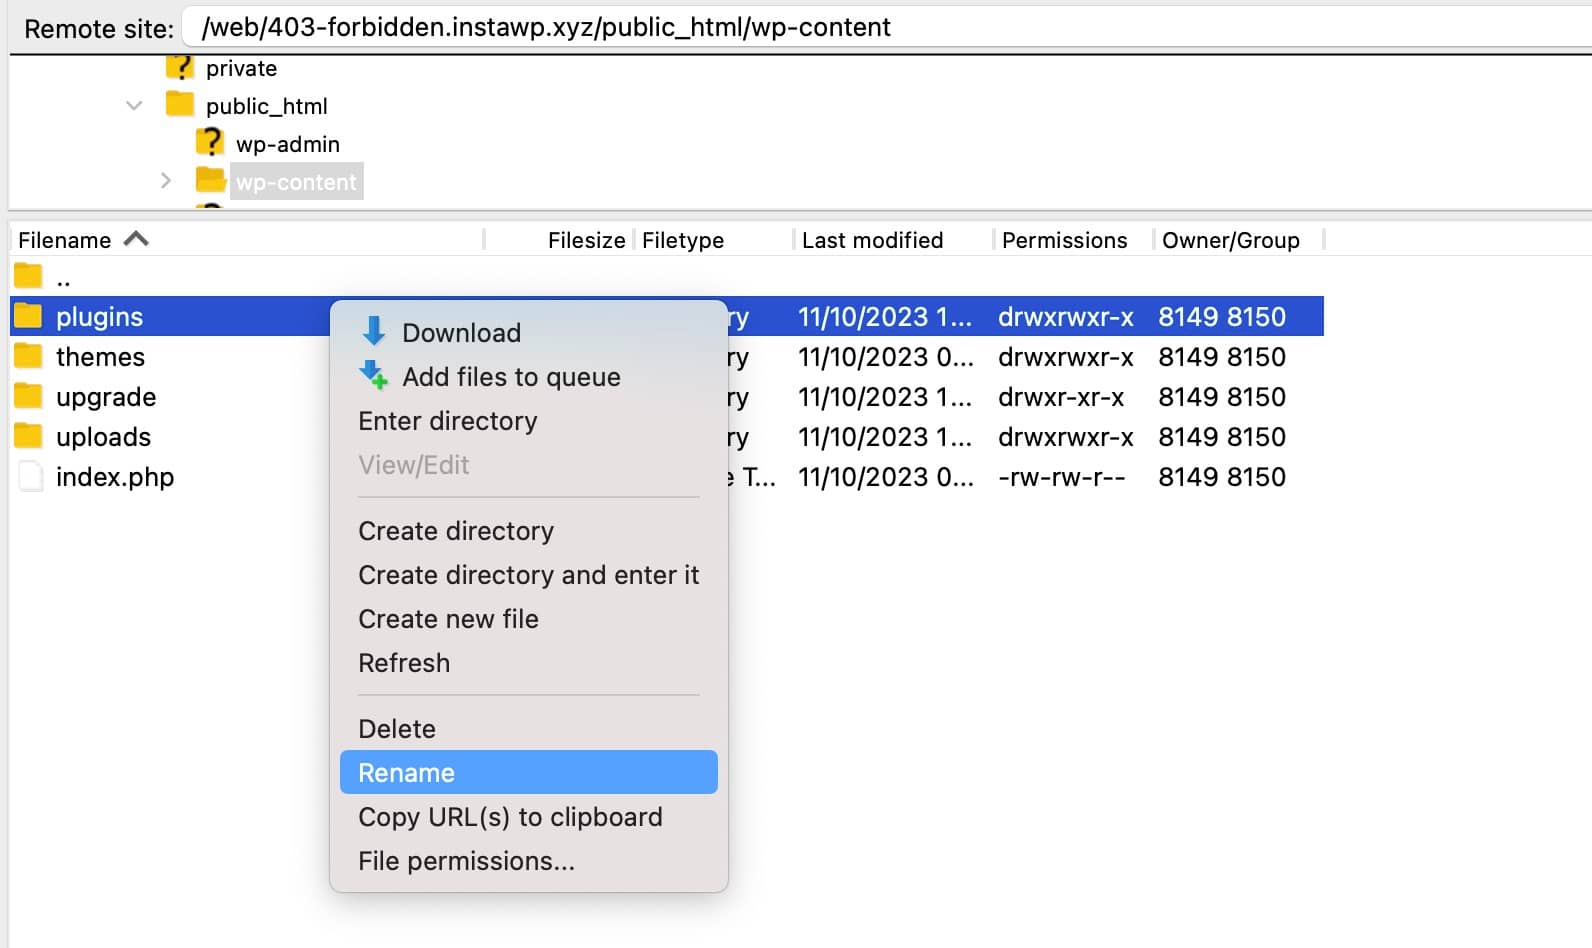
- Find the plugins folder inside the wp-content folder.
- Right-click on the plugins folder and choose the option to rename it.
- Change the name to something like plugins-off.

Changing the name of the folder will automatically deactivate all of the plugins on your site. You can then try accessing your site’s dashboard to see if the WordPress 403 Forbidden error has disappeared.
If the error is gone, you know that there’s an issue in one of your site’s plugins.
You can then go back to your FTP client and rename the folder back to plugins from plugins-old. As long as you’ve logged in to your WordPress dashboard, the plugins should now appear in the Plugins list again, but they will rename inactive.
You can reactivate them one by one until you find the plugin that’s causing the WordPress 403 Forbidden error on your site.
3. Turn off your CDN 💻
Implementing a content delivery network (CDN) on your website can be an excellent way to ensure that it performs optimally, no matter where your visitors are located. However, if there is an issue with your CDN’s server configuration, this could result in the WordPress 403 Forbidden error.
You can turn off your CDN to test this. There are many different CDN providers, but Cloudflare is one of the most popular. So we’ll use it for our example. Log in to your Cloudflare control panel, and go to Overview in the menu:


After that, scroll to the bottom of the page and find Advanced Actions. As you can see, you can either pause or completely remove your site from Cloudflare. We recommend just pausing it to start.
Then you can test your site to see if the 403 error persists.
4. Disconnect from your VPN 🚧
If you use a virtual private network (VPN) to protect your privacy, this could also be causing the issue. So you might need to disconnect it.
That process will vary depending on your provider. However, it’s usually simple. It may be as easy as toggling an off switch in your Chrome extension settings. Once you’ve disconnected your VPN, revisit the page that was displaying the error to determine whether this was the issue.
5. Remove and restore your .htaccess file 🔄
If none of the above methods have fixed the WordPress 403 Forbidden error, you can try removing and restoring your site’s .htaccess file. It could be corrupt.
However, keep in mind that this method is only suitable for advanced WordPress users. Managing website files is a delicate process, and even a tiny mistake could severely impact the functionality of your website.
Even if you’re comfortable moving forward, you’ll still want to begin this process by making a fresh backup of your site. Once that’s done, you’ll want to connect your website to an FTP client such as FileZilla.
To do this, you’ll need your FTP credentials from your web host. If you’re not sure what they are, you can find them in your control panel or reach out to your web host’s support team. Once your site is connected, you’ll be able to manage its files remotely:


