Uploading images to WordPress is easy, but figuring out the right sizes for your site can get tricky. From thumbnails to banners and featured images, every part of your site needs a specific size to look its best. WordPress helps by automatically generating different image sizes, but knowing how to use them—and when to tweak them—can save you time and hassle.
In this guide, we’ll cover the basics of WordPress image sizes, recommend dimensions for common uses, and show you how to customize them for your needs. Let’s make your images work smarter, not harder!
Table of Contents
- Default WordPress Image Sizes
- Recommended Image Dimensions for Common Uses
- How to Adjust Default WordPress Image Sizes
- Adding Custom Image Sizes
- How to Edit Image Sizes Directly in WordPress
Default WordPress Image Sizes
When you upload an image to WordPress, it doesn’t just store the original. Instead, it creates four different sizes to make sure your images look great no matter where they’re used. Here’s the breakdown:
- Thumbnail: 150 × 150 pixels – Ideal for galleries, blog previews, and widgets.
- Medium: 300 × 300 pixels – Perfect for in-post images and smaller banners.
- Large: 1024 × 1024 pixels – Great for headers, sliders, and featured images.
- Full Size: The original image you uploaded.
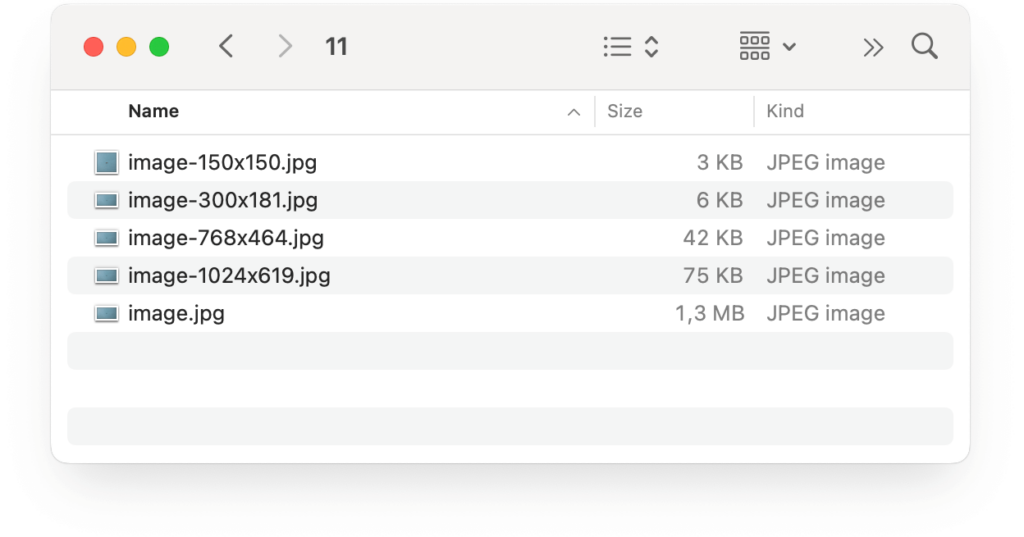

WordPress automatically selects the best size for each placement. For example, a thumbnail might appear in a blog preview, while a large image could fill a header. This makes your site faster and ensures images always look their best.
Recommended Image Dimensions for Common Uses
Choosing the right image size is vital to creating a site that looks professional and loads quickly. Not sure what size works where? Here’s a quick guide to recommended dimensions for common image types:
- Featured Images: 1200 × 630 pixels – The main image that grabs attention at the top of your posts or pages.
- Header/Background Images: 1920 × 1080 pixels – Full-width visuals used in headers, hero sections, or banners for added depth and design appeal.
- Logos: 250 × 100 pixels – Small and sharp for headers or footers without taking up too much space.
- Favicon: 512 × 512 pixels – The small icon that appears in the browser tab and bookmarks.
- E-commerce Product Images: 800 × 800 pixels – For showcasing products clearly in WooCommerce or other online stores.
Tip: Maintain consistent aspect ratios to avoid stretched or cropped visuals. For example, use a 16:9 ratio for headers or featured images and a 1:1 ratio for thumbnails.
Upgrade Your Website with a Premium WordPress Theme
Find a theme that you love and get a 20% discount at checkout with the FLASH20 code

How to Adjust Default WordPress Image Sizes
Sometimes, the default image sizes in WordPress just don’t cut it for your needs. Adjusting them is super simple. Here’s how to do it:
- Go to Media Settings: Log into your WordPress dashboard and navigate to Settings > Media.
- Edit Image Dimensions: Update the width and height for Thumbnail, Medium, and Large image sizes to suit your design preferences.
- Save Changes: Once you’ve entered your desired dimensions, click Save Changes to apply them.
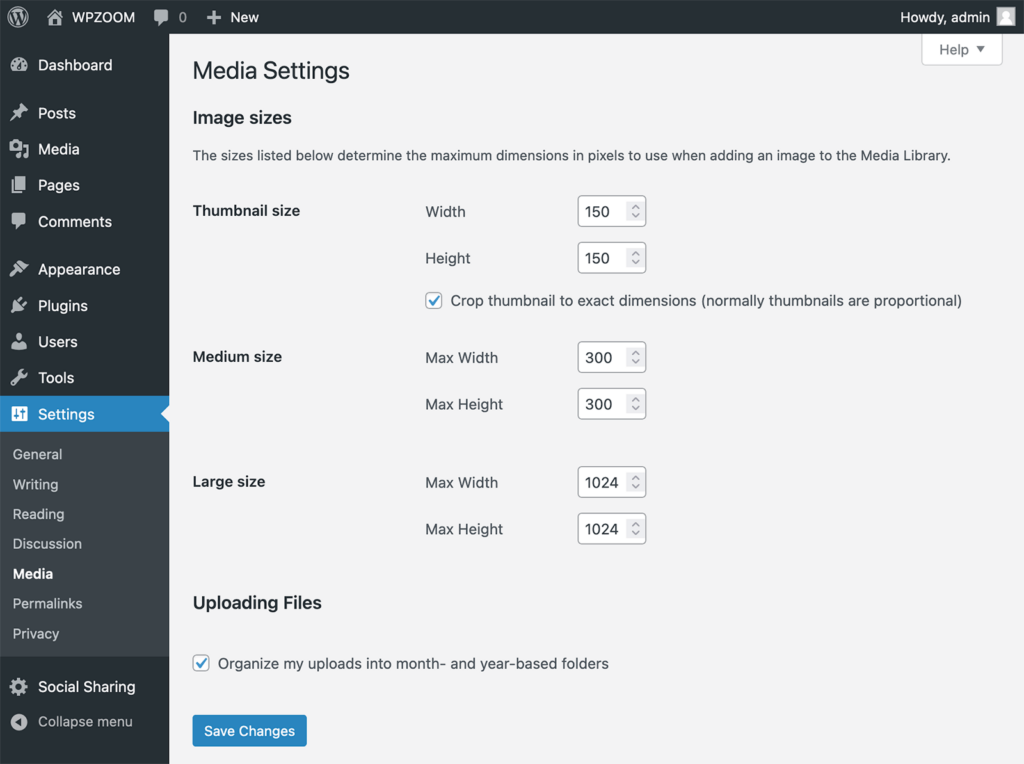

But wait—updating sizes only affects new uploads. For existing images, you’ll need to regenerate thumbnails. Use a plugin like Regenerate Thumbnails to automate this step and save yourself some time.
Adding Custom Image Sizes
Need a unique image size for your WordPress site? Maybe a specific dimension for a featured section or a custom layout? Here’s how you can create your own image sizes with ease:
1. Edit the functions.php File: Open your theme’s functions.php file.
Always use a child theme or back up your site before making changes.
2. Check if Thumbnail Support is Enabled: Review your theme’s functions.php file to see if add_theme_support(‘post-thumbnails’); is already present. If it’s not there, add this line:
add_theme_support('post-thumbnails');This ensures WordPress knows your theme can handle thumbnails.
3. Add the Custom Size: Add the following code snippet to the same functions.php file:
add_image_size('custom-size', 600, 400, true); // Width, Height, CropReplace ‘custom-size’ with a unique name, and adjust the dimensions to your needs.
3. Use the Custom Size: To use your custom size in your theme files, call it like this:
the_post_thumbnail('custom-size');4. Regenerate Thumbnails: Don’t forget to regenerate thumbnails for your existing images using a plugin like Regenerate Thumbnails.
Non-Technical Option: Prefer to skip the coding? Use a plugin like Perfect Images for an easier way to add custom dimensions.
How to Edit Image Sizes Directly in WordPress
Sometimes, you upload an image and realize it needs a little tweak—maybe it’s too big, or you want to crop out unnecessary parts. WordPress has you covered with a built-in editor that works in both the Classic and Gutenberg editors. Here’s how you can use it in either setup:
Editing Images in the Classic Editor
1. Open the Media Library. Go to Media > Library from your WordPress dashboard. Select the image you want to edit.
2. Access the Image Editor. Click the Edit Image button below the preview to open the editor.
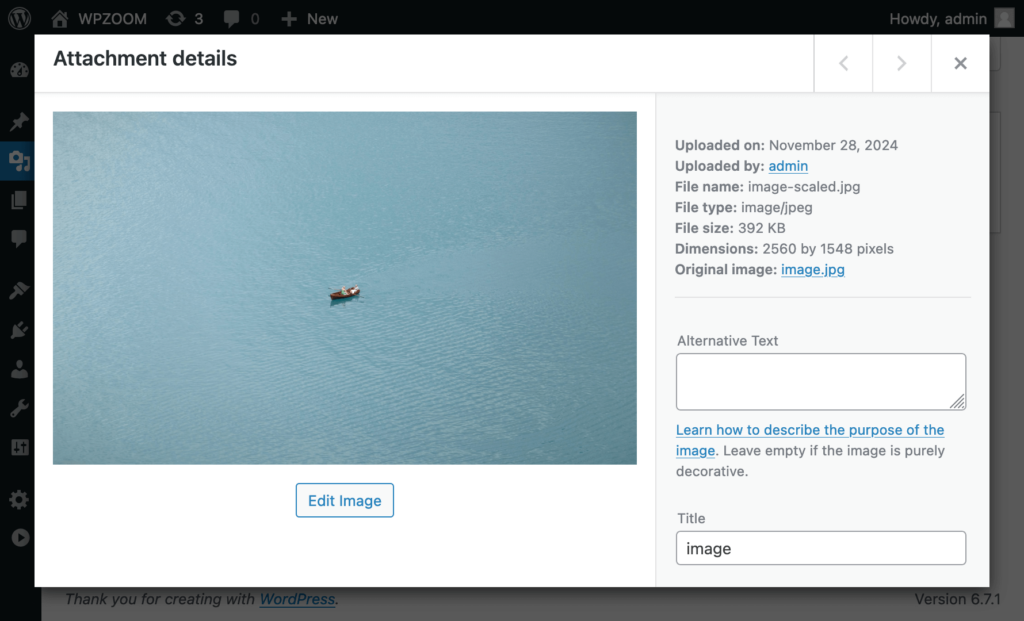

3. Crop or Resize the Image. To crop the image, click and drag to select the area you want to keep, then hit the Crop button. To edit the image, under “Scale Image,” enter the new dimensions. WordPress automatically keeps the aspect ratio unless you manually change both width and height.
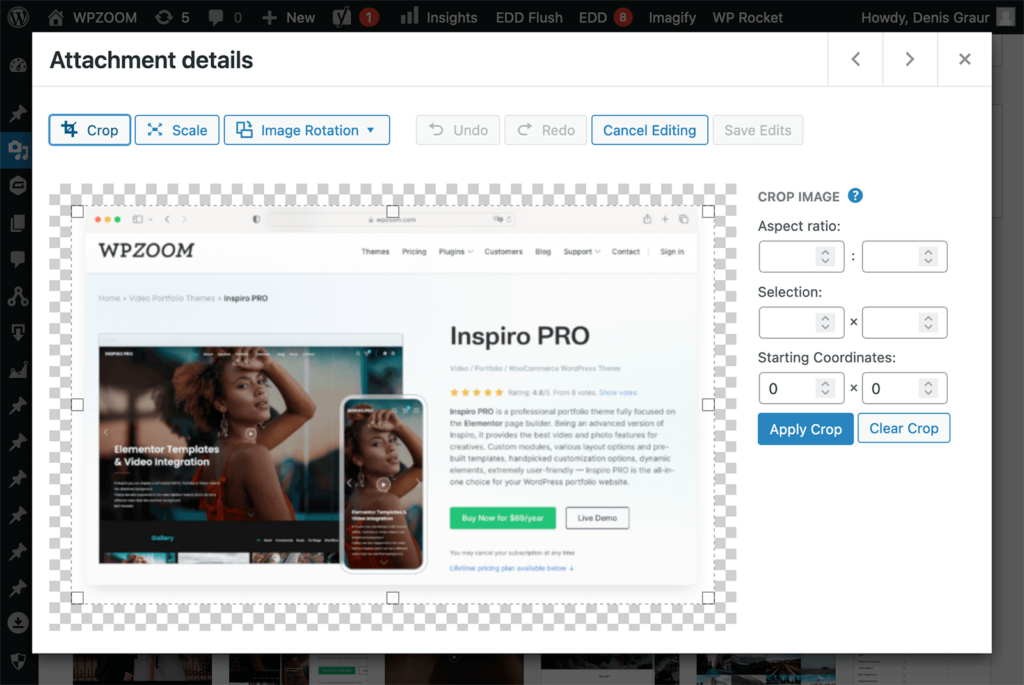

4. Save Changes. Click Save to apply your edits. The updated image will replace the original everywhere it’s used on your site.
Editing Images in the Gutenberg Editor
- Insert an Image Block. Add an Image block in the Gutenberg editor by clicking the + button. Choose an image from your media library or upload a new one.
- Quick Resizing in the Editor. Adjust the Width and Height directly in the block toolbar or settings panel on the right. Use the drag handles on the image to resize it visually.
- Access Advanced Editing. If you need to crop or scale, click the Media Library button in the block settings. This opens the full WordPress image editor. Follow the same steps as in the Classic Editor to crop or resize your image.
- Save and Preview. Changes made in the Gutenberg editor appear immediately as you work, giving you a live preview of your adjustments.
Pair Perfect Images with Perfect Themes
Optimizing your WordPress image sizes isn’t just about looks; it’s about creating a site that works better for you and your visitors. Pair those perfect images with a theme that’s built to impress! WPZOOM offers stunning designs, easy customization, and lightning-fast performance. Ready to upgrade your site? Explore WPZOOM’s themes today and find the one that fits your style perfectly. Your images (and your visitors) will thank you!
Upgrade Your Website with a Premium WordPress Theme
Find a theme that you love and get a 20% discount at checkout with the FLASH20 code


Subscribe to the WPZOOM newsletter.
Join 150,000 people. Get our latest news & releases delivered to your inbox.

