The login page is one of the most frequented screens on a WordPress site, yet its default design is often overlooked. With its standard logo, bland background, and minimal options, it needs to reflect the personality or professionalism of your website.
Learning how to customize the WordPress login page not only enhances branding but also provides a more seamless and welcoming experience for users. For example, a membership site benefits immensely from a tailored login page that aligns with its theme, reassuring users that they are in the right place. Similarly, for agencies building client sites, a custom-branded login page showcases attention to detail and professionalism.
Let’s explore how to make this transformation effortless yet effective.
Table of Contents
- WordPress Login Page Customization Methods
- Using Plugins to Customize the Login Page
- Using Code to Customize the Login Page Manually
WordPress Login Page Customization Methods
Customizing the WordPress login page can be achieved through various approaches, each catering to different skill levels and project requirements. Whether you prefer simplicity or maximum flexibility, there’s an option to suit your needs.
- Using Plugins: For beginners or those seeking a quick solution, login page customization plugins are ideal. They allow you to modify elements like logos, backgrounds, and error messages through an intuitive interface—no coding required.
- Using Code (Manual Customization): For advanced users or those with specific design requirements, manual customization provides unmatched flexibility. By editing the functions.php file, you can replace the default WordPress logo, modify link URLs, or add custom error messages. Adding custom CSS further allows precise control over the login page’s design, such as styling the background, forms, and text. This method requires technical knowledge but enables complete alignment with your site’s branding.
Each method has its strengths, from the ease of plugins to the versatility of manual coding. Your choice depends on your technical expertise and the complexity of your design goals.
Using Plugins to Customize the Login Page
Customizing the WordPress login page has never been easier, thanks to various plugins that simplify the process. Here are three highly recommended options:
- LoginPress: This plugin offers a robust set of features to customize your login page effortlessly. The free version is sufficient for most users, allowing changes to logos, backgrounds, and error messages. However, for those who require advanced customizations—like reCAPTCHA integration or social logins—the premium version unlocks additional powerful features.
- WPForms: Best suited for users who already have or plan to purchase the PRO plan or higher, WPForms offers login form customization through its premium User Registration add-on. While this makes it a pricier option, it’s perfect for those already leveraging WPForms for other site functionalities, such as contact forms or payment integration.
- Login Designer: A newer plugin in the space, Login Designer is ideal for those seeking a completely free solution. It’s perfect for users experimenting with a refreshed login page design without committing to premium plugins. The plugin focuses on providing modern templates and basic styling options, making it a great entry-level choice.
Each plugin caters to different needs, so choosing the right one depends on your project’s requirements.
How to Create a Custom Login Page with LoginPress
Below, we’ll walk through the process using the LoginPress plugin, a popular choice for transforming your login screen.
1. Install and Activate the Plugin
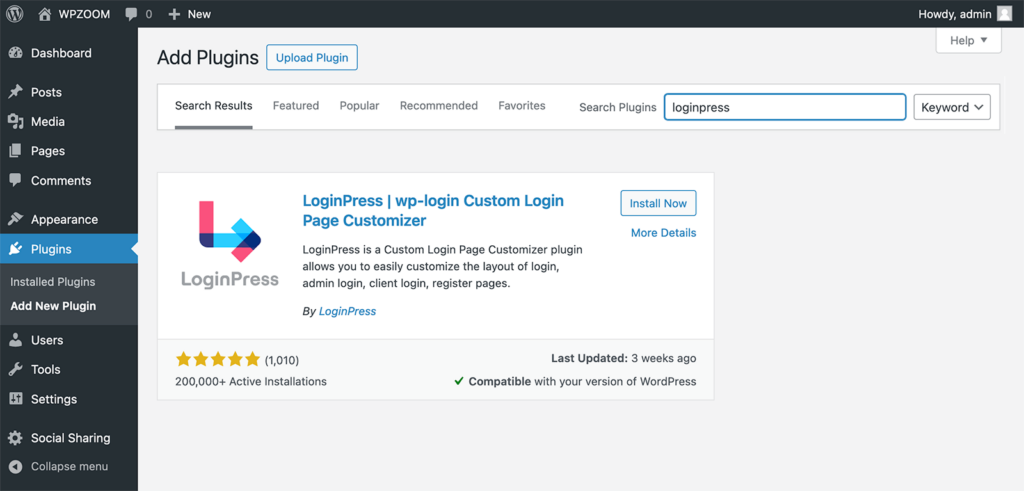
Navigate to Plugins > Add New in your WordPress dashboard. Search for “LoginPress,” install it, and activate it.

2. Access the Customizer
In your WordPress admin panel, go to LoginPress > Customizer.
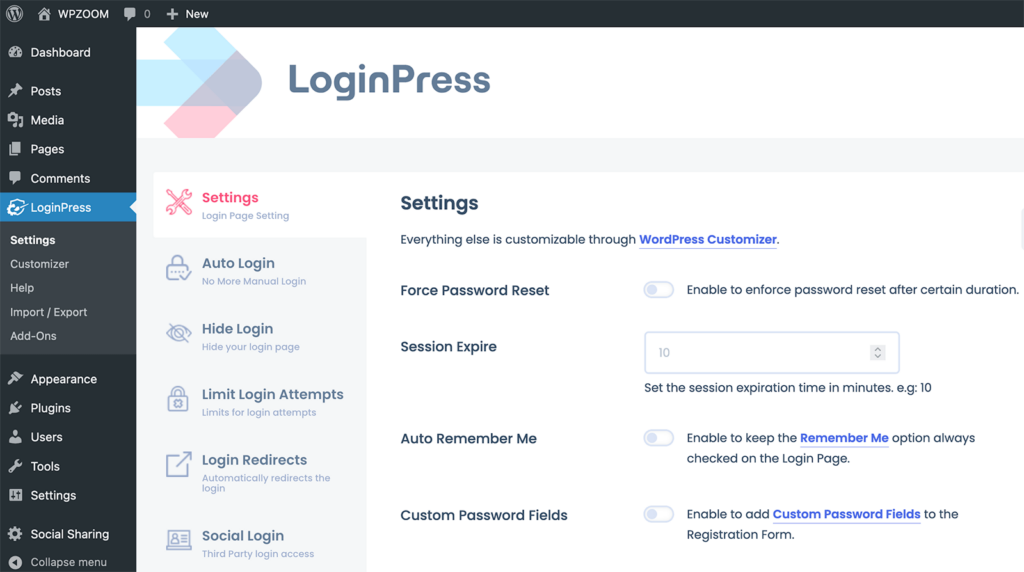

This opens a live preview interface where you can see your changes in real-time as you customize the login page. Click on LoginPress from the left menu.

3. Customize Your Login Page
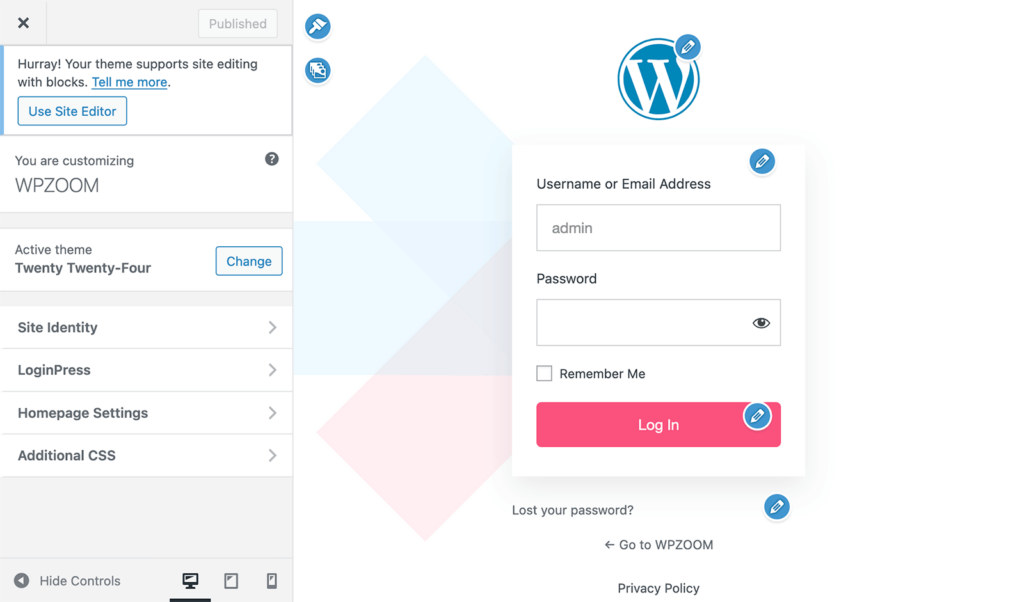
LoginPress offers multiple options to customize every aspect of your login page:
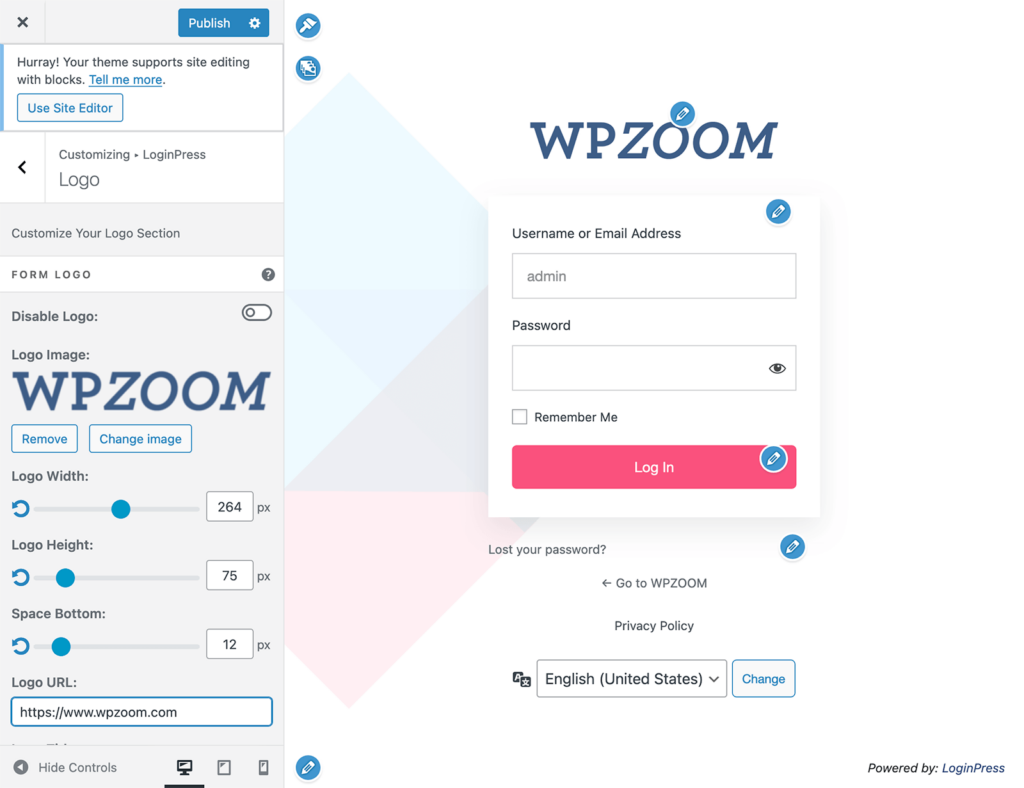
Customzize the Logo:
Replace the default WordPress logo with your brand’s logo by uploading an image. Adjust its size, position, and spacing to fit your design.

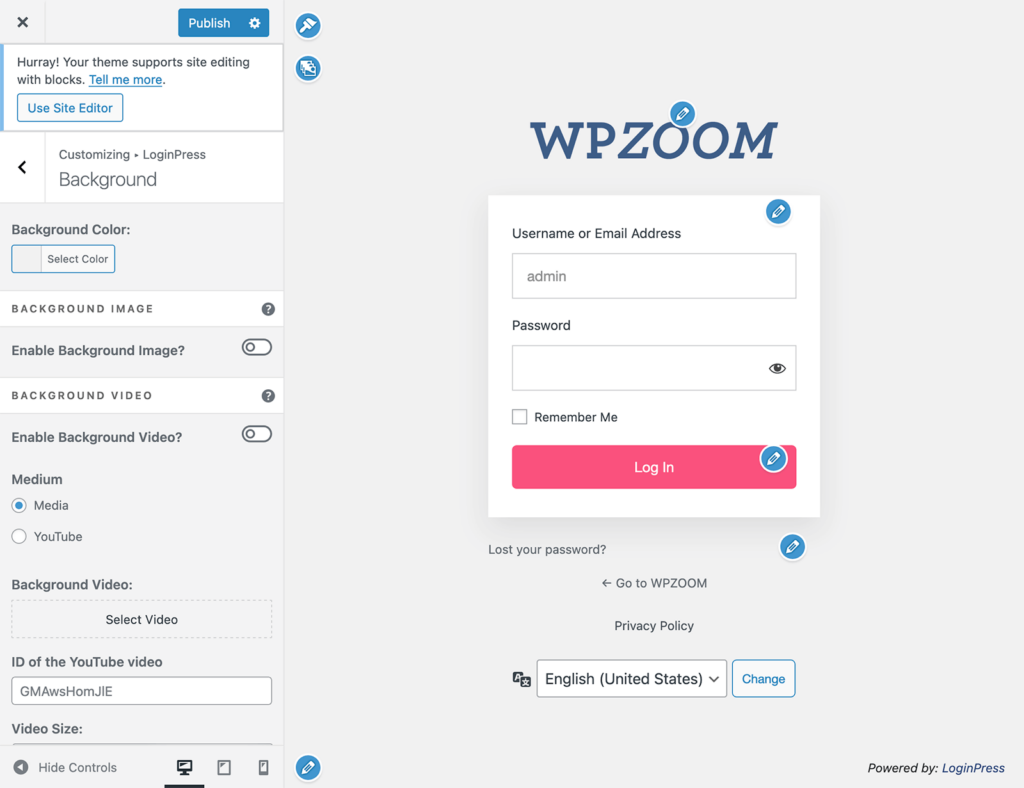
Customize the Background:
Customize the background with solid colors, images, or videos for a dynamic look.

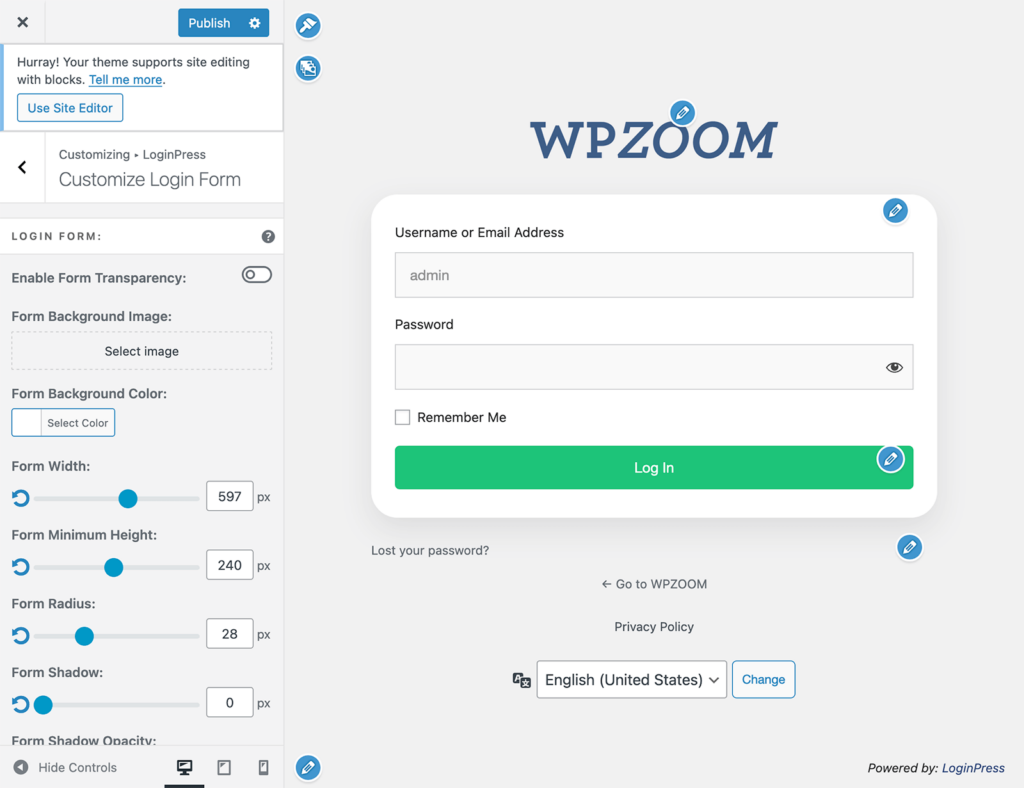
Customize the Form Design:
Adjust the form’s colors, padding, transparency, and borders for a polished design. Add shadows or round the corners for a sleek finish.

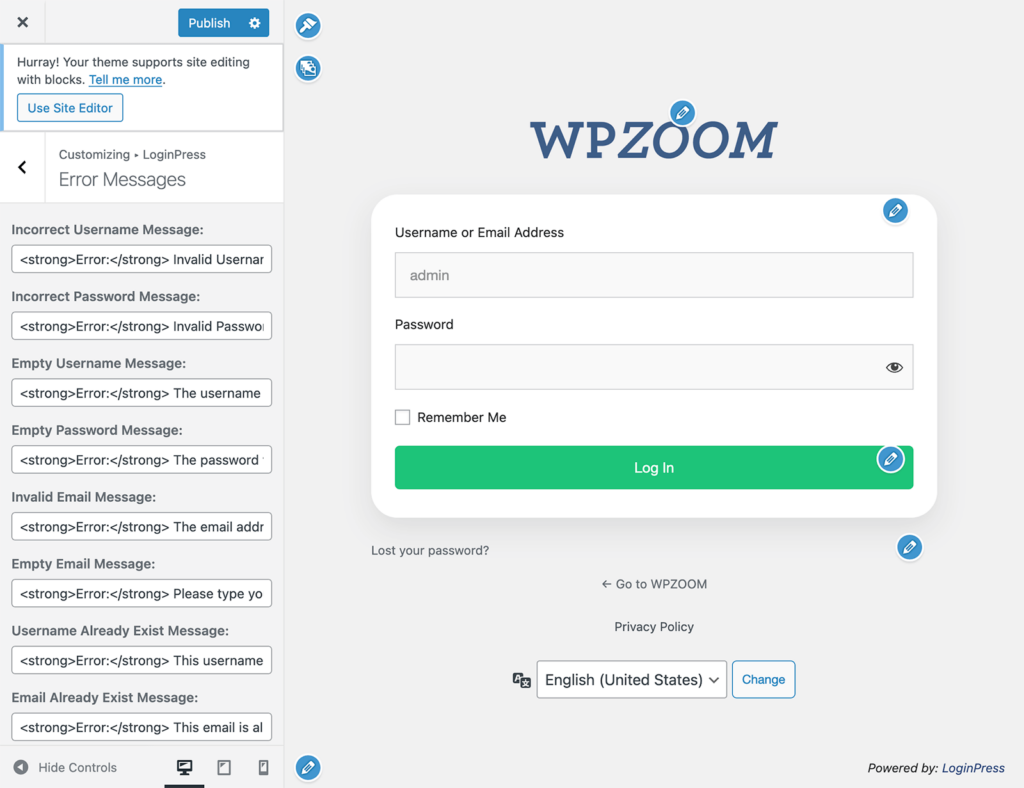
Customize the Error Messages:
Personalize messages to guide users more effectively and maintain your brand’s tone.

4. Preview and Publish
Use the live preview feature to check changes in real-time. Once satisfied, click Publish to make the changes live.
With these simple steps, you can create a branded and visually appealing login page that aligns with your site’s aesthetics.
Upgrade Your Website with a Premium WordPress Theme
Find a theme that you love and get a 20% discount at checkout with the FLASH20 code

Using Code to Customize the Login Page Manually
For those with technical expertise or specific design requirements, customizing the WordPress login page using code offers maximum flexibility. This method allows you to create a custom login page without a plugin, tailoring every detail from logos to links, ensuring complete alignment with your brand.
Using Custom CSS
Adding custom CSS lets you modify the login page’s appearance to match your site’s branding.
Create a Custom Stylesheet
Start by creating a separate CSS file for your login page styles. This keeps your customizations organized and independent of your main theme’s stylesheet.
1. Access your WordPress theme directory using an FTP client or the File Manager in your hosting dashboard.
2. Navigate to the active theme folder and create a new CSS file (e.g., style-login.css).
3. Add styles for elements like the logo, background, and form. Example:
body.login {
    background-color: #f9f9f9;
    background-image: url('path-to-background-image.jpg');
    background-size: cover;
    background-position: center;
}
.login h1 a {
    background-image: url('path-to-logo.png');
    background-size: contain;
    width: 200px;
    height: 100px;
}
.login form {
    background-color: #ffffff;
    border-radius: 10px;
    padding: 20px;
    box-shadow: 0 4px 6px rgba(0, 0, 0, 0.1);
}
4. Save the file in your theme directory.
Enqueue the Stylesheet
To apply your custom styles, enqueue the stylesheet through your theme’s functions.php file.
1. Open the functions.php file of your active theme.
2. Add the following code to include the custom stylesheet:
function custom_login_styles() {
    wp_enqueue_style('custom-login', get_stylesheet_directory_uri() . 'https://b8f4g5a7.delivery.rocketcdn.me/style-login.css');
}
add_action('login_enqueue_scripts', 'custom_login_styles');
This ensures your custom styles are loaded specifically for the login page, keeping the rest of your site unaffected.
Customize Specific Elements
Here are some additional CSS customizations you can apply:
Form Inputs:
.login form .input {
    border: 1px solid #ccc;
    border-radius: 5px;
    padding: 10px;
}
Login Button:
.wp-core-ui .button-primary {
    background-color: #0073aa;
    border-color: #0073aa;
    color: #fff;
    text-transform: uppercase;
    font-weight: bold;
}
Error Messages:
.login .message {
    background-color: #d4edda;
    border-left: 5px solid #28a745;
    color: #155724;
}
.login .error {
    background-color: #f8d7da;
    border-left: 5px solid #dc3545;
    color: #721c24;
}
Once your CSS is in place, log out and visit the login page to review your changes. Adjust the styles as needed to ensure they look great across devices.
Modifying functions.php
For advanced users, editing the functions.php file is a powerful way to customize the WordPress login page. This method allows you to change logos, URLs, messages, and more while keeping your customizations centralized within your theme.
Replacing the WordPress Logo
By default, the WordPress login page features the WordPress logo. You can replace it with your own logo to better reflect your brand.
1. Upload your logo to your theme’s images directory or media library.
2. Add the following code to your theme’s functions.php file:
function my_login_logo() {
    echo '';
}
add_action('login_enqueue_scripts', 'my_login_logo');
3. Replace custom-logo.png with the filename and path to your logo.
Changing the Logo Link
By default, the logo links to WordPress.org. Redirect it to your homepage or another relevant page.
Add the following code to functions.php:
function my_login_logo_url() {
    return home_url();
}
add_filter('login_headerurl', 'my_login_logo_url');
Customizing Error Messages
WordPress error messages can be vague or too technical. Create more user-friendly messages.
Add this code snippet to replace the default error text:
function my_custom_login_error_message() {
    return 'Oops! The credentials you entered are incorrect. Please try again.';
}
add_filter('login_errors', 'my_custom_login_error_message');
For a custom login welcome message, use the login_message filter:
function my_custom_login_message() {
return '';
}
add_filter('login_message', 'my_custom_login_message');Redirecting After Login
To direct users to a specific page after they log in, add this code:
Redirect all users to a specific page:
function my_login_redirect($redirect_to, $request, $user) {
    return home_url('/welcome');
}
add_filter('login_redirect', 'my_login_redirect', 10, 3);
Customize the redirect based on user roles:
function my_role_based_redirect($redirect_to, $request, $user) {
    if (isset($user->roles) && in_array('administrator', $user->roles)) {
        return admin_url();
    } else {
        return home_url('/dashboard');
    }
}
add_filter('login_redirect', 'my_role_based_redirect', 10, 3);
This ensures that users land on the most relevant page after login.
This approach unlocks endless possibilities for customizing the WordPress login page, ensuring a design that’s both functional and visually appealing.
Make Every Page Shine with WPZOOM
A custom WordPress login page is just the start of creating a professional WordPress experience. To build a cohesive and polished website, you need the right tools, and WPZOOM themes deliver precisely that.
Our themes are crafted carefully to ensure your site looks great and functions flawlessly. Whether starting a new project or enhancing an existing site, WPZOOM has options tailored for you. Why settle for the ordinary when you can create extraordinary? Explore WPZOOM themes today and see how effortless it is to elevate your website design.

