You installed a WordPress theme, added your logo, and set up your navigation—but something feels off. The spacing is weird. The menu isn’t where you want it. And the header background? Not what you expected. Sound familiar?
Customizing a WordPress header can be confusing if you don’t know where to look. In this guide, I’ll walk you through how to edit the header in WordPress using theme settings, Site Editor, Theme Customizer, and plugins—so your site looks exactly how you envisioned.
Table of Contents
- Editing Your Header with Built-In Theme Settings
- Editing the Header in Block-Based Themes
- Manually Editing the header.php File
- Enhancing Your Header with Plugins
Not all WordPress themes handle headers the same way. Some let you tweak everything with a few clicks, while others require a more hands-on approach.
Before making any changes, you need to identify your theme type. This will determine the proper method for editing your header—through built-in theme settings, Full Site Editing (FSE), or the Classic Theme Customizer. Skipping this step could lead to much wasted time searching for options that don’t exist in your theme.
To identify your theme type, head to Appearance in your WordPress dashboard. What do you see?
- If you see Editor, your theme uses Full Site Editing (FSE)—you’ll customize your header using WordPress blocks.
- If you see Customize, your theme relies on the Classic Theme Customizer for header modifications.
- If your theme has a Theme Options panel, it likely comes with built-in header settings, making customization even more effortless.
Now that you’ve figured out your theme type, let’s walk through the best way to edit your header using the available tools.
This method applies to classic themes that rely on the Theme Customizer for design modifications.
If your theme includes built-in header customization options, you’re in luck. This is the fastest and easiest way to update your header—no plugins, no custom code, just a few clicks.
Themes like Inspiro Premium give you complete control over your custom header layout directly within WordPress, so you can adjust it without hassle. Here’s how to do it with Inspiro Premium using the Theme Customizer:
1. Go to Appearance > Customize in your WordPress dashboard.


2. Select Header Options (Header or Header & Navigation, depending on your theme) to access customization settings.


3. Here, you can select the header layout, choose if you want to show a search form and a cart icon, or if you want a sticky header.


4. Preview your changes in real time using the Customizer panel.
5. Click “Publish” when everything looks good.
That’s it! Your header is updated instantly—no need to mess with extra tools.
If your theme doesn’t offer these built-in settings, or if you’re using a block-based theme with Full Site Editing, you’ll need a different approach. Next, we’ll explore how to edit your header using the WordPress Site Editor.
Upgrade Your Website with a Premium WordPress Theme
Find a theme that you love and get a 20% discount at checkout with the FLASH20 code
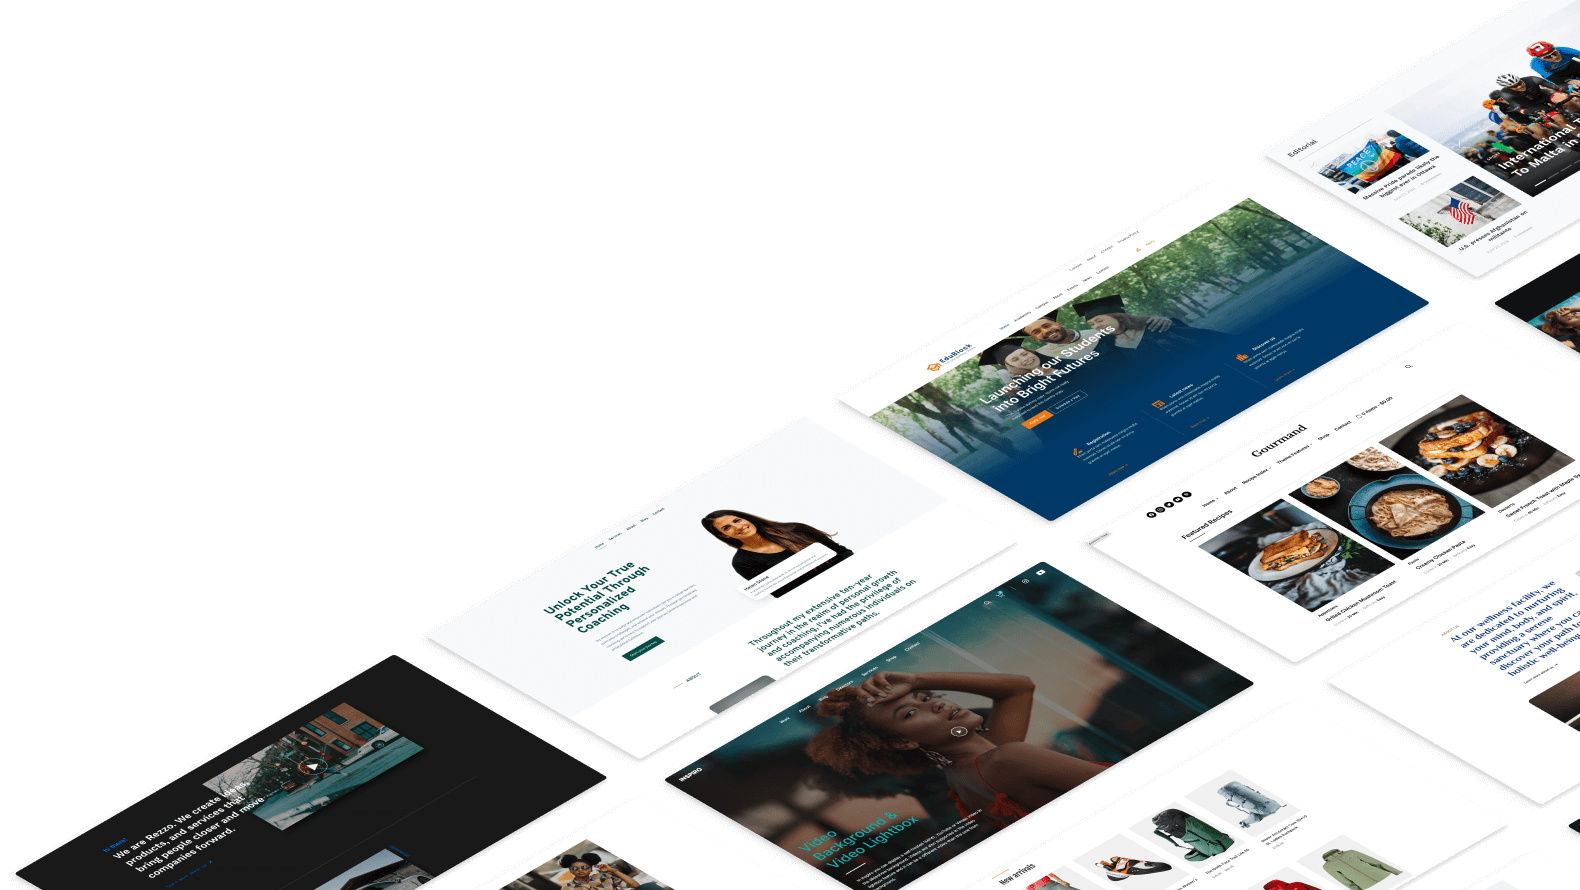

If you use a block-based theme, your header is fully customizable using WordPress Full Site Editing (FSE). Unlike traditional theme settings, FSE acts as a flexible header builder, giving you complete control over your header layout and letting you add, remove, and rearrange elements visually using Gutenberg blocks—no coding required.
Here’s how to edit your header with FSE using the UniBlock PRO theme as an example:
1. From your WordPress dashboard, go to Appearance > Editor (also called Site Editor in some installations).


This opens the Full Site Editor, where you can make site-wide changes, including modifying the Header template.
2. Navigate to Patterns.
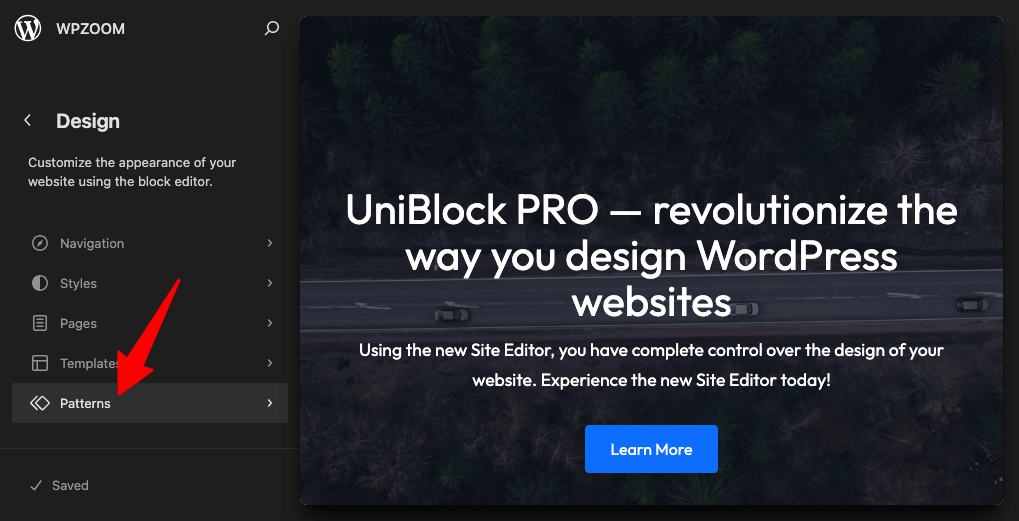

3. Click Header in the left menu and choose the header you want to edit from the right side of the screen.
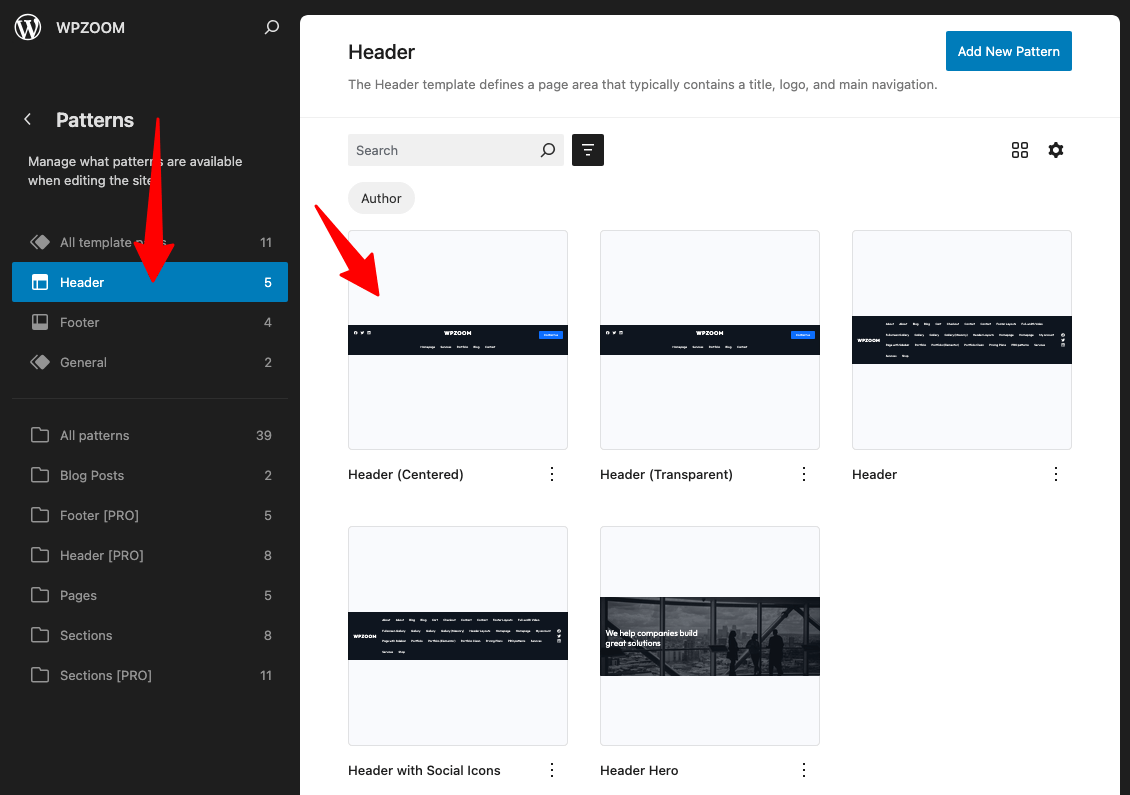 header” srcset=”https://b8f4g5a7.delivery.rocketcdn.me/wp-content/uploads/2025/01/uniblock-patterns-header.png 1130w, https://b8f4g5a7.delivery.rocketcdn.me/wp-content/uploads/2025/01/uniblock-patterns-header-734×516.png 734w, https://b8f4g5a7.delivery.rocketcdn.me/wp-content/uploads/2025/01/uniblock-patterns-header-1024×720.png 1024w” sizes=”(max-width: 1130px) 100vw, 1130px”/>
You can also select the header directly when editing a page and click the Edit button to start editing the header.


4. Click the + Add Block button to add new blocks to your header
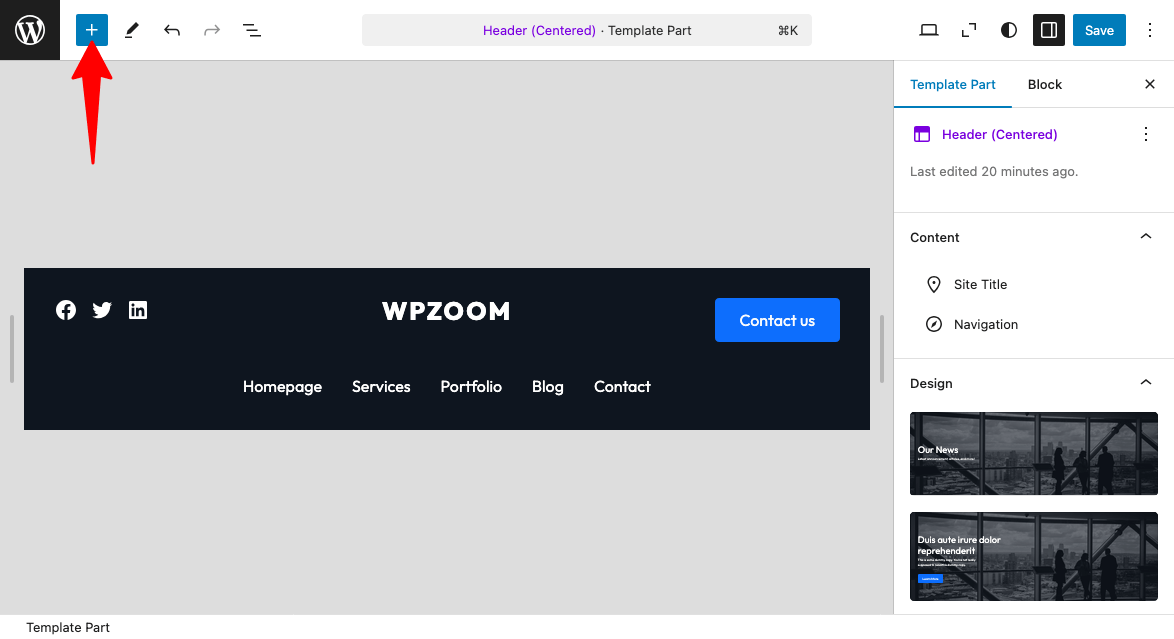

Edit the existing block to customize your header:
- Site Logo Block or Site Title Block – Upload your logo or use a site title instead of the logo.
- Navigation Block – Add, remove, or rearrange menu items.
- Social Icons Block – Insert social media icons and link them to your profiles.
- Button Block – Use it for a call-to-action button (e.g., “Contact us” or “Subscribe”).
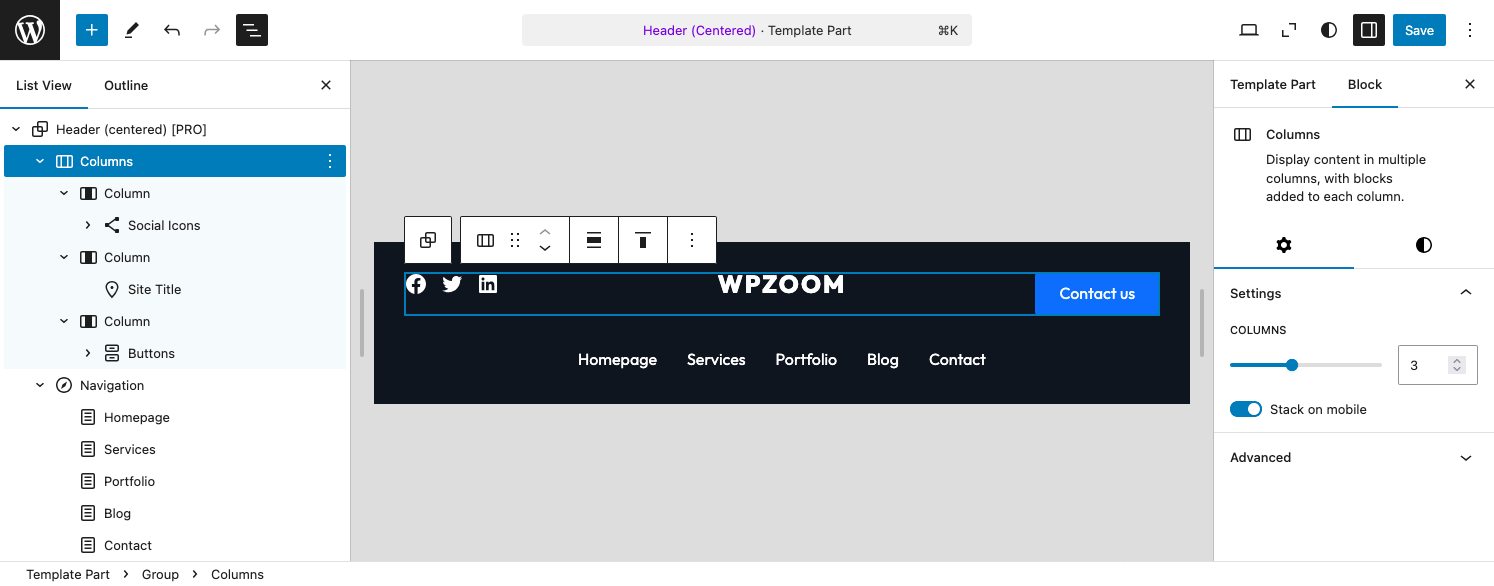

5. Style the Header: Click the Styles icon to explore header styling options such as adjusting colors, fonts, padding, and margins. Customize the header background or typography to align with your site’s branding.


6. Refine the layout and spacing:
- Align the menu and logo for a balanced design.
- Adjust padding and spacing to improve readability.
- Enable a sticky header if you want it to stay visible while scrolling.
7. When everything looks good, click Save to apply your updates across the site.
If your theme doesn’t offer enough customization options, you might need to use a plugin or add custom code—which we’ll explore next.
Sometimes, no matter how many settings you tweak or plugins you try, your header still isn’t quite right. It might be time to edit your header manually using code.
Before we go any further, this isn’t the first option you should try. Editing your theme’s core files can break your site if done incorrectly. But if you’re comfortable with code and need deeper customization, here’s how to do it the right way—without losing your changes when your theme updates:
1. Use a Child Theme (Trust Me, You’ll Thank Yourself Later)
Making edits directly to your theme files? Bad idea. Every time your theme updates, your customizations will disappear. That’s why we use child themes—they let you make changes safely.
Go to Appearance > Themes and check if you already have an active child theme.
If not, you’ll need to create a child theme manually (if one doesn’t exist) and activate it.
3. Copy header.php from your parent theme’s directory and paste it into your child theme’s folder.
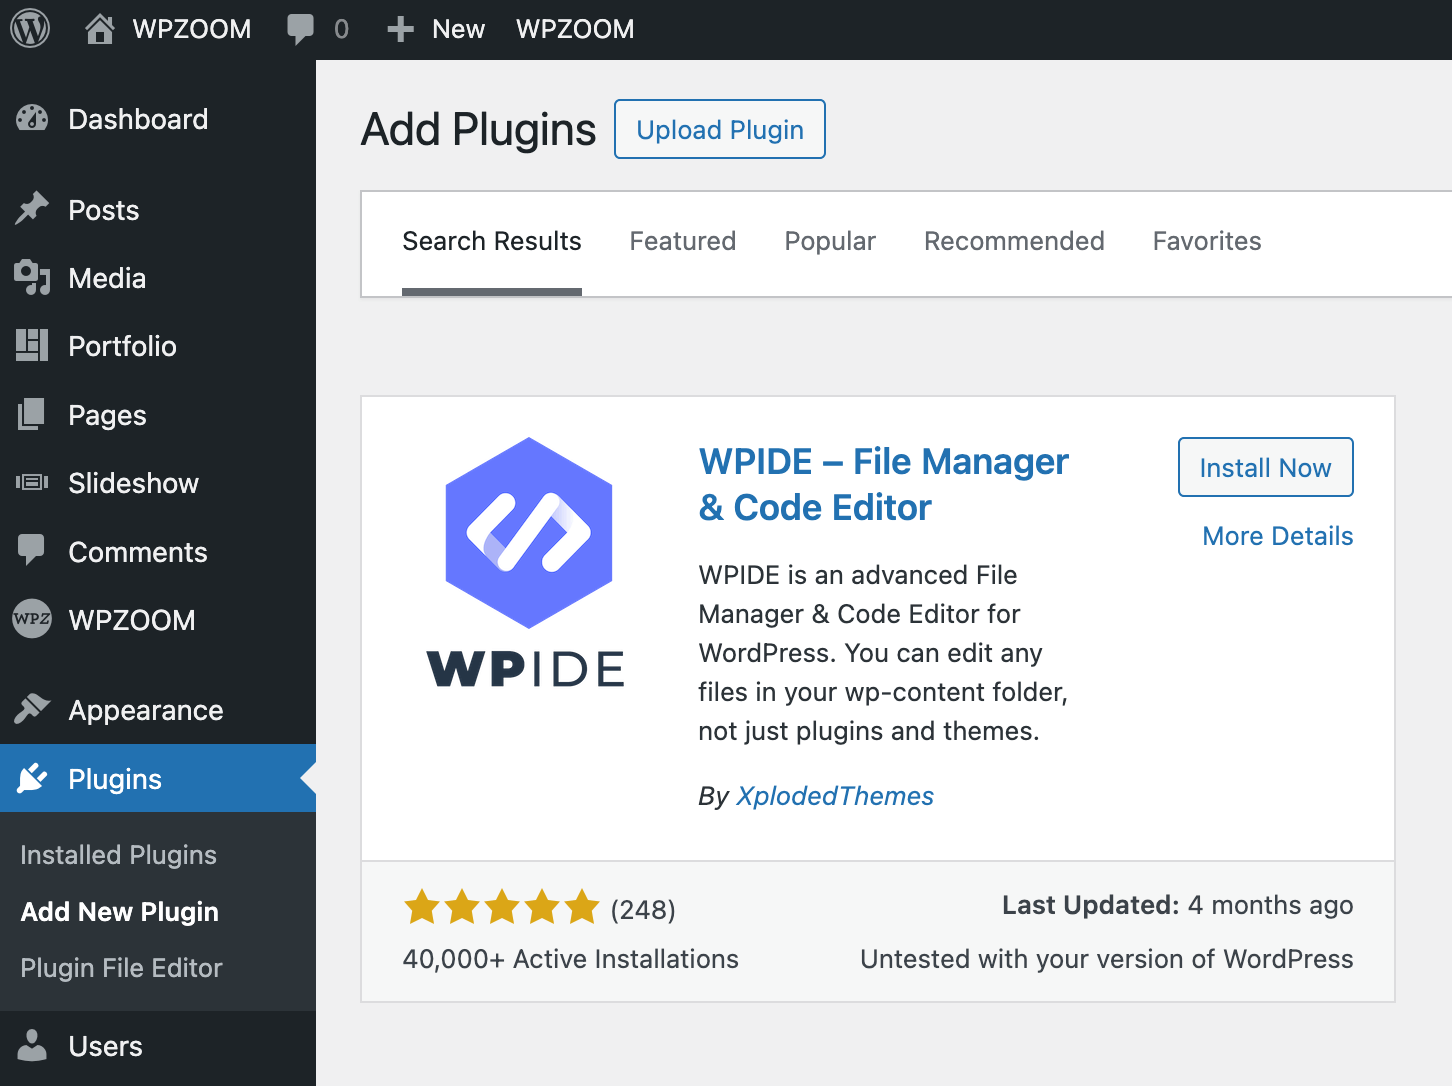
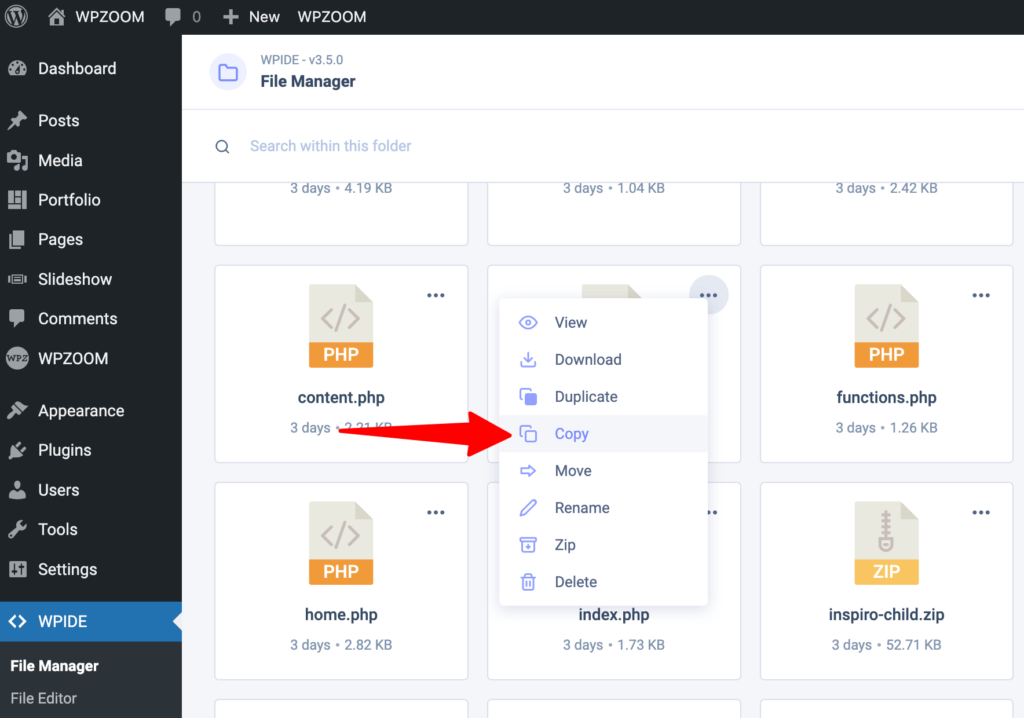
The easiest way to do this is by using the WPIDE plugin, which allows you to move files between theme directories and provides a better interface for editing theme files:
Install and activate the WPIDE plugin from Plugins > Add New Plugin.

Navigate to WPIDE > File Manager, click on themes and navigate to your theme parent folder.
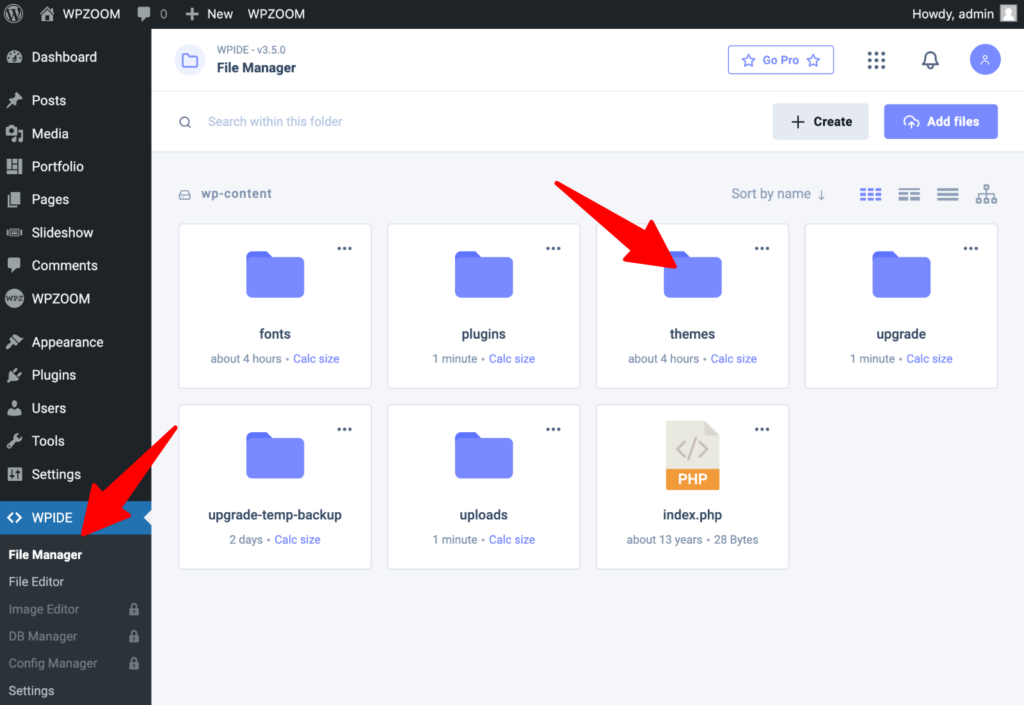

Locate header.php, click the 3-dots icon, click Copy, choose your child theme folder to copy it their.

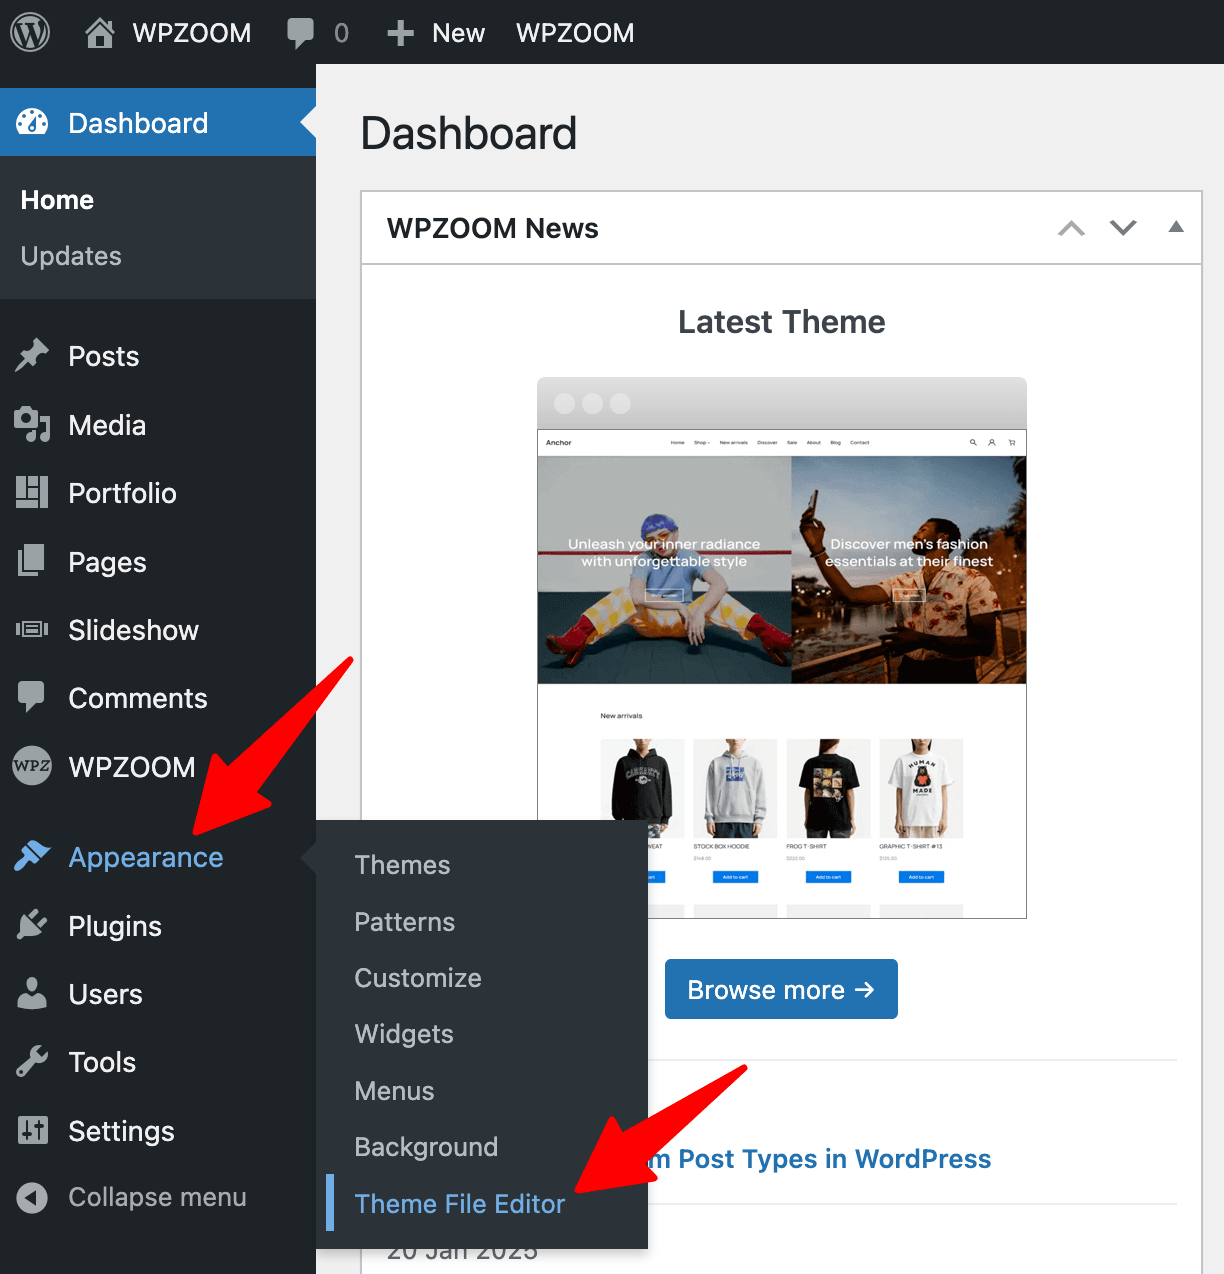
4. Edit the copied header.php file in the WordPress Theme File Editor (Appearance > Theme File Editor).

Select your child theme from the dropdown.
Locate and open header.php.
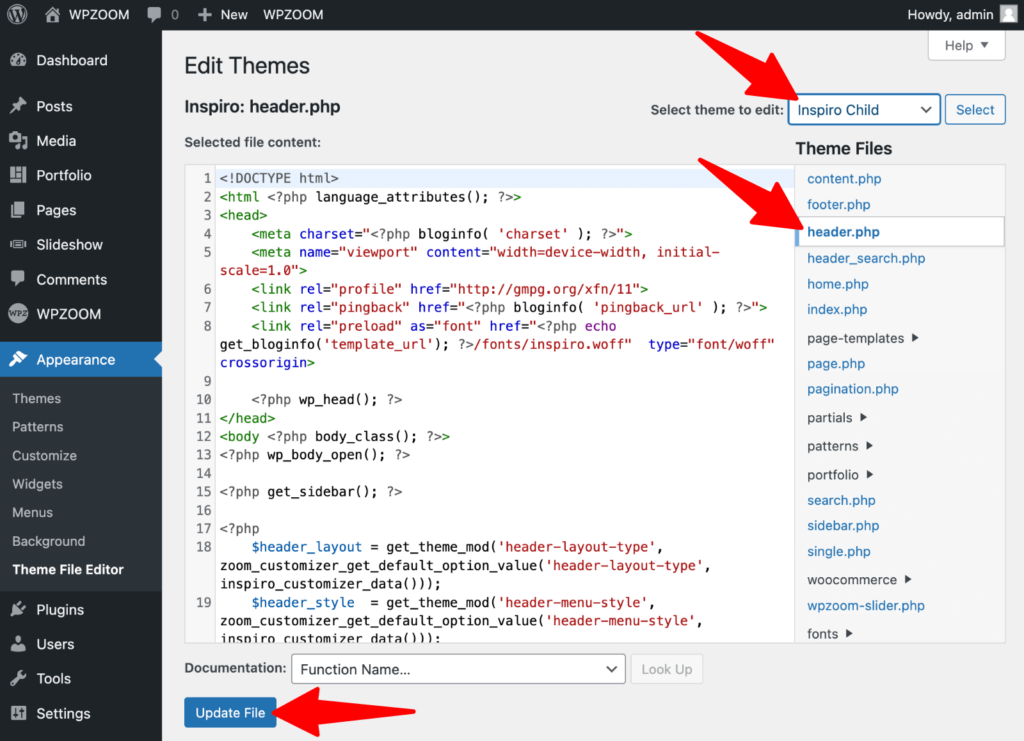

Make your changes carefully—adding extra elements, adjusting layout structure, or modifying styles.
Click Update File to save your changes.
7. Test and Verify Changes. Visit your website and check if your header looks the way you intended. Test on different devices to check for mobile responsiveness and ensure everything still functions properly.
If you’re using a block-based theme, the Theme File Editor has been moved under Tools > Theme File Editor instead of Appearance. However, manually editing header.php in block themes is not practical because these themes rely on the Site Editor for managing header content visually. Changes made directly in header.php may not affect the haeder’s appearance, making the Site Editor a better solution for block-based themes.
If you’re only looking to insert Google Analytics, Facebook Pixel, or other tracking scripts, modifying header.php isn’t your best option. A slight mistake can crash your site. Instead, in the next section, we’ll explore header plugins, which let you insert scripts safely.
If your theme’s built-in customization options and Full Site Editing don’t provide the flexibility you need, or if you want to add functionality without modifying theme files, using header plugins is a great solution. Plugins allow you to enhance your header with additional features such as sticky headers, custom layouts, tracking scripts, and more—without requiring any code.
Here are some of my favorite plugins:
- WPCode: Need to insert Google Analytics, Facebook Pixel, or custom scripts? This plugin lets you do it without touching header.php.
- Sticky Menu & Sticky Header: Want your header to stay put while scrolling? This plugin makes it easy.
- Header Footer Code Manager: Need scripts on specific pages only? This tool helps you organize them without cluttering your theme files.
Plugins save time and prevent mistakes, but if you ever need deeper customization, you can combine them with custom code for even more control. Whatever you choose, your header should work for you—not against you.
Your website’s header should look great and function smoothly—without hours of troubleshooting or extra plugins. That’s precisely what WPZOOM’s premium themes offer. Whether you need a clean navigation bar, a standout call-to-action, or a transparent header, you can make changes quickly using built-in customization options.
With WPZOOM themes, you can adjust your logo, menus, backgrounds, and social icons in just a few clicks. No complicated settings and no custom code—just an intuitive interface that lets you design a header that fits your brand. Plus, everything stays responsive, so your site looks just as polished on mobile as on desktop.

