So if you’re ready to channel some inner JCVD Bloodsport energy into your WordPress static site then let’s get started.
What is Lunr.js and why it’s a perfect search solution for static sites 🌙
⏭️ If you’re already sold and just want the implementation steps, click here to skip straight to the tutorial.
Lunr.js is a compact JavaScript library that’s designed specifically for browser-based search. Unlike traditional WordPress search which hammers your database with queries, Lunr.js handles everything on the client side. No PHP processing. No API calls to external services. Just pure, speedy JavaScript goodness.
The best part is that adding Lunr.js to your static site won’t increase your hosting costs one cent. Your site will still run on Cloudflare Pages (or a similar service) with all the benefits I covered in the main guide on how to launch a static site.
With that said, I want to briefly set some proper expectations. Lunr.js has a lot going for it, but it’s not a flawless solution. Here’s what to expect…
The ups and downs of using Lunr.js ⬆️⬇️
There are two main things to take into consideration when deciding if this is going to be a good search solution for your static site:
- Size of your site.
- Search quality trade-offs.
Performance considerations for larger sites
Lunr.js works brilliantly for small to medium-sized sites, but there are some practical limits to consider:
- Index size and loading time: For every 100 posts, expect roughly 100-200KB of index file size. This might not sound like much, but a site with 1,000+ posts could end up with a 1MB+ index that would need to load in visitors’ browsers before searching begins. For smaller sites, this loading is nearly instantaneous, but larger sites might experience a noticeable delay.
- Memory usage: The entire index loads into the browser’s memory. For very large sites, this could potentially slow down the visitor’s browser (i.e., not just the tab with your search page but all their tabs).
The bottom line is that if your site has fewer than 500 pages, you’ll likely be fine.
Search quality: What you gain and what you give up
Compared to server-side search solutions, Lunr.js makes some tradeoffs:
The good stuff:
- Relevance-based ranking out of the box.
- Fuzzy matching to deal with accidental typos.
- Term stemming (finding “running” when searching for “run”).
The compromises:
- No natural language processing for understanding query intent.
- Limited ability to handle complex queries with many search operators. This isn’t an enormous drawback since most people don’t use search operators anyway, but it’s just something to be aware of in case it’s important to you. The solution I’m going to give you includes two (wildcard and exact match) search operators which will suffice for the vast majority of use cases.
For most personal blogs, portfolio sites, and small business websites, these tradeoffs are completely reasonable. Your visitors will still get helpful, relevant results.
Phase one: Set up your development environment 👨🏻💻
Now that you understand what Lunr.js is all about, it’s time to roll up your sleeves and get everything ready for implementation.
Required tools 🧰
To pull this off, you’ll need a few essentials:
- Your local WordPress site (with the Simply Static plugin).
- Lunr.js library.
- A code editor (e.g., Sublime Text or even the simple text editors that come installed on both Mac and Windows).
- Terminal on Mac / Command Line on Windows.
If you followed my previous guide on setting up a static WordPress site, then all of these – with the exception Lunr.js perhaps – will be familiar to you.
⚠️ Note: My demo static site was built using Neve FSE, which is a block theme, but you can use this tutorial for classic themes as well. There’s only one tiny difference in the way it gets implemented and that difference happens right at the beginning of the tutorial – I’ll point it out.
Add Lunr.js to your local WordPress environment 🖥️
Assuming you are using Local by Flywheel, the first step is to get into your WordPress site. Make sure the One-click admin is toggled on and then tap on the WP Admin button:
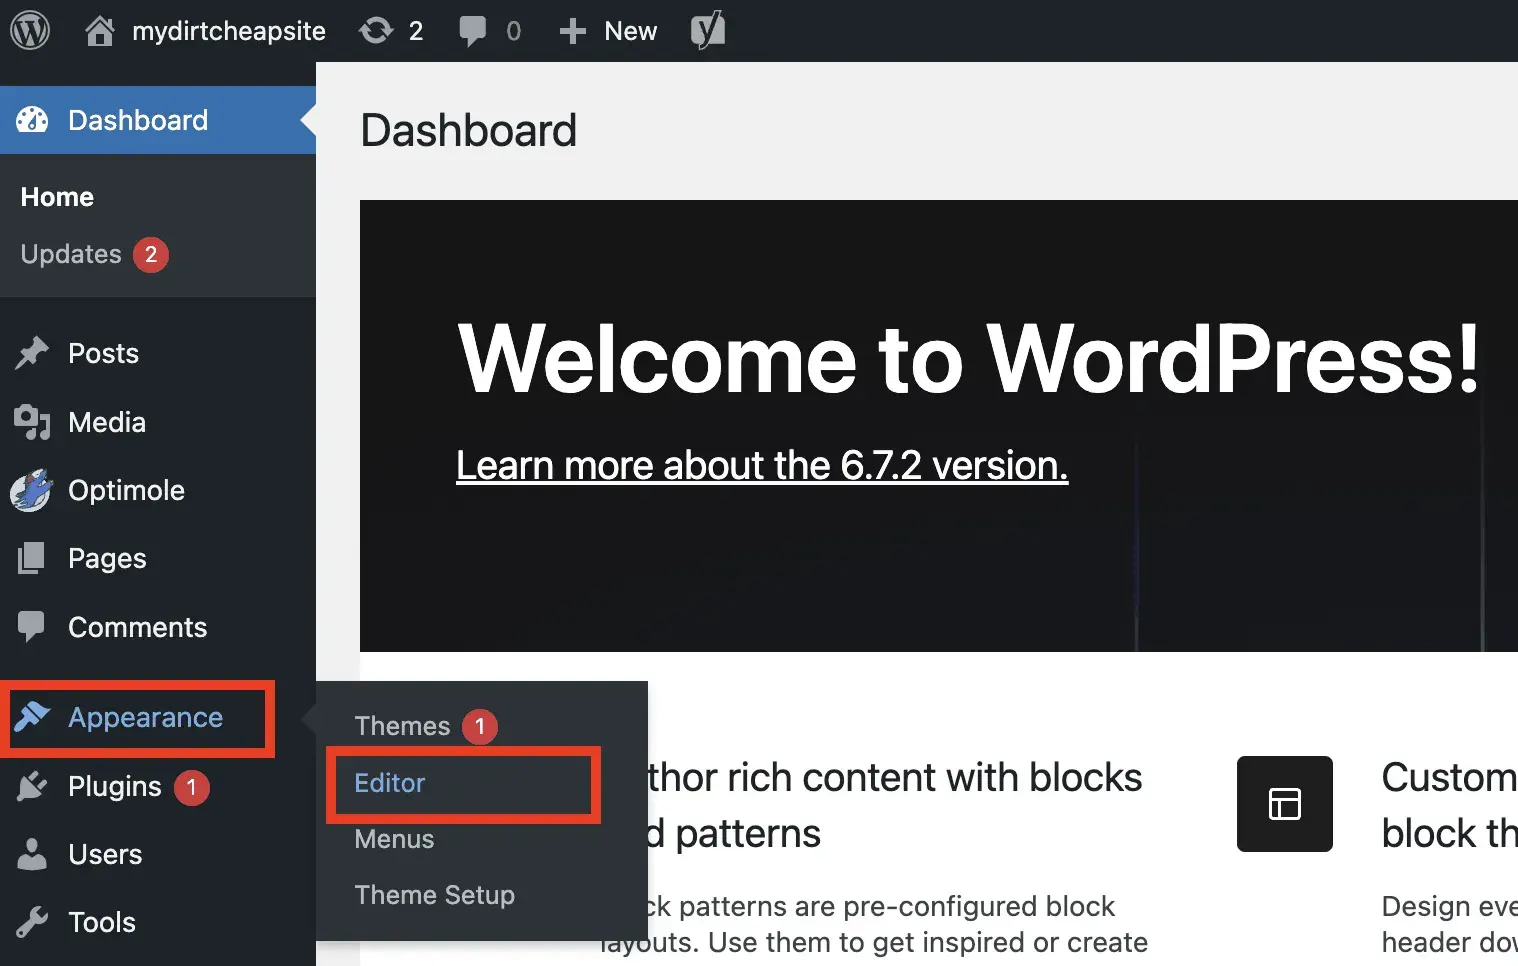
Next, from your WordPress dashboard, go to Appearance → Editor.

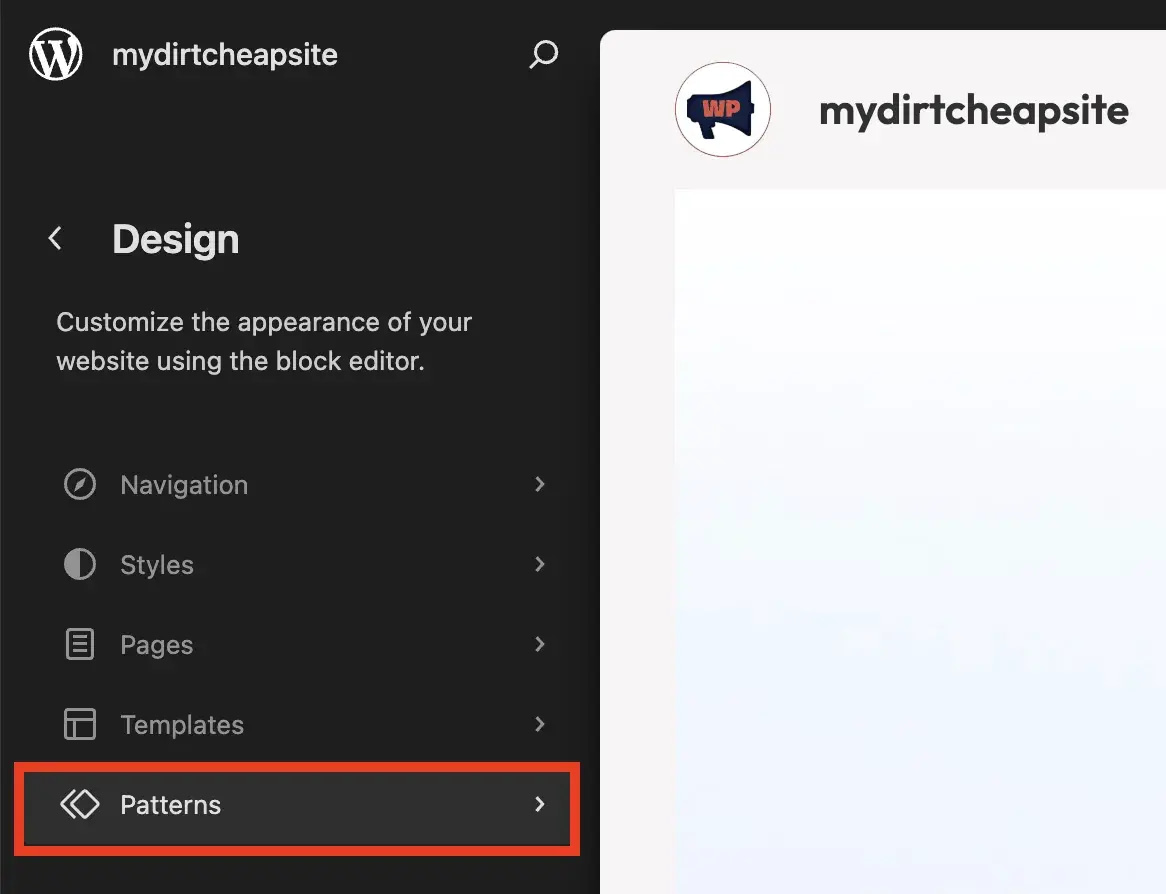
This will bring you into the Full Site Editor. Select Patterns from the side menu:

If you’re not specifically using the Neve FSE theme but another block theme then the next screen is going to look slightly different.
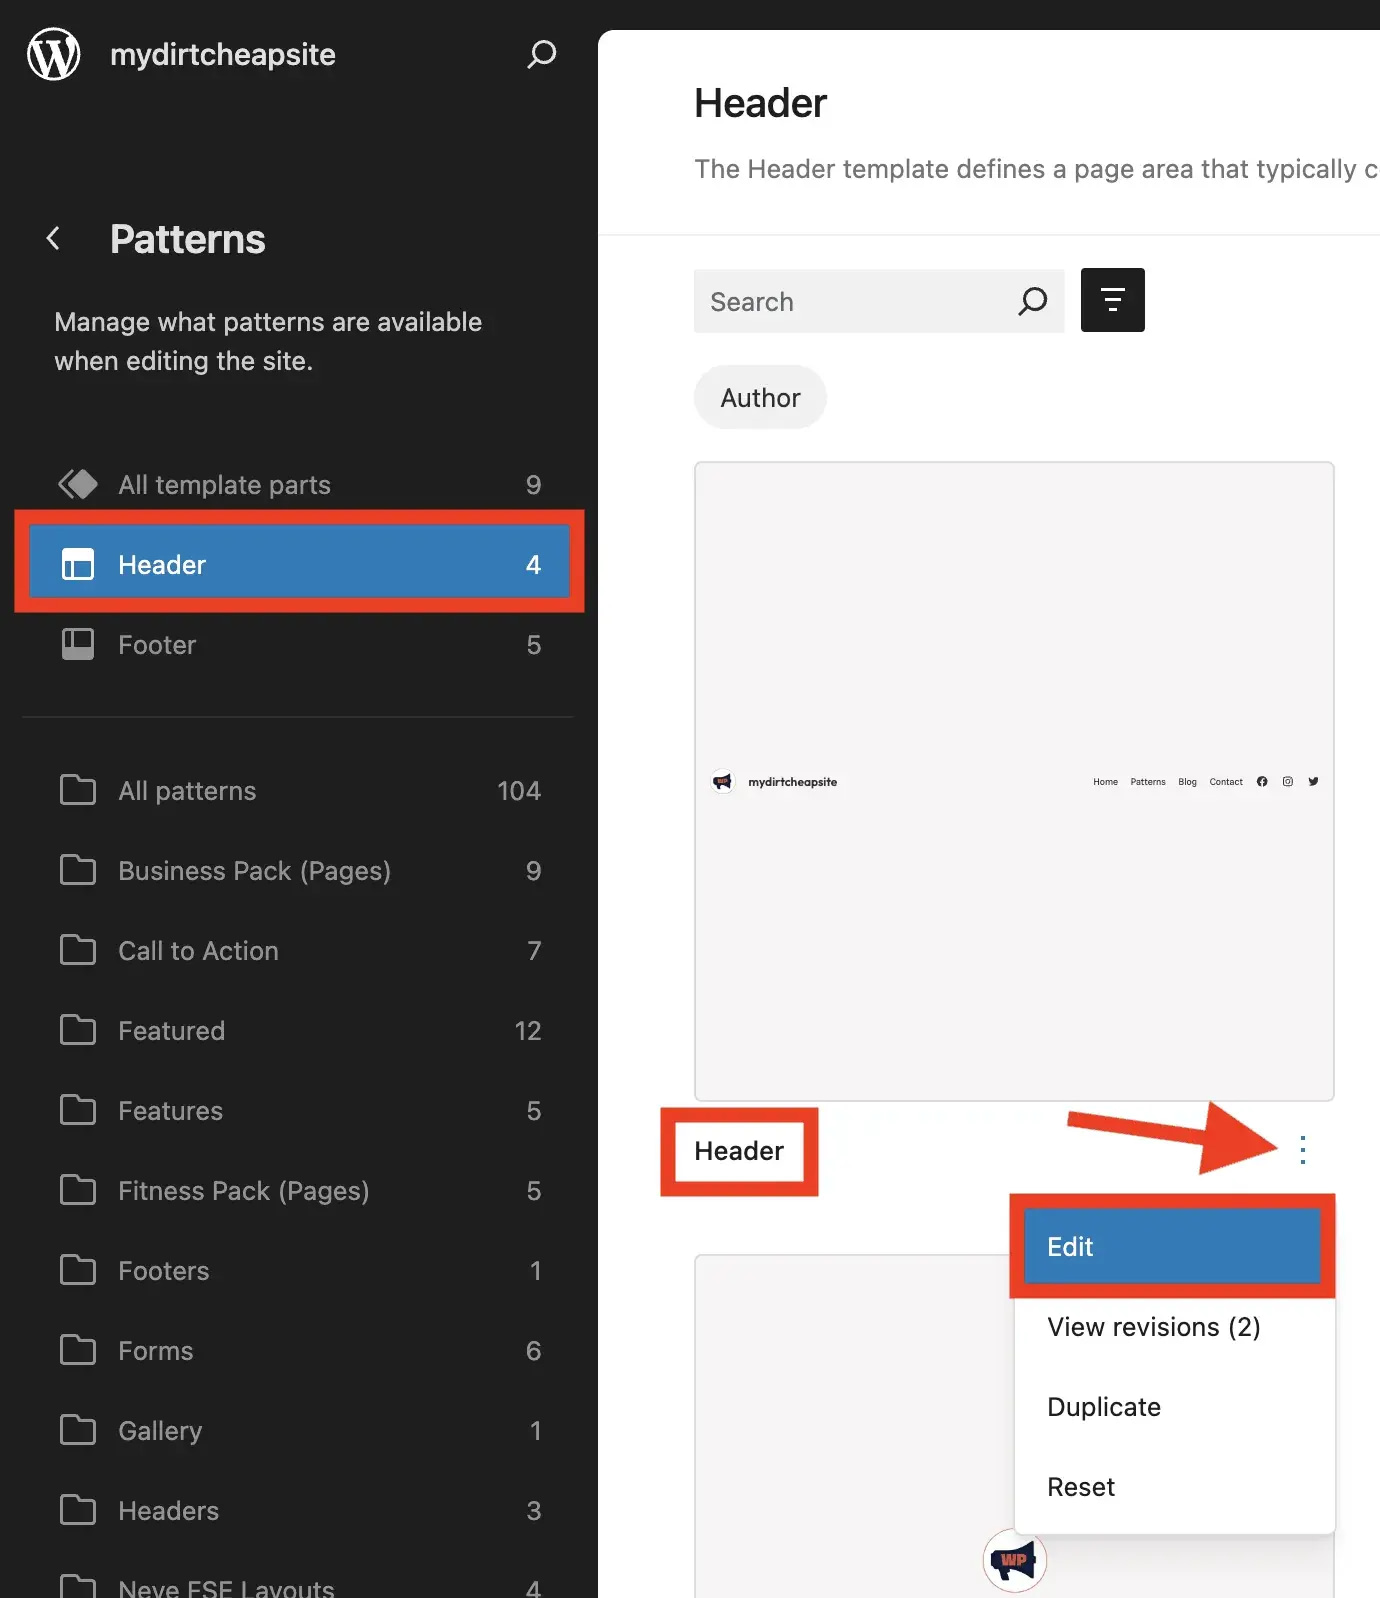
Nonetheless, you should be able to see an option for Header under All template parts.
This is because every theme is going to have at least one header template where your navigation menu and other common features are stored (e.g., site icon, site title). Many themes actually have multiple header templates (that includes Neve FSE), but the default one is typically called “Header” with no other words.
You might also see “Main Header” or “Header Main.” The idea is to look for the one that sounds the most like it’s the default option. Once you have it, tap the three vertical dots and click on Edit:

Next, you will need to add a Custom HTML block to the header template, which means you’ll first need to get to the highest-level parent block by clicking anywhere inside the header. After that:
- Click the farthest left button repeatedly until you reach the top parent block.
- Once there, click the little + icon on the bottom right to add a new block.
- Type in html.
- Click on Custom HTML to add the block.

