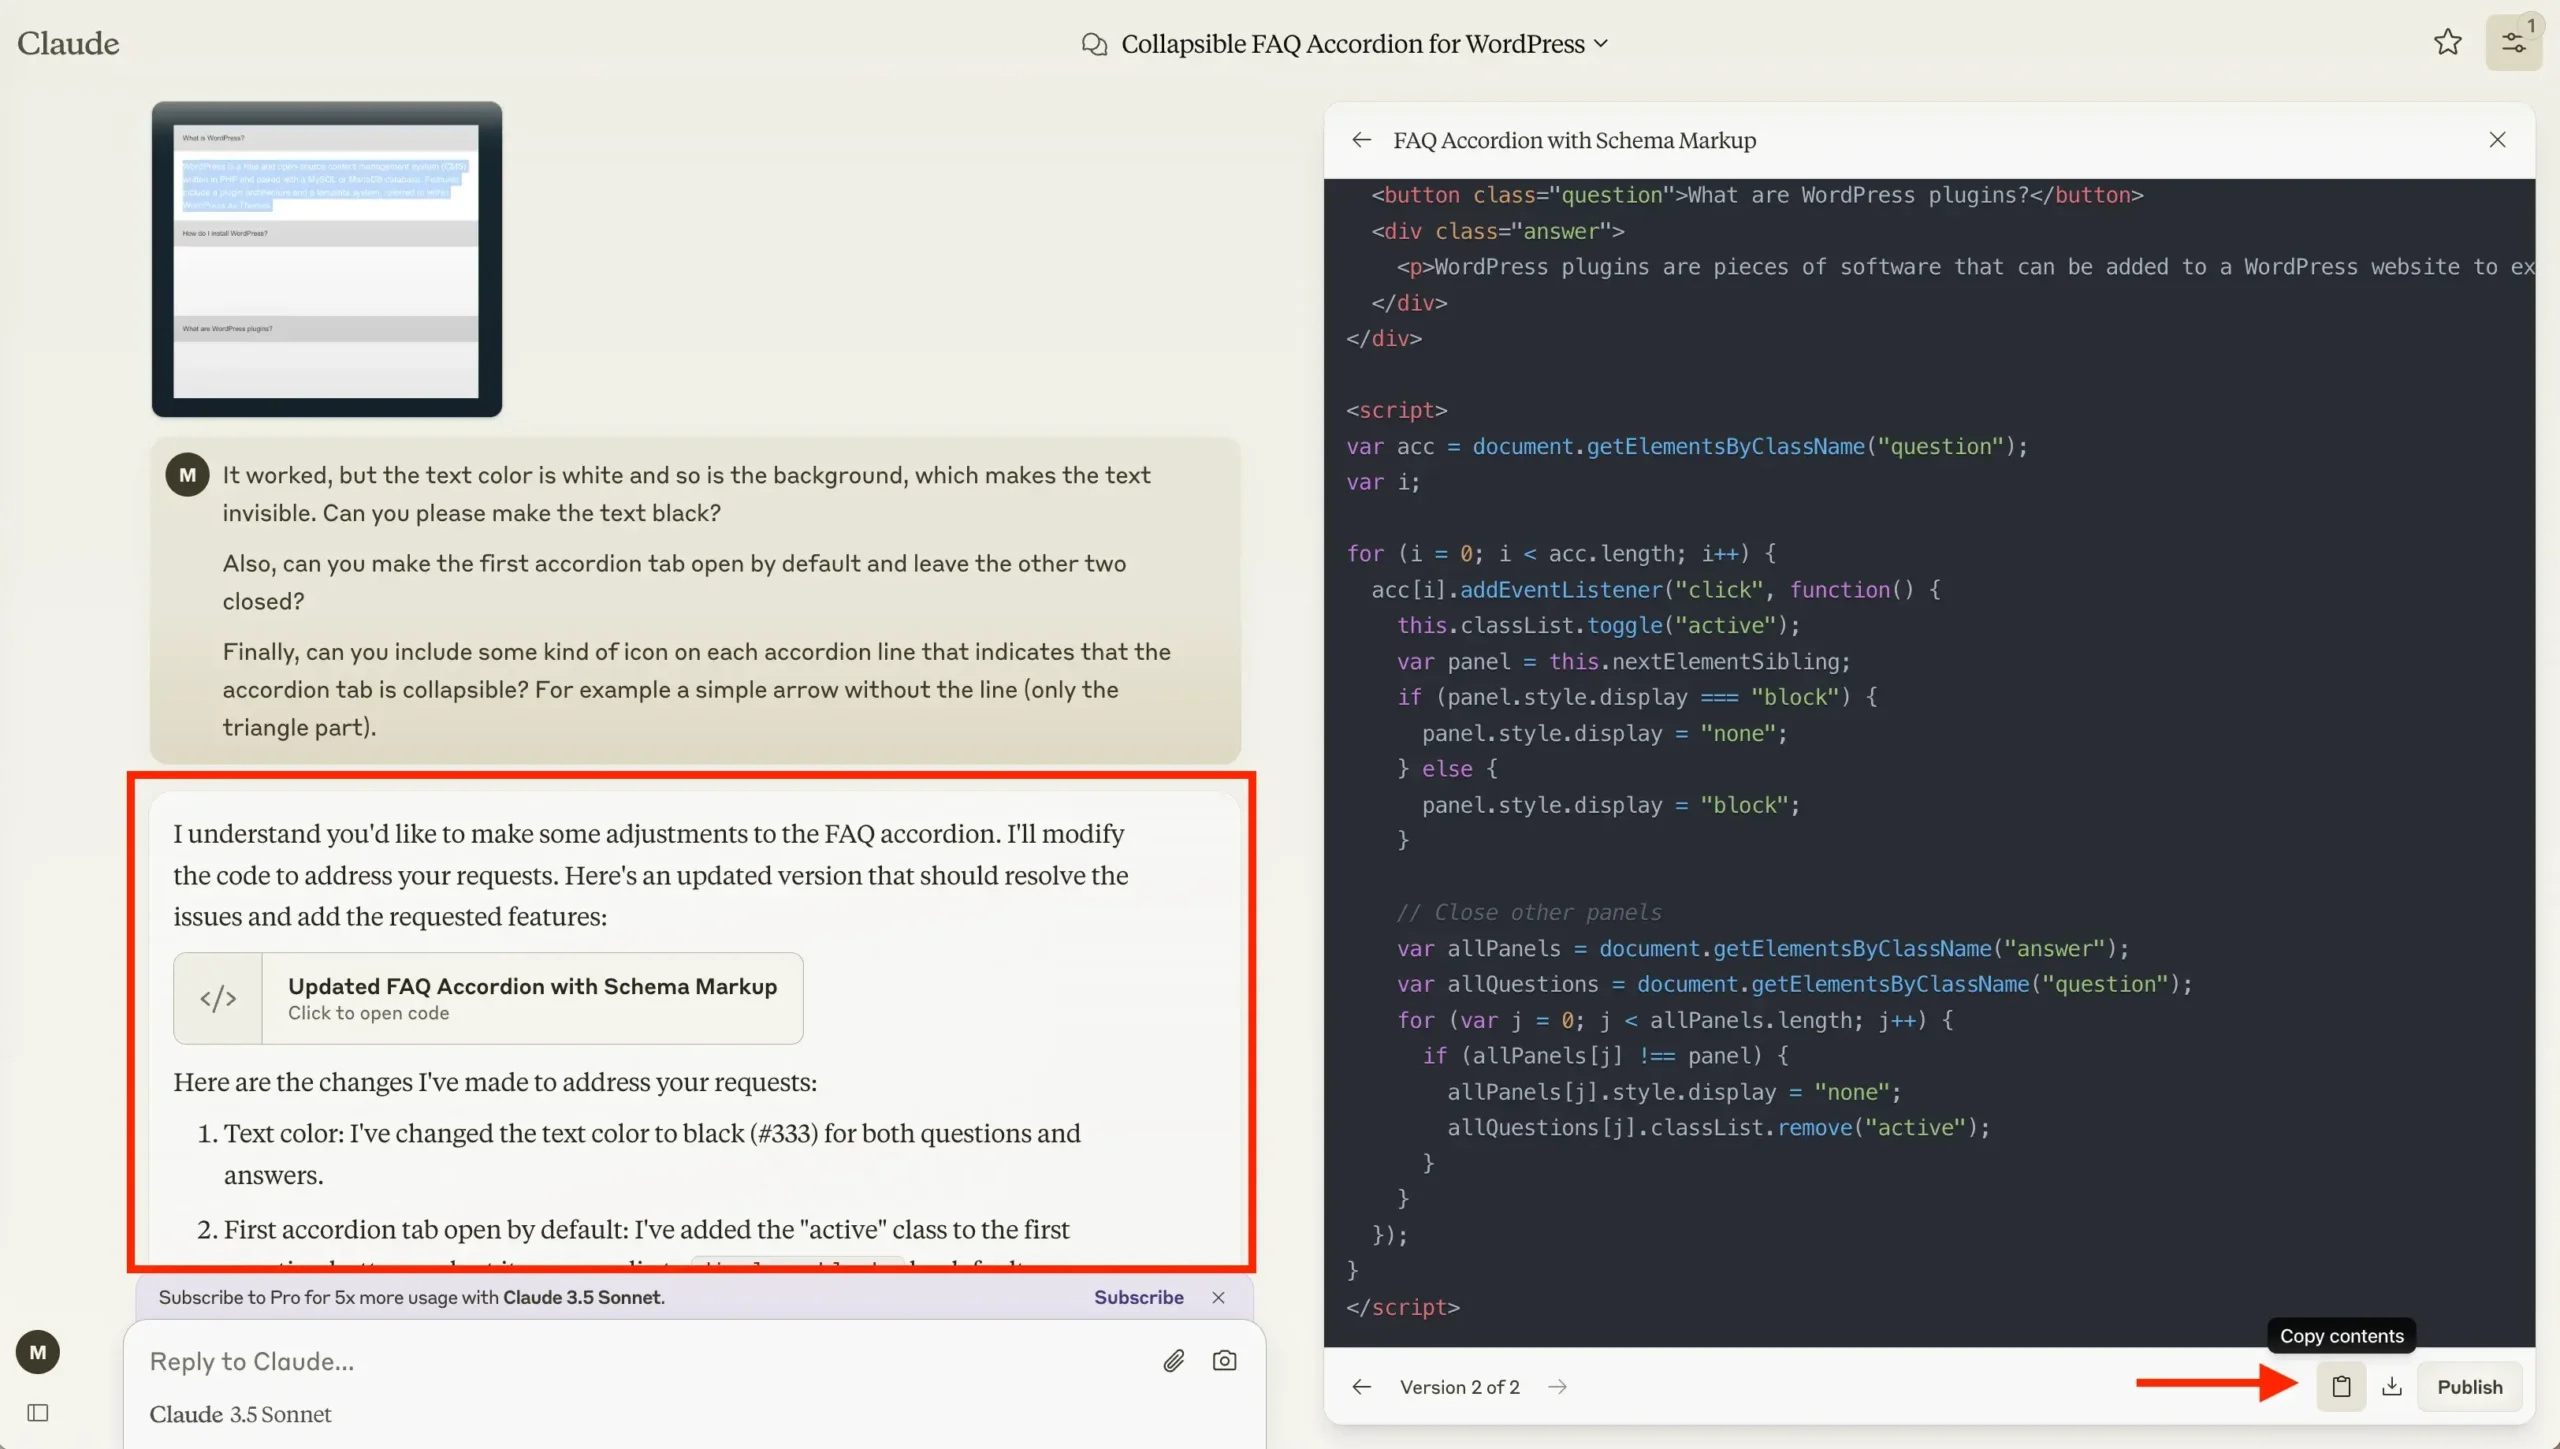
When you do this yourself, try to think of every small detail and give it to Claude. Otherwise, it’ll be left to chance. When you get the initial code back, look for the small clipboard. Click it to copy the code to your own computer’s clipboard.
Then go back to your post and paste it into the custom HTML block you added earlier. (In case you don’t know the keyboard shortcut to paste, it’s Command + V on a Mac and Ctrl + V on a Windows PC.)
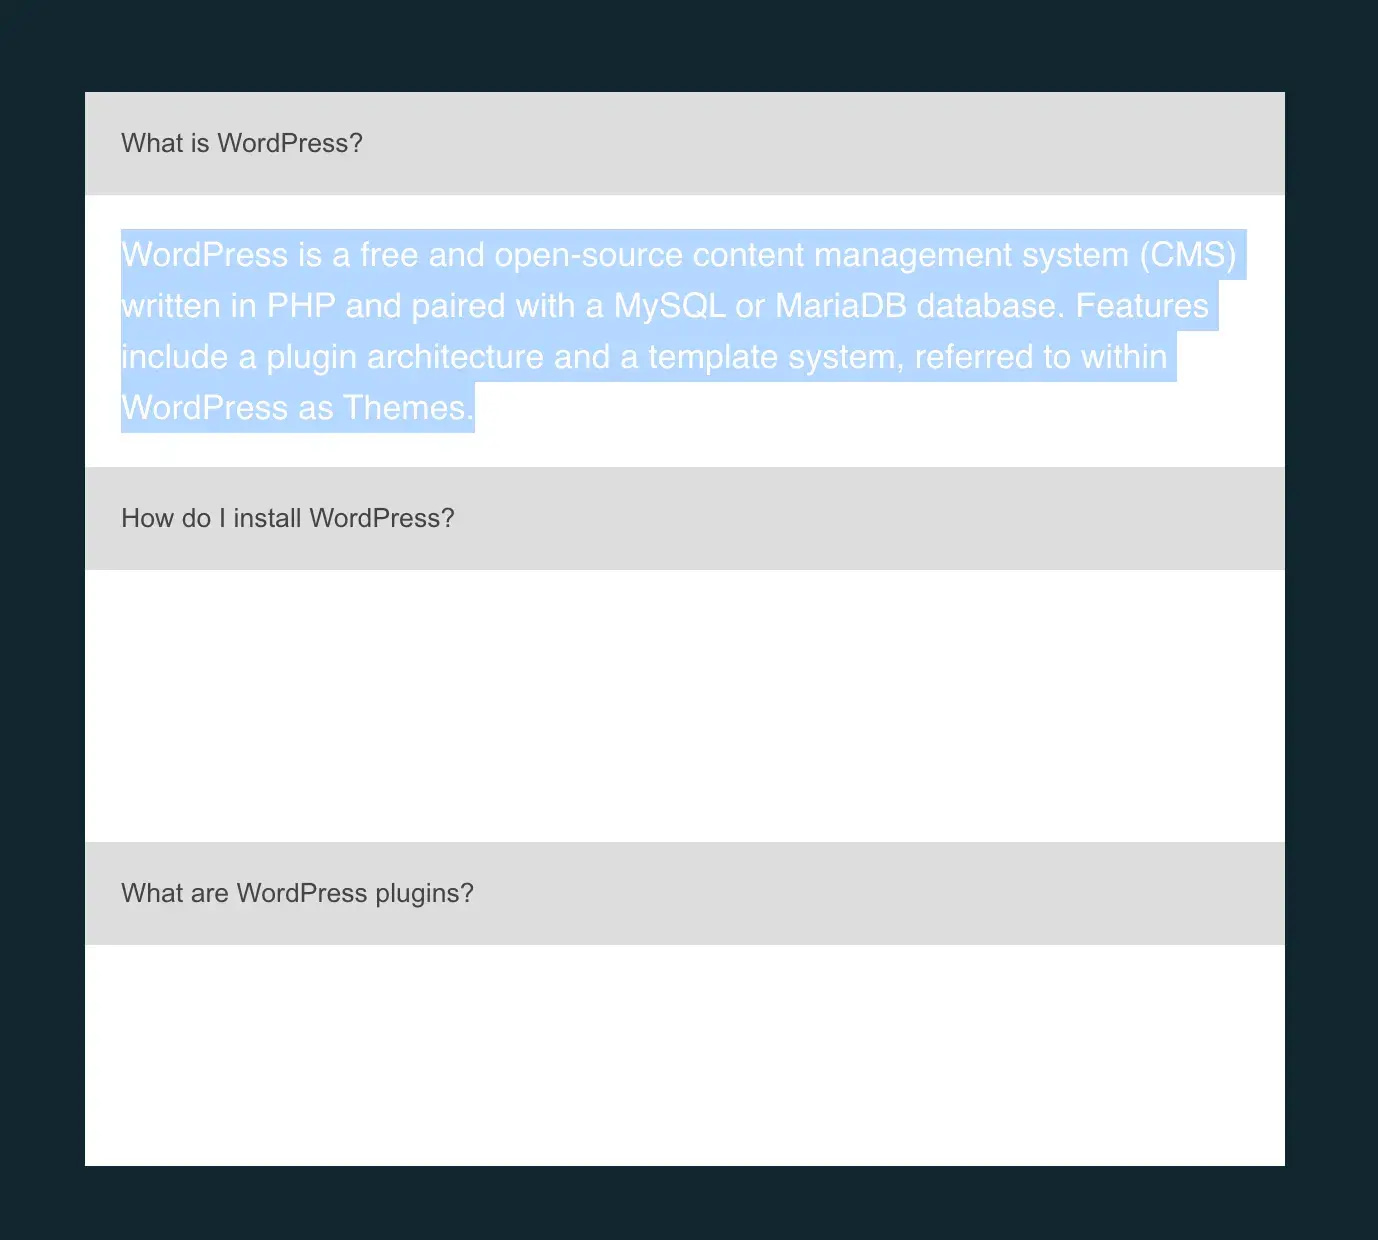
This is what my FAQ section looked like on the frontend, based on the initial code that Claude generated:

Notice anything?
In this version, Claude created a white background with white text. Not exactly an effective color combination.
This is why I said to include every little detail you can think of.
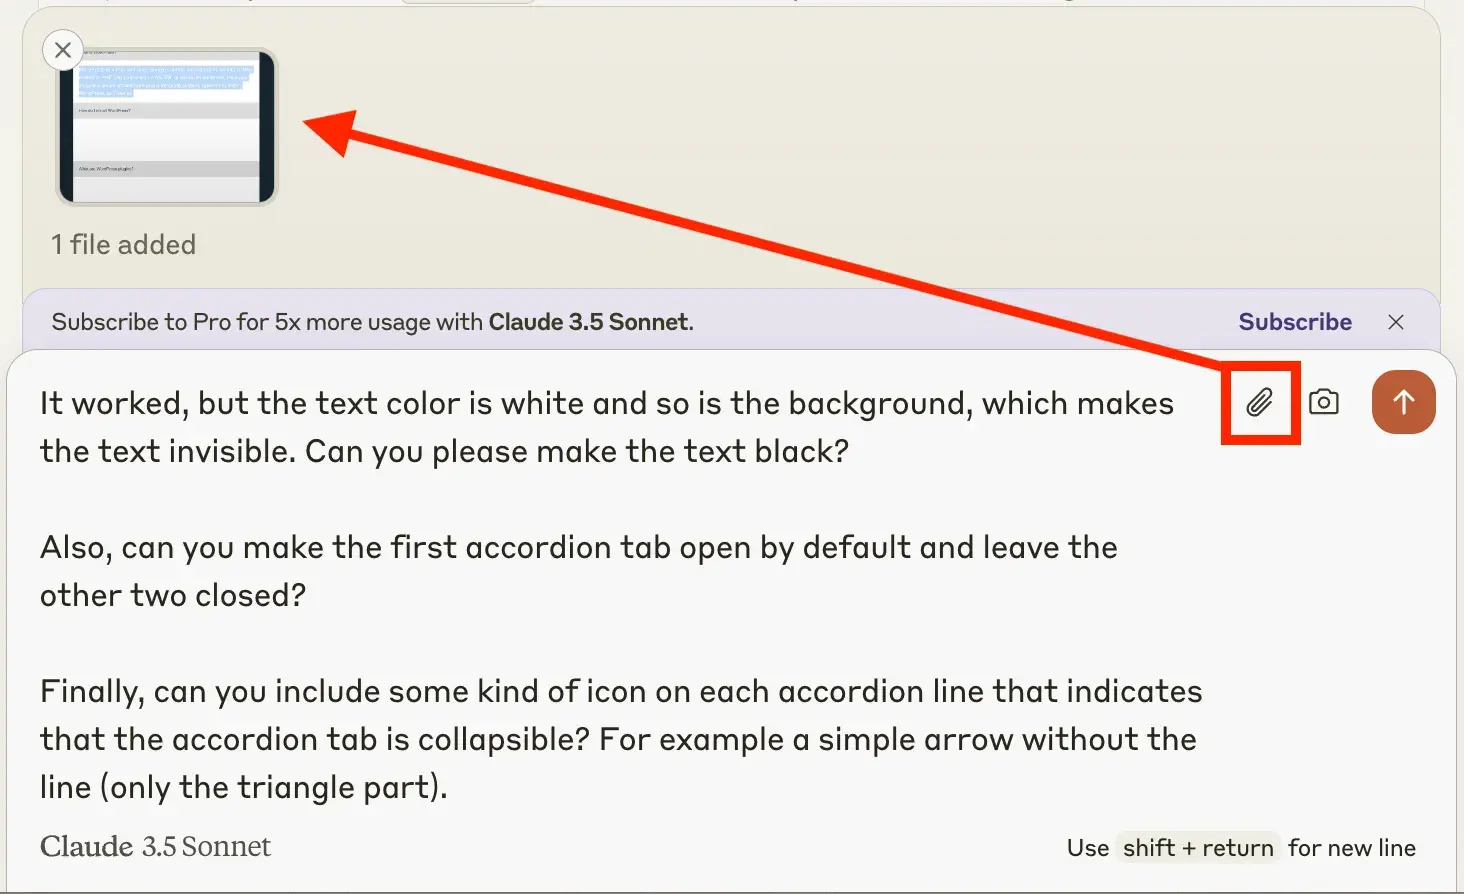
Luckily, it’s an easy fix. If you find yourself in a similar situation (which you probably will) simply screenshot the result and give it to Claude by clicking the little paperclip icon.
Then explain the issue(s) and ask it to make your desired adjustments.

Below is Claude’s response to me, as well as the updated custom code:

Once again, click on the little clipboard icon to copy the adjusted code. Then go back to your post to replace the code that was there with this new code.
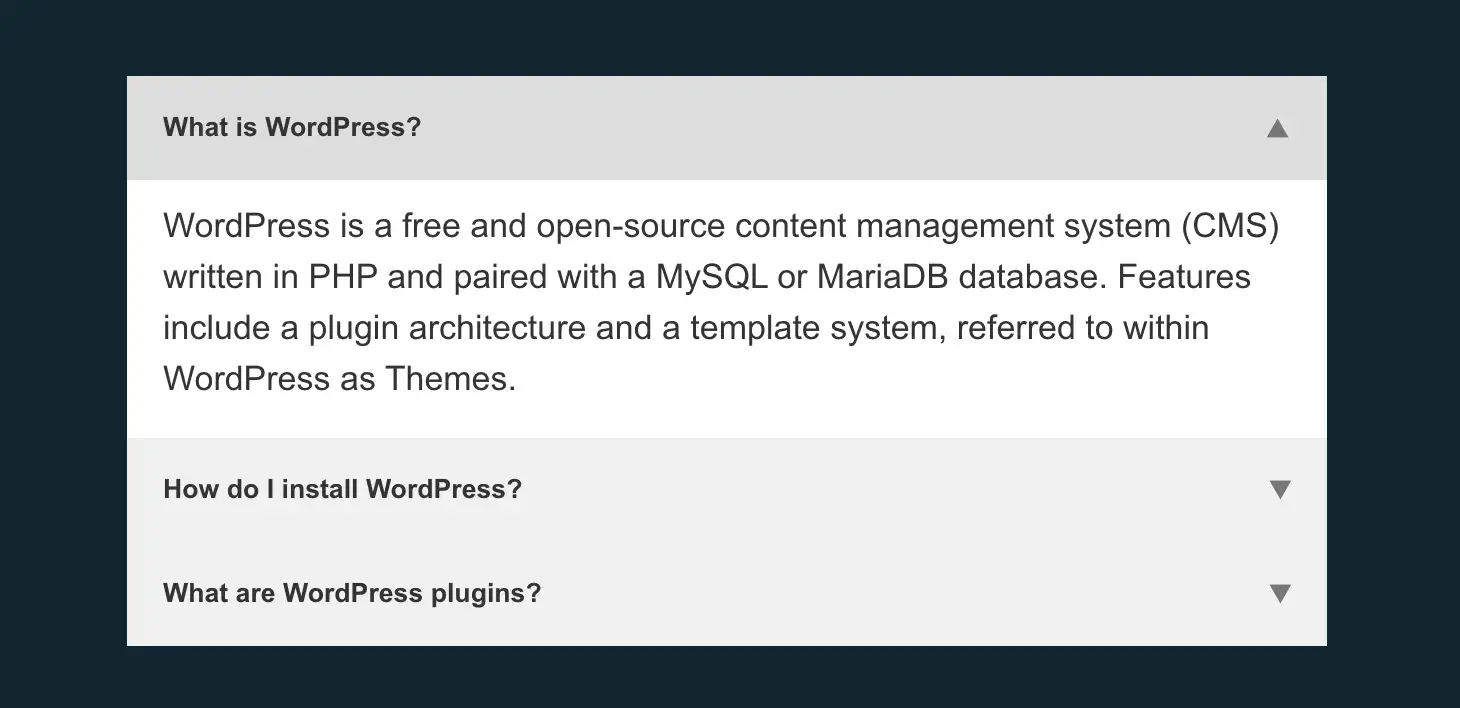
Afterwards check the result on the frontend:

Much better, right?
Claude fixed the color problem, added little arrows to indicate that the tabs are collapsible, and left the first tab open by default. In short, it did everything I asked it to do.
Final thoughts and takeaways
You just saw how relatively easy it is to add your own custom HTML by using Gutenberg’s built-in HTML block and the Claude AI chatbot. The trick with using Claude (or any similar AI tool) is to be detailed and persistent.
I lucked out in the example I shared because it only took me two tries to get it right. That’s not always going to be the case, though. It might take you five or even ten tries.
As a general rule of thumb, the more complex of a feature you want to add, the more attempts it’s going to require. This is simply due to the fact that the code is going to be more complicated and thus more opportunities for errors will be present.
If you really find yourself getting stuck, consider using two AI tools at the same time so you can cross-reference the code. For example, if you start with Claude as your primary code generator but you find yourself going around in circles with trying to fix errors, then run the code through ChatGPT and see what it says. It might see something that Claude doesn’t (or vice versa).
Also take into consideration that global styles in your theme might override whatever code you add to the HTML block. If that’s the case, then your fix might require some additional steps. But that’s outside the scope of this tutorial.
And that’s it!
Was this helpful? Do you feel confident enough to try it yourself? If you have any questions, let me know in the comments below. I’ll be happy to assist you.

