These days, WordPress developers rely on Git to make development smoother and allow multiple people to work on the same project without stepping on each other’s toes.
Bitbucket is a popular Git platform, but just having your code there isn’t enough — you also want a way to connect this repository to your server. That way, updates pushed to Bitbucket can automatically deploy to your server, keeping your WordPress site up-to-date without manual, repetitive steps.
That’s where Bitbucket Pipelines come in. Bitbucket Pipelines lets you set up a workflow for continuous deployment, so updates in your repo are automatically deployed to your site. If you’re using Kinsta as your host, you can use SSH and Bitbucket Pipelines to make the whole process hands-free.
This article explains how to set up continuous deployment for your WordPress site hosted on Kinsta using Bitbucket Pipelines.
Prerequisites
Before setting up continuous deployment for your WordPress site on Kinsta, make sure you have the following ready:
- Your WordPress site should already be hosted on Kinsta.
- Local machine access to your WordPress site files.
- A Bitbucket account where you’ll store and push your site’s code.
- Basic familiarity with Git, like how to push code and work with a
.gitignorefile.
Set up your WordPress site on Bitbucket
As a Kinsta user, you have two easy ways to access your WordPress site’s files. You can either pull your site from the Kinsta server into DevKinsta, which lets you work locally, or you can create a downloadable backup directly from your MyKinsta dashboard. For this guide, we’ll use the backup method.
Download your WordPress site files
To download a copy of your WordPress files from Kinsta, follow these steps:
- Navigate to your site in the MyKinsta dashboard.
- In the left sidebar, click Backups to access your site’s environment backups.
- Go to the Download tab and create a downloadable backup.
- Once the download is ready, save it to your local PC.
This backup will be a compressed file. Unzip it to access all your WordPress files.
Set up your project for Git and create a repository on Bitbucket
Open the folder containing your site’s files in your preferred code editor. To prevent uploading unnecessary WordPress core files, media uploads, or sensitive information, add a .gitignore file to the root directory of your project.
You can use a standard template, copy its contents, and save it to ensure only the essential files are tracked.
Your local WordPress files are now prepared for Git. In Bitbucket, go to your workspace and create a new repository with no files. (Do not include a .gitignore file, as we already created one locally.)
Set up SSH authentication and push to Bitbucket
To securely connect to your Bitbucket repository, you must set up SSH authentication and then push your code.
- Generate an SSH key pair on your local machine. Use your own email address in the following command:
ssh-keygen -t ed25519 -C "[email protected]"Save the key pair in a location you can easily reference (e.g.,
~/.ssh/id_rsa_bitbucket). - Copy the public key (
~/.ssh/id_rsa_bitbucket.pub) and add it to Personal Bitbucket Settings > SSH Keys. This authorizes your machine to push code securely.Add SSH key to Bitbucket. - With the SSH key added, use the following commands to push your code to Bitbucket:
# Initialize a new Git repository
git init
# Stage all files for the first commit
git add .
# Commit the files with a message
git commit -m "Initial commit of WordPress site files"
# Add the Bitbucket repository as the remote origin
git remote add origin [email protected]:your-username/your-repo.git
# Push the files to Bitbucket
git push -u origin main
Replace
your-usernameandyour-repowith your Bitbucket username and repository name.
Once this is done, you’re all set up on Bitbucket. You can then configure your Kinsta server to receive updates from your Bitbucket repository.
Configure your Kinsta server for automated deployments
To enable automated deployments from Bitbucket, you’ll establish SSH access to Bitbucket and then configure Git to use SSH on the Kinsta server.
Step 1: Set up SSH access to Bitbucket for secure connections
To allow the Kinsta server to pull code from Bitbucket, you must generate an SSH key on the server and add its public key to your Bitbucket account.
SSH into your Kinsta server using the SSH terminal command available in your MyKinsta dashboard:

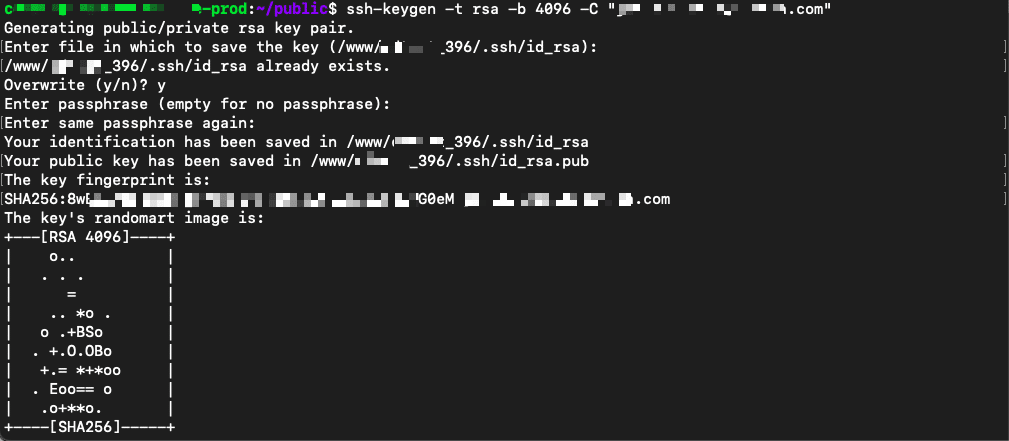
Then, generate a new SSH key (skip this step if you already have one):
ssh-keygen -t rsa -b 4096 -C "[email protected]"Press Enter to save the key to the default location and leave the passphrase blank when prompted.

Next, you’ll need to add the public key to Bitbucket. To access the key, use this command:
cat ~/.ssh/id_rsa.pubCopy the entire output, then go to Bitbucket Settings > SSH Keys in your Bitbucket account and add the public key. This will authorize the Kinsta server to access your Bitbucket repository securely.
Step 2: Configure Git to use SSH on the Kinsta server
Navigate to your site’s live directory on the Kinsta server by running the command below:
cd /www/your-site/publicYou can find this path in the Environment details section of your MyKinsta site dashboard, as shown below:

Next, initialize the directory as a Git repository and set the remote URL to use SSH:
git init
git remote add origin [email protected]:your-username/your-repo.git
Replace your-username and your-repo with your Bitbucket username and repository name, respectively.
Confirm that the SSH setup works by running:
ssh -T [email protected]If successful, you should see a message like: “authenticated via SSH key. You can use git to connect to Bitbucket. Shell access is disabled”
With this setup, your Kinsta server is now ready to receive and deploy updates from Bitbucket directly through Bitbucket pipelines.
Set up Bitbucket Pipelines for automated deployment
Bitbucket Pipelines is a continuous integration and delivery (CI/CD) tool that allows you to automate tasks when you push changes to your repository. In this setup, we’ll configure a pipeline that triggers a deployment to Kinsta whenever there’s a new push to the main branch.
Add required environment variables
Before configuring the pipeline, you’ll need to set up some environment variables in Bitbucket to store sensitive information securely. Navigate to Repository Settings > Repository Variables in Bitbucket and add the following with its corresponding value:
KINSTA_USERNAME: This is your SSH username for the Kinsta server. It’s used by Bitbucket Pipelines to log in and execute deployment commands.KINSTA_SERVER_IP: This is the IP address of your Kinsta server. It allows Bitbucket Pipelines to know which server to connect to for deployment.PORT: This is the SSH port used by your Kinsta server. Kinsta servers use a custom port, so you must specify that here. You can find these details on your site’s Info page in your MyKinsta dashboard.
MyKinsta STFP/SSH details. SSH_PRIVATE_KEY: This is your base64-encoded SSH private key from your local machine. Bitbucket Pipelines will use this key to authenticate to your Kinsta server. To encode your private key in base64, run:cat ~/.ssh/id_rsa | base64Copy the output and add it as the value for
SSH_PRIVATE_KEY.
Bitbucket Pipeline configuration
Now, let’s write the configuration file, bitbucket-pipelines.yml, to automate deployments. This file defines the pipeline, specifying when it should run, what commands to execute, and how to connect to your Kinsta server. You can do this locally in your IDE.
Here’s the full configuration:
pipelines:
  branches:
    main:
      - step:
          name: Deploy to Kinsta
          script:
            - pipe: atlassian/ssh-run:0.8.1
              variables:
                SSH_USER: $KINSTA_USERNAME
                SERVER: $KINSTA_SERVER_IP
                PORT: $PORT
                COMMAND: |
                  cd /www/your-site/public &&
                  git fetch origin main &&
                  git reset --hard origin/main
                SSH_KEY: $SSH_PRIVATE_KEY
                DEBUG: 'true'
A closer look at this pipeline configuration
This pipeline is set up to automate deployments to your Kinsta server whenever there’s a new push to the main branch. Here’s a breakdown of what each part does:
- Pipeline trigger: The
pipelinessection is configured to trigger on pushes to themainbranch. This means any new commit tomainwill automatically start the deployment. - Step: The step is named “Deploy to Kinsta” for clarity. This step contains the main deployment actions.
- SSH-run pipe: We use the
atlassian/ssh-runpipe, which allows Bitbucket to connect to your Kinsta server via SSH and execute commands remotely. This pipe simplifies the process of setting up an SSH session, running the commands, and closing the session, so there’s no need to manage SSH details manually in the script. - Deployment commands: The
COMMANDblock contains the commands that deploy the latest code to your WordPress site. Here’s what each command does:- The first command navigates to the live directory where WordPress is hosted.
- The second command then runs
git fetch origin mainto pull the latest code from the main branch in Bitbucket. - The last command then updates the live site with the latest code from the main branch.
This configuration handles all aspects of the deployment — from connecting to Kinsta to updating your site files — so your WordPress site on Kinsta will stay up-to-date automatically with each push to main.
Test the pipeline
Save the bitbucket-pipelines.yml file in the root directory of your repository and commit the changes. When you push this to the main branch, the pipeline will automatically trigger and start the deployment process.
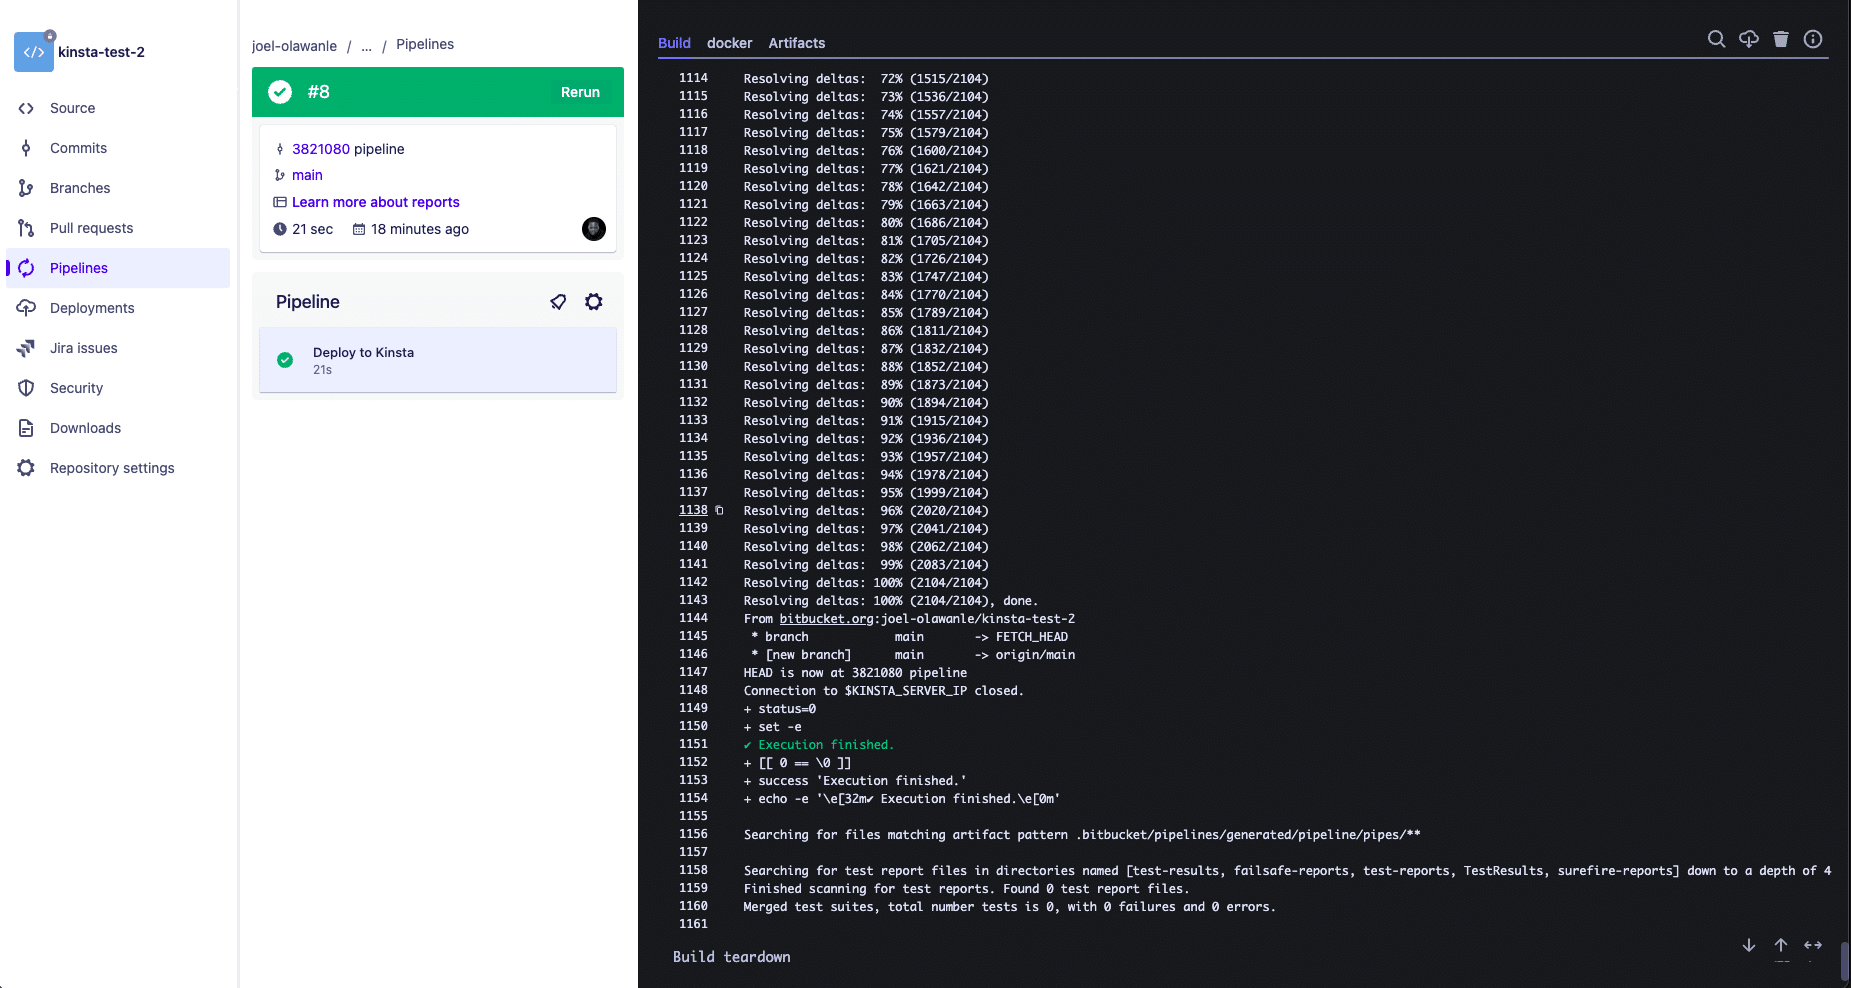
You can monitor the deployment’s progress in the Bitbucket Pipelines dashboard. If everything is set up correctly, Bitbucket will connect to your Kinsta server, fetch the latest code, and deploy it to your live site.

For troubleshooting, check the pipeline logs in Bitbucket, especially if DEBUG is set to "true". The logs provide detailed information about each step, which can help identify any connection or configuration issues.
Summary
Setting up automated deployments from Bitbucket to Kinsta is a powerful way to keep your WordPress site up-to-date without the hassle of manual updates. After connecting Bitbucket Pipelines and your Kinsta server, every push to your repository is immediately reflected on your live site, minimizing downtime and reducing deployment errors.
Remember that DevKinsta provides a simpler option for solo developers. DevKinsta allows you to push your local development environment directly to Kinsta with a single click, avoiding the need for a pipeline setup. An added advantage of this approach is that your database changes can also be included, keeping both your code and content in sync effortlessly.
What do you think of this process? Have questions or run into any issues? Share your feedback or ask in the comments below!


