WordPress makes it easy to manage online assignments, whether you’re running a school, a university, or an independent course platform. With the right plugins, you can create assignments, collect submissions, track progress, and provide feedback, all within a system that’s flexible and simple to use.
This guide covers everything you need to know about managing assignments in WordPress, from choosing the best tools to optimizing workflow and ensuring a smooth experience for both educators and students.
Let’s get to it!
Choosing the right WordPress plugin for assignments
Managing assignments in WordPress requires more than just creating a post or page. A dedicated plugin provides structured tools for setting deadlines, collecting submissions, grading, and tracking student progress. The best choice depends on whether you need a full learning management system (LMS) or a simpler form-based solution.
Let’s take a moment to look at some popular options:
LearnDash
One of the most popular LMS plugins for WordPress, LearnDash offers built-in assignment submission, manual and automated grading, and progress tracking. It’s ideal for schools, universities, and online course creators who need structured learning paths, quizzes, and certificates. The included reporting tools also make it easy for instructors to monitor student performance and ensure timely feedback.
Tutor LMS
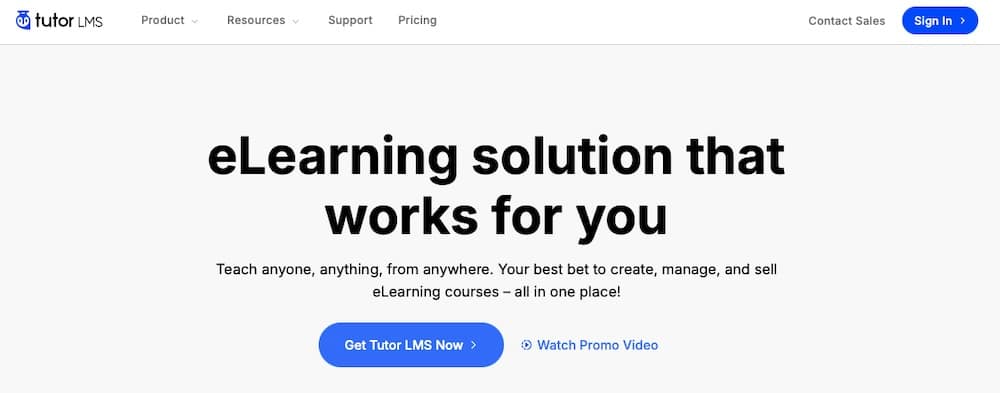
Tutor LMS provides an intuitive interface for managing assignments and is a great option for educators looking for an easy-to-use solution. It includes assignment submission, file uploads, and automated grading. The plugin also supports monetization options, so it’s useful for selling courses alongside structured assignments.
LifterLMS
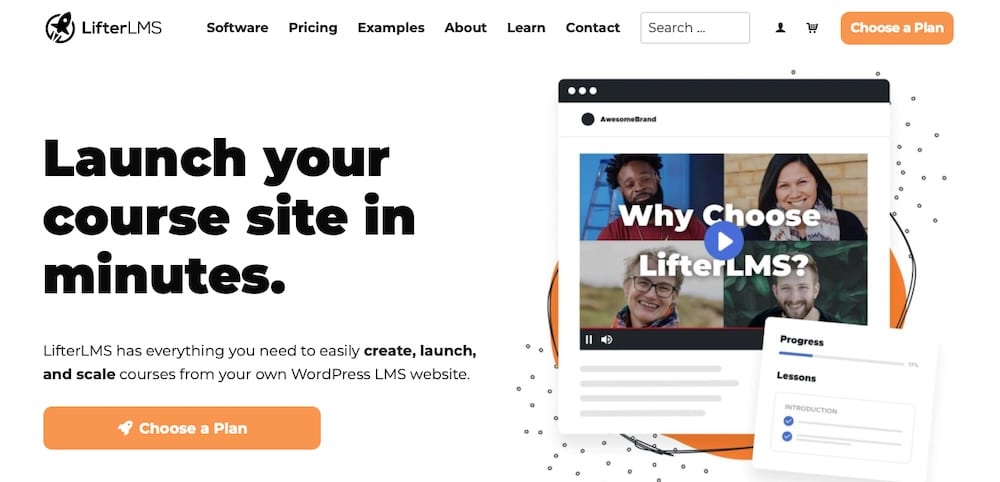
LifterLMS is another flexible alternative that offers assignment modules, drip content scheduling, and engagement tools like certificates and badges. It’s a strong choice for membership-based education platforms or coaching programs that want to add interactive assignments within a broader learning experience.
WPForms or Gravity Forms

For educators who don’t need a full LMS, WPForms or Gravity Forms offer a straightforward way to collect assignments. These form builder plugins allow students to submit work through file uploads and text fields while enabling automatic notifications for submissions and grading. This approach works well for individual educators or institutions looking for a lightweight solution.
What to consider when choosing a plugin
The best assignment plugin depends on your specific needs. Before selecting one, consider:
- Ease of use: A plugin should be simple for both instructors and students to use. A cluttered or overly technical interface can slow things down.
- Integration with an existing LMS: If your school or institution already uses an LMS, ensure the plugin works with it to avoid compatibility issues.
- Assignment features: Look for file upload options, deadline management, and built-in grading tools. Some plugins also support resubmissions and feedback loops.
- Notifications and reporting: Timely alerts help educators track submissions and let students know when feedback is available. Reporting tools are useful for monitoring progress over time, too.
Installing and setting up the assignment plugin
Once you’ve chosen an assignment plugin, the next step is installation and configuration. For this guide, we’ll walk through setting up LifterLMS.
Step 1: Install and activate LifterLMS
In your WordPress dashboard, go to Plugins > Add New. Search for LifterLMS and click Install Now.
Once installed, click Activate to enable the plugin.

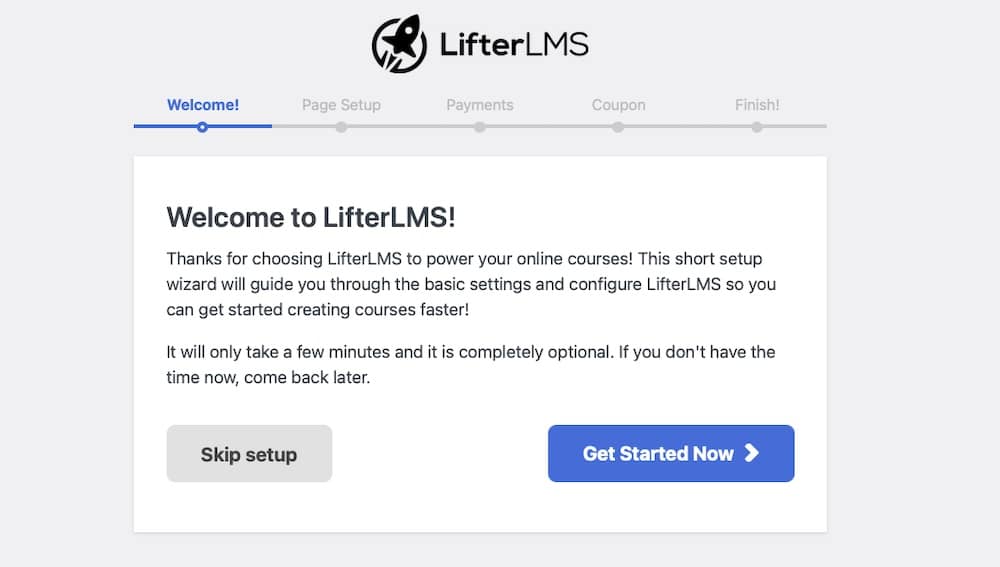
LifterLMS will launch its setup wizard, which guides you through the basic configuration. Follow the prompts to set up your course environment.
Step 2: Configure user roles and permissions
LifterLMS includes different user roles for managing assignments and student access:
- Students: These are enrolled learners who can access courses and submit assignments.
- Instructors: Users responsible for creating and managing courses, including grading assignments.
- Membership Instructors: Instructors assigned to specific membership levels.
- LMS Managers: Users with broader administrative capabilities over the LMS.
To assign an Instructor role to a user, go to your WordPress dashboard and select Users > All Users. Tick the checkbox next to the username of the person you wish to assign the role to.
In the Change role to… drop down menu, select Instructor.

Then, click Change to save the changes.
Step 3: Configure grading settings
LifterLMS supports both manual and automated grading, allowing instructors to assess student work efficiently. Assignments, like essays or file uploads, require manual grading, where instructors review submissions and assign scores. For quizzes with multiple-choice or true or false questions, automated grading can be enabled by setting correct answers and point values in the quiz settings.
Grading settings can also be adjusted within the Course Builder, where instructors define point values, set pass/fail criteria, and enable feedback options.
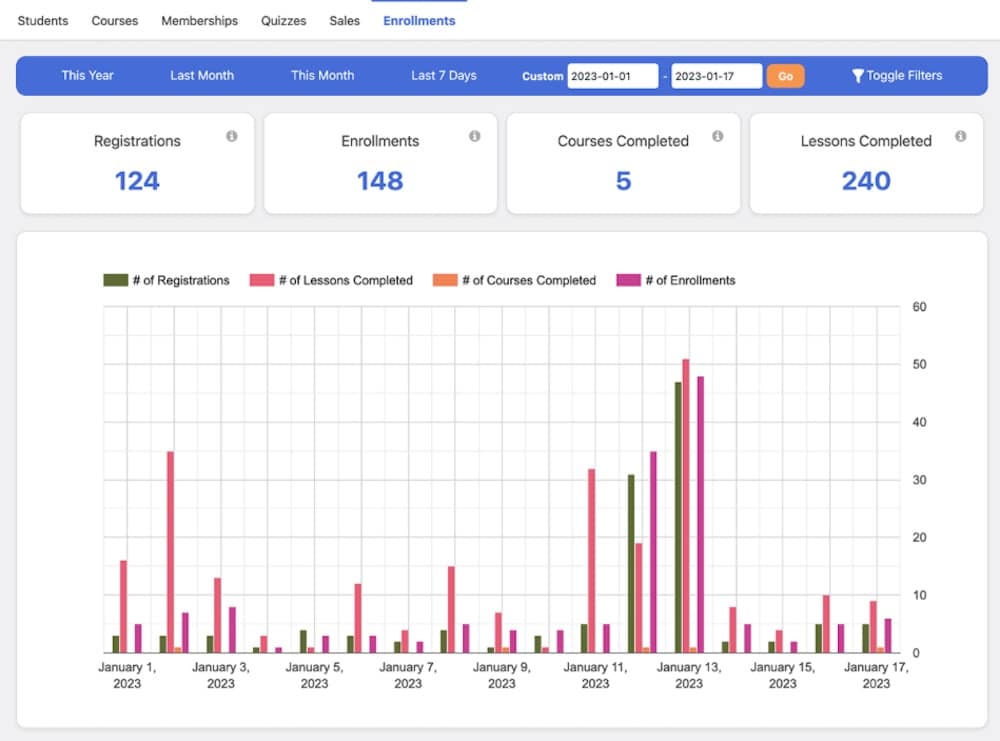
The Reporting Dashboard provides an overview of student performance, allowing instructors to track progress and ensure timely grading.
Creating courses or pages for assignments
Whichever assignment plugin you choose, the next step is to create a structure for students to access and submit their work. If you’re using an LMS like LifterLMS, assignments can be integrated directly into courses. If you’re not using an LMS, you can still manage assignments by creating dedicated pages or posts and embedding submission forms.
Let’s quickly take a look at both of these approaches now.
Managing LMS-based assignments
LifterLMS makes it easy to organize assignments within structured courses. Assignments are linked to lessons, allowing students to submit work as they progress.
1. Create a course
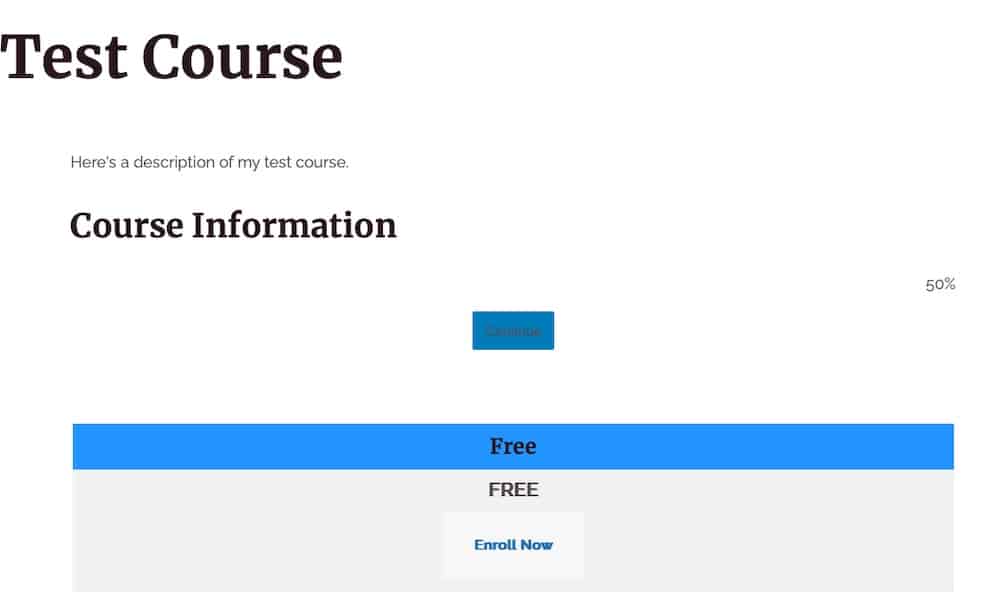
In the WordPress dashboard, go to LifterLMS > Courses and click Add New Course. Enter a course title, description, and any necessary details like access plans, pricing info, and any restrictions you’d like to place on access.
2. Add lessons and modules
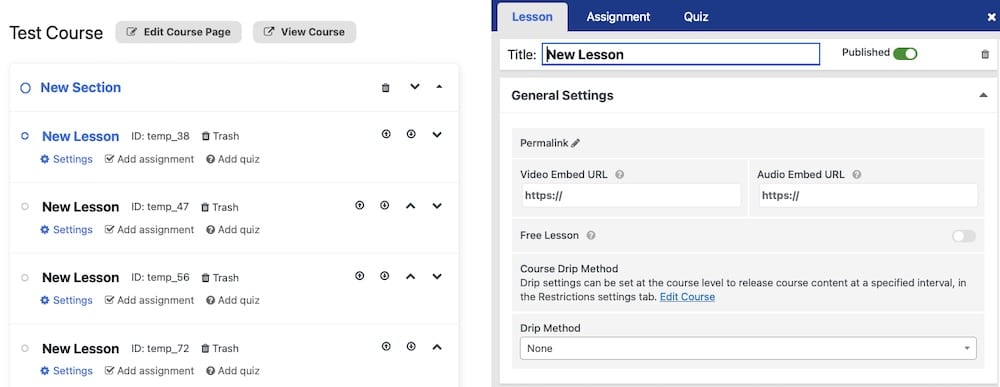
Use the Course Builder to create lessons. Click Add New Lesson, name it, and drag it into the correct module.
3. Attach assignments
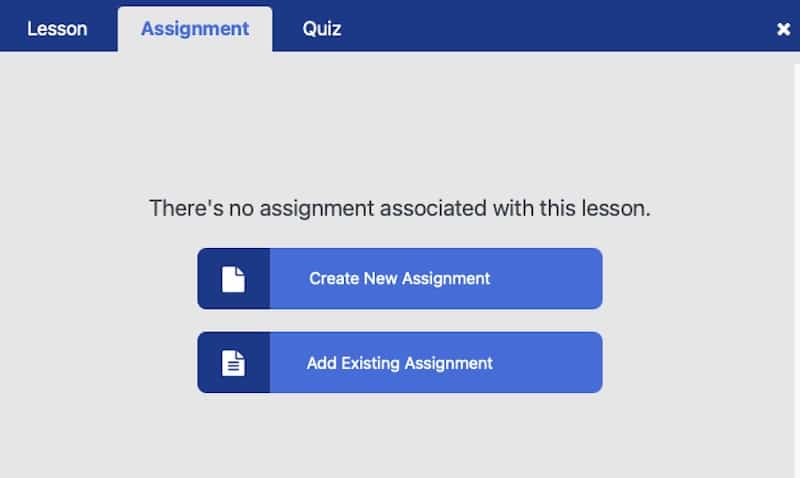
Open a lesson and click the Assignment tab, then click Create New Assignment.
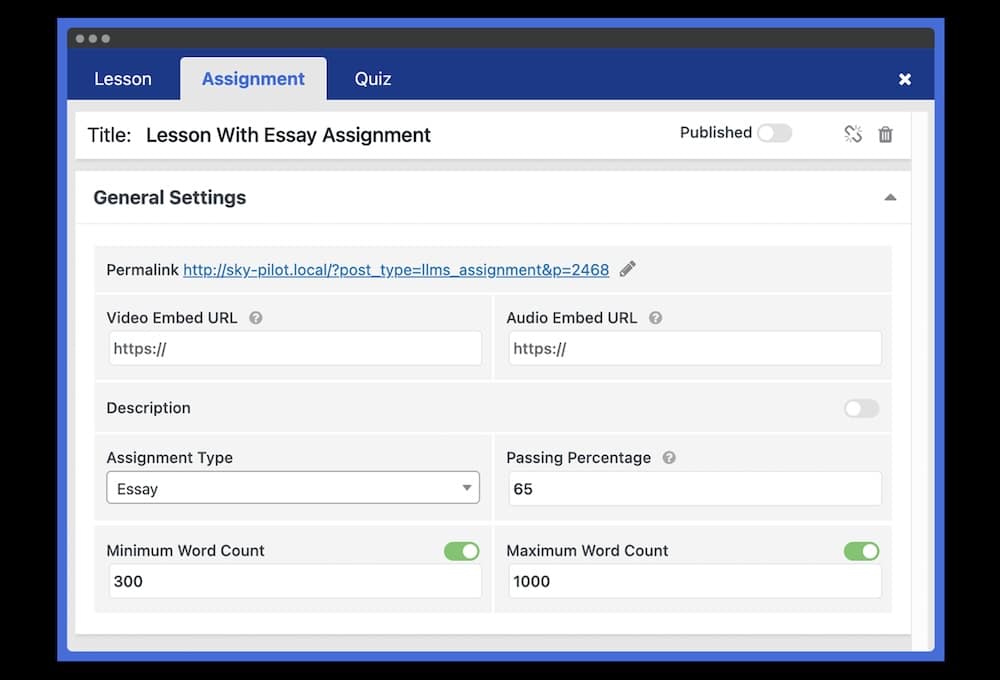
Choose a submission type, such as file upload or text response, and set deadlines. In the following example, you can see an essay assignment with word count specifications listed. (Note: you need the premium LifterLMS Assignments module to make use of this feature.)
4. Publish and enroll students
Once everything is set up, publish the course and either manually enroll students or allow them to self-enroll.
With LifterLMS, assignments become an integrated part of the course structure, making it easy to track progress and provide feedback.
Managing non-LMS assignments
If you’re not using an LMS, WordPress pages or posts can serve as a simple way to distribute and collect assignments. For this example, we’ll be using the WPForms plugin. Make sure you have it installed before proceeding.
To do this, you’ll need to first create an assignment page. Go to Pages > Add New (or Posts > Add New) and enter the assignment details, including instructions and deadlines.
Next, create a form with fields for student names, responses, and file uploads. In WPForms, go to WPForms > Add New, choose a File Upload Form, and customize it.
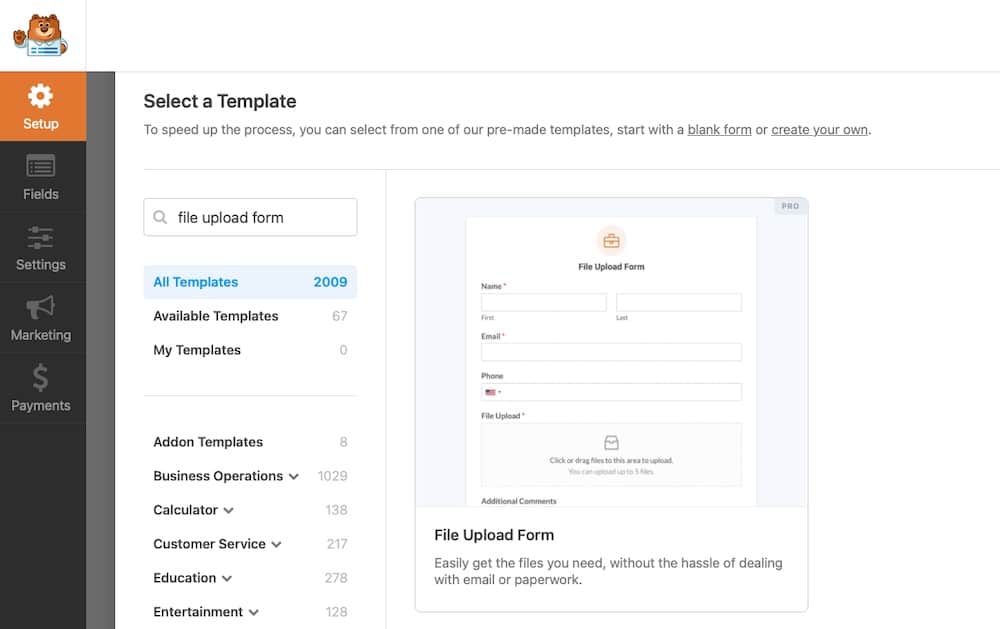
Embed the form using the WPForms block in the WordPress editor.
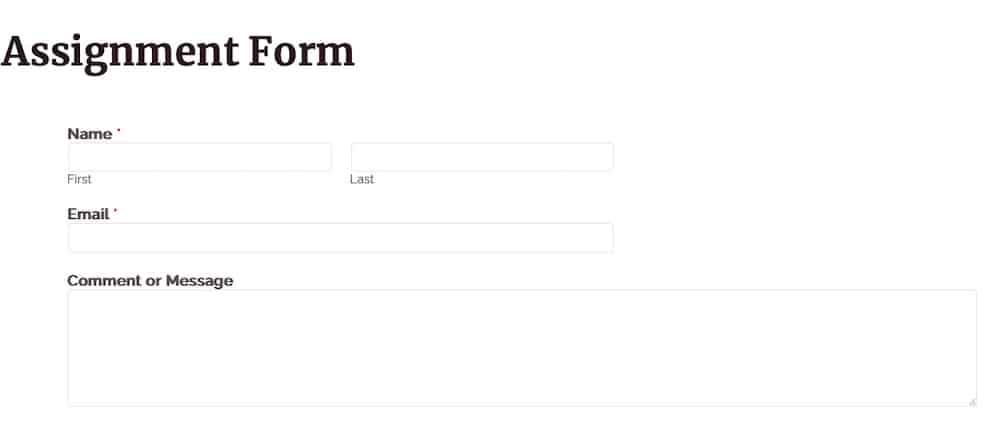
This approach works well for smaller-scale assignment management, where an LMS may not be necessary.
Configuring assignments for students
Once your course structure is in place, the next step is to configure your assignments. To continue our example using LifterLMS, this includes defining submission options and enabling resubmissions or feedback.
Defining submission settings
LifterLMS allows various submission types, ensuring flexibility for different assignment formats.
You’ll first want to choose a submission method:
- File uploads: This is best for essays, research papers, and multimedia projects.
- Text-based submission: This option allows students to submit responses directly within WordPress. Ideal for short essays or discussion-based assignments.
From there, set a deadline for the assignment. Define a due date to encourage timely submissions. Instructors can allow late submissions if needed. You can also enable multiple attempts, if you want. This means you’d allow students to resubmit assignments if revisions are permitted.
Enabling assignment resubmissions and feedback
Some courses may allow students to revise and resubmit their work based on feedback. To enable this:
Go to Courses and select the course you created. Open the course in the Course Builder. Next, click the assignment you’d like to adjust its settings and toggle on the Allow Resubmissions option. Set a limit on the number of attempts, if needed, then save your changes.
Once assignments are fully configured, students can submit their work, and instructors can efficiently manage grading and feedback within the LifterLMS dashboard.
Managing student submissions efficiently
Once assignments are set up, the next step is managing student submissions. LifterLMS provides tools for instructors to review work, approve or reject submissions, provide feedback, and track student progress. Efficient management ensures students receive timely responses and stay engaged in the learning process.
Viewing and reviewing submitted assignments
All submitted assignments are accessible from the LifterLMS dashboard. To view submissions:
Go to LifterLMS > Reporting then click on the Assignments tab to view assignments. Select the assignment to see a list of student submissions.
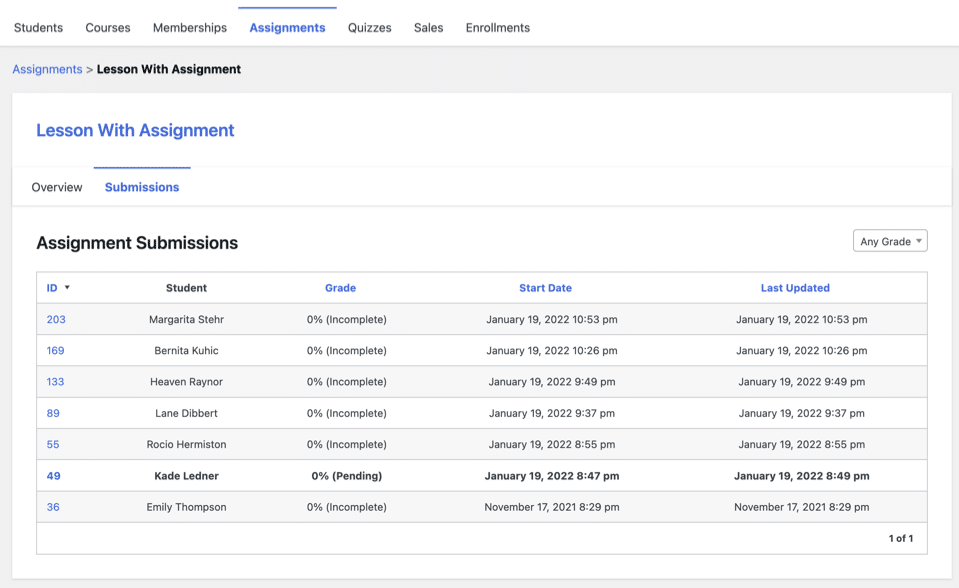
Approving, rejecting, or providing feedback
LifterLMS allows instructors to approve, reject, or request resubmissions based on grading criteria.
While viewing the submission, click Start a Review to begin the evaluation. After reviewing the assignment, give it a grade and provide feedback in the Remarks section.
Click Save Review to finalize.
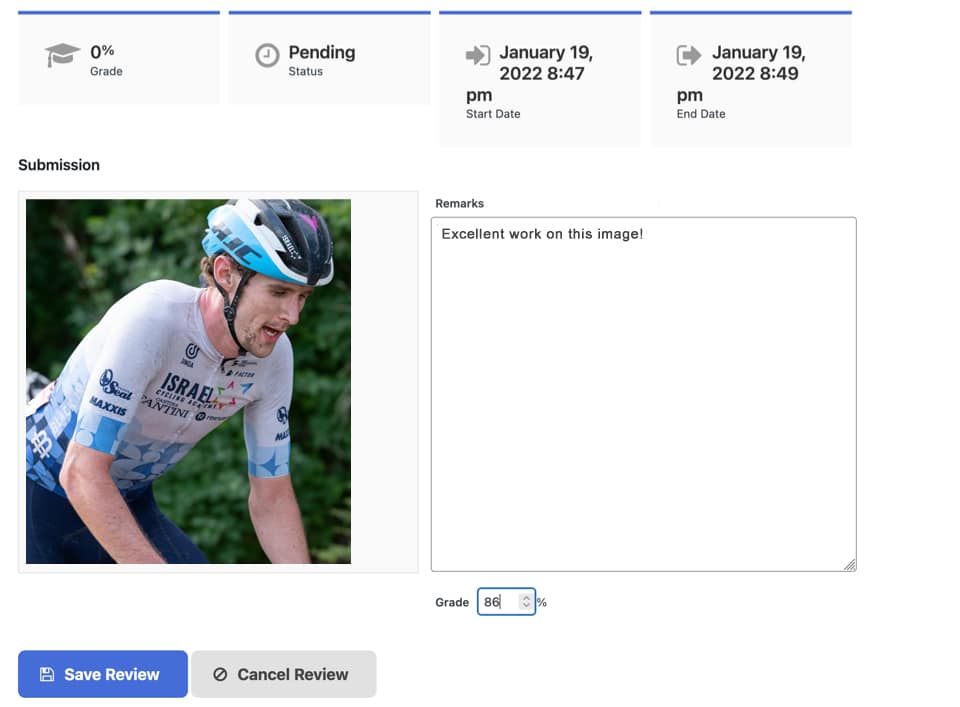
Enabling notifications and student communication
Keeping students informed about their assignments makes for a smoother learning experience. Many LMS include built-in notifications for submission updates, grading, and deadlines, ensuring both students and instructors stay on track. Additional communication tools like BuddyPress or bbPress can be added to the mix to enhance interaction within the learning environment as well.
Setting up email and dashboard notifications
LifterLMS allows automated email and dashboard notifications for key assignment activities. To configure notifications:
Go to LifterLMS > Settings > Notifications in the WordPress dashboard.
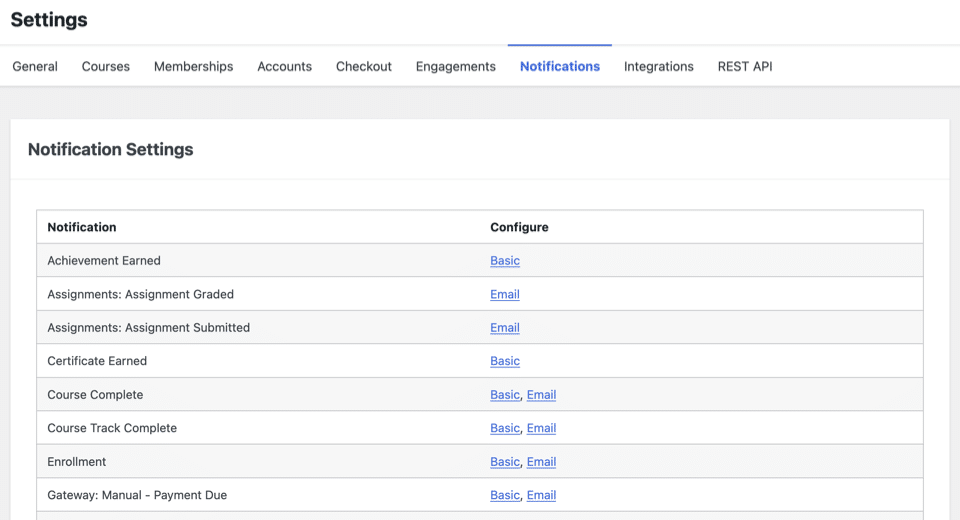
Enable email alerts for things like student welcome, lesson complete, and achievement earned. Instructors can customize notification content to ensure messages are clear and actionable, too.
Enhancing communication with BuddyPress or bbPress
While whatever LMS you choose will likely provide basic notifications, adding a community or forum-based communication tool can help facilitate discussions and support.
With BuddyPress, you can create a private social network where students can ask questions, share updates, and engage in group discussions. Meanwhile, bbPress allows you to add a discussion forum for assignments, allowing students to collaborate and seek clarification.
To integrate one of these tools, you just install the plugin like normal, then set up discussion groups for each course or assignment. Then, you can encourage students to use forums for questions instead of email. This adds a collaborative element to your courses, which can improve student engagement.
Adding advanced features
Enhancing assignment management with advanced features can improve student engagement, and make working on coursework more pleasant. To continue with our LifterLMS example, this platform supports gamification, scheduling, and third-party integrations, all of which go a long way toward making assignments more interactive and efficient.
Gamification and student engagement
Incorporating elements like badges, certificates, and leaderboards motivates students to complete assignments and stay engaged. LifterLMS includes native support for features that fit this category like certificates and achievement badges.
For enhanced gamification, consider integrating plugins like GamiPress, which offers advanced features like customizable badges and leaderboards.
Assignment scheduling and automation
Structured content delivery ensures students progress through coursework in a logical sequence. A drip content feature allows you to control when assignments become accessible. With it, you can schedule lessons and assignments to release after a set period or upon completion of prerequisites, maintaining a steady learning pace.
Integrating third-party tools
Adding on third-party tools can improve the assignment process, too. Integrating Google Drive can make it easier for you to receive and process documents from your students (and to share more detailed feedback).
For some, using plagiarism detection could be important. Services like Turnitin or Turnitin’s Unicheck act as a way to determine the originality of student work.
Securing the assignment area
Protecting assignment submissions and ensuring only enrolled students can access coursework is essential for maintaining academic integrity. WordPress and LifterLMS offer built-in security features, but additional measures can help restrict access, prevent spam, and safeguard file uploads.
Restricting assignment access to enrolled students
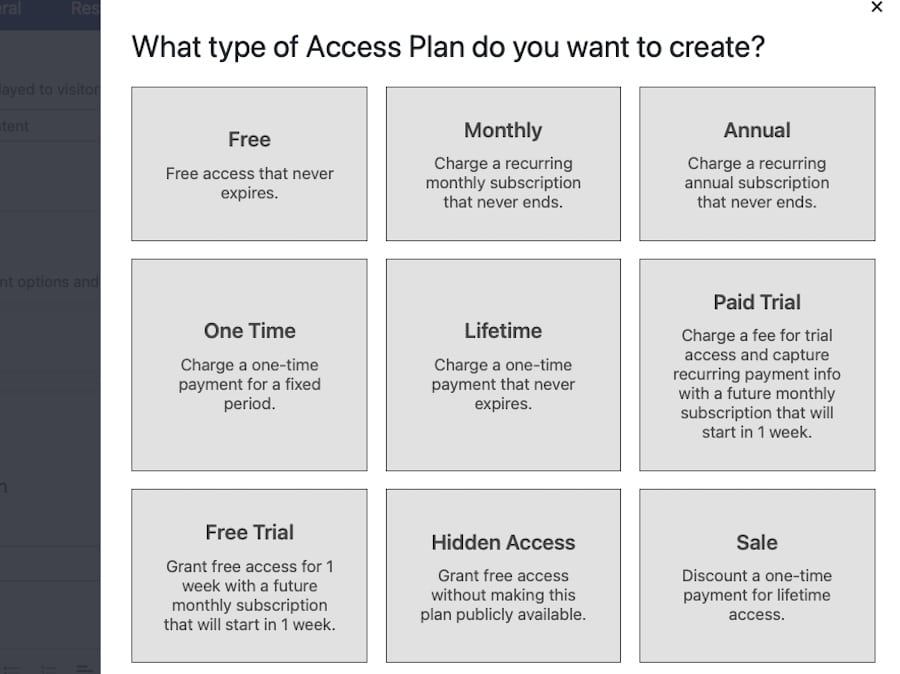
By default, LifterLMS restricts course content — including assignments — to enrolled students. However, to ensure assignments are not accessible to unauthorized users, go to LifterLMS > Courses in your WordPress dashboard. Select the desired course then scroll down to the Access Plans section to ensure that enrollment is required for course access. You can also add a new plan here to suit your needs.
Using a membership plugin for gated content
If you’re not using an LMS, a membership plugin like MemberPress is a solid choice for restricting assignment access to registered users or paying students. To set up gated content, install and activate MemberPress from the WordPress dashboard. Then go to MemberPress > Rules and create a new rule to protect assignment pages.
Implementing CAPTCHA to prevent spam submissions
If you’re using WPForms or Gravity Forms for assignment submissions, enabling CAPTCHA helps prevent spam or automated submissions.
In WPForms, you’d do this by going to WPForms > Settings > CAPTCHA and enabling Google reCAPTCHA or hCaptcha.
In Gravity Forms, add a CAPTCHA field when building the submission form.
This prevents bots from submitting fake assignments and protects instructors from unnecessary review work.
Enforcing file upload security
Allowing students to upload assignments as files introduces potential security risks. To reduce threats, you should restrict file types to only those that your students would feasibly need to submit, like PDF, DOCX, or TXT.
Limit file sizes can prevent excessively large uploads that could slow down your server or be used maliciously.
It’s also a good idea to use a security plugin like Wordfence or Sucuri to scan uploaded files for potential threats.
Combining these security measures keeps assignment submissions safe and ensures only authorized students access coursework.
Testing the workflow and optimizing
Before launching assignments to students, testing the entire submission and grading process is a good idea. Running tests can help identify issues that could disrupt students’ work.
Go through a test submission as a student
To simulate the student experience, create a test user and complete an assignment. Enroll the test user in the relevant course, then log in as the test student and navigate to an assignment.
Submit a test response, whether as a file upload or text entry, and check if it appears in the instructor’s dashboard.
If the submission doesn’t go through, verify that assignments are correctly attached to lessons and that submission settings are enabled.
Checking grading, feedback, and notifications
Once a test assignment is submitted, review the grading and feedback process. Log in as an instructor and go to LifterLMS > Reporting > Assignments.
Locate the test submission and grade it manually. If auto-grading is enabled (for quizzes or assessments), check that scores are calculated correctly. Provide feedback comments and approve or reject the submission.
Log back into the test student account to confirm that the grade and feedback appear correctly.
Additionally, verify that email and dashboard notifications are working:
- The instructor should receive an email about the new submission.
- The student should get a notification when the assignment is graded.
- Deadline reminders should be triggered if enabled.
Addressing common issues
During testing, you may encounter some common problems:
- Submission errors: If students can’t submit assignments, check the file upload settings, ensure the LMS is properly linked to the course, and confirm that the WordPress media library allows the correct file types.
- Email notifications not working: If students or instructors aren’t receiving emails, check spam folders, confirm that LifterLMS notifications are enabled, and consider using an SMTP plugin.
- Slow file uploads: Large file sizes can slow down submissions. Limit accepted file formats and sizes.
After resolving any issues, perform another test submission to confirm that everything works smoothly. Taking the time to do this before launch ensures a seamless experience for both students and instructors.
Summary
Managing online assignments in WordPress is simple with the right tools. By using an LMS, you can create structured courses, set up assignments, collect submissions, track student progress, and provide feedback — all within a single platform. Even if you’re not using an LMS, there are options for you. Form plugins offer a lightweight alternative for assignment management.
To ensure the best experience for all involved, it’s important to choose the right plugin, configure assignments properly, enable notifications, and test the workflow before launching. Advanced features can be added, too, to further enhance student engagement and simplify administrative tasks.
No matter which route you choose, consider signing up for managed hosting for WordPress from Kinsta. With fast loading speeds, automatic backups, and top-tier security, Kinsta ensures your WordPress site runs smoothly — whether you’re managing a handful of students or an entire institution.
Learn more about Kinsta’s managed hosting for WordPress and take your online learning platform to new heights.

