Creating a church website is a powerful way to connect with both your congregation and new visitors. Your website serves as a digital gateway to your church, offering information on services, sermons, and upcoming events. With WordPress, you can easily build a functional and welcoming site, even if you’re new to website creation.
This guide will walk you through the process step by step, helping you create a site that reflects your church’s mission and serves your community online.
Quick Guide on Building a Church Website
Step 1: Register a Domain Name
The first step in building your church website is selecting and registering a domain name. This is essentially your website’s address, such as yourchurchname.com, and it plays a crucial role in how people find you online. A well-chosen domain name not only reflects your church’s identity but also makes it easier for members and visitors to remember and share.
Here are some tips to help you choose the perfect domain name for your church:
- Keep it simple and memorable: A shorter domain name is easier to type and recall. Avoid complex names or abbreviations that might confuse people.
- Include your church’s name or mission: Make sure your domain reflects your church’s identity. For example, FirstBaptistSpringfield.com or GraceCommunityChurch.org are clear and descriptive.
- Consider using extensions like “.com” or “.church.”: While “.com” is the most recognized extension, “.church” can be a great alternative that immediately tells visitors the nature of your site.
- Avoid numbers and special characters: Keep it straightforward to reduce the chance of errors when people try to access your site.
Once you’ve selected your domain name, you must register it with a domain registrar or your hosting provider, which may offer a free domain when you sign up. After this, you’ll be one step closer to getting your church’s online presence up and running!
Step 2: Choose a Web Hosting Provider
Web hosting is essentially the service that keeps your church website live online, ensuring it’s accessible to anyone who wants to visit. A good web host is crucial for keeping your site fast, secure, and reliable, especially when your congregation and new visitors start exploring your content.
When selecting a hosting provider, here are some key things to consider:
- Reliability & Uptime: Choose a provider that offers high uptime (99.9% or more) to ensure your site is always accessible.
- WordPress Optimization: Pick a host optimized for WordPress for better performance and easy management.
- Affordability: Shared hosting is a budget-friendly option for most churches.
- Customer Support: Make sure the host offers good customer support in case you run into issues.
For more detailed information on the best WordPress hosting options, check out our comprehensive guide to the best WordPress hosting providers.
Once you’ve selected your hosting provider and signed up, the next step is to connect your domain to your hosting account.
Step 3: Install WordPress
WordPress is the ideal platform for your church website because it’s user-friendly, highly customizable, and packed with features that can help your site grow alongside your church community.
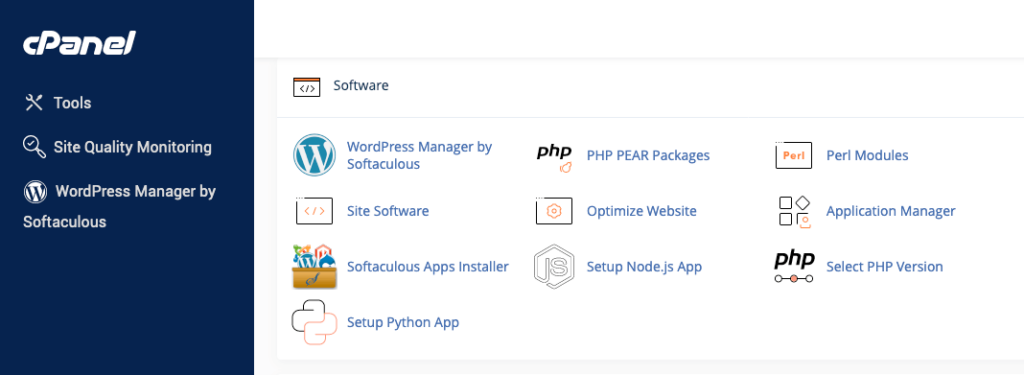
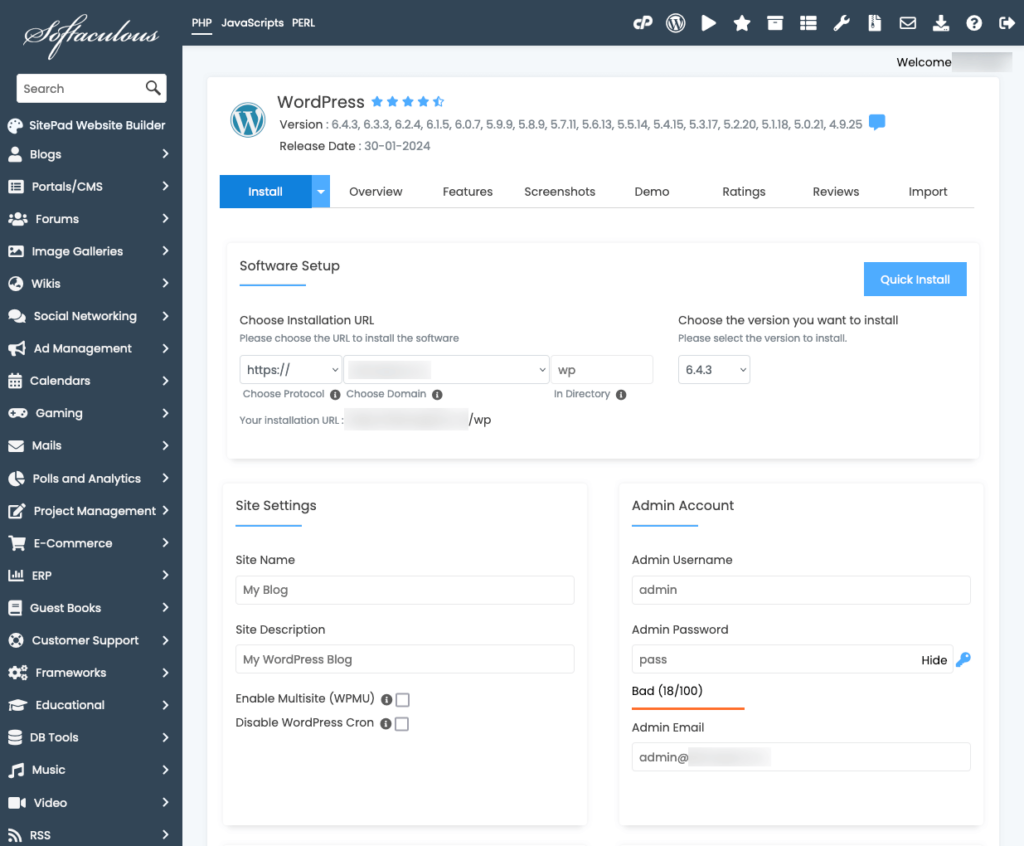
Most web hosts offer a one-click WordPress installation option, making it the simplest way to get started. Here’s how you can do it:
- Log in to your hosting account: Once logged in, navigate to your hosting dashboard.
- Find the WordPress installation tool: Look for an option like “Install WordPress” or “One-Click Install” within the dashboard (it may vary slightly depending on your host).

- Select your domain: Choose the domain you registered for your church website.
- Fill in your site details: Enter basic information like your site’s title (e.g., “Grace Community Church”), your WordPress username, and your admin email.

- Click Install: Within a few moments, WordPress will be installed on your domain, and you’ll be given login details to access your WordPress dashboard.
If your hosting provider doesn’t offer a one-click install or you prefer the manual route, you can still install WordPress easily.
Once WordPress is installed, you can access your dashboard by visiting yourdomain.com/wp-admin and logging in with the credentials you set during installation. This is where all the magic happens! From here, you can customize your site, add content, and manage everything related to your church’s online presence.
Step 4: Choose and Install a WordPress Theme
A WordPress theme controls the overall look, layout, and feel of your website, allowing you to create a welcoming, visually appealing space that reflects your church’s mission and community.
To build a church website, you’ll want a theme that is not only beautiful but also functional. This means choosing one that can display sermons, events, and church-related content effectively while being easy for your visitors to navigate. The good news? WordPress offers thousands of themes that fit these needs, but to simplify things, we highly recommend using the Inspiro Premium Theme by WPZOOM, which includes a ready-made Church Starter Site.
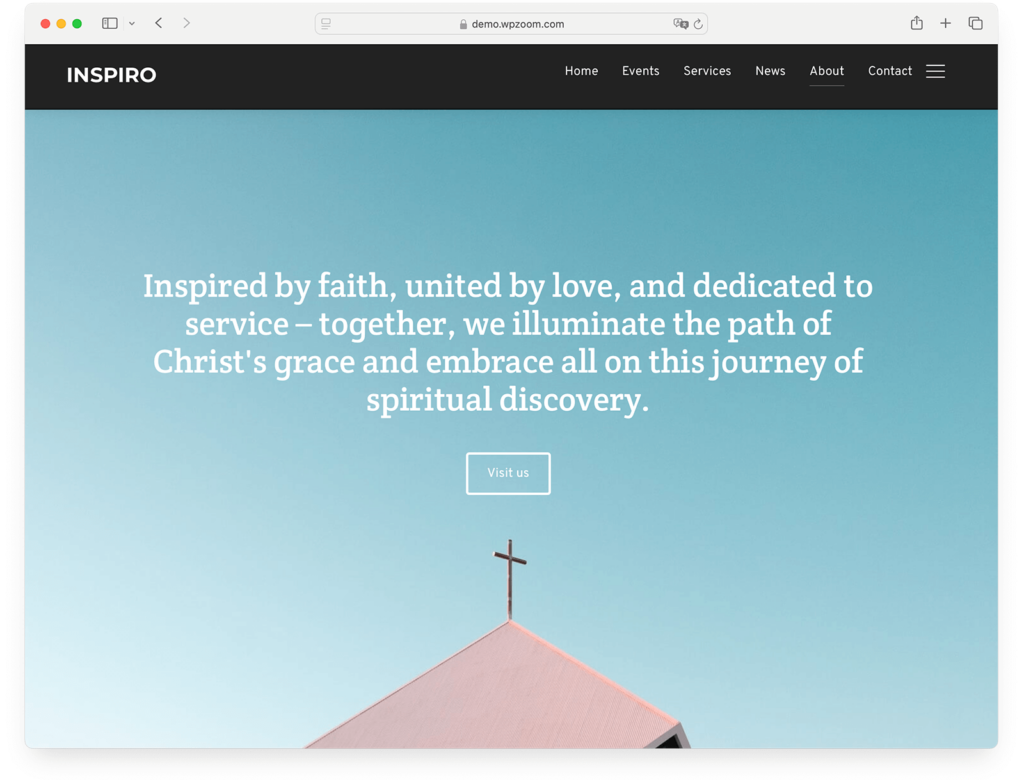
Installing the Inspiro Premium Theme for your church website is quick and easy:
- Purchase and Download: Visit WPZOOM and purchase the Inspiro Premium Theme. Then, download the theme files from your WPZOOM account.
- Install the Theme: In your WordPress dashboard, go to Appearance > Themes, click Add New, then select Upload Theme. Choose the Inspiro theme file you downloaded and click Install Now, followed by Activate.
- Import the Church Starter Site Demo: Navigate to the WPZOOM menu, select the Church Starter Site, and import the demo to instantly set up your site with the pre-built church layout.
In just a few steps, your church website will be up and running with a beautiful, functional design!
Upgrade Your Website with a Premium WordPress Theme
Find a theme that you love and get a 20% discount at checkout with the FLASH20 code


Step 5: Install Essential Plugins
Plugins act like apps for WordPress, adding features that enhance your site, from managing sermons to accepting online donations. Here are some essential plugins tailored to meet the unique needs of a church website:
- Advanced Sermons. Advanced Sermons is a powerful plugin for managing and displaying sermons. It allows you to upload sermon videos, audio, and notes and organize them by speaker, series, or topic. This makes it easy for your congregation to access past sermons from anywhere.
- The Events Calendar. This plugin makes it simple to create and display an interactive calendar directly on your website, showing all your church’s key events and keeping your congregation informed about upcoming services, events, and gatherings.
- GiveWP. GiveWP allows you to securely accept online tithes, offerings, and donations. With its customizable donation forms and detailed tracking features, it’s an excellent tool for managing fundraising efforts and helping your community contribute easily.
- WPZOOM Forms. Create custom forms for contact pages, prayer requests, volunteer sign-ups, and more with WPZOOM Forms. This user-friendly plugin integrates seamlessly with your church website, making it easy to build any type of form you need.
- Yoast SEO. Yoast SEO helps you optimize your website for search engines, making it easier for new visitors to discover your church online. It guides you through improving your content’s readability and SEO performance, boosting your site’s visibility.
By installing these essential plugins, you’ll not only add important functionality to your church website but also create a more engaging and user-friendly experience for your visitors.
Step 6: Add Content to Your Website
The content is the heart of your website—it engages visitors and communicates your church’s mission, activities, and community. WordPress makes managing content simple by allowing you to create pages and posts, each serving a different purpose.
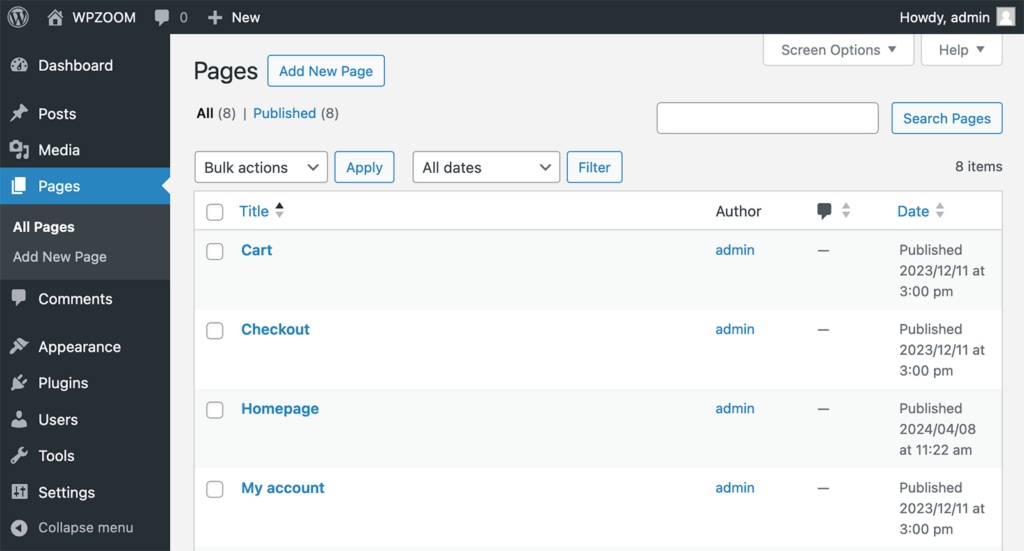
For your church website, most of the key information will be organized in pages, while posts might be used for announcements or devotionals.
Pages are used for static, timeless content that doesn’t change frequently. They’re perfect for foundational sections like your Home page, About page, Ministries, and Contact information.
Essential pages to include:
- Home: Brief intro, links to sermons, and upcoming events.
- About: Church mission, history, and leadership.
- Ministries: Information on various ministries and how to get involved.
- Sermons: Archive of past sermons with audio, video, or notes.
- Events: A list or calendar of upcoming church activities and services.
- Contact: A form or contact info for inquiries.
Posts, on the other hand, are dynamic and time-sensitive. They are ideal for blog entries, church news, or weekly updates.
Step 7: Optimize Your Church Website for SEO
Optimizing your church website for SEO (Search Engine Optimization) helps ensure people can find it easily through search engines like Google.
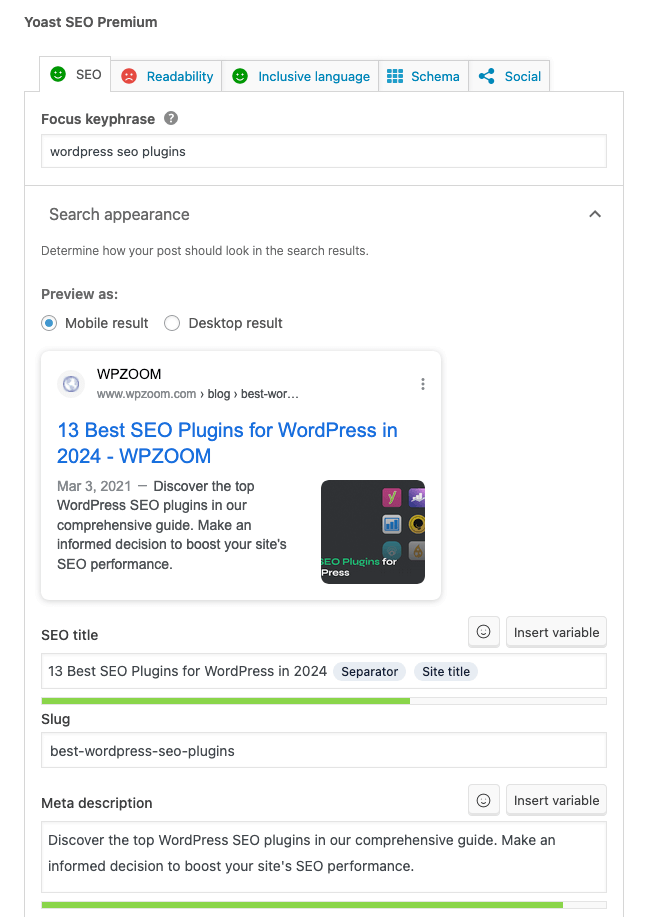

Here are some simple ways to boost your site’s visibility:
- Install Yoast SEO: This plugin helps you optimize your content for search engines by guiding you through keyword usage, meta descriptions, and readability improvements. Use it on each page and post to enhance your SEO performance.
- Focus on Local SEO: Include your church’s location in critical areas like the Home and Contact pages. This helps people in your community find your church when searching online. Also, set up Google Business Profile to improve your local search visibility.
- Use SEO-Friendly URLs: Go to Settings > Permalinks and select “Post Name” for clean, keyword-friendly URLs (e.g., yourchurch.com/sermons).
- Optimize for Speed: Improve site speed using a caching plugin like WP Rocket and compressing images. A faster website enhances both user experience and SEO.
- Link Internally: Connect related pages and posts within your site to help visitors (and search engines) navigate easily. This also boosts SEO by creating a well-structured internal linking system.
By following these simple steps, your church website will be more discoverable, helping you reach and engage a wider audience.
Step 8: Launch Your Church Website
After setting up and optimizing your church website, it’s time to launch! Follow these quick steps to ensure a smooth launch:
- Review Content: Double-check all pages for accuracy and polish. Test all links to make sure they work correctly.
- Test on Devices and Browsers: Ensure your site looks great and functions well on mobile devices and different browsers, such as Chrome, Safari, and Firefox.
- Check SEO Settings: Ensure that SEO elements like meta descriptions, alt text for images, and clean URLs help your site rank well in search results.
- Announce the Launch: Share the exciting news on social media, through an email to your congregation, and during church services. Provide the website link and encourage everyone to visit.
- Invite Feedback: Use a simple contact form to ask visitors for feedback on how to improve the site after launch.
By following these steps, you’ll successfully launch your church website and ensure it’s ready to serve and engage your community online!
Step 9: Maintain and Update Your Church Website
Your church website is live, but the work doesn’t stop there. Regular maintenance is essential to keep your site secure, functional, and up-to-date. Here are key ways to ensure your website stays in great shape:
- Update WordPress, Themes, and Plugins: Check your WordPress dashboard regularly for updates. Keeping everything updated helps prevent security issues and ensures smooth functionality.
- Back Up Your Website: Set up automatic backups using a plugin like UpdraftPlus. Regular backups protect your data and allow easy recovery if something goes wrong.
- Monitor Performance: Use tools like Google Analytics to track how visitors interact with your site. Look for pages that need improvement and optimize your content for better user engagement.
- Add Fresh Content: Keep your site current by regularly updating sermons, events, blog posts, and church news. This keeps your congregation engaged and boosts your SEO rankings.
- Check Security: Ensure your security plugin (like Wordfence) is active and monitor for potential threats. Also, scan your site regularly to maintain its integrity.
By maintaining your church website, you’ll provide a safe, reliable, and continually engaging experience for both members and visitors.
Bottom Line
Building a church website with WordPress is easier than you might think, especially when using a theme like Inspiro Premium from WPZOOM. It makes it simple to design a beautiful, functional site that reflects your church’s mission.
By following these steps—choosing a domain, setting up hosting, installing a theme, and adding content—you’ll create a welcoming online space for your congregation and new visitors.
Keep your site updated and engaging, and it will become a valuable tool for connecting with your community.

