Do you want to create a landing page in WordPress for your Facebook ads?
The right landing page will motivate visitors from your Facebook ad campaign to take action, and convert them into leads and customers.
In this article, we’ll show you how to create a high-converting Facebook ads landing page in WordPress.
Why Create a Facebook Ads Landing Page in WordPress?
Are you running Facebook ads? When someone on Facebook clicks on one of your ads, you want to direct them to your WordPress website.
But if they land on your homepage, they may lose interest or not be able to find what they’re looking for. That’s why you want to link to a dedicated landing page instead.
A landing page, also known as a squeeze page, is designed for a specific purpose and high conversion rates. It’s where those who responded to your ad can learn more about what you’re promoting and take the next step.
An effective landing page will match the design, tone, and content of your ad. It will convey a sense of urgency that motivates the user to act now.
You might use images and video to explain detailed information quickly, and social proof such as testimonials and reviews to demonstrate why other people love your business.
With that being said, let’s look at how to create a Facebook ads landing page in WordPress.
How to Create a Facebook Ads Landing Page in WordPress
First, you need to install and activate the SeedProd plugin. For more details, see our step by step guide on how to install a WordPress plugin.
SeedProd is the best landing page plugin for WordPress and allows you to create any type of landing page quickly and easily without any coding or design skills. While there’s a free version of SeedProd, we’ll be using the Pro version since it offers more powerful features.
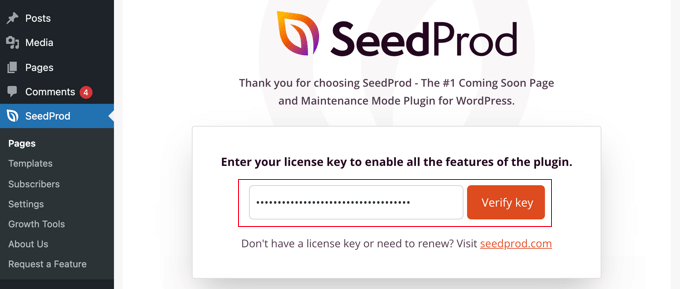
Upon activation, you’ll see a welcome screen where you can enter your license key. You can find this information under your account on the SeedProd website. After pasting your license key, you’ll need to click the ‘Verify key’ button.
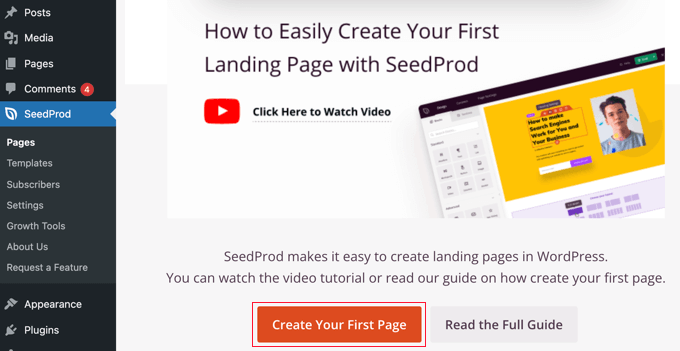
Next, you should scroll down until you see the ‘Create Your First Page’ button.
Simply click the button to get started.
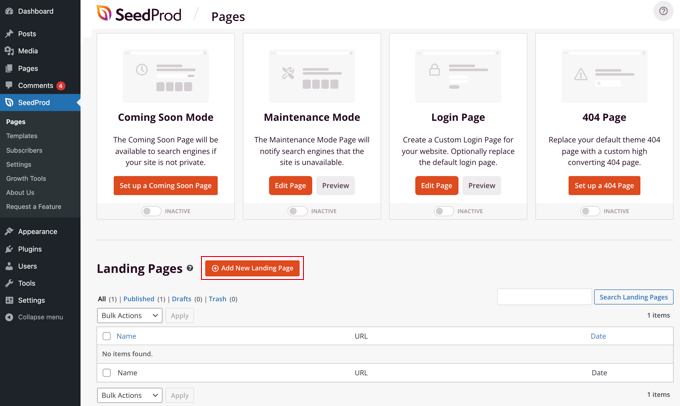
This will take you to SeedProd’s landing page dashboard where you can see landing page modes for different types of pages.
You need to click the button labeled ‘+ Add New Landing Page’ to get started.
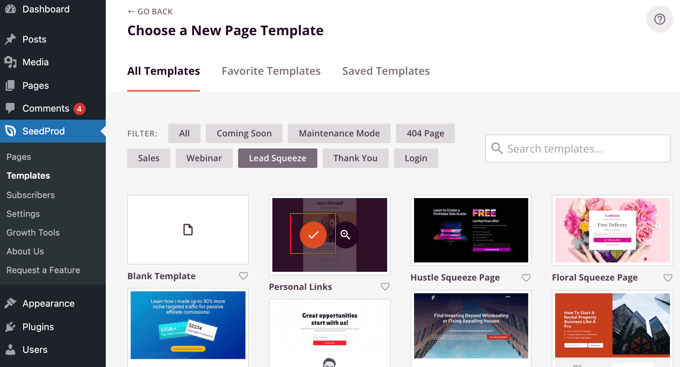
Next, you need to choose a template as a starting point for your page. SeedProd comes with dozens of beautiful landing page templates neatly organized for different campaign types.
You can filter the templates by clicking one of the tabs along the top, such as ‘Lead Squeeze’. When you hover your mouse over a template, you can preview it by clicking the magnifying glass icon, or select it by clicking the red tick icon.
After selecting a template, you’ll be asked to give your new page a name.
The page URL will be filled in automatically, but you can change it if you wish. You will need to add this URL to your Facebook ad later on, so make a note of it.
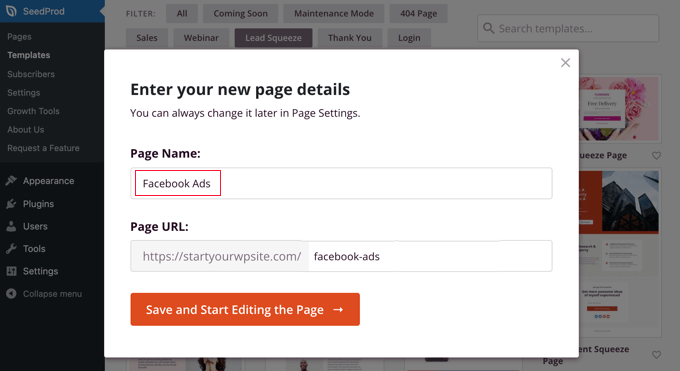
Once you click the button labeled ‘Save and Start Editing the Page’, you’ll be taken to the SeedProd drag and drop page builder.
You’ll see blocks on the left that let you add content to your landing page, such as headlines, lists, images, or buttons, and a preview of how your page will look on the right.
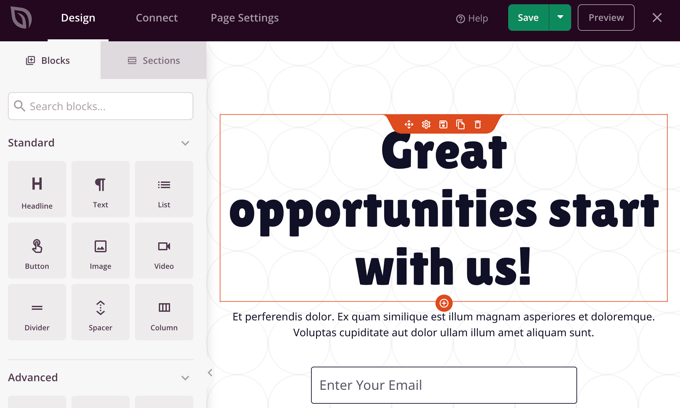
To create an effective landing page, you’ll need to customize it to match your Facebook ad. You can change anything in the preview pane simply by clicking on it, and add additional blocks using drag and drop.
First, you need to click the headline so that you can see its contents on the left of the screen, where you can edit it to match your ad. Simply delete the existing text and type in your own.
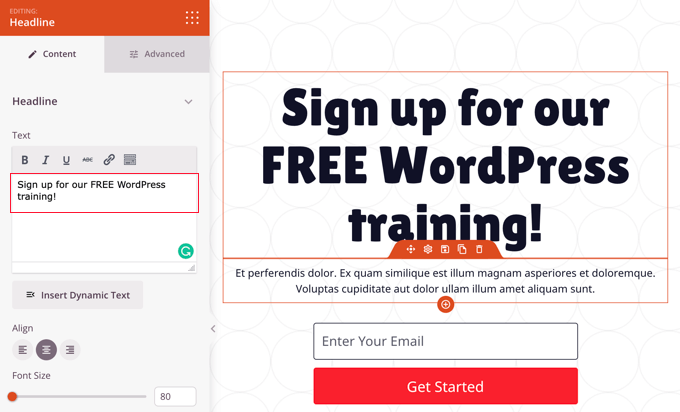
You’ll see a formatting toolbar just above the text box, and underneath there are icons for text alignment, a slider to adjust the font size, and more. You’ll find more formatting options in the Advanced tab, such as typography, text color and shadow, spacing, and device visibility.
Next, we’ll add a different background image to the top of the page. To do that, move your mouse to the top of the preview pane until you see a purple toolbar. After that, you need to click the cog icon to display settings for that section.
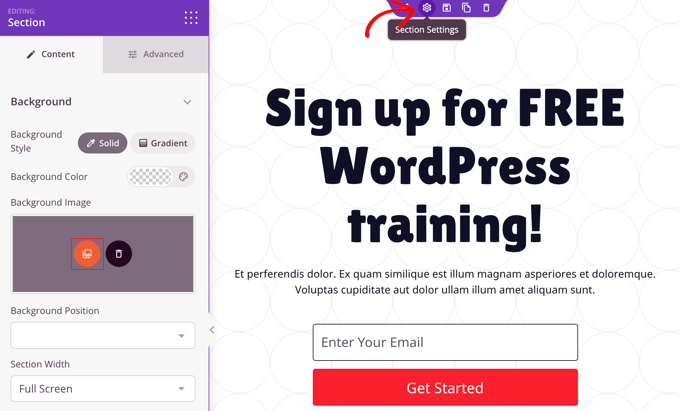
Here you can change the background image to match your Facebook ad. You need to click the red background image icon to open your WordPress media library. Here you can select or upload the background image from your ad.
You can also customize the optin subscription box that came included in the template. To do that, you need to hover your mouse over the email address and then click the cog icon to display the settings for that block.
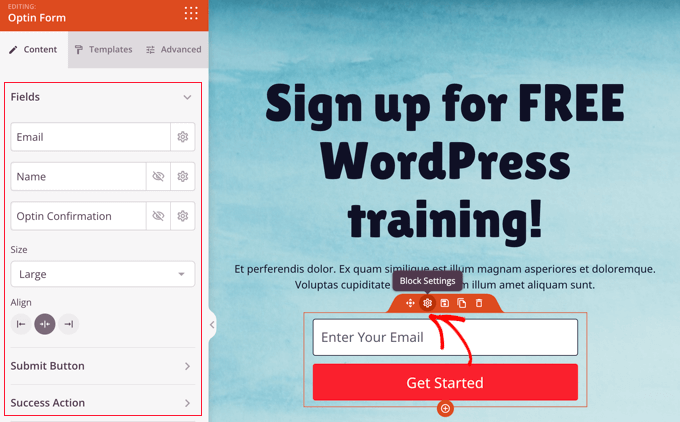
You can now customize the optin fields and the size and alignment of the box. You can also change the wording, size, and color of the ‘Submit’ button and customize the success action.
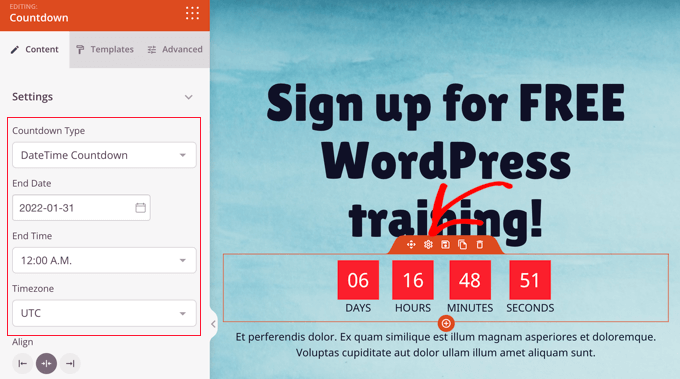
If your promotion is a limited time offer, then it’s smart to add a sense of urgency with a countdown timer. To do that, simply locate the ‘Countdown’ block and drag it onto your page.

Next, you need to set the expiration date and time.
Once you click the cog icon to access the block’s settings, you will be able to pick the date and time that the offer ends. Don’t forget to choose the correct time zone.
Once you’re happy that your landing page matches the Facebook ad and contains all of the necessary information, it’s time to publish it.
To do that, you should click the drop down menu button next to Save in the top right corner and then click ‘Publish’.

How to Link Your Facebook Ad to Your Landing Page
Now that your landing page is published, you can add the link to your Facebook ad.
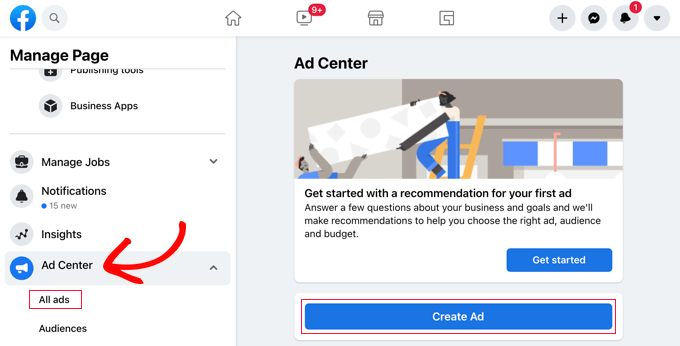
You should head over to your Facebook page where you can create or edit your ad. To create a new ad you need to navigate to ‘Ad Center’ and click on the ‘Create Ad’ button. Or you can access your existing ads by clicking on ‘All ads’.
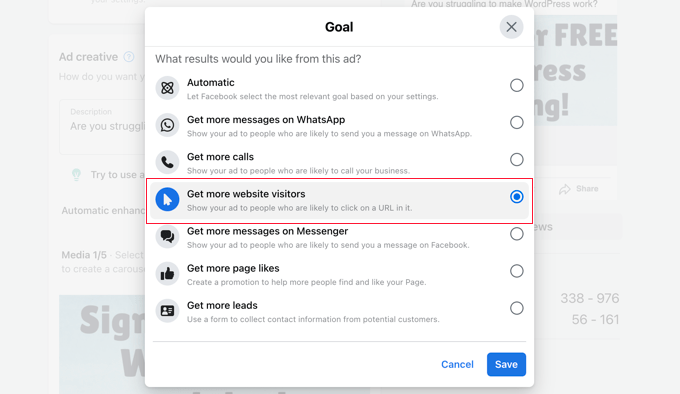
At the top of your ad, you will notice a section called ‘Goal’.
This should say ‘Get more website visitors‘. If it doesn’t, then you need to click the ‘Change’ button to adjust it.

You should then select ‘Get more website visitors’ from the list.
Then, click on the ‘Save’ button to store your choice.
After that, you need to scroll down to the Website URL field and enter the landing page’s URL that you made note of earlier.
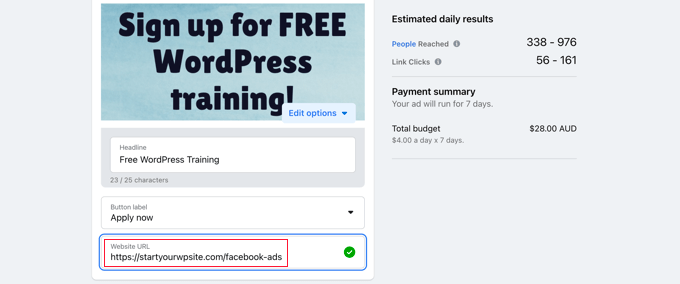
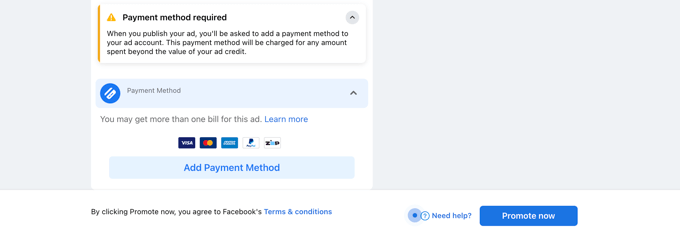
Once you are happy with your ad and have selected a payment method, you should click on the ‘Promote now’ button at the bottom of the page to push your Facebook ad live.
That’s it! Next, you may want to set up tracking in your website so you can measure the effectiveness of your Facebook ad landing page. You can learn how by following our step by step guide on WordPress conversion tracking made simple.
We hope this tutorial helped you learn how to create a landing page for Facebook ads in WordPress. You may also want to learn how to create an email newsletter the right way, or check out our list of proven ways to make money online blogging with WordPress.
If you liked this article, then please subscribe to our YouTube Channel for WordPress video tutorials. You can also find us on Twitter and Facebook.

