So, you’ve been tinkering with WordPress, and now you’re ready for the next big step: building your own plugin. 🚀 Don’t worry—this isn’t as scary as it sounds!
Whether you want to solve a specific problem on your site or flex your coding skills, this step-by-step guide on how to create a WordPress plugin will take you through the process, one simple step at a time.
Let’s create something awesome together! ✨
Quick Guide on Creating a WordPress Plugin
Step 1. Pre-Requisites Before Creating a Plugin
Before jumping into coding your first WordPress plugin, let’s ensure you have everything you need to set yourself up for success.
Basic Requirements
You don’t need to be a coding wizard to create a plugin for WordPress, but having some familiarity with the following will make your journey smoother:
- PHP: This is the primary programming language WordPress is built on. If you can write basic PHP, you’re good to go!
- HTML & CSS: These will help you style and structure any user-facing elements your plugin might have.
- WordPress Structure: Knowing your way around the WordPress admin dashboard and understanding themes, plugins, and hooks will save you time.
But don’t stress! Even if you’re starting fresh, there are plenty of resources to brush up on these skills.
Tools You’ll Need
You’ll also need the right tools to code, test, and debug your plugin. Here’s a quick checklist:
- A Local Development Environment. Think of this as your coding playground where you can test your plugin without affecting a live site. Tools like XAMPP, WAMP, or Local by Flywheel are great for setting up a local WordPress installation.
- A Test WordPress Site. This can be your local setup or a staging site. Never test new plugins on your live website (trust me, it’s a lesson you don’t want to learn the hard way).
- A Good Text Editor or IDE. Your coding companion! Visual Studio Code, Sublime Text, or PHPStorm are popular options. Choose the one you’re comfortable with—it’ll make a world of difference.
- WordPress Plugin Handbook: This is the official guide for plugin development. It covers everything from basic hooks to advanced API integrations.
Step 2. Create a Plugin Folder
It’s time to get down to business—creating the framework for your plugin. Think of this as laying the foundation for your plugin’s house.
Every plugin starts with its own dedicated folder. Here’s how to create one:
- Navigate to your WordPress installation directory.
- Open the wp-content/plugins folder.
- Create a new folder and give it a unique name that reflects your plugin’s purpose. For example, if you’re building a social sharing plugin, you might name it social-sharing.
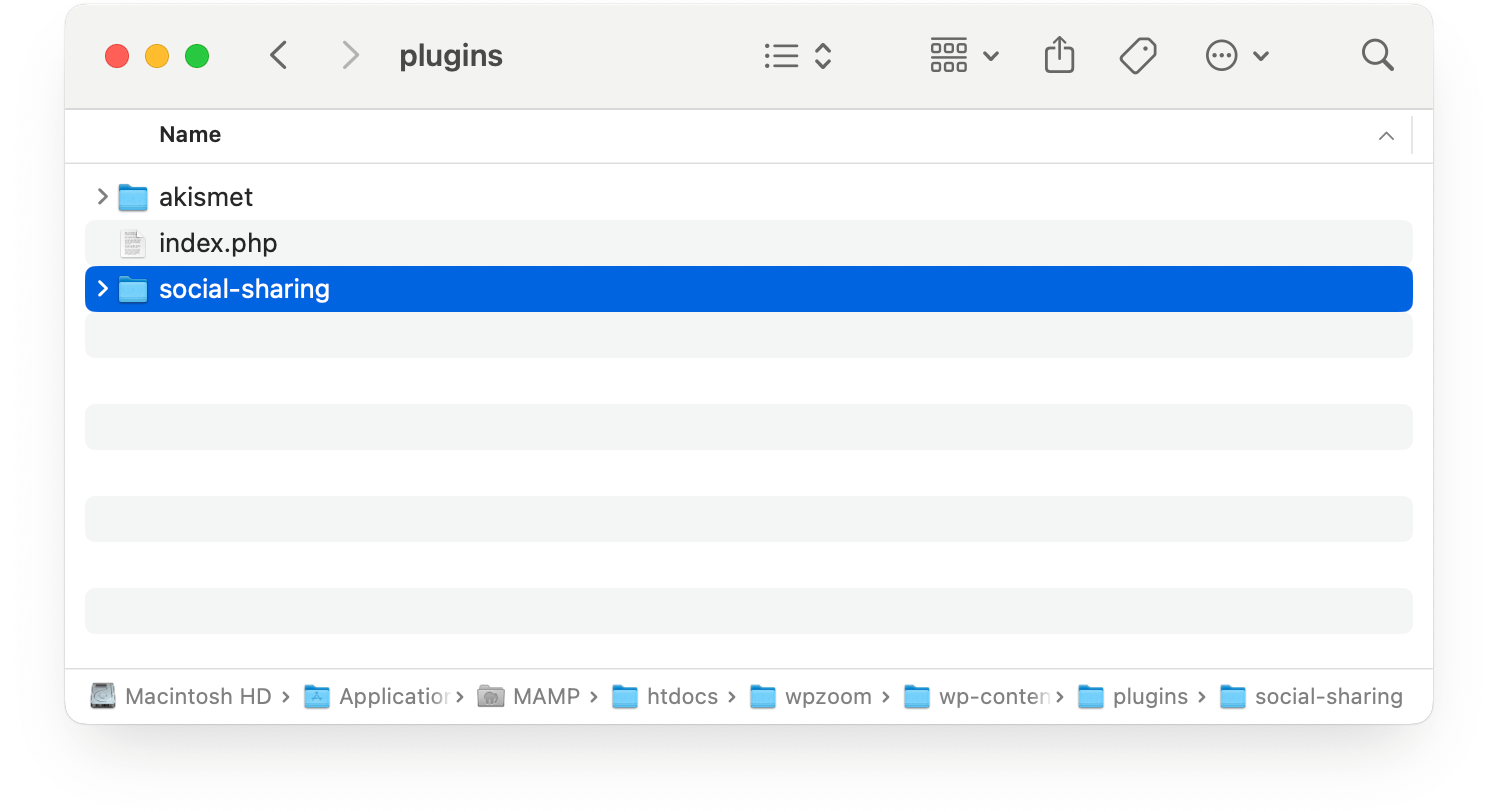

Pro Tip: Stick to lowercase letters and use hyphens to separate words. This keeps things clean and professional!
Step 3. Create the Main Plugin File
Next, let’s add the main file that will power your plugin.
1. Inside your new folder, create a PHP file with the same name as the folder. For example, if your folder is social-sharing, the file should be social-sharing.php.
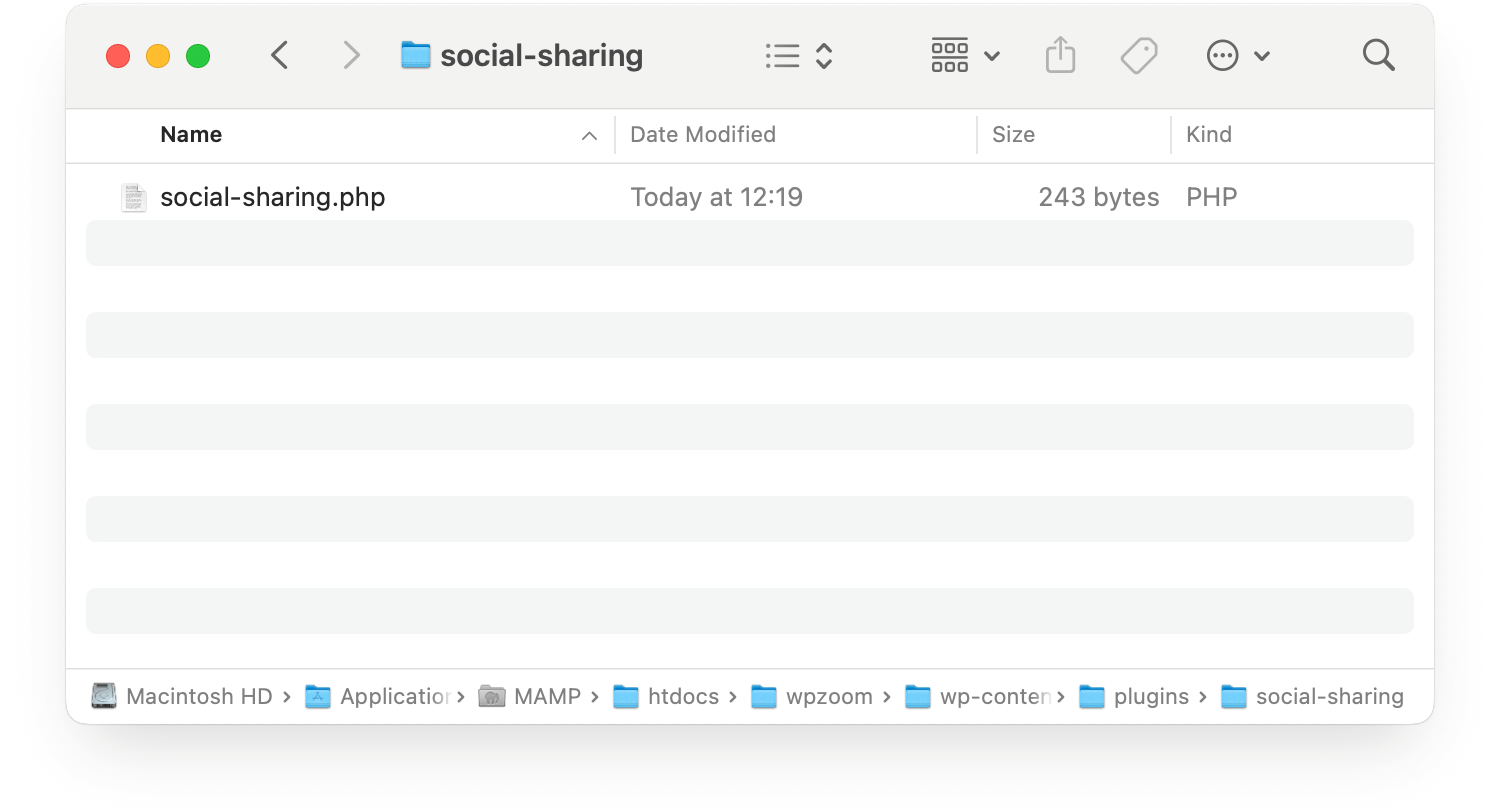

2. Open the file in your text editor and add the plugin header. This tells WordPress the essential details about your plugin. Here’s an example:
Save your file and take a moment to celebrate—you’ve taken the first step to build a WordPress plugin! 🎉
Step 4. Activate Your Plugin
Now, let’s see your plugin in action (well, sort of—it’s empty, but still exciting).
- Head to your WordPress dashboard.
- Go to Plugins > Installed Plugins.
- Find your plugin in the list and click Activate.
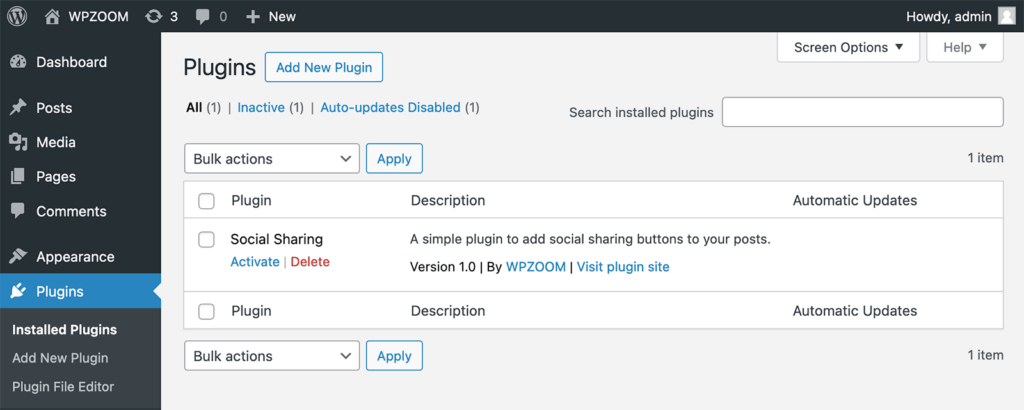

Boom! Your plugin is live.
It doesn’t do anything right now, but you’ve successfully set up the framework.
Step 5: Adding Basic Functionality
It’s time to make your plugin do something! You’ll add basic functionality to your plugin by writing simple code. This is where the magic happens, and your plugin begins to come to life.
Basic functionality in WordPress custom plugins refers to the initial features or actions your plugin performs when activated.
Every functionality begins with a function in PHP. Functions allow you to encapsulate the logic your plugin performs.
Here’s a simple example of how to add a custom message in the footer of your WordPress site:
1. Open your plugin’s main file (social-sharing.php or similar).
2. Add this code:
Thank you for visiting my website!';
}
add_action('wp_footer', 'add_custom_footer_message');
?>
Explanation:
- add_custom_footer_message(): This function contains the HTML you want to add.
- add_action(‘wp_footer’, ‘add_custom_footer_message’): The add_action function connects your custom function to WordPress’s wp_footer action, which runs when the footer loads.
3. Save the file, refresh your site, and scroll to the footer.
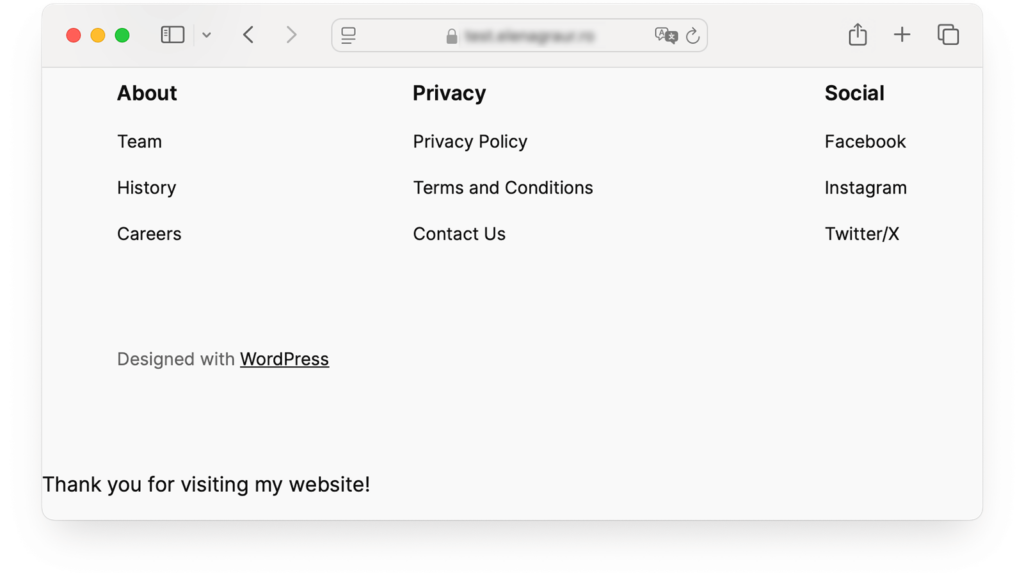

Ta-da! Your custom message should appear.
This is a simple example, but you can use hooks to do much more when you develop a WordPress plugin—like adding styles, scripts, or even creating custom features.
Quick Insight: What Hooks Are and Why They Matter
Hooks are one of the most powerful features in WordPress. They allow you to “hook into” WordPress’ core functionality and execute your custom code at specific points. This means you can modify or add new features to your site without altering the core WordPress files.
There are two main types of hooks:
- Action Hooks: These let you add functionality at specific points during WordPress’ execution. For example, using the wp_footer action hook, you can insert custom content or scripts into your site’s footer.
- Filter Hooks: These allow you to modify existing data before it’s displayed or processed. For instance, you could use a filter hook to change the text of a specific WordPress message.
Think of hooks as flexible tools that give you full control over how WordPress behaves, making them a crucial part of any plugin development.
Step 6: Adding Admin Pages
Most plugins have an admin page where users can tweak settings. Let’s create a basic settings page for your plugin:
1. Add the following code to your main plugin file:
Social Sharing Settings';
echo 'Welcome to the settings page! Customize your plugin here.
';
}
?>2. Refresh your WordPress admin dashboard.
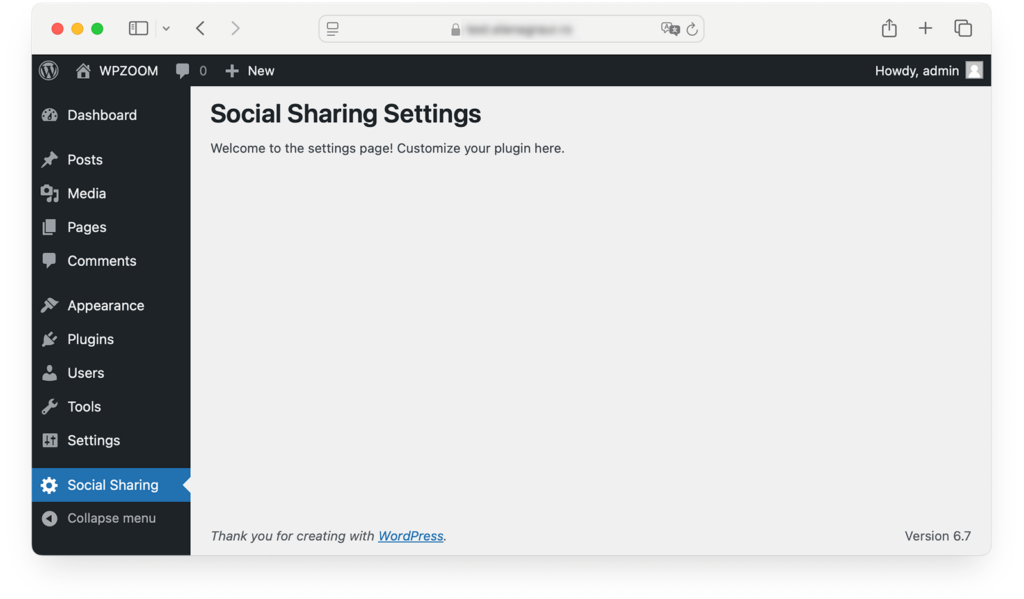

You’ll see a new menu item called Social Sharing. Click on it to view your plugin’s first settings page!
Upgrade Your Website with a Premium WordPress Theme
Find a theme that you love and get a 20% discount at checkout with the FLASH20 code


Step 7: Handling Plugin Settings
You’ll want to save and retrieve settings to make your plugin genuinely interactive. WordPress makes this easy with the Options API.
Quick Insight: Understanding the WordPress Options API
The Options API is a built-in WordPress feature that allows you to save, retrieve, and update data in your site’s database. It’s commonly used in plugin and theme development to store settings and configurations, making it an essential tool for creating dynamic and interactive plugins.
Here’s how it works:
- Saving Data: The update_option() function lets you store information like user preferences, plugin settings, or any custom data. For example, saving a custom footer message input by a user.
- Retrieving Data: The get_option() function is used to fetch the saved data and display or use it within your plugin.
- Deleting Data: If you no longer need a particular setting, you can clean up your database using the delete_option() function.
Using the Options API ensures your plugin settings are stored efficiently and reliably, without directly interacting with the database. It’s a safe and WordPress-approved way to manage data for plugins.
Here’s how you can add a form to save a setting (e.g., the text for your custom footer message):
1. Replace the social_sharing_settings_page function with the following:
// Create the settings page content
function social_sharing_settings_page() {
	if (isset($_POST['footer_text'])) {
    	update_option('social_sharing_footer_text', sanitize_text_field($_POST['footer_text']));
    	echo '';
	}

	$footer_text = get_option('social_sharing_footer_text', 'Thank you for visiting my website!');

	echo '';
	echo '';
}
2. Replace the existing add_custom_footer_message function with the following:
' . esc_html($footer_message) . '';
}
add_action('wp_footer', 'add_custom_footer_message');
?>
In the first version, this function uses a hardcoded message. However, when we introduce a settings page where users can save a custom message, the function must be updated to retrieve the saved value from the database.
3. When you visit your plugin’s settings page, you’ll see a form.
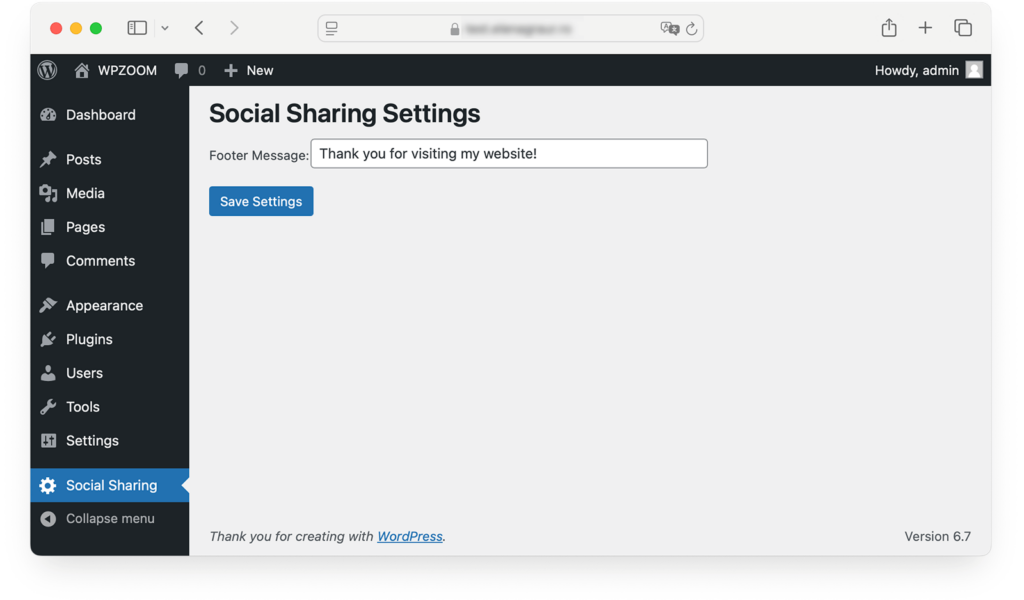

Enter a custom message, save it, and see it appear in your site’s footer!
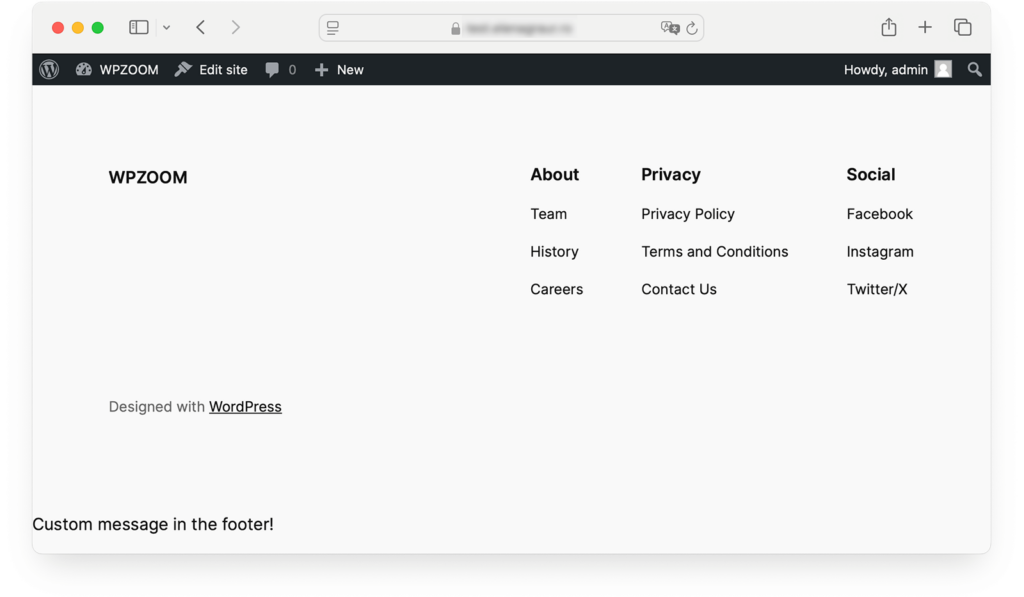

Congratulations! You’ve just added actual functionality to your plugin.
This is just the beginning—you can keep building more advanced features from here.
Step 8. Testing and Debugging Your Plugin
Your plugin is starting to take shape, and it’s time to ensure it works flawlessly. Testing and debugging are crucial steps to avoid unexpected issues when others use your plugin—or when you use it on a live site.
WordPress has several built-in features and plugins that help track down issues.
Enable Debugging in WordPress
Add the following code to your wp-config.php file:
define('WP_DEBUG', true);
define('WP_DEBUG_LOG', true);
This will log any errors to a debug.log file in the wp-content folder. You can review this file to pinpoint issues.
Use Debugging Plugins
Plugins like Query Monitor provide real-time feedback on your plugin’s performance, database queries, and more. Install it from the WordPress Plugin Repository and start exploring its insights.
PHP Error Logging
If you’re testing locally, use error_log() to log custom messages for debugging. For example:
error_log('Testing: This function is running correctly.');Check your server’s error log to see the output.
Testing Best Practices
Testing ensures your plugin behaves as expected across different environments. Here’s how to do it effectively:
- Test Themes: Check if your plugin works with various WordPress themes. Conflicts can sometimes arise if themes override certain functions or styles.
- Test Plugins: Activate other popular plugins alongside yours. Ensure there are no compatibility issues or errors.
- Cross-Browser Testing: If your plugin has front-end elements, test them across popular browsers like Chrome, Firefox, Safari, and Edge to ensure consistent appearance and functionality.
- Mobile Responsiveness: Many users browse on mobile devices. Use your browser’s developer tools or online tools like BrowserStack to test how your plugin looks and performs on mobile.
You’ve built and tested your plugin—excellent work! Now, let’s prepare it for the world.
Step 9: Organize Your Plugin Files
Whether you plan to share it publicly or use it across multiple sites, packaging your plugin properly ensures it’s easy to install and distribute.
Before you package your plugin, ensure it’s clean and organized. A typical plugin folder might look like this:
social-sharing/
├── social-sharing.php
├── includes/
│   ├── helper-functions.php
├── assets/
│   ├── css/
│   │   ├── style.css
│   ├── js/
│   │   ├── script.js
├── templates/
│   ├── admin-page.php
└── readme.txt
Explanation:
- includes/: Contains PHP files with functions, hooks, and core logic for your plugin.
- assets/: Holds static assets like CSS, JavaScript, and images.
- templates/: Contains HTML templates for admin pages, settings forms, or front-end outputs.
- readme.txt: Provides details about your plugin, especially if you submit it to the WordPress Plugin Repository.
Step 10: Add a Readme File
A well-written readme.txt file is essential, especially if you’re submitting your plugin to the WordPress Plugin Repository. Here’s a basic structure for the file:
=== Social Sharing ===
Contributors: yourusername
Tags: social media, sharing, social icons
Requires at least: 5.0
Tested up to: 6.3
Requires PHP: 7.2
Stable tag: 1.0
License: GPLv2 or later
License URI: https://www.gnu.org/licenses/gpl-2.0.html

== Description ==
A simple plugin to add social sharing buttons to your WordPress posts and pages.

== Installation ==
1. Upload the `social-sharing` folder to the `/wp-content/plugins/` directory.
2. Activate the plugin through the Plugins menu in WordPress.
3. Go to Settings > Social Sharing to configure.

== Changelog ==
= 1.0 =
* Initial release.
This file provides installation instructions and gives users a quick overview of your plugin.
Step 11: Compress Your Plugin
You need to compress your plugin into a .zip file to distribute it. Here’s how:
- Navigate to your plugin folder (social-sharing).
- Select all files and folders within the plugin directory.
- Right-click and choose Compress or Add to Zip (depending on your operating system).
- Name the zip file (e.g., social-sharing-plugin.zip).
Step 12: Submit Your Plugin to the WordPress Repository (Optional)
Want to share your plugin with the WordPress community? Here’s how to submit it to the official Plugin Repository:
- Create a WordPress.org Account: If you don’t already have one, register at WordPress.org.
- Submit Your Plugin: Visit the Add Your Plugin page and follow the submission steps.
- Wait for Approval: The WordPress team will review your plugin. Once approved, you’ll receive instructions on uploading your plugin files using Subversion (SVN).
Your plugin is ready to share with the world—or use on your sites!
Final Tips and Best Practices
Congratulations! You’ve built, tested, and packaged your WordPress custom plugin. Before we wrap up, let’s review a few best practices to keep your plugin efficient, secure, and user-friendly.
1. Keep Your Code Clean and Modular
Organized code isn’t just for aesthetics—it makes debugging and updating your plugin much easier. Here’s how to maintain clean code:
- Split your code into separate files for different functionalities.
- Use comments to document what each part of the code does.
- Follow WordPress coding standards.
2. Follow WordPress Security Best Practices
Security is critical when creating plugins. Always:
Sanitize User Input
Sanitization ensures that user-provided data is cleaned before processing. Use functions like sanitize_text_field() and sanitize_email() to clean input data, for example:
$name = sanitize_text_field($_POST['name']);Validate Inputs
Validation ensures user input meets specific criteria before processing:
if (!is_numeric($_POST['age'])) {
	wp_die('Invalid age input.');
}
Escape Output
Escaping ensures that data is safe to display in the browser by converting special characters into HTML entities. Use functions like esc_html() and esc_attr() to safely display user input:
echo esc_html($data);Use Nonces
Nonces (number used once) are tokens used to validate user requests. Add nonces to forms and actions to protect against Cross-Site Request Forgery (CSRF). For example:
3. Optimize Performance
Nobody likes a plugin that slows down their site! Here’s how to keep things fast:
- Only load styles and scripts on pages where they’re needed. Use the wp_enqueue_scripts hook smartly.
- Avoid running unnecessary database queries. Cache results whenever possible.
4. Stay Updated with WordPress Changes
WordPress evolves quickly. Regularly update your plugin to ensure compatibility with the latest WordPress version. Testing your plugin on staging environments with beta releases of WordPress can help you stay ahead.
Bottom Line: Start Building Today!
And that’s it—you’ve learned how to create a WordPress plugin from scratch! 🎉 Whether solving a problem for your site or sharing your creation with the world, building a WordPress plugin opens up endless possibilities in WordPress development.
As you continue developing WordPress plugins, why not check out WPZOOM’s suite of plugins? Built with developers and users in mind, we offer practical solutions to enhance your WordPress site. Pair these plugins with our beautifully designed themes to build feature-rich, cohesive websites. WPZOOM has everything you need to complement your journey as a plugin developer!
Happy coding, and welcome to the WordPress plugin developer community! 💻✨

