If you do fall into the I-don’t-have-a-Stripe-account-yet category, then be prepared to set aside a few minutes to complete this.
Also, make sure to have all the necessary legal information pertaining to your organization handy because they ask about everything. Although it can feel a bit cumbersome, it’s to be expected. Anything involving financial transactions is heavily scrutinized so there is no way around it.
Step three: create your first donation form
After you’ve connected your Stripe account, you can get to work on creating your first donation form.
💡 Technically speaking, you can also exit the Setup Wizard and create your donation form first, but it obviously won’t be fully functional until you complete the link with Stripe. I’m mentioning it in case you work as part of a team and some other person has the information required to complete the Stripe setup. While you wait for them, you can still get ahead on the process and have everything ready to go for when they complete their part.
Add a new form, name it, set the form type, and choose a layout
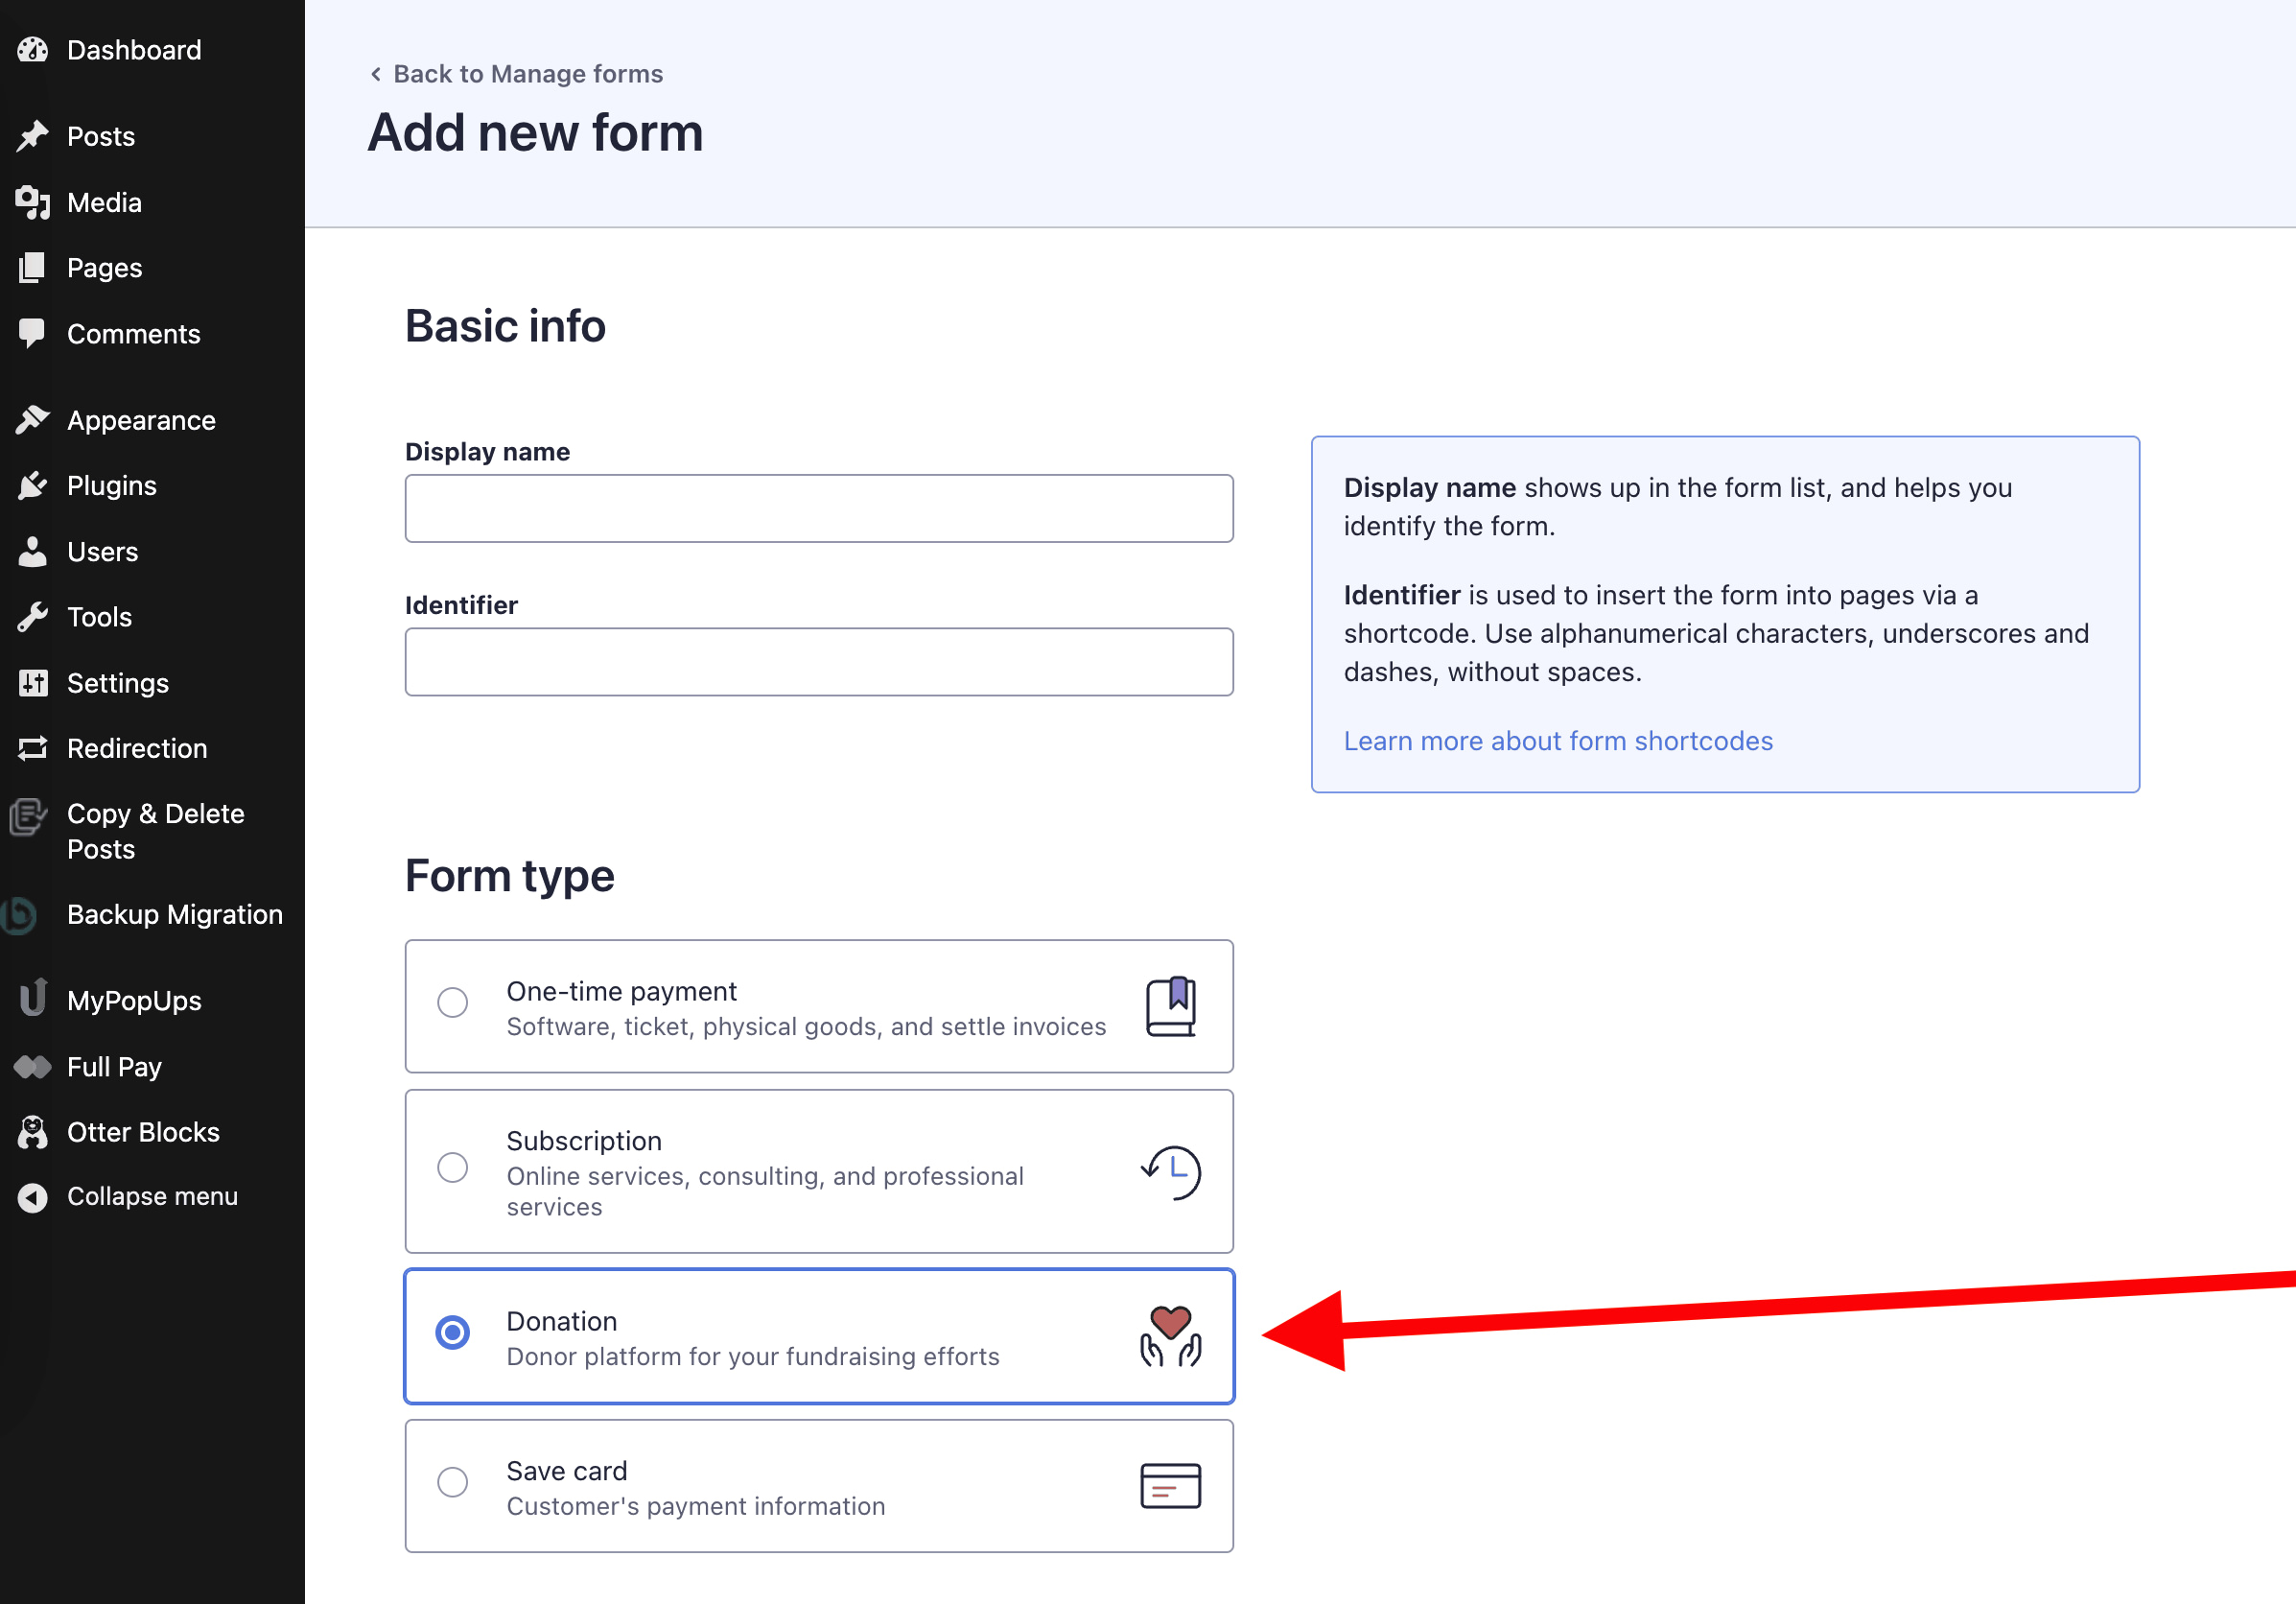
To begin, hover over WP Full Pay in the wp-admin menu, and then click on Payment Forms → ADD FORM:
Next, give your form a name.

The Identifier field will be auto-populated based directly on what you type into the Display name field. The purpose of it is to add a tag to the shortcode associated with the form. This shortcode is how you will insert the donation form into whatever pages or posts you want – we’ll cover that later.
For now, I recommend not using the auto-populated identifier because it will most likely be unnecessarily long. Instead just put a word like “donate” or “donate1” if you plan on having several forms.
Below this, it asks you to choose your Form type, which is so obvious that it doesn’t require an explanation.
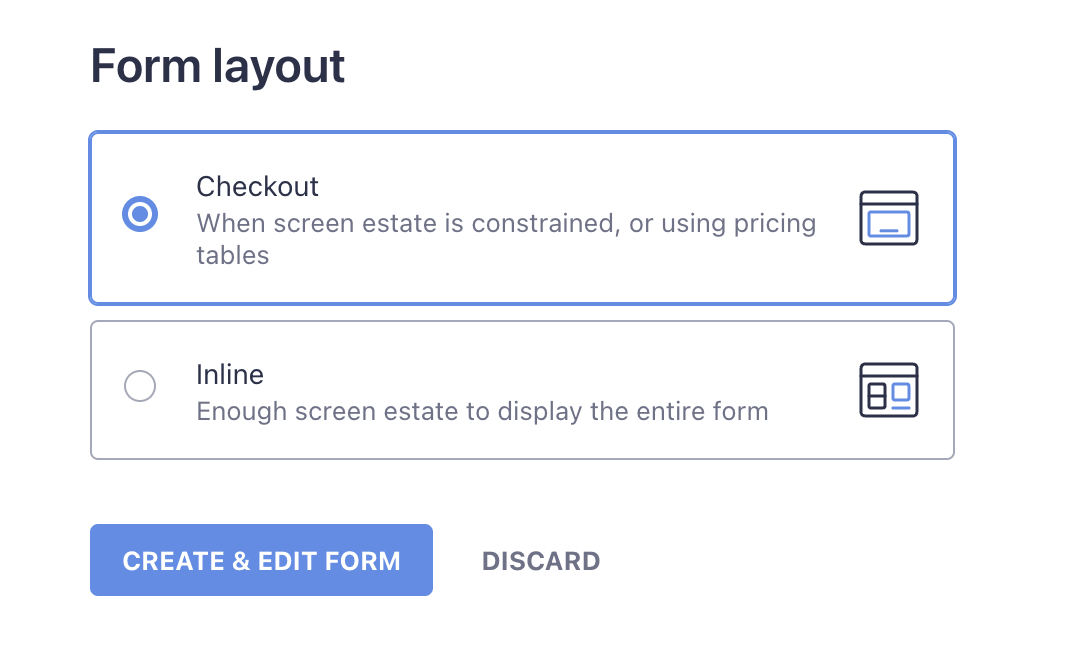
The only other thing left is to choose the layout – Checkout or Inline.

One of the biggest differences between the two is that the Checkout version is going to give you a smaller form, while the Inline version will give you a bigger form.
Of course there are other differences as well. For example, choosing Inline will let donors complete their entire payment process on the page, whereas going with Checkout will redirect them to a dedicated Stripe-hosted page. Check out this knowledge base article for a full breakdown of the layouts.
For this tutorial, I am going to choose the Checkout option, but feel free to choose the one that works best for you. It won’t affect anything else about the remaining steps we’re going to cover.
Set your currency and suggested donation amounts
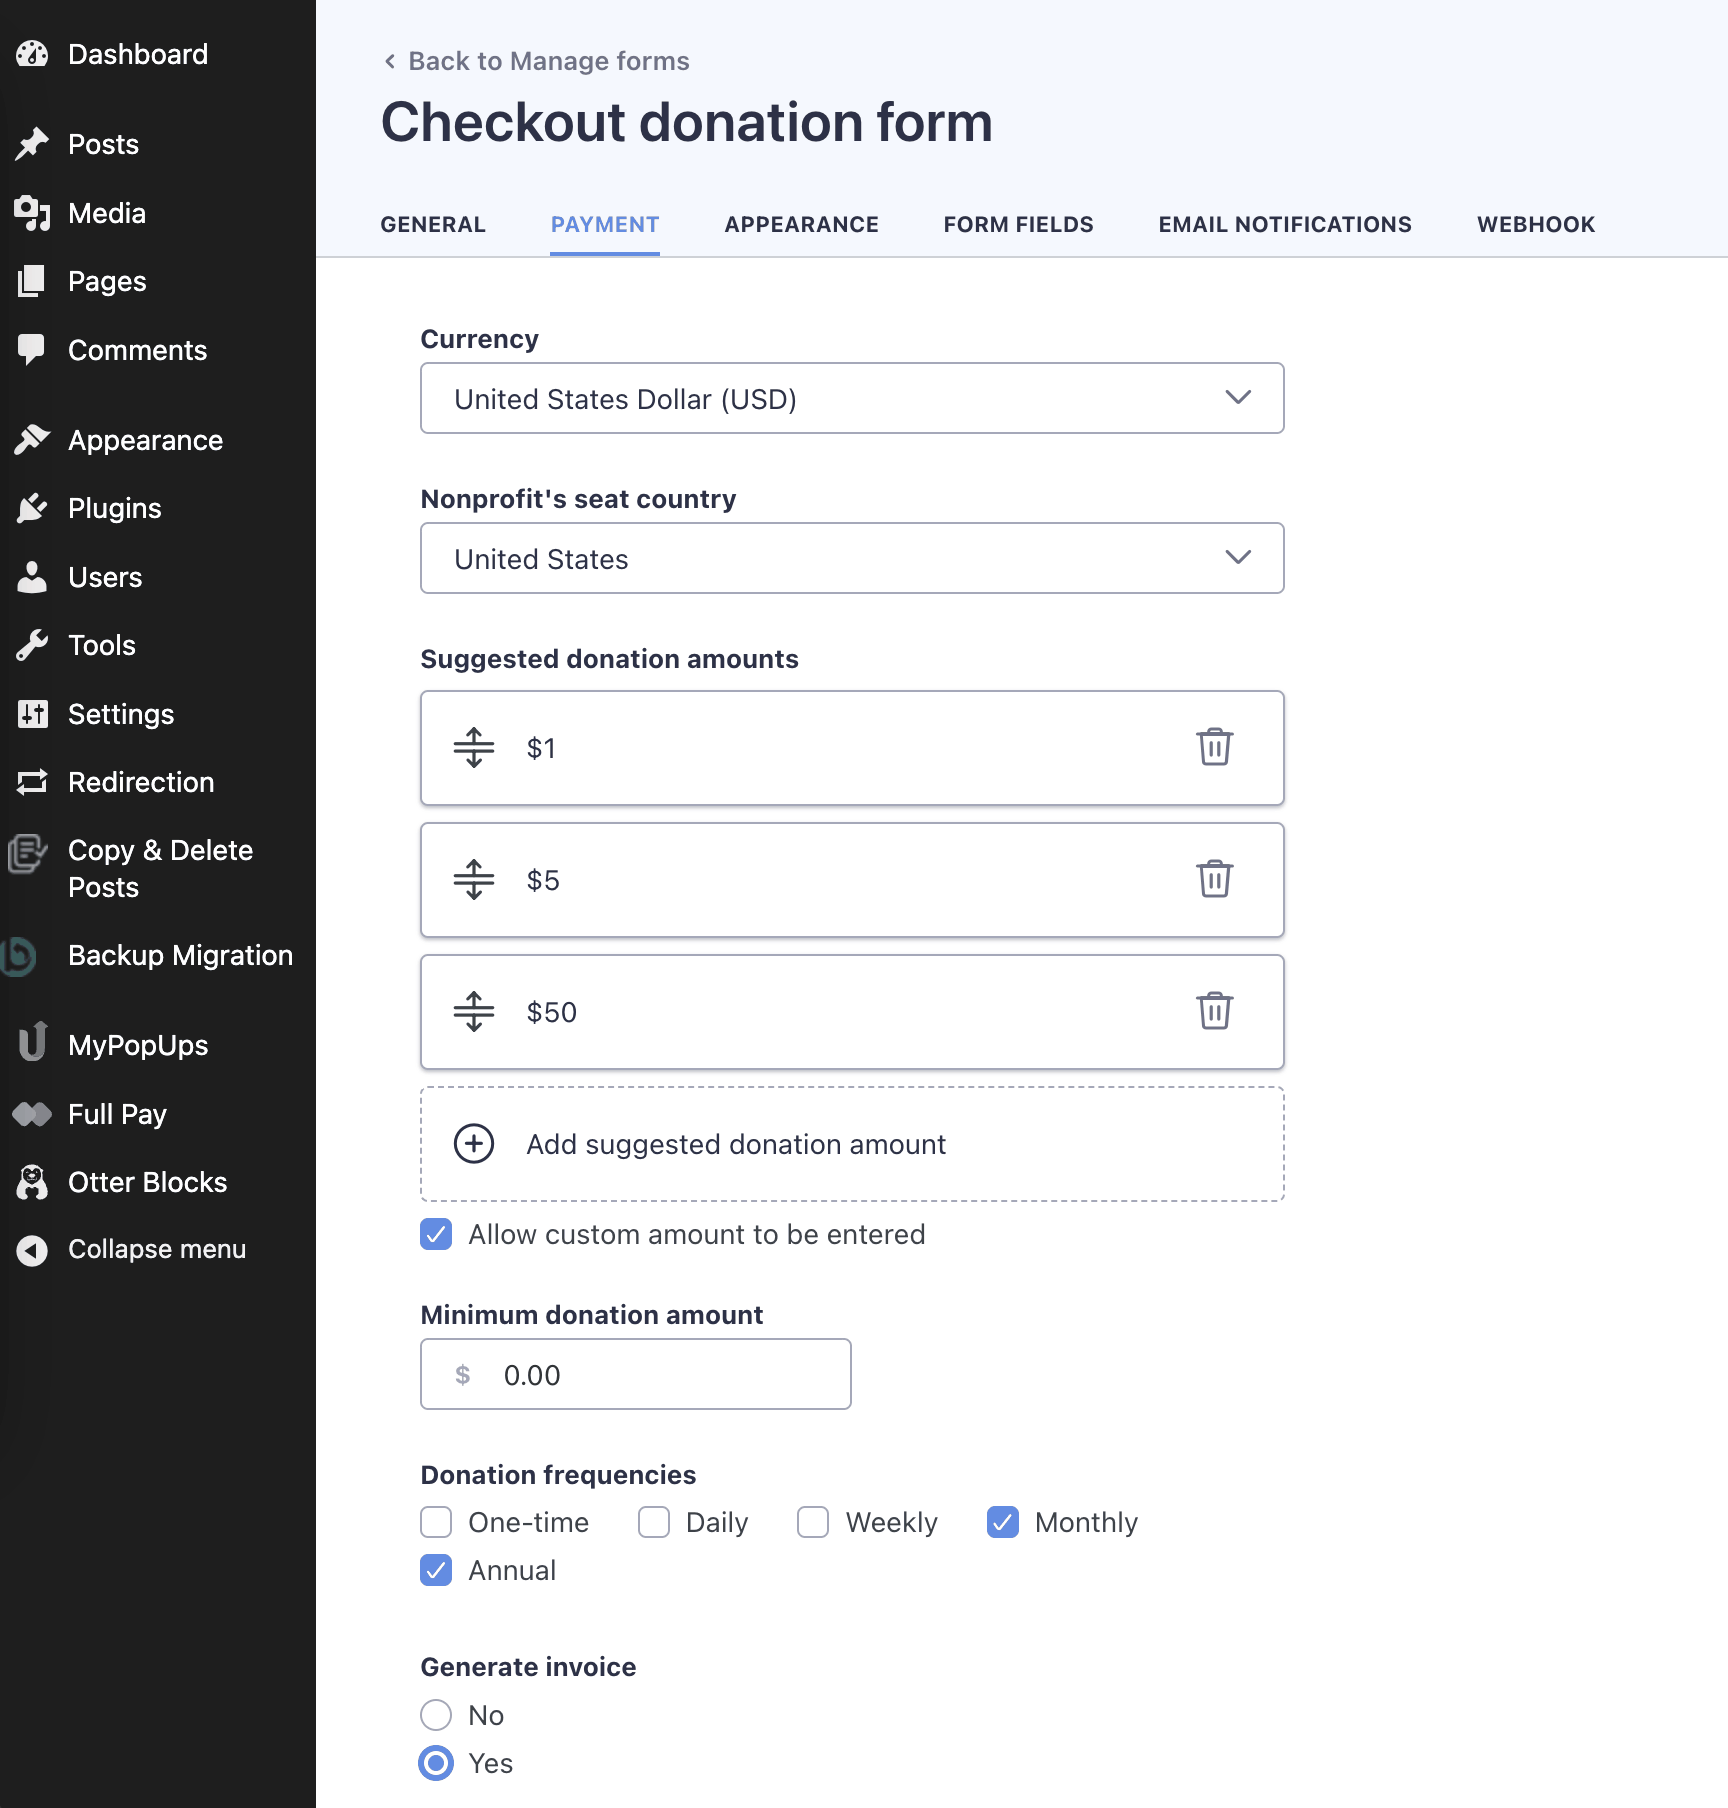
On the next tab – PAYMENT – you can choose from a very long list of world currencies. When I say long, I mean that it is highly unlikely that you won’t find whatever currency you’re looking for.
In addition, you can add suggested donation amounts and check off an option to allow donors to set their own custom amount.
💡 Pro tip: On the page where you’ll be inserting the form, consider adding short descriptions of what each suggested amount will accomplish. Something like “$50 provides meals for five families” will help donors understand their impact and could increase your conversions.

Near the bottom, you’ll find additional customizations, including the ability to set donation frequencies and to generate an invoice for those who make a donation.
Adjust the appearance of your form
The Appearance tab contains several ways to make your form more inviting and on-brand. Let’s run through the key settings:
First is the form button text. The standard “Donate” works fine, but you can also add {{amount}} to show the person’s selected amount right on the button. This adds a nice touch of last minute confirmation that they are donating the amount they intended.
For the product name and description, keep it straightforward but compelling and transparent.
⚡️ Power feature: If you want to show progress toward your fundraising goal, simply check the “Show donation goal” box and put in your target amount. Nothing motivates donors quite like seeing that progress bar fill up! 💰 It’s a powerful psychological tool that you’ll see showcased on major fundraising platforms like GoFundMe and Kickstarter, and with WP Full Pay, you can take advantage of it too!

