WordPress can display a plethora of different types of content, but organizing it can be tough. The default options are fairly limited, and customizing them can be confusing. That’s precisely why I decided to put together this brief guide.
By using custom post types, you can create a new type of item – like posts and pages – which will contain a different set of data. It’ll have its own admin menu, its own editing pages, its own custom taxonomies, and a bunch of other utilities.
If you’re wondering why you need one of these in the first place, they’re best for websites with content that is organized along an unusual structure. So if you have any content that you need to display differently than on regular posts and pages, a custom post type may be just what you need. They’re also great for SEO, due to their built-in permalinks.
What is a Custom Post Type?
A post type, despite the specific-sounding name, can be used for any kind of content. You’ve probably seen them before, since developers use custom post types to add portfolios, staff, testimonials and more to their WordPress themes. So a custom post type is just a regular post with a different post_type value in the database. There are five default post types: post, page, attachment, revision, and navigation menu. WordPress 3.0+, however, gives you the capability to add your own custom ones.
The term taxonomy comes up often in reference to custom post types and that might be a bit confusing to some. For those new to WordPress, taxonomies are a way to group posts and custom post types together. WordPress comes with four built-in ones: category, tag, link category, and post formats. You can learn more about the specifics of these over at the WordPress Codex. However, you can also create your own custom taxonomies and use them in your post types to group and sort content.
How to Create a Custom Post Type?
Adding custom post types in WordPress is extremely easy since WordPress includes the core function register_post_type that can be used to create them. This means if you are a plugin developer you can easily include custom post types in the theme you are creating. Or you can add them via your child theme or via a custom plugin.
Creating A Custom Post Type Manually (using code)
First things first, where should you add your code? The best place to register and add your custom post types depends on your project. If you are working on a client site that already has a theme active you’ll want to create a child theme and register your post types from there. If you are creating your own custom theme you can place the code in the functions.php file or in any other file called from your functions.php. And if you are developing a plugin it doesn’t really matter where you add the code, so long as the code runs before the ‘init’ action hook to make sure it’s available.
For testing purposes, your functions.php file will do just fine. But a plugin will ensure you won’t break your site on changing or upgrading your theme.
If the custom post type is really important, consider making it a must-use plugin. For the uninitiated, must-use plugins are installed in a special directory inside the content folder and are automatically enabled on all sites. Must-use plugins don’t show in the default list of plugins on the plugins page of wp-admin.
Anyway, a custom post type can be added to WordPress via the register_post_type( ) function. This allows you to define a new one by several labels. Once you’ve created your header, you can use this function before the admin_menu, but after the after_setup_theme action hooks. If created correctly, you can pull this off with only a few lines of code. From the WordPress Codex, here’s a simple example of a new custom post type:
function create_post_type() {
  register_post_type( 'acme_product',
    array(
      'labels' => array(
        'name' => __( 'Products' ),
        'singular_name' => __( 'Product' )
      ),
      'public' => true,
      'has_archive' => true,
    )
  );
}
add_action( 'init', 'create_post_type' );
This would create a post type named “product” that’s identified as “acme_product.” The register_post_type function gets two values. The first one being “labels” for the name. The second one is “public” to make it show up on the admin screen and on your site. And lastly “has_archive” to enable the new post type’s archive.
After setting this up, you should see the menu entry for the custom post type, be able to add posts, view the post list in the admin, and visit them on your website. There are many more values, or arguments, you can add to a custom page. A full list of them can be found on the register post type page of the Codex.
Next, create a 16×16 pixel icon image and save it to your current plugin folder. This is required for the custom post type icon in the dashboard. Another option is to use a font icon. If you’d be interested ingoing that route we have a quick guide for how to use Dashicons for your custom post types that you should read. Then you can go on and activate the plugin.
A note on naming: while it’s tempting and convenient to use a simple custom post type identifier it’s better to prefix. Use a short namespace that identifies the plugin, theme, or website that uses the custom type. For a much more detailed guide, checkout the tuts+ guide to WordPress Custom Post Types. They dig into more code and custom post type options if you want to code your post types yourself. But if you want a quicker and easier option, keep reading!
Creating a Custom Post Type with Post Types Unlimited

The easiest way to add new custom post types is with a plugin. The free Post Types Unlimited plugin happens to make creating and managing custom post types a breeze. You can even create custom taxonomies too.
All you have to do is install the plugin. You can grab it right from the WordPress directory (see the links above). Or install it from your WordPress dashboard under Plugins > Add New and search for “post types unlimited” – it should be the first result. Just install and activate.

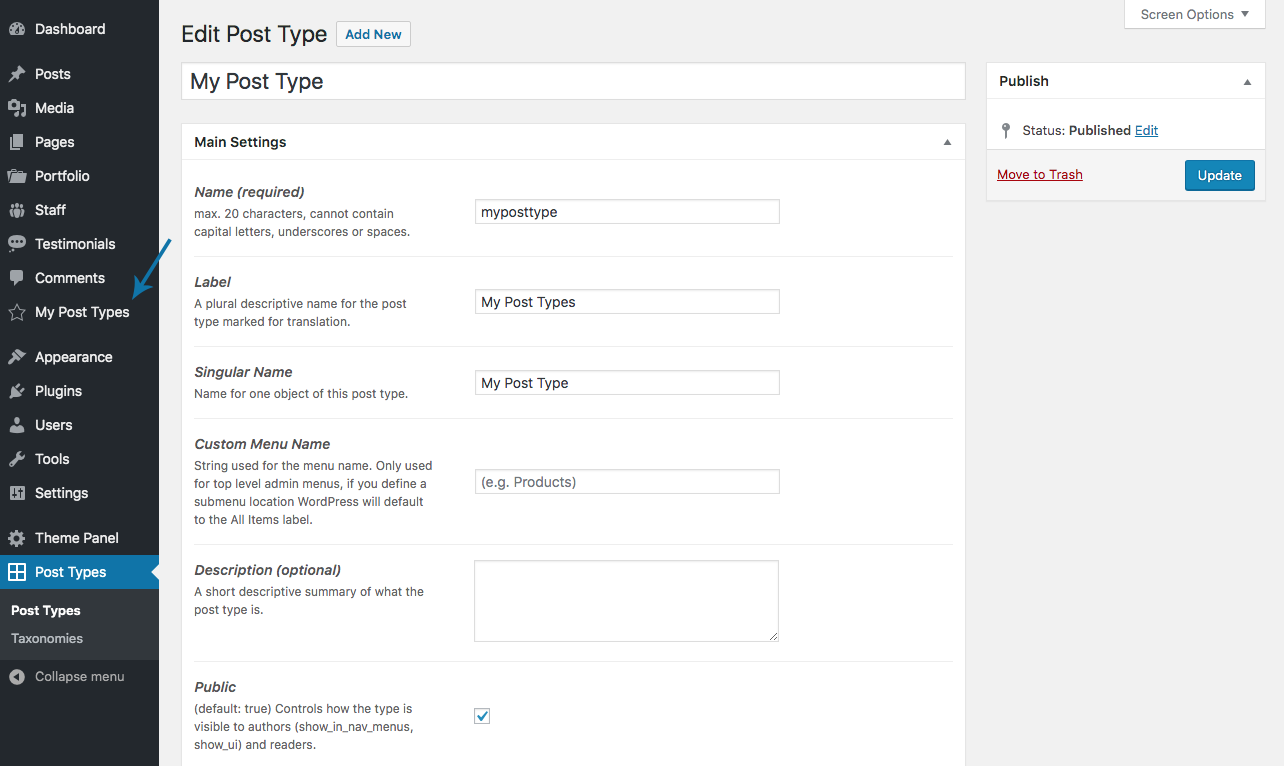
This will add a new Post Types menu item towards the bottom of your dashboard. Click on it to begin creating your new post types and taxonomies. There are tons of options for the custom post type or taxonomy name, making the new post type visible to authors, where it appears in your dashboard (or where within a submenu, such as under “Settings”), the menu icon, supported metaboxes (just check the ones you’d like to include), and even advanced settings for the REST API.
Choose the options you want to enable for your new post type and save. That’s it. It’s ready to go! Just look for the name you gave your new custom post type in your dashboard. Ours is named “My Post Types” in the screenshot above. (Note – we did not assign a location, so it was simply added after the existing post types on our test site.)

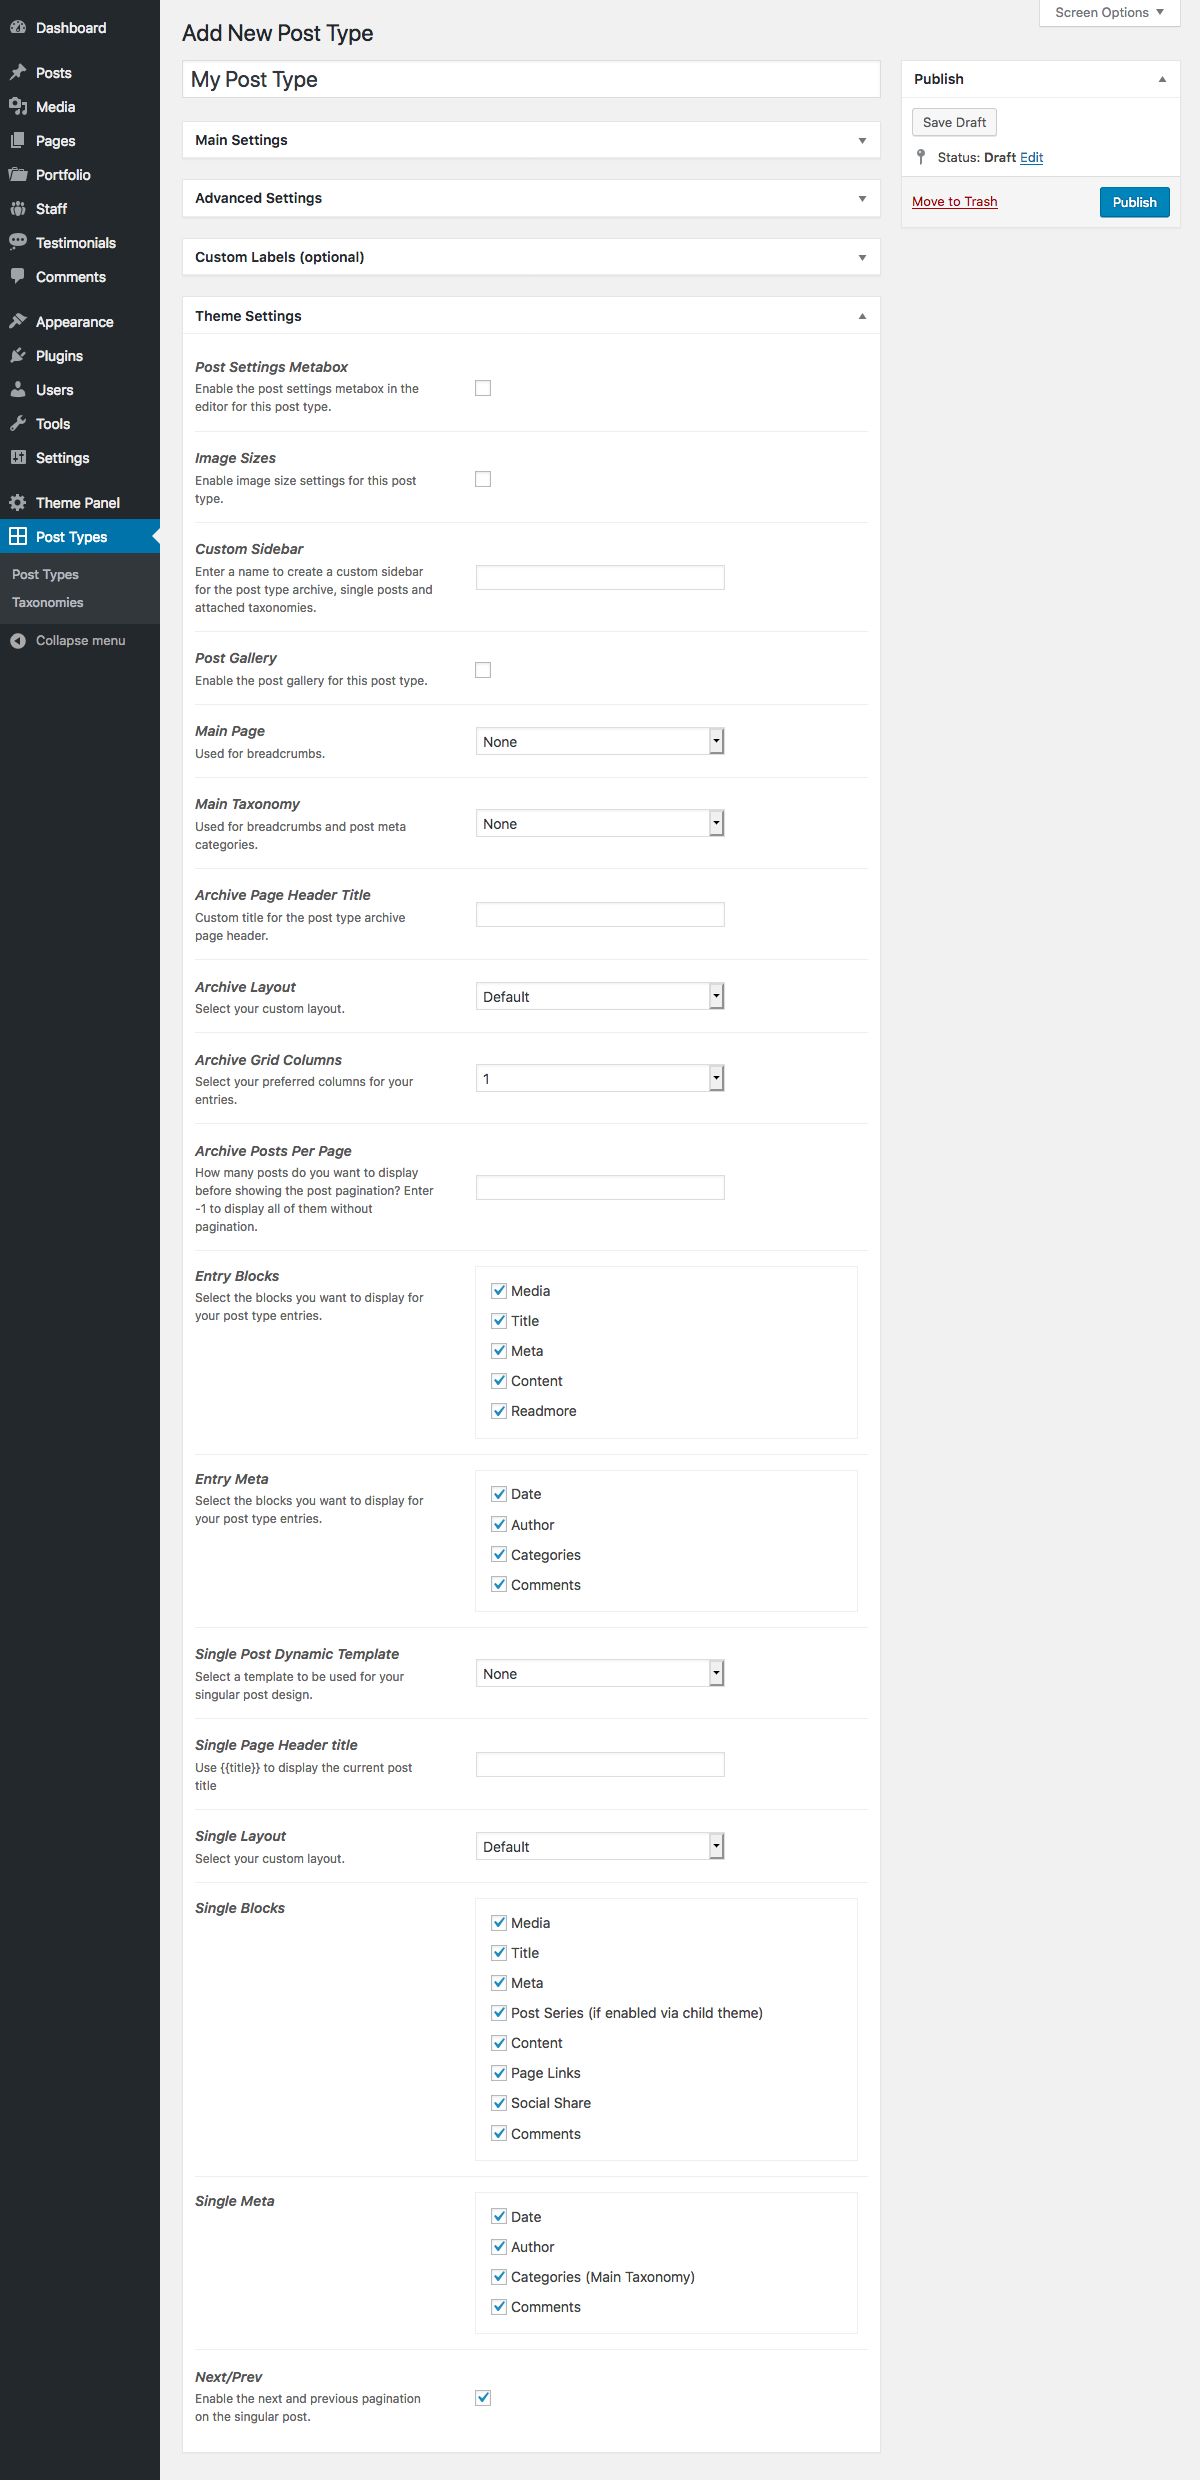
Post Types Unlimited was created to work great with any WordPress theme, but if you’re using the Total WordPress Theme you’ll have access to a ton of exclusive and powerful options. Set a custom main page for your breadcrumbs, choose the new post type’s archive layout options, select entry (and single entry) blocks and meta, enable Next/Prev pagination and more.
WCK WordPress Creation Kit PRO

The WordPress Creation Kit PRO is a premium WordPress plugin that makes it easy to customized your WordPress installation so clients or contributors only see what you want them to. This powerful plugin gives you control over custom fields and post type to create your own cleaned up installation of WordPress.
If you are a web developer you probably already know that WordPress can be overwhelming for some clients, and one way to help them streamline the process of using their website is to trim down what they can and can’t see on the backed of their WordPress installation. Enter the WordPress Creation Kit PRO. With this you can create a user friendly WordPress installation specific to your client. You can create and rename custom post types and taxonomies to make it easier for them to understand, or hide some of the settings options included with the WordPress theme you’ve used for their website. There’s tones you can do with the WordPress Creation Kit PRO.
Another great feature of the WordPress Creation Kit PRO is the custom fields included. Depending on the post type you are creating you might want to add a text area for content, a drop down of options (such as staff member titles, or the type of equipment used for a photo shoot), the date or something else. Whatever your needs, WordPress Creation Kit PRO includes 11 custom field options so you can make your post types easy for your clients to use.
ACPT – Custom Post Types for WordPress

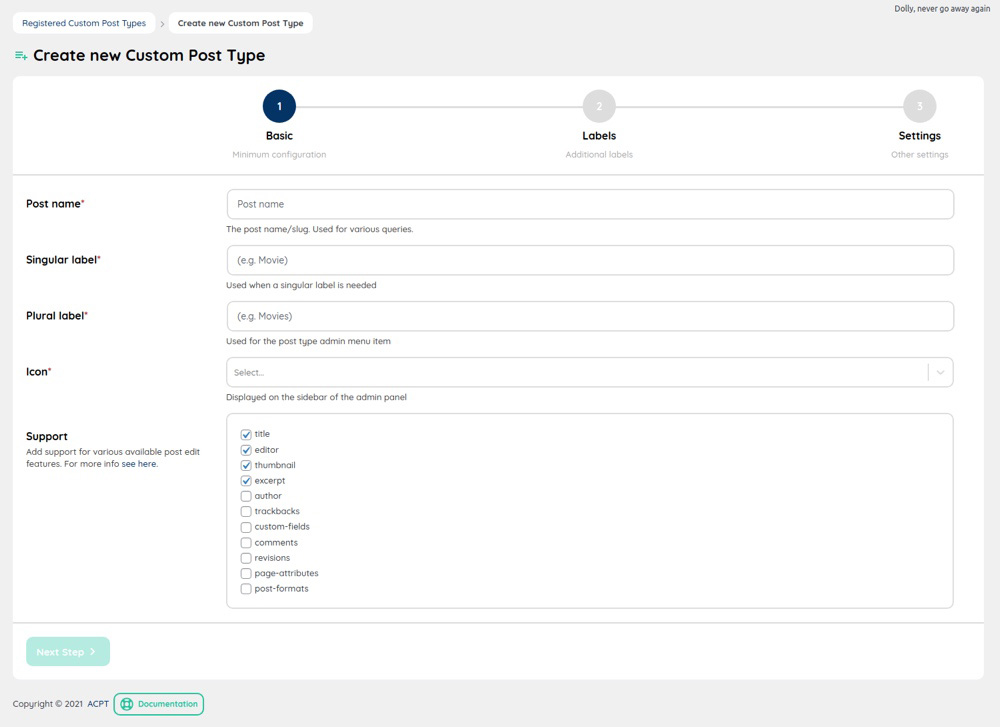
Another option is ACPT Custom Post Types for WordPress. This freemium plugin offer a lite version that you can grab from WordPress.org to add the ability to register custom post types and taxonomies and create meta box fields (with field types for email, select and text to choose from). All it takes is 3 clicks, and ACPT even walks you through the process.

Whether you want to add a new post type for news outside of your blog, or one to organize your complex music library this plugin is a great choice. Plus ACPT lite also offers quick page builder integration (via a custom shortcode, Gutenberg block and Elementor widget), as well as seamless WooCommerce integration (for all product types and default data). So you should be able to install and get started no matter what setup your WordPress site is currently using.
But you should know the pro version has even more features! This gives you more control over your custom post type as well as options for advanced settings. Visit the main ACPT.io site to upgrade for access to added meta box field types (24 total including multi-select, toggles, addresses, maps, phone number, colors, currency, date, times, embeds, galleries, images, lists, HTML and more), enhanced post type relationships, support for custom APIs (which you can use to manage available ACPT operations), a helpful HTML template builder for archives or singles pages, and even the ability to import/export data.
Custom post types can sound intimidating, but they don’t need to be. With a little practice, you can get the basics of custom post types down and create the site you need. And with the free Post Types Unlimited plugin, there’s no excuse not to. Now that you’ve got the basics down, let us know if you have any additional questions. Or if you have more helpful tips, share them! Feel free to drop me a line in the comments below. Let’s get a discussion going!

