Steps to enable WordPress maintenance mode
Step 1: Install and activate the plugin 🖱️
There are multiple plugins that allow you to enable WordPress maintenance mode. And, of course, each tool will have its own unique settings.
For this article, we’ll have a look at how to use Themeisle’s LightStart – Maintenance Mode, Coming Soon and Landing Page Builder.
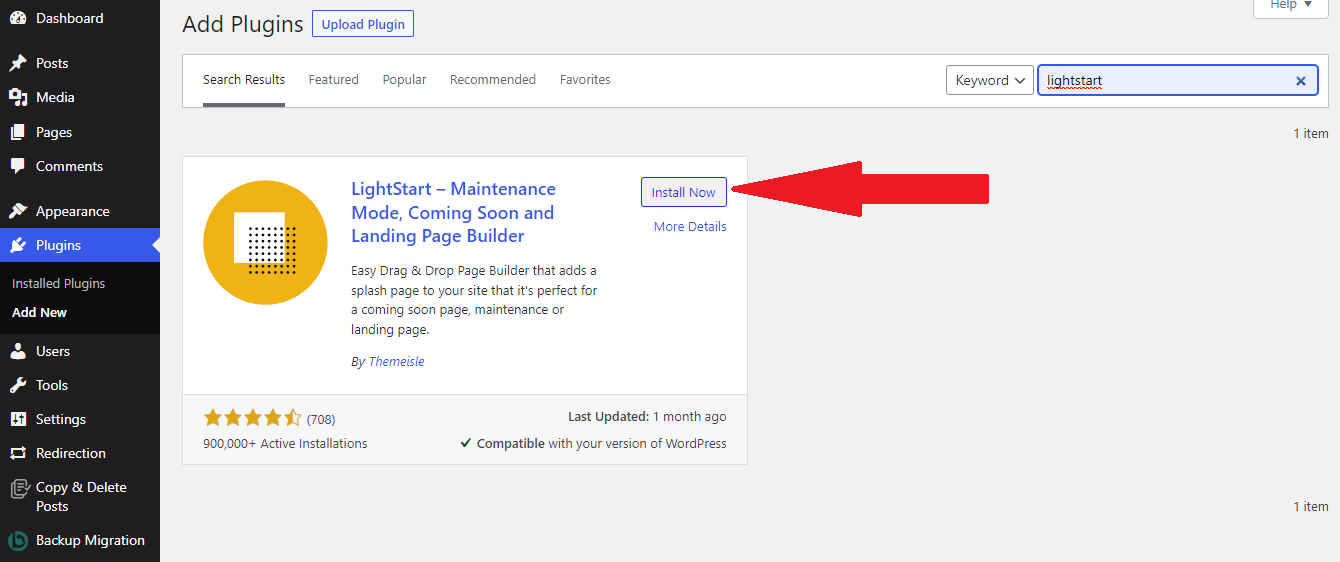
To get started, navigate to Plugins → Add New on your website.
Then type in “LightStart” in your search bar. After doing so, Install and Activate the plugin.
Step 2: Choose a template 🎨
Whenever you get a new plugin, it’s always great to play around with its settings. This will help ensure that the tool meets your needs.
Some tools are limited in how much customization you can do. However, with LightStart, there are many great elements you can tweak or change to help ensure that when you place your website under maintenance mode, it will match the look and feel of your existing website.
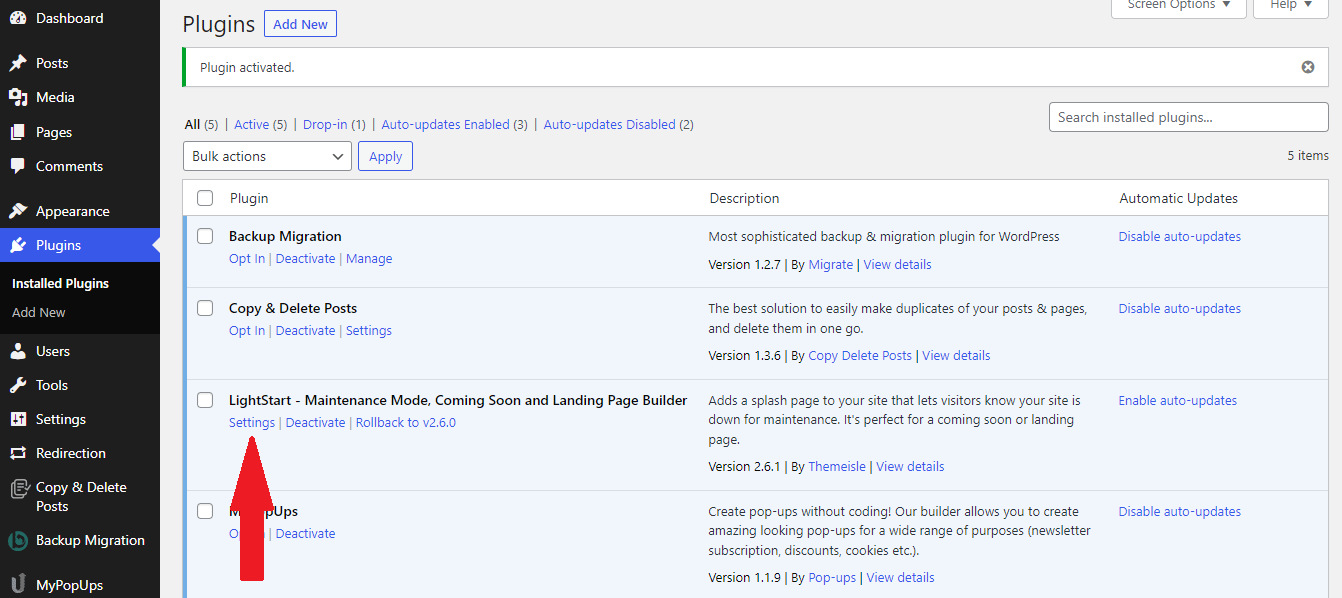
To choose a template, just navigate to Installed Plugins → Settings.
This will lead you to a page with three different free templates to select from: Maintenance Mode, Coming Soon, and Landing Page.
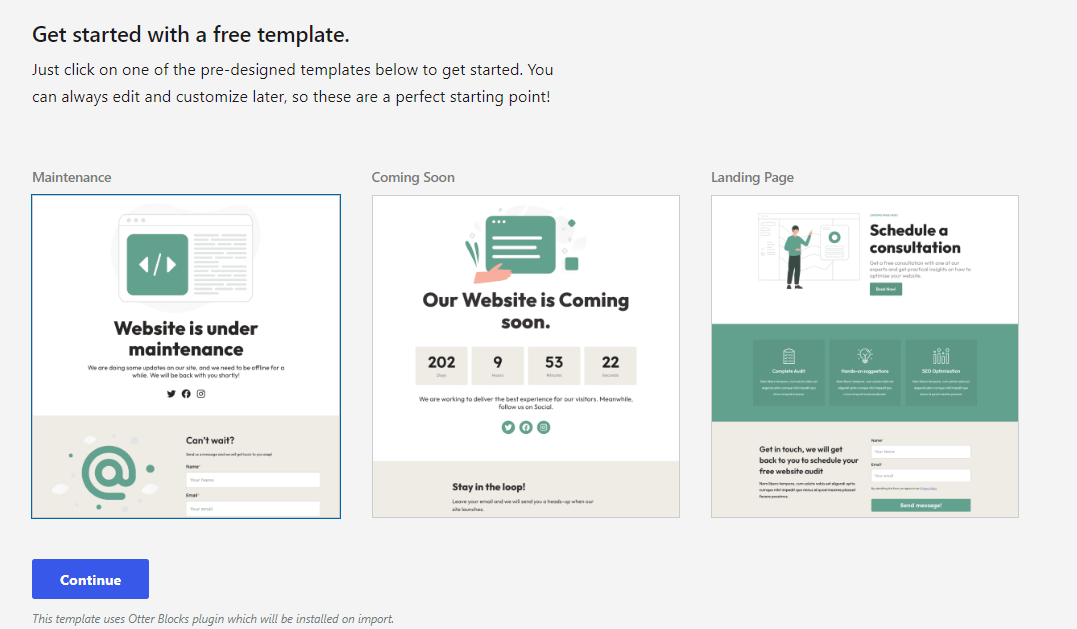
Each template is different. From a sign-in form to a countdown clock, social media icons to help redirect visitors to your social accounts, etc.
The style you pick will obviously depend on your needs and preferences, but let’s assume that the “Maintenance” template is what you prefer. Just click on it and hit Continue in the bottom left corner.
Step 3: Customize the template using blocks ⚙️
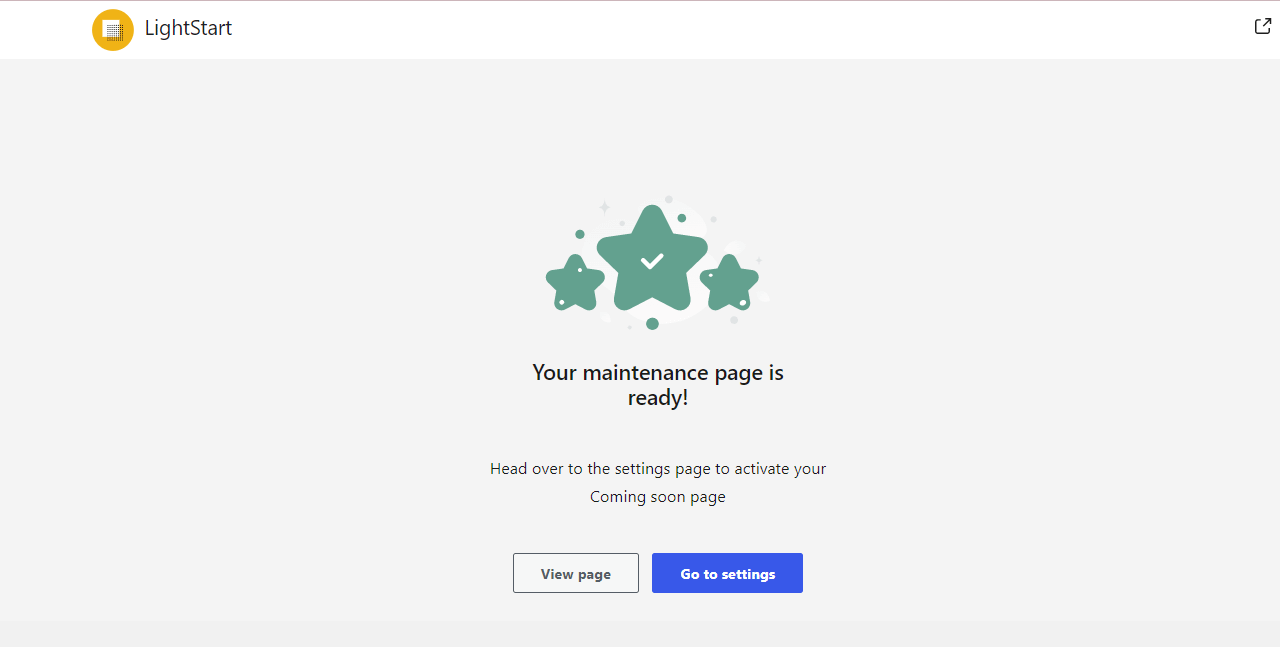
Immediately after selecting the Continue button from the previous step, you will get a message informing you that the page is ready.
However, since we want to customize it, you can click on the Go to settings option.
To change the contents of the page, you can select the Design tab and then click Edit page.
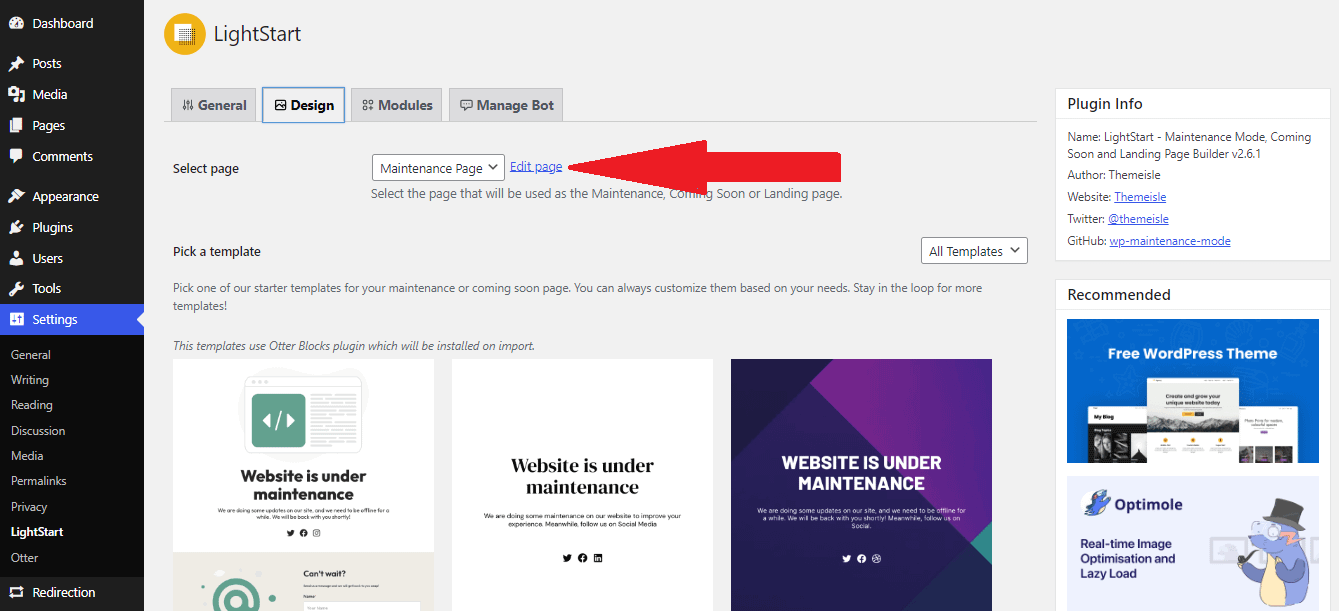
You will then be led to the block editor, where you can change the contents and any other element of the page to your liking.
As you customize your page, remember to keep your website visitors in mind.
Sometimes, when our websites go into maintenance mode, it can be quite frustrating or disruptive for our visitors. That’s why it’s essential to keep them in the loop by giving them the necessary information when our websites are down.
If you’re putting your website into maintenance mode, it helps to be both transparent and friendly in your communication.
The LightStart plugin allows you to be creative with your communication with helpful tools, like:
- Adding a countdown timer.
- Adding a bot.
- Linking to your social media pages.
- Allowing your visitors to subscribe so that they can be notified when the website will be back up.
- Allowing your visitors to contact you if they need to communicate something with you urgently.
Let’s take a closer look at how to add a couple of these components to your page.
⏱️ Adding a countdown timer:
Start by navigating to the block editor and clicking on the Design tab → Edit Page.
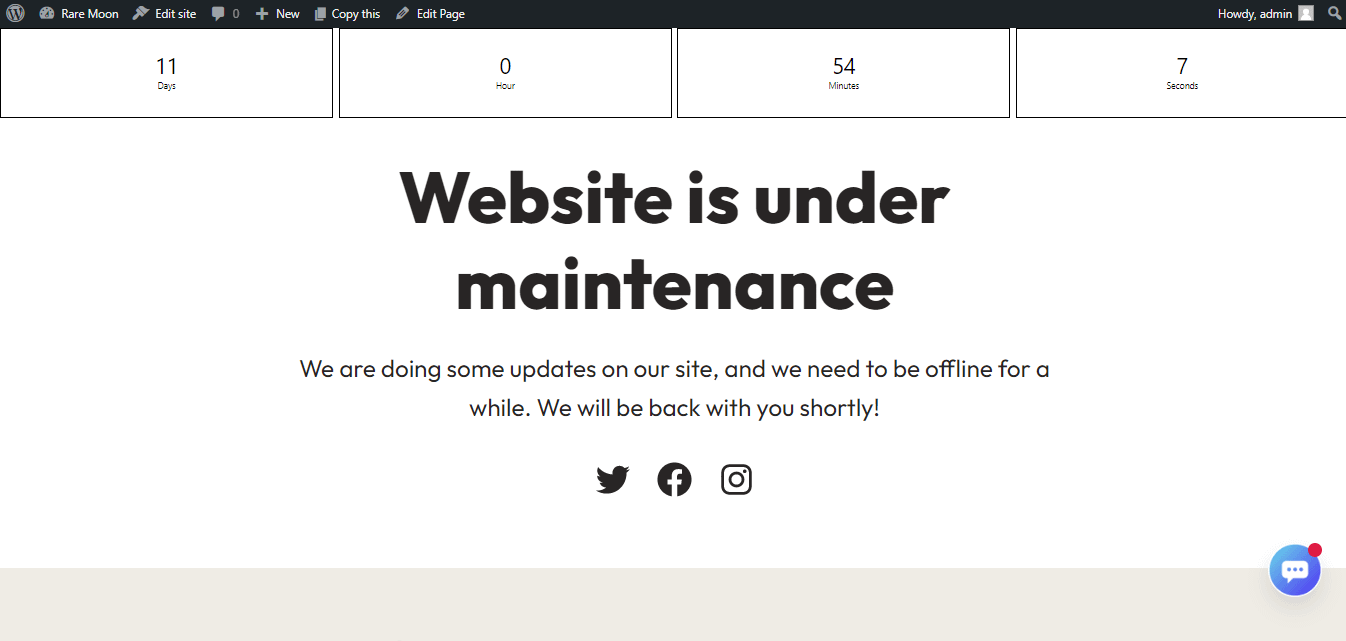
In the block editor, select where you want your timer to show up on the page. For this example, we’ve chosen the top of the page. Then, select Countdown for the type of block you want to add.
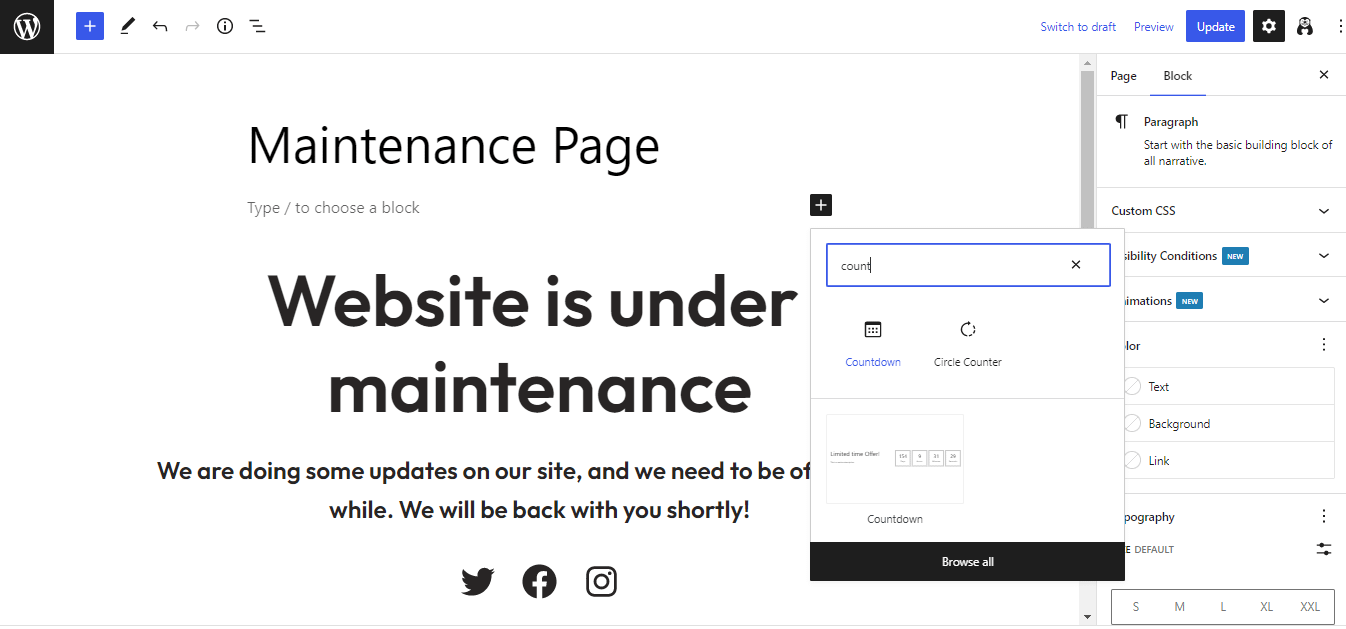
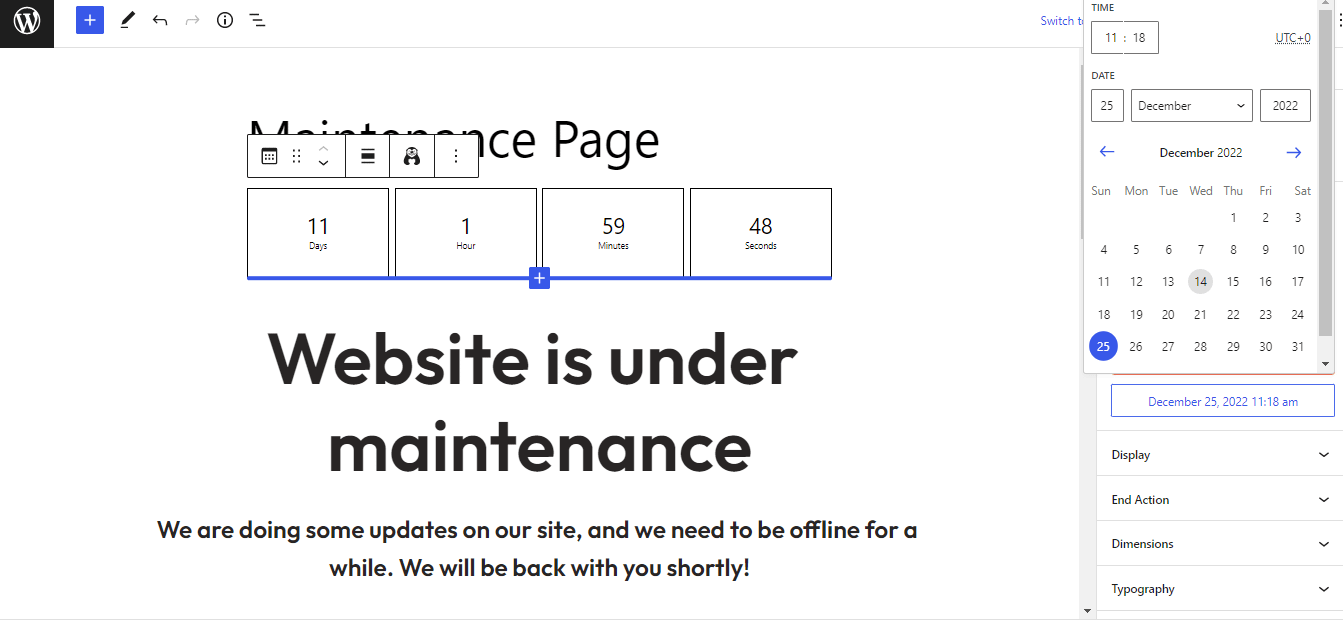
You can then edit the countdown timer by selecting Time Settings and clicking on the date you expect your website to be back up. Once you’re happy, click the blue Update in the top right corner.
📱 Linking to your social media pages:
You can use the plugin page to help your visitors stay in touch with you through social media.
To add links to your social media pages, simply navigate to the Design tab and then click Edit page.

You can continue to customize any element of the page to your liking. When you’re done, remember to click the Update button.
Step 4: Set up a chatbot 🗨️
The fourth step to enable WordPress Maintenance Mode is to add a chatbot to your page. This helps you communicate with your visitors in an engaging way.
You can also use your bot to capture email addresses or to answer any questions your visitors may have.
To get started with this setup, navigate to the Manage Bot tab and set the status to Activated.
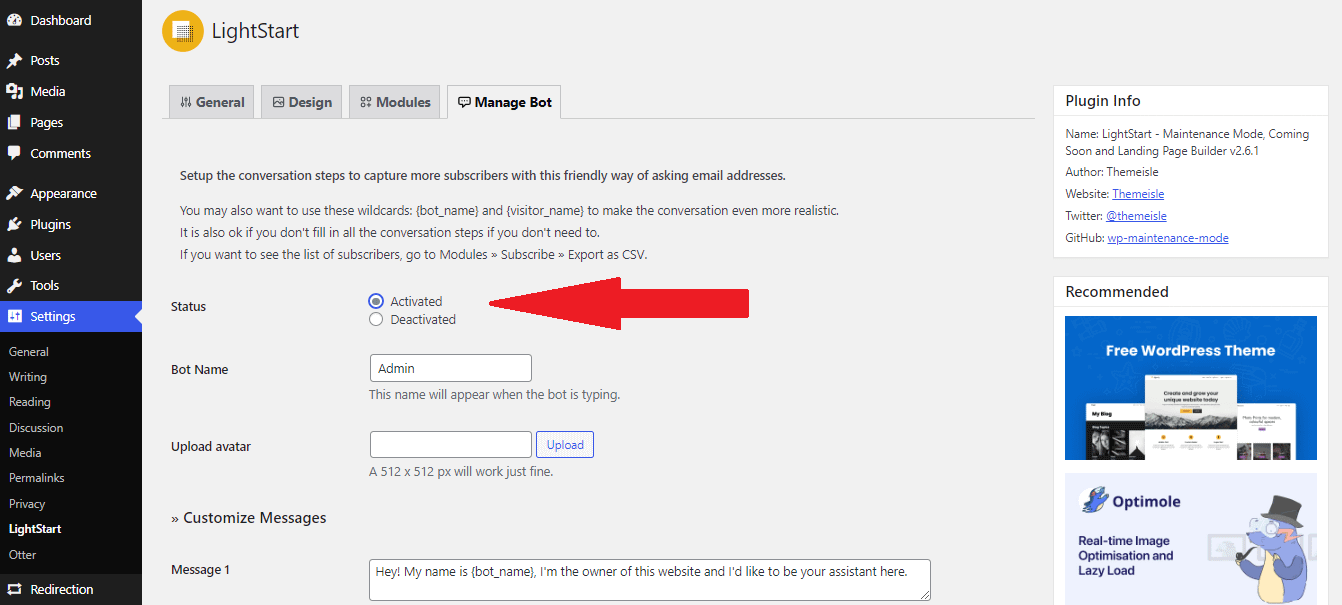
The Manage Bot tab allows you to change the bot’s name, upload a unique avatar for the bot, and also customize the messages the bot will communicate with your visitors.
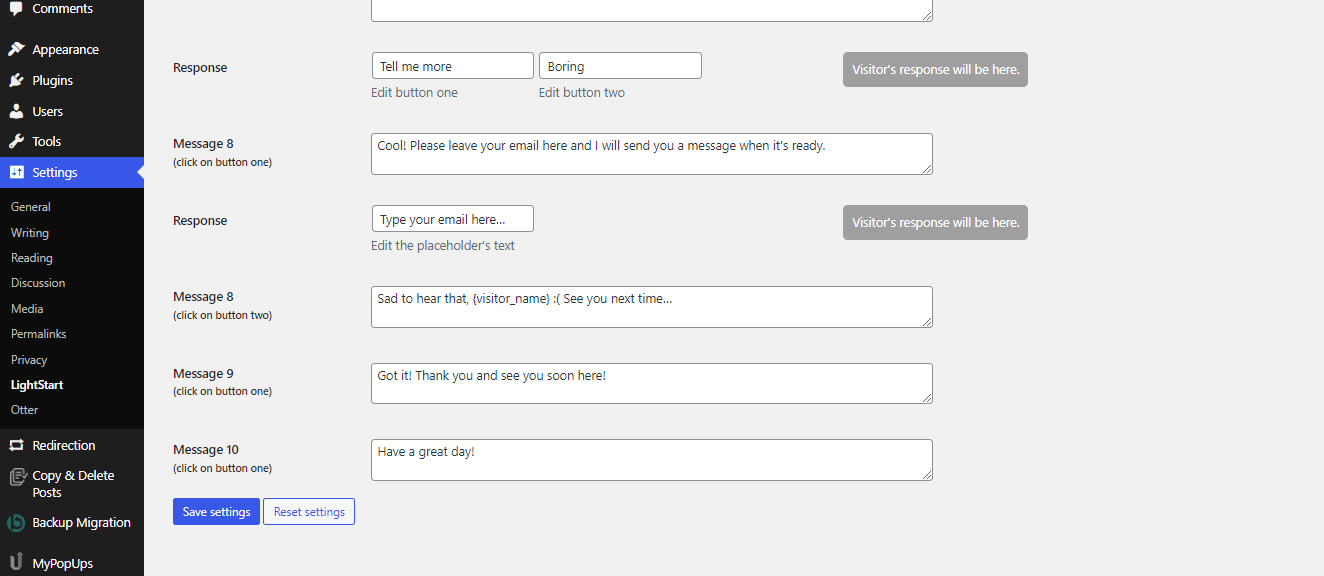
Once you’re happy with your bot and the messaging, select Save Settings at the bottom.
Step 5: Set up exclusions ❎
If you have a team of people that you want to add as users while your website is in maintenance mode, you can do so by navigating to the General tab and scrolling down to the Backend Role and Frontend Role fields.
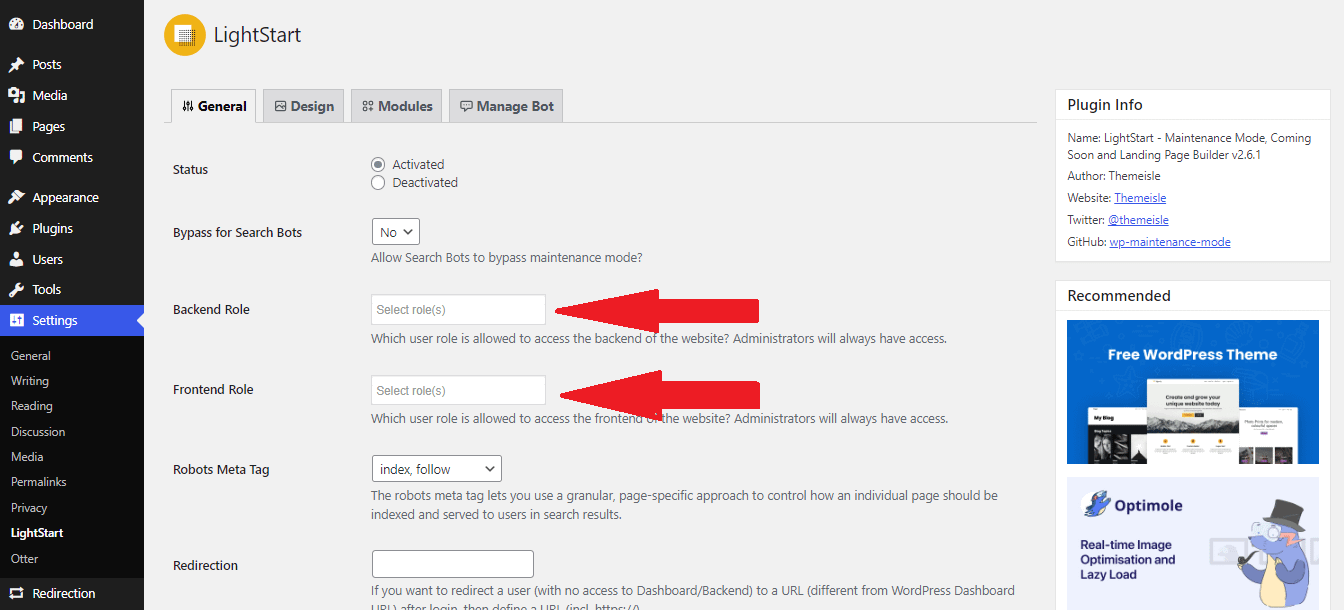
For the Backend Role, you have the choice to choose which of your users you want to have access to your dashboard while it’s in maintenance mode.
You might want to select Editor if there are a few pieces that need some editing, and keep in mind that Admin always has access to the backend.
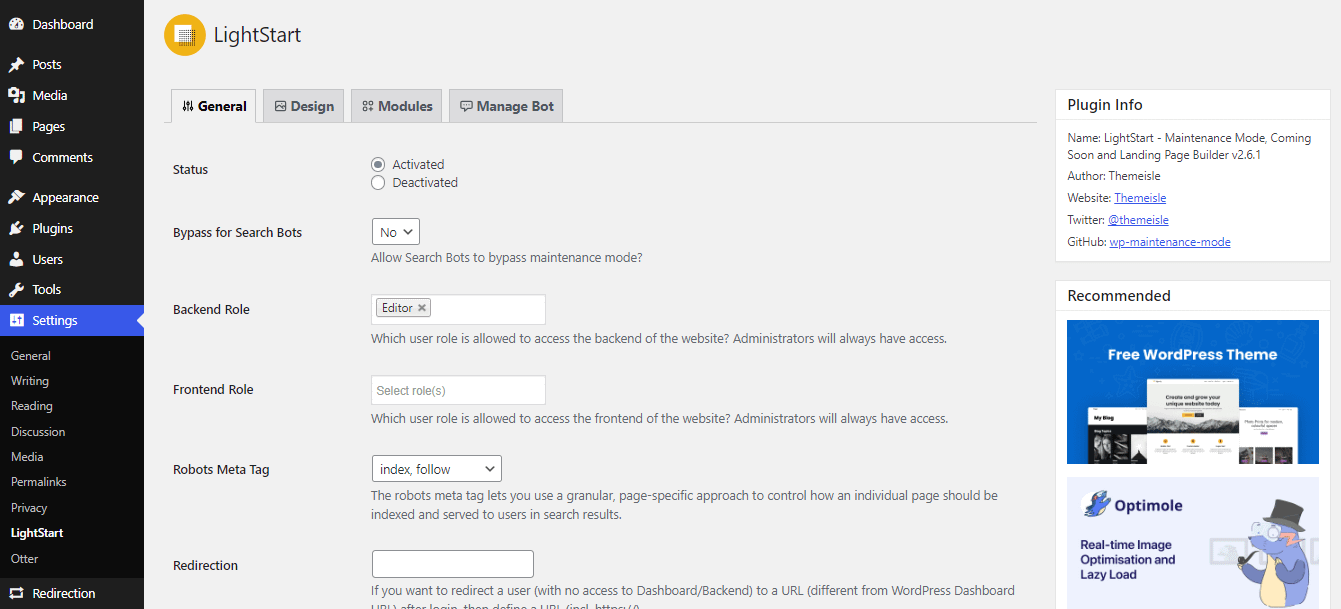
For the Frontend Role, you also have the option of selecting who you want to give access to. Depending on your needs, you have the option of choosing between your editors, authors, contributors, and subscribers.
Once you’ve completed editing your page and you’re happy with the changes you’ve made, you can select Save Settings at the bottom of the page.
And that’s all there is to it. You officially have enabled WordPress maintenance mode on your website.
Why put your WordPress website in maintenance mode?
🎁 There are a few notable benefits to WordPress maintenance mode:
- It’s convenient when you’re experiencing some common WordPress website challenges.
- Enabling WordPress maintenance mode allows you to take the time to sort out whatever issues your website has without having visitors see pages with errors and have a less-than-pleasant user experience.
- It allows you to communicate with your visitors, so they’ll find out what’s going on and when they can expect to see your site back up.
- It’s perfect if you’re trying to rebrand. All you need to do is set up a professional maintenance page to let anyone visiting your website while rebranding know that something big is coming soon.
- It’s ideal for adding content to your website without impacting your visitors’ experience.
- It leaves the right impression and allows visitors to have the best experience interacting with your business or organization.
- It keeps your visitors engaged and informed.
You have all the tools you need 🧰
Maintenance mode is a great tool to use when you’re making any changes or updates to your WordPress website.
It can prevent your visitors from seeing broken pages while also giving you a chance to communicate the changes being made and when they can expect the site to be back up again. While it might have felt like an overwhelming process before, LightStart makes it very easy.
Simply install and activate the plugin, customize the settings to your liking, communicate what you want to your visitors, and control which users have access to your frontend and backend. And that’s all there is to it!
If you’re still having trouble or have any questions feel free to post them in the comments section below!

