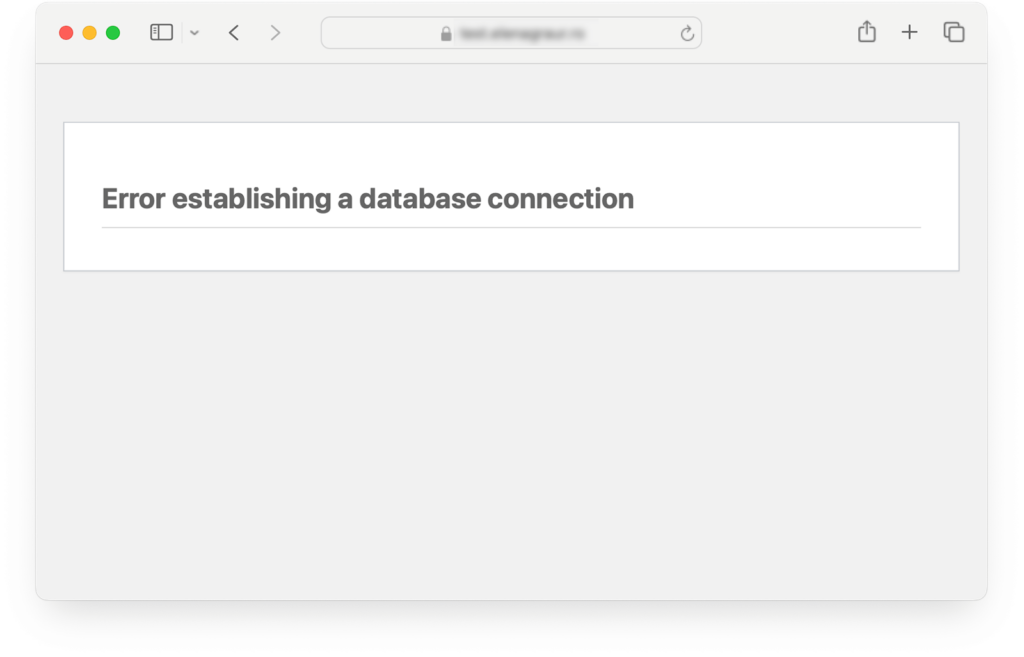
Dealing with the “Error Establishing a Database Connection” in WordPress can feel like hitting a brick wall. One moment your website is up and running smoothly, and the next, you’re faced with a frustrating error message that can bring your site to a screeching halt.
But don’t worry—you’re not alone in this. Many WordPress users encounter this issue at some point, and the good news is that it’s usually fixable with a bit of troubleshooting.
In this guide, we’re going to walk you through the steps to identify the cause and resolve the problem quickly.
Table of Contents
- What is the “Error Establishing a Database Connection” in WordPress?
- Common Causes of the Error Establishing a Database Connection
- How to Troubleshoot and Fix the Error Establishing a Database Connection
What is the “Error Establishing a Database Connection” in WordPress?
The “Error Establishing a Database Connection” in WordPress is a common issue that can leave your website inaccessible to visitors. Essentially, it means that your WordPress site is unable to communicate with its database, which stores all the essential content, user information, and settings that your site needs to function properly.
Without this connection, WordPress can’t fetch the data it needs to display your site. So, instead of your homepage or latest post, visitors are greeted with an empty page or a confusing error message.

It’s a frustrating experience, especially if you’re not sure what’s causing the issue. But don’t worry, you’ve got this. Understanding what’s happening is the first step to fixing it, and I’m here to guide you through every part of that journey. Together, we’ll get your site back on track.
Common Causes of the Error Establishing a Database Connection
Understanding the root of the problem is key to fixing it, and the good news is that this error usually boils down to a few common issues. Let’s break them down so you can get a better idea of what might be going wrong behind the scenes.
- Incorrect Database Credentials. Think of your WordPress site as a busy office building. To get in, you need the right key—or in this case, the correct database credentials. If the database name, username, password, or host in your WordPress configuration file (wp-config.php) file is incorrect, WordPress can’t get inside to access the data it needs. This is one of the most frequent culprits behind the error, and luckily, it’s also one of the easiest to fix.
- Corrupted WordPress Files. Just like how a corrupted file on your computer can cause programs to malfunction, corrupted WordPress files can lead to this database connection error. Maybe a WordPress update didn’t go as planned, or something went awry during a recent file transfer. When WordPress can’t find the right files in the right places, it can’t connect to the database properly.
- Corrupted Database. Your WordPress database is like a library that organizes all your content and settings. But sometimes, this library can get a little messy—corruption can sneak in, especially after a server crash, an interrupted update, or a malicious attack. When the database is corrupted, WordPress struggles to pull the right information, leading to that frustrating error message.
- Server Issues. Sometimes, the problem isn’t on your end at all. If your hosting server is down, overloaded, or experiencing issues, WordPress won’t be able to connect to the database, no matter how well everything else is set up. Server issues can be temporary, but they’re still a common cause of this error and might require a call to your hosting provider.
These are the usual suspects when it comes to the WordPress database error. Now that you know what might be causing the issue, you’re well on your way to fixing it.
How to Troubleshoot and Fix the Error Establishing a Database Connection
Let’s roll up our sleeves and dive into the step-by-step solutions to get your site back online.
1. Check and Update Database Credentials
One of the first things to check is your database credentials. Let’s walk through the process of checking and updating these credentials to make sure they’re correct:
1. Open your wp-config.php file. You’ll find this file in the root directory of your WordPress installation. You can access it using an FTP client like FileZilla or through your web host control panel’s file manager.
2. Once you’ve located the wp-config.php file, it’s time to check the credentials. Here’s what you’re looking for:
define('DB_NAME', 'your_database_name');
define('DB_USER', 'your_database_username');
define('DB_PASSWORD', 'your_database_password');
define('DB_HOST', 'localhost');
3. To cross-check with your hosting provider, log in to your hosting account. Most hosts have a MySQL database management section where you can view your databases and users. For example, in cPanel, you’d go to the “MySQL Databases” section.
4. Verify your database name, database username, password, and host. While most setups use localhost as host, some hosting environments require a different hostname. Your hosting provider’s documentation or support team can confirm the correct setting.
These details need to match exactly with what’s set up in your hosting account. Even a tiny typo can throw everything off.
5. If you spot any errors, go ahead and correct them. Save the file and try accessing your site again.
If this was the issue, you should be back in business!
2. Repair the WordPress Database
If you’ve double-checked your database login credentials and the error persists, the next logical step is to look at the health of your WordPress database itself. Sometimes, databases can become corrupted, causing WordPress to struggle in establishing a connection.
1. Enable the Database Repair Tool: WordPress has a built-in feature specifically designed to help you repair your database. This tool is super handy, but it’s hidden by default to prevent unauthorized access. Here’s how to enable it:
Just like in the previous section, you’ll need to open your wp-config.php file.
Scroll to the bottom of the wp-config.php file, and just before the /* That’s all, stop editing! Happy publishing.*/ line, add the following code:
define('WP_ALLOW_REPAIR', true);
Once you’ve added the line, save the changes to the file. This will activate the database repair tool.
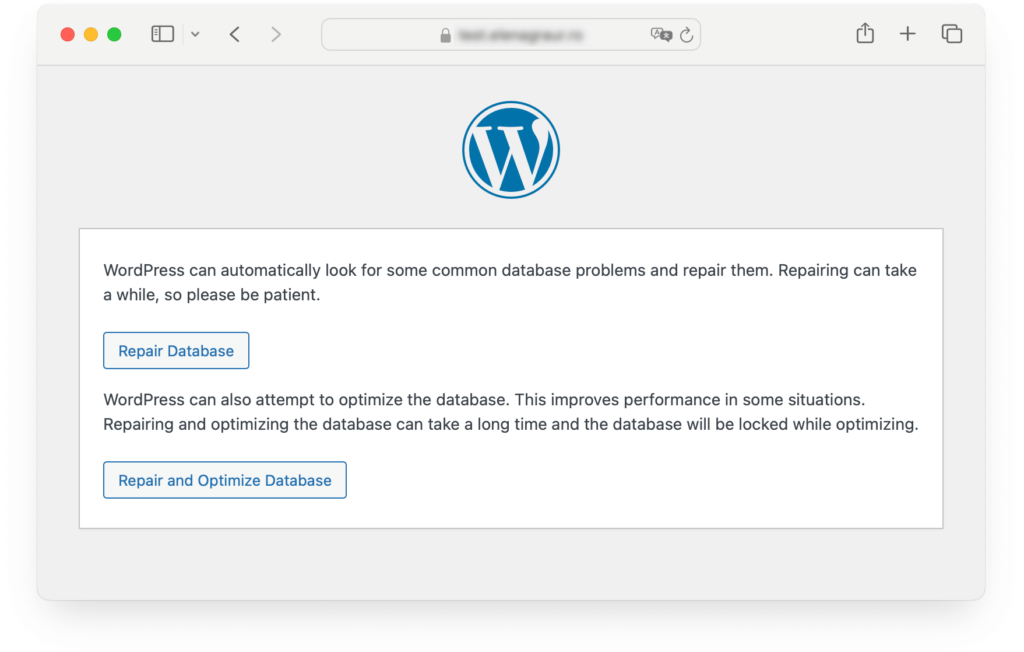
2. Run the Repair Process: In your web browser, go to https://yourwebsite.com/wp-admin/maint/repair.php.
You’ll see options to either repair the database or repair and optimize. Click on “Repair Database” to get started.

WordPress will now go through your database, looking for issues and fixing them. Depending on the size of your database, this could take anywhere from a few seconds to several minutes. Once it’s done, you’ll see a confirmation message on the screen.
3. Remove the Repair Code: For security reasons, it’s important to disable the repair tool after you’ve used it. Leaving it enabled could allow unauthorized users to access the tool and potentially cause harm to your site.
Just like before, open your wp-config.php file using your preferred method.
Find the line you added earlier—define(‘WP_ALLOW_REPAIR’, true);—and delete it.
Save your changes to ensure the repair tool is disabled.
Go back to your browser and refresh your website. With any luck, the repair process will have fixed any issues, and your site will load normally.
3. Check and Fix Corrupted WordPress Files
It’s time to check on those WordPress files. Corrupted files can be a sneaky cause of this error.
- Download a Fresh Copy of WordPress: Go to WordPress.org and download the latest version of WordPress. This will download a .zip file containing all the WordPress core files.
Once the download is complete, unzip the file on your computer. This will create a folder containing the WordPress files you’ll need to upload to your site.
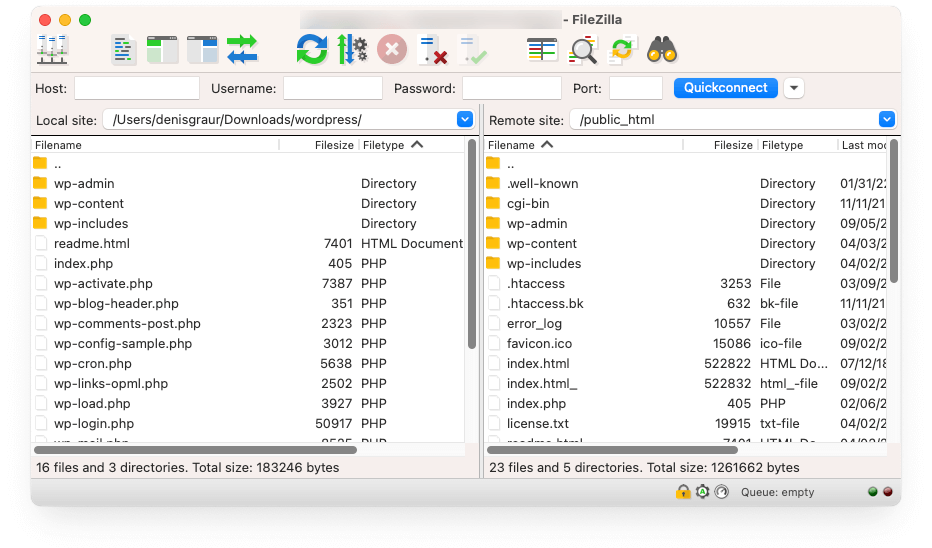
- Access Your Site via FTP: To replace the corrupted files on your site with the fresh ones you just downloaded, you’ll need to access your site’s files directly. This is typically done using an FTP (File Transfer Protocol) client like FileZilla.
Open your FTP client and enter your site’s FTP credentials (usually provided by your hosting provider). Once connected, navigate to the website’s root directory. This is often called public_html, www, or htdocs.
In the root directory, you’ll see folders and files such as /wp-admin/, /wp-includes/, /wp-content/, and several .php files like index.php and wp-config.php.


- Backup your site: Before making any changes, it’s always a good idea to back up your site. This includes all your files and your database. Many hosting providers offer easy backup options, or you can use a WordPress plugin like UpdraftPlus.
- Upload the new files: From the fresh WordPress files on your computer, upload everything except the /wp-content/ folder and the wp-config.php file. These two should not be replaced because they contain your site’s content and configuration settings.
Depending on the size of your site and your internet connection, this process might take a few minutes. Ensure that all files are uploaded and overwritten successfully.
- Clear Your Cache (If Applicable): Sometimes, after replacing files, your browser or site’s caching system might still serve up the old, corrupted versions. Clearing your cache ensures that you and your visitors are seeing the most up-to-date version of your site.
Go to your browser settings and clear the cache. This forces your browser to load the fresh files you just uploaded.
If you’re using a caching plugin, clear your site’s cache from the plugin settings.
Open your website in a browser and refresh the page. Hopefully, the “Error Establishing a Database Connection” message will be gone, and your site will be back online.
4. Update the WordPress Site URL
Sometimes, the problem can be traced back to incorrect or mismatched site URLs.
Before we get into the technical steps, it’s important to understand when updating the site URL is necessary:
- Site Migration: If you’ve moved your WordPress site to a new domain or server, the site URL in the database might still point to the old domain.
- SSL Installation: Switching from http to https after installing an SSL certificate can sometimes lead to connection issues if the site URL isn’t updated.
- Incorrect Settings: Sometimes, changes in the WordPress settings or database can lead to an incorrect site URL, causing WordPress to struggle with connecting to the database.
If any of these scenarios sound familiar, updating the site URL could help resolve the error.
To update your WordPress Site URL, you’ll need to access your site’s database directly. The most common way to do this is through phpMyAdmin, a web-based database management tool available in most hosting control panels.
- Go to your hosting provider’s website and log in to your account. Look for a section labeled “Databases” or “phpMyAdmin.”


- Once inside the database section, find and click on the phpMyAdmin option. This will open the phpMyAdmin interface, where you can manage your site’s database.
- In phpMyAdmin, you’ll see a list of databases on the left-hand side. Click on the database associated with your WordPress site (the name of the database is usually the same as the one in your wp-config.php file).

- In the list of database tables, look for one named wp_options. Click on it to open and view its contents.

- Once inside the wp_options table, you’ll need to find two specific rows—siteurl and home. These are usually located near the top of the table, but you can also use the search function in phpMyAdmin to locate them quickly.
- Click the “Edit” option next to the siteurl row. This will open a form where you can modify the URL. Make sure that the URL matches the exact domain name of your site (including http:// or https://).
- Next, click “Edit” next to the home row and ensure that it also matches your site’s domain name. The home URL should be identical to the siteurl unless you intentionally want visitors to be redirected to a different URL when they access your homepage.
- After updating the URLs, click the “Go” button to save your changes. phpMyAdmin will apply the updates to your database immediately.
After updating the site URL in phpMyAdmin, it’s a good idea to double-check these settings from within your WordPress dashboard to ensure everything is configured correctly.
If the database connection issue is resolved, you should be able to access your WordPress admin area:
- Go to https://yourwebsite.com/wp-admin/ and log in.
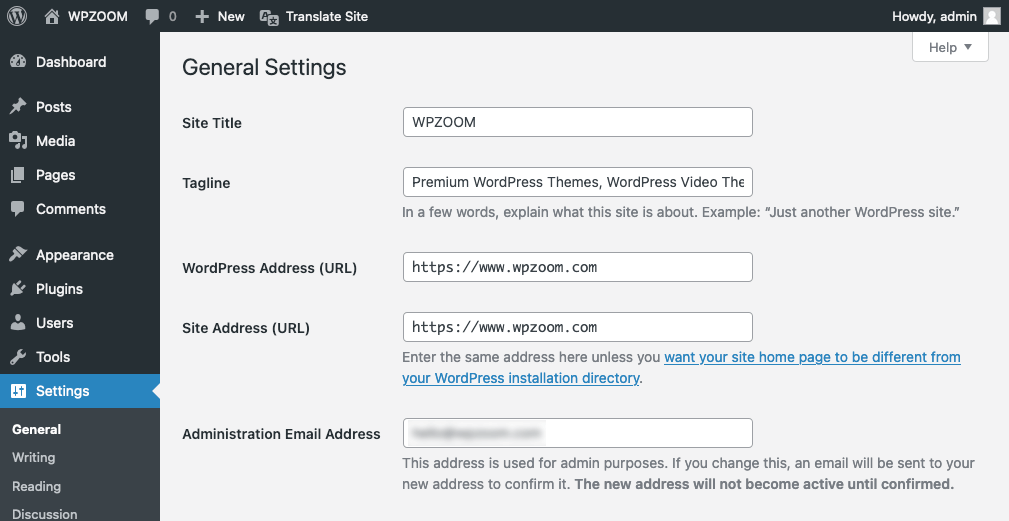
- Go to the Settings menu and click on “General.” Here, you’ll see the WordPress Address (URL) and Site Address (URL) fields.


- Make sure both the WordPress Address and Site Address match the URLs you updated in phpMyAdmin. If they’re correct, no further action is needed. If they’re not, update them directly in the dashboard and save your changes.
Open your site in a web browser and check if the homepage loads correctly. Navigate through a few pages to ensure there are no issues. If you’re using a caching plugin or a content delivery network (CDN), clear the cache to ensure the most recent version of your site is being displayed.
5. Check Server Status and Contact Your Hosting Provider
If everything seems fine on your end but the error persists, it might be time to check in with your hosting provider.
Many hosting providers have status pages where you can see if there are any ongoing issues. If the web and database server is down, that could explain the error.
If you can’t find anything on the status page, reach out to your hosting provider’s support team. They might be able to shed light on MySQL server issues that are causing the error.
6. Restore a Backup
When all else fails, sometimes the best solution is to turn back time—at least as far as your website is concerned.
If you’ve been keeping regular backups of your site (and I hope you have!), now’s the time to use them.
Use your hosting provider’s backup tools or a WordPress plugin to restore your site to a previous state before the error occurred.
After restoring, check to see if the error has been resolved. With any luck, this will get your site back to normal.
7. Seek Professional Help
If you’ve tried everything and the “Error Establishing a Database Connection” is still blocking access to your WordPress site, it might be time to call in the professionals.
WPZOOM is here to help. Our team of WordPress experts can quickly diagnose the issue, whether it’s a database problem, server misconfiguration, or something more complex. We’ll implement a tailored solution to get your site back online as quickly as possible. Plus, we offer ongoing support to ensure your site stays in top shape. Don’t let this error disrupt your site any longer. Contact WPZOOM today for expert assistance. We’re here to help you get back to what matters most—your website.


