Manual WordPress installation might sound technical, but it’s actually quite straightforward. The process takes less than five minutes once you understand the steps involved, and you don’t need to be a coding expert to complete it successfully.
In this guide, you’ll learn exactly how to install WordPress manually on your website. We will walk you through downloading WordPress, creating a database, configuring connection files, and running the installation script. By the end, you’ll have not just a functioning WordPress site but also a deeper knowledge of how your website works behind the scenes.
Table of Contents
- What You Need Before Installing WordPress Manually
- Step 1: Download the WordPress Files
- Step 2: Extract the WordPress Files
- Step 3: Upload WordPress Files to Your Web Server
- Step 4: Create a MySQL Database and User
- Step 5: Configure the wp-config.php File
- Step 6: Run the WordPress Installation Script
- Step 7: Complete the WordPress Installation
- Common WordPress Installation Issues and How to Fix Them
What You Need Before Installing WordPress Manually
Before jumping into the WordPress installation process, ensure you have everything needed to set up your site properly. Having these items ready will make the process much smoother:
- A domain name – This is the web address users type to visit your site (like wpzoom.com)
- Web hosting account – You need a hosting space where your WordPress files will live. Most hosting providers offer packages specifically designed for WordPress sites.
- FTP access or File Manager – You’ll need a way to transfer files to your hosting server. FileZilla is a popular free FTP client, or you can use your hosting provider’s built-in File Manager through cPanel.
- Basic technical comfort – No coding skills are required, but you should feel comfortable downloading files, creating databases, and following technical instructions.
- Latest WordPress package – You’ll download this directly from WordPress.org during the installation.
- Database access – Your hosting account must allow you to create MySQL databases. Most web hosts provide tools like phpMyAdmin or the MySQL Database Wizard to handle this task.
- About 15 minutes of time – The actual process is quick once you’ve gathered everything needed.
Each of these elements plays a key role in the installation process. If your hosting provider offers 24/7 support, you might want to have their contact information handy in case you run into any issues along the way.
Are you ready with these prerequisites? Let’s continue to the first step of the installation process!
Step 1: Download the WordPress Files
The first stage to manually install WordPress involves getting the latest version of WordPress from the official source. Here’s how to do it:
Go to the Download page on WordPress.org and click the big blue “Download WordPress” button.
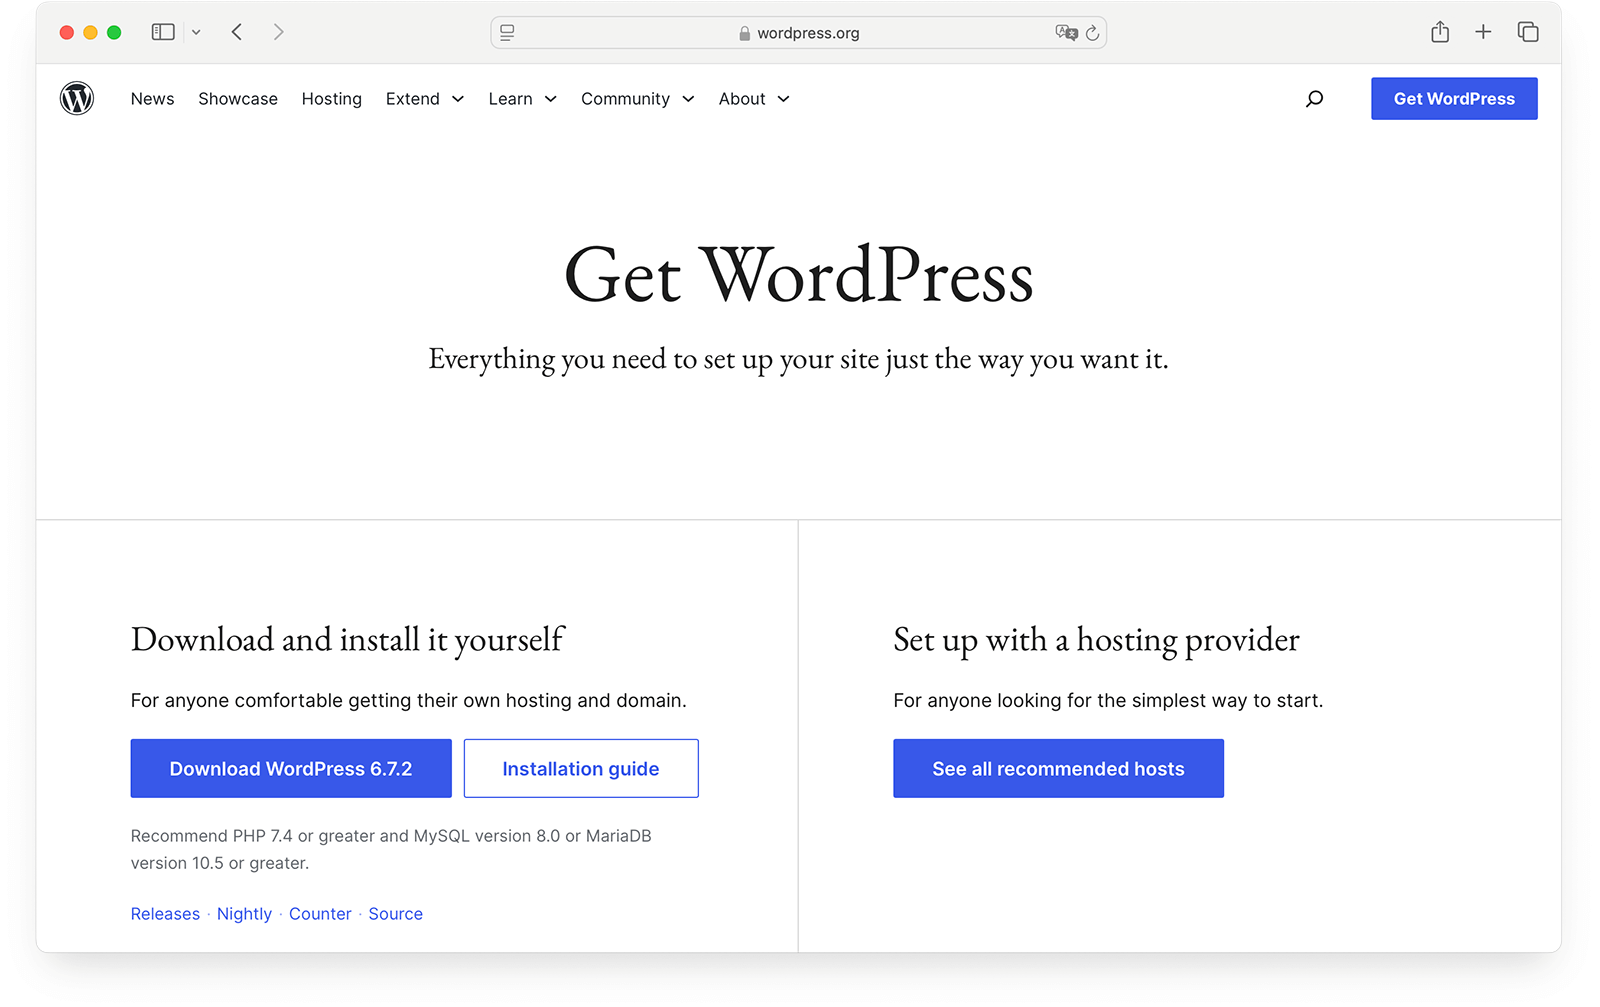

This will save the latest WordPress release to your computer as a compressed zip file (something like “wordpress-6.x.x.zip“).
The file you download contains everything needed to run WordPress, including:
- Core WordPress files
- Default themes
- Sample configuration files
- README documentation
At this point, you don’t need to modify any files. The package comes ready with all the components required to launch your WordPress site.
After downloading WordPress, you need to unpack the files before uploading them to your server.
Extract the contents using your computer’s built-in unzip tool or any extraction software:
- On Windows: Right-click the file and select “Extract All”
- On Mac: Double-click the file to unzip
- On Linux: Right-click and select “Extract” or use the terminal command:
unzip wordpress-x.x.x.zip
The extracted folder contains several files and subdirectories, each serving a specific purpose:
- /wp-admin/ – Files for the WordPress dashboard
- /wp-content/ – Your themes, plugins, and uploads will live here
- /wp-includes/ – Core WordPress system files
- Various PHP files in the root directory – These control how WordPress functions
Step 3: Upload WordPress Files to Your Web Server
With your WordPress files extracted and ready, it’s time to transfer them to your hosting account. You have several methods to choose from, depending on what works best for you:
Using FTP (File Transfer Protocol)
1. Open your FTP client (like FileZilla or Cyberduck)
2. Enter your connection details:
- Host: Your domain or server address (often ftp.yourdomain.com)
- Username: Your FTP username
- Password: Your FTP password
- Port: Usually 21 (default for FTP)
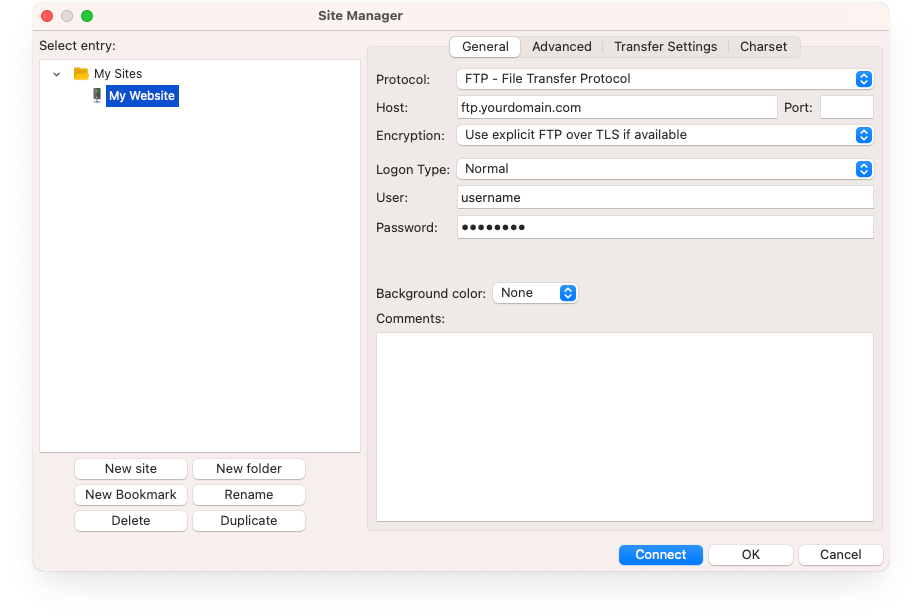

3. Connect to your server
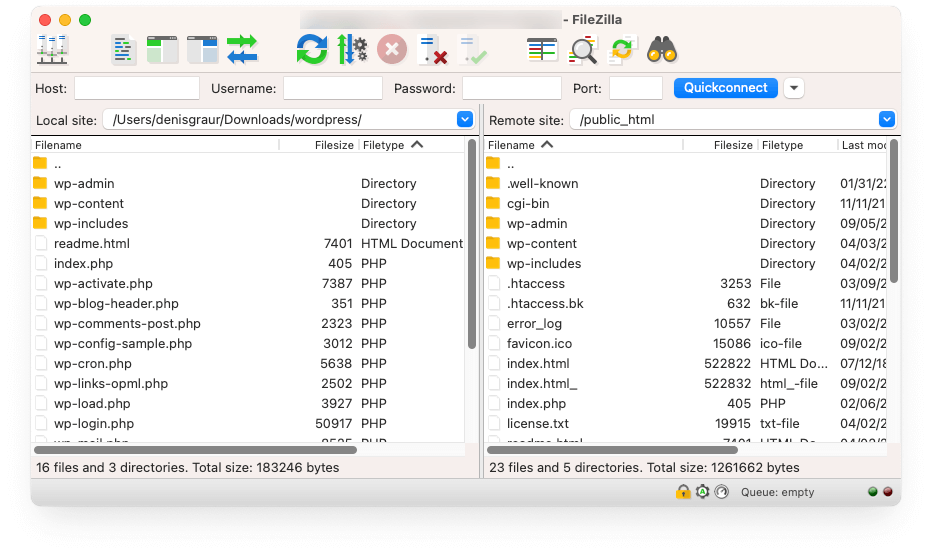
4. Navigate to your website’s root directory on the remote server (typically called “public_html,” “www,” or “httpdocs“)
5. Upload the WordPress files by dragging the contents of the extracted WordPress folder to your server. Ensure you upload the files and folders inside the WordPress folder, not the folder itself.

Using File Manager (Through cPanel)
1. Log in to your hosting cPanel
2. Find and click on “File Manager” in the Files section
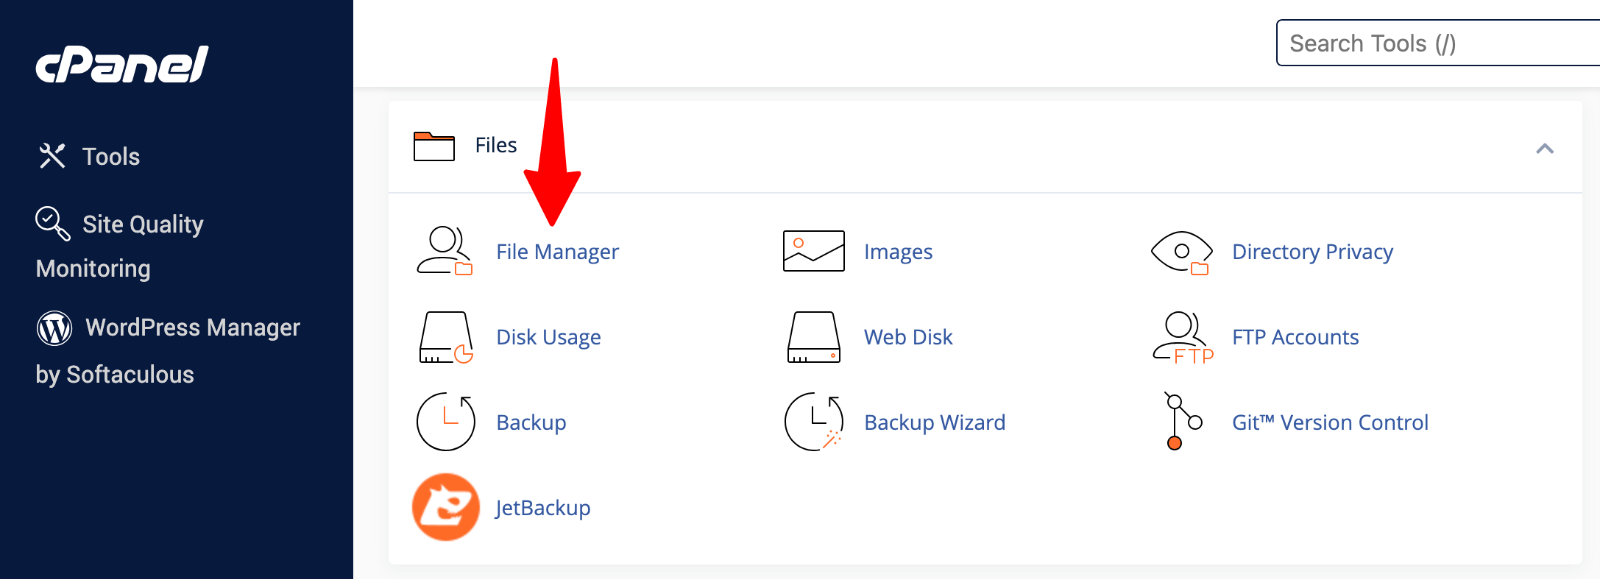 File Manager” class=”wp-image-809072″ srcset=”https://b8f4g5a7.delivery.rocketcdn.me/wp-content/uploads/2025/03/cpanel-file-manager.png 1600w, https://b8f4g5a7.delivery.rocketcdn.me/wp-content/uploads/2025/03/cpanel-file-manager-734×266.png 734w, https://b8f4g5a7.delivery.rocketcdn.me/wp-content/uploads/2025/03/cpanel-file-manager-1024×371.png 1024w, https://b8f4g5a7.delivery.rocketcdn.me/wp-content/uploads/2025/03/cpanel-file-manager-1536×556.png 1536w” sizes=”(max-width: 1600px) 100vw, 1600px”/>
3. Navigate to your root directory (usually public_html)
4. Click “Upload” and select all files from the WordPress folder on your computer
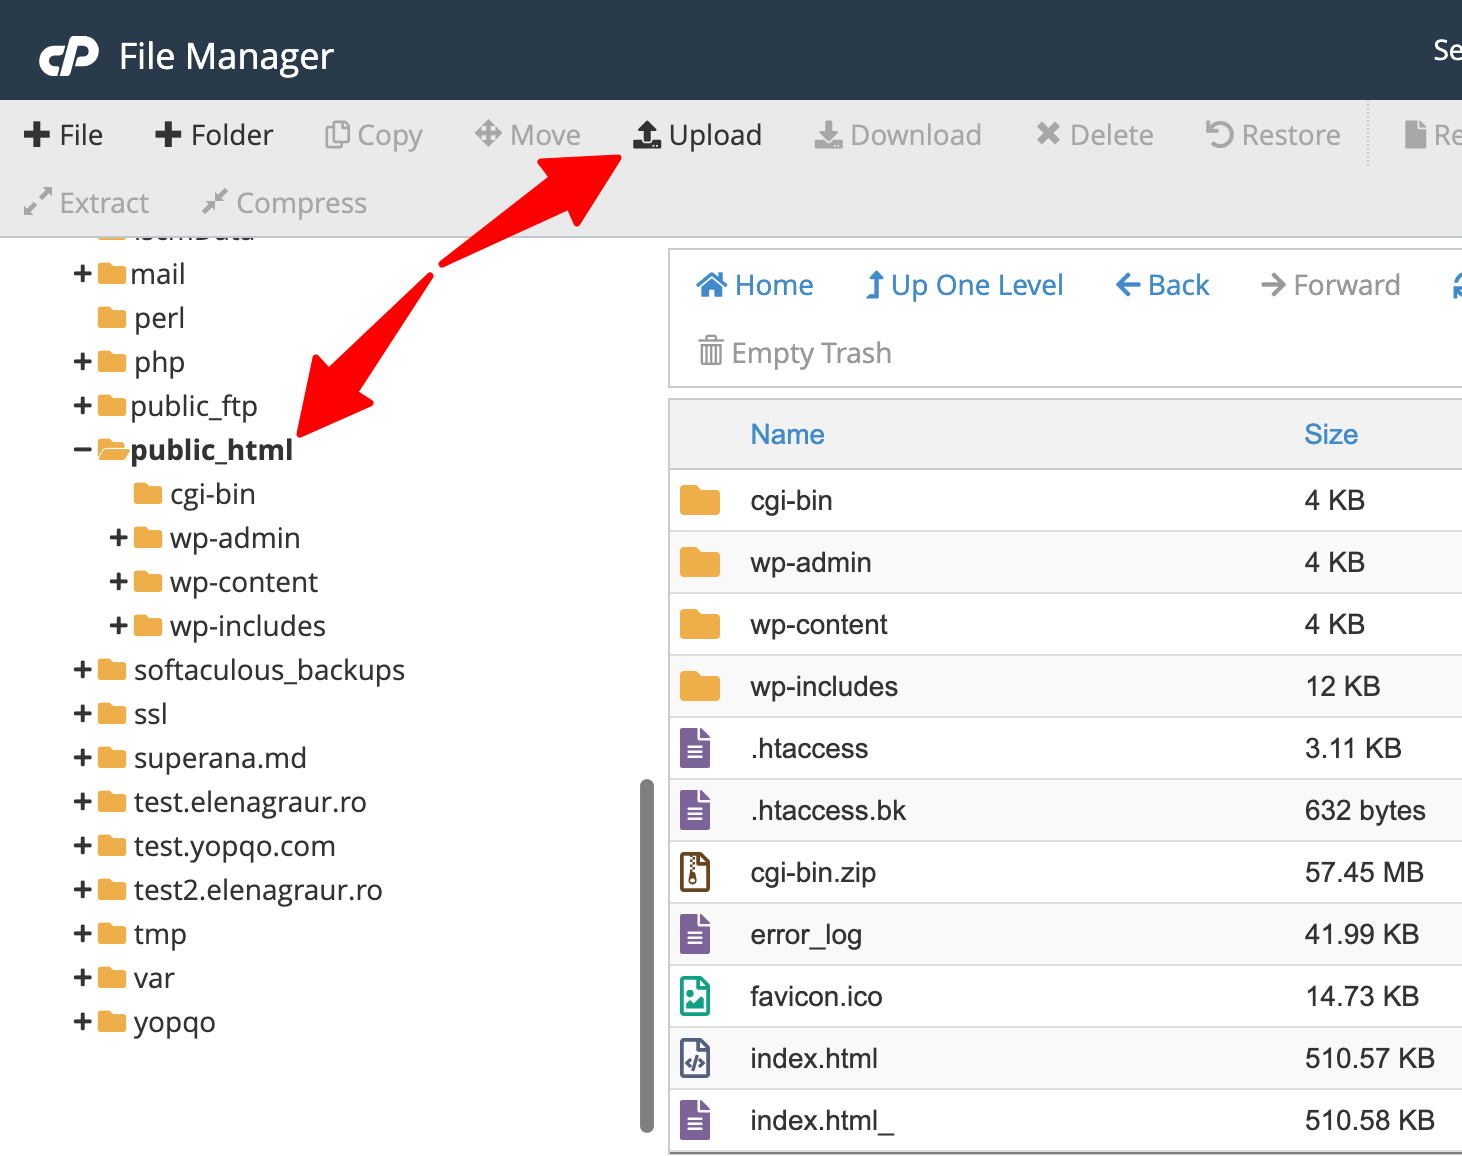

5. Wait for the upload to complete – this may take a few minutes, depending on your internet connection
Where to Upload the Files
You have two options for where to place your WordPress files:
- Root directory – If you want WordPress to run on your main domain (example.com), upload the files directly to the root folder (public_html)
- Subdirectory – If you want WordPress on a subdirectory (example.com/blog), create that folder first, then upload the WordPress files there
Upgrade Your Website with a Premium WordPress Theme
Find a theme that you love and get a 20% discount at checkout with the FLASH20 code


Step 4: Create a MySQL Database and User
WordPress stores all your content, settings, and user information in a database. Before continuing with installation, you need to create a database and user account. Most hosting providers offer tools through cPanel to make this process simple:
Using MySQL Database Wizard in cPanel
1. Log in to your hosting cPanel account
2. Find the “Databases” section and click on “MySQL Database Wizard“
 MySQL Database Wizard” class=”wp-image-809745″ style=”object-fit:cover” srcset=”https://b8f4g5a7.delivery.rocketcdn.me/wp-content/uploads/2024/04/cpanel-mysql-database-wizard.png 1600w, https://b8f4g5a7.delivery.rocketcdn.me/wp-content/uploads/2024/04/cpanel-mysql-database-wizard-734×211.png 734w, https://b8f4g5a7.delivery.rocketcdn.me/wp-content/uploads/2024/04/cpanel-mysql-database-wizard-1024×294.png 1024w, https://b8f4g5a7.delivery.rocketcdn.me/wp-content/uploads/2024/04/cpanel-mysql-database-wizard-1536×442.png 1536w” sizes=”(max-width: 1600px) 100vw, 1600px”/>
3. Enter a name for your database (some hosts require adding a prefix) and click “Next Step“
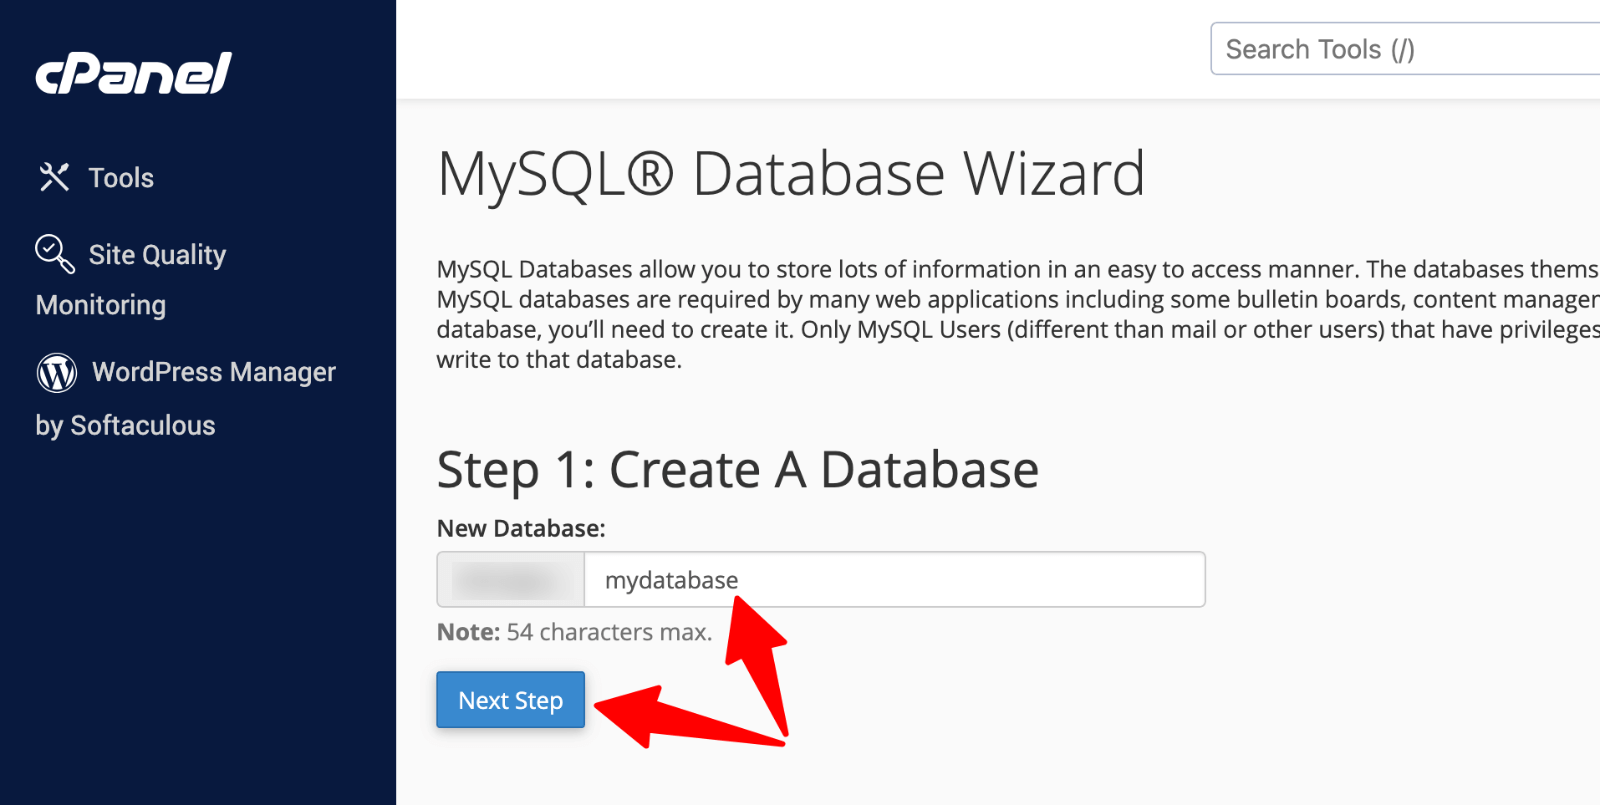 Database name” srcset=”https://b8f4g5a7.delivery.rocketcdn.me/wp-content/uploads/2024/04/cpanel-database-name.png 1600w, https://b8f4g5a7.delivery.rocketcdn.me/wp-content/uploads/2024/04/cpanel-database-name-734×369.png 734w, https://b8f4g5a7.delivery.rocketcdn.me/wp-content/uploads/2024/04/cpanel-database-name-1024×515.png 1024w, https://b8f4g5a7.delivery.rocketcdn.me/wp-content/uploads/2024/04/cpanel-database-name-1536×773.png 1536w” sizes=”(max-width: 1600px) 100vw, 1600px”/>
4. Enter a username (different from your cPanel login) and create a strong password (use the generator if available).
Note: Write down these details! You’ll need them later.
Click “Create User“.
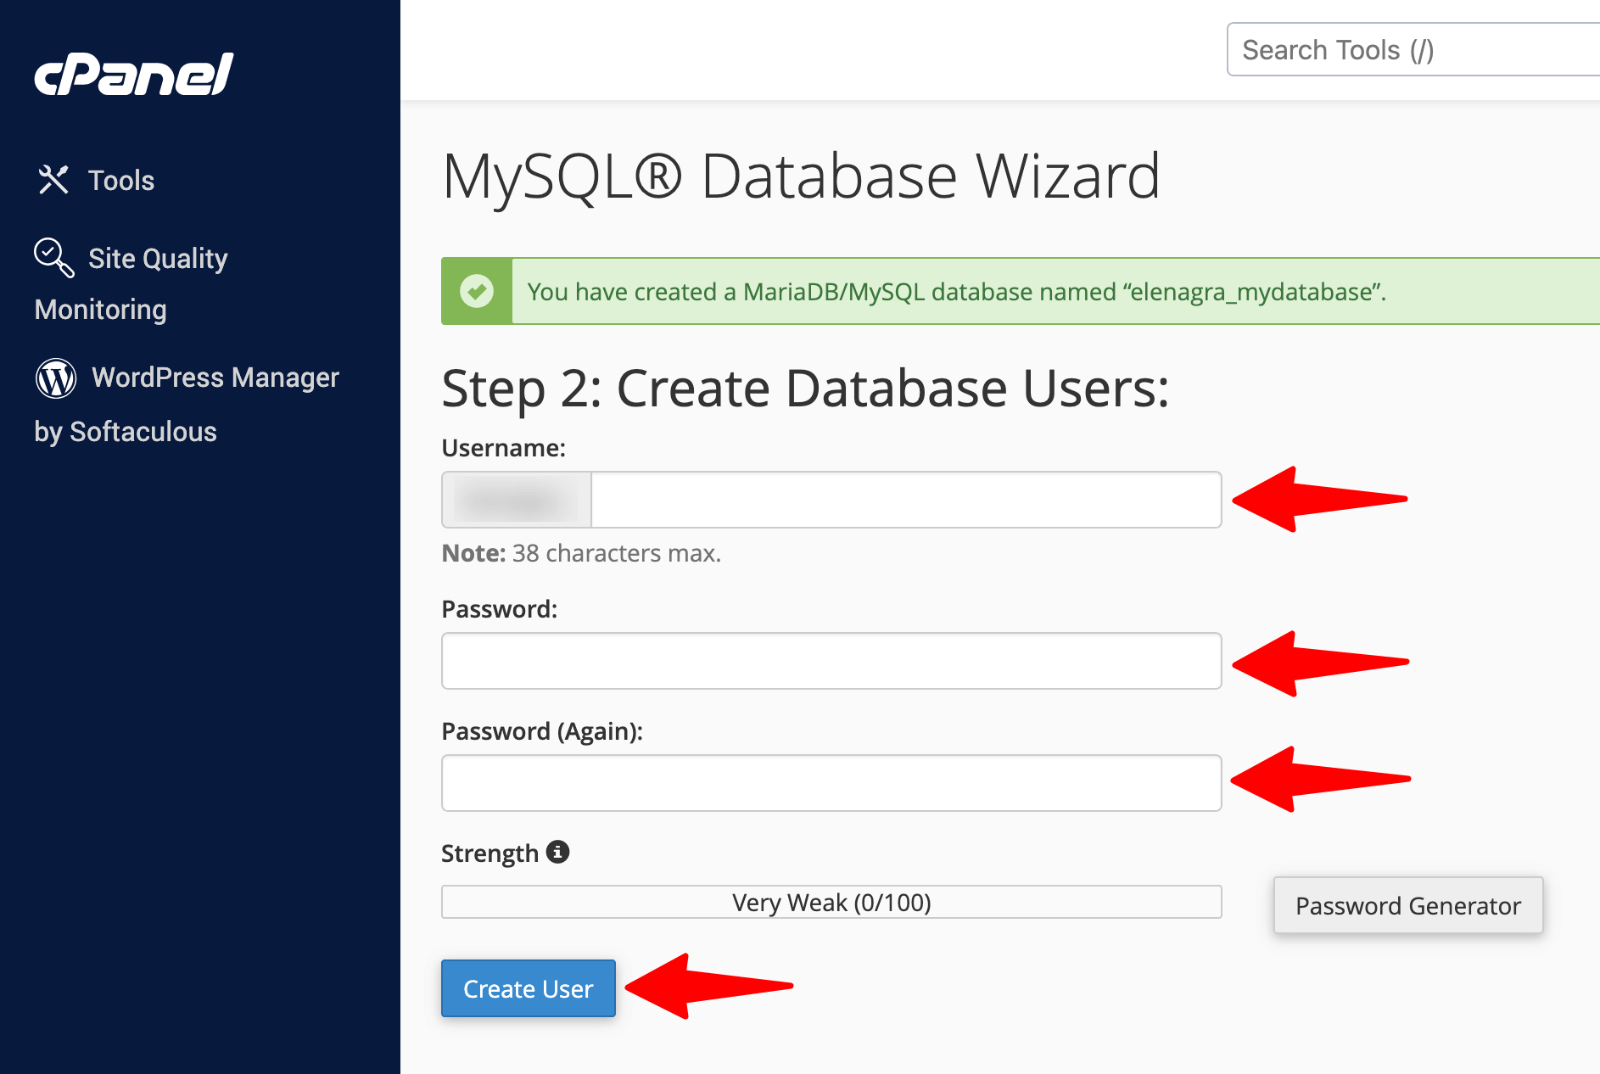 Database name” srcset=”https://b8f4g5a7.delivery.rocketcdn.me/wp-content/uploads/2024/04/cpanel-database-user.png 1600w, https://b8f4g5a7.delivery.rocketcdn.me/wp-content/uploads/2024/04/cpanel-database-user-734×493.png 734w, https://b8f4g5a7.delivery.rocketcdn.me/wp-content/uploads/2024/04/cpanel-database-user-1024×687.png 1024w, https://b8f4g5a7.delivery.rocketcdn.me/wp-content/uploads/2024/04/cpanel-database-user-1536×1031.png 1536w” sizes=”(max-width: 1600px) 100vw, 1600px”/>
5. Check the box for “All Privileges“. This allows your WordPress installation to create tables and manage data.
Click “Next Step“.
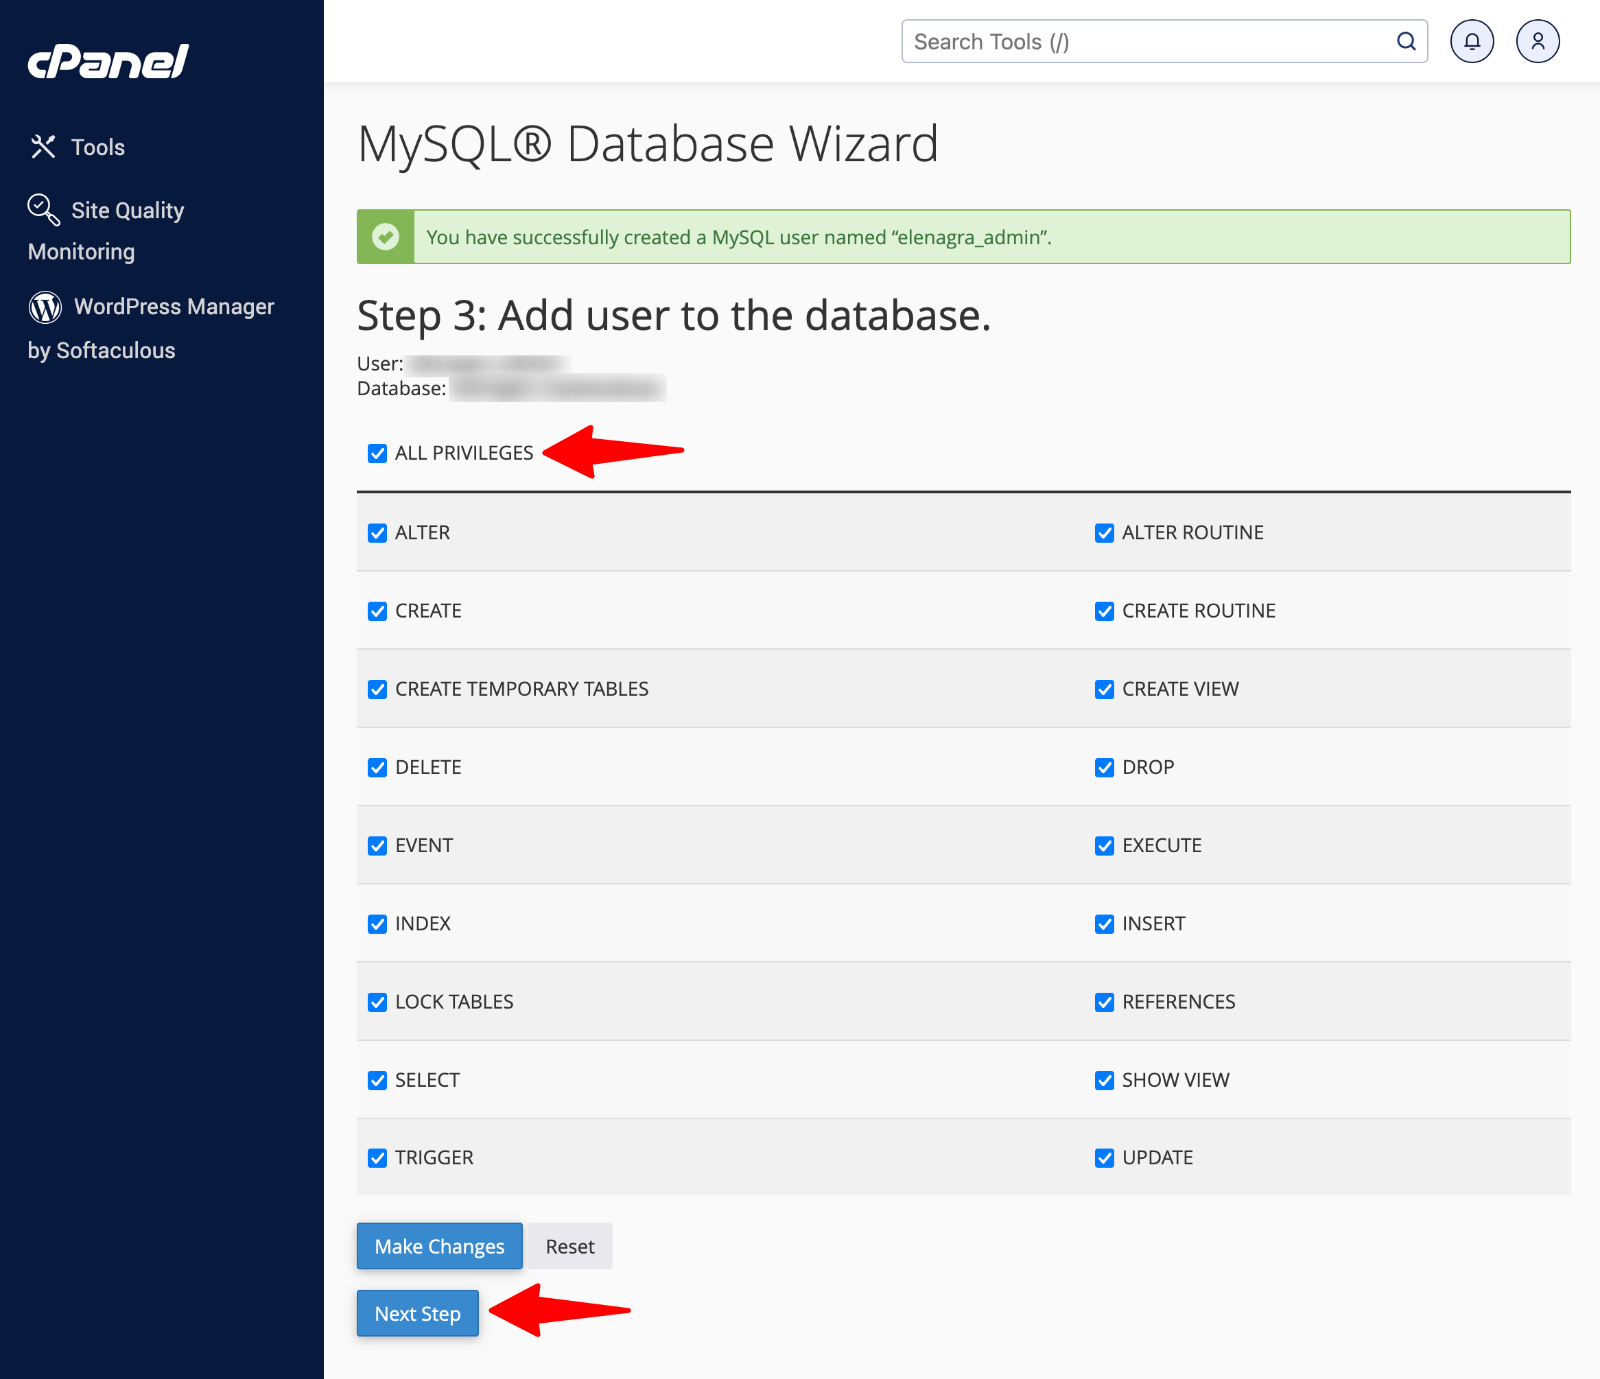 Database priveleges” class=”wp-image-809749″ srcset=”https://b8f4g5a7.delivery.rocketcdn.me/wp-content/uploads/2024/04/cpanel-database-priveleges.png 1600w, https://b8f4g5a7.delivery.rocketcdn.me/wp-content/uploads/2024/04/cpanel-database-priveleges-734×633.png 734w, https://b8f4g5a7.delivery.rocketcdn.me/wp-content/uploads/2024/04/cpanel-database-priveleges-1024×883.png 1024w, https://b8f4g5a7.delivery.rocketcdn.me/wp-content/uploads/2024/04/cpanel-database-priveleges-1536×1324.png 1536w” sizes=”(max-width: 1600px) 100vw, 1600px”/>
6. Complete the process and save your database information:
- Database Name
- Username
- Password
- Database Host (usually “localhost”)
Checking Your Database
After creating the database, you can verify it was set up correctly:
1. Return to cPanel.
2. Click on “phpMyAdmin“.
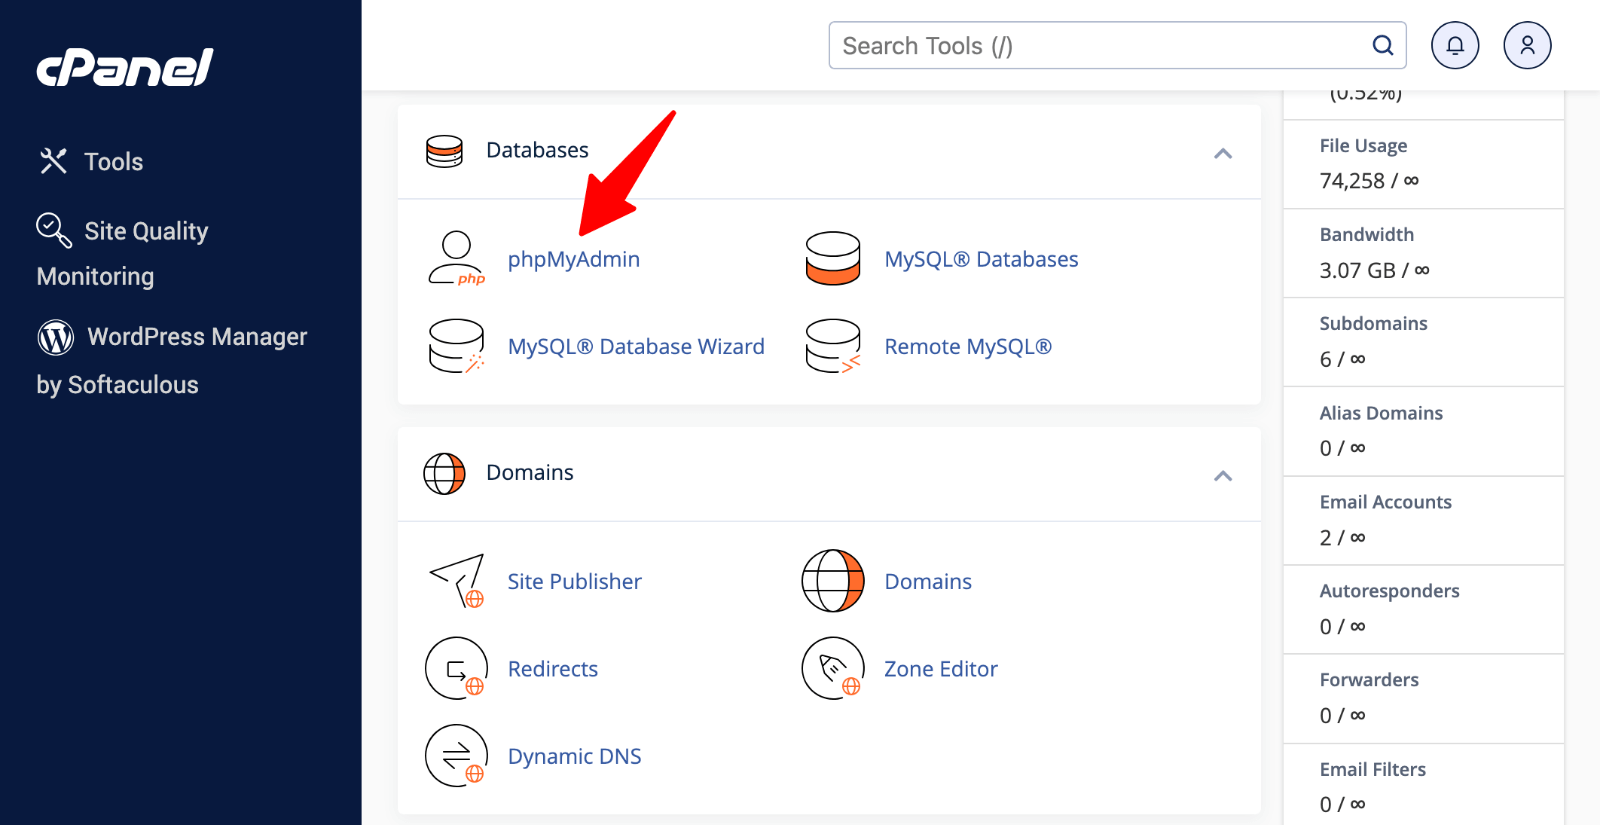 phpMyAdmin” srcset=”https://b8f4g5a7.delivery.rocketcdn.me/wp-content/uploads/2024/03/cpanel-phpmyadmin-1.png 1600w, https://b8f4g5a7.delivery.rocketcdn.me/wp-content/uploads/2024/03/cpanel-phpmyadmin-1-734×378.png 734w, https://b8f4g5a7.delivery.rocketcdn.me/wp-content/uploads/2024/03/cpanel-phpmyadmin-1-1024×528.png 1024w, https://b8f4g5a7.delivery.rocketcdn.me/wp-content/uploads/2024/03/cpanel-phpmyadmin-1-1536×792.png 1536w” sizes=”(max-width: 1600px) 100vw, 1600px”/>
3. Look for your new database in the left sidebar.
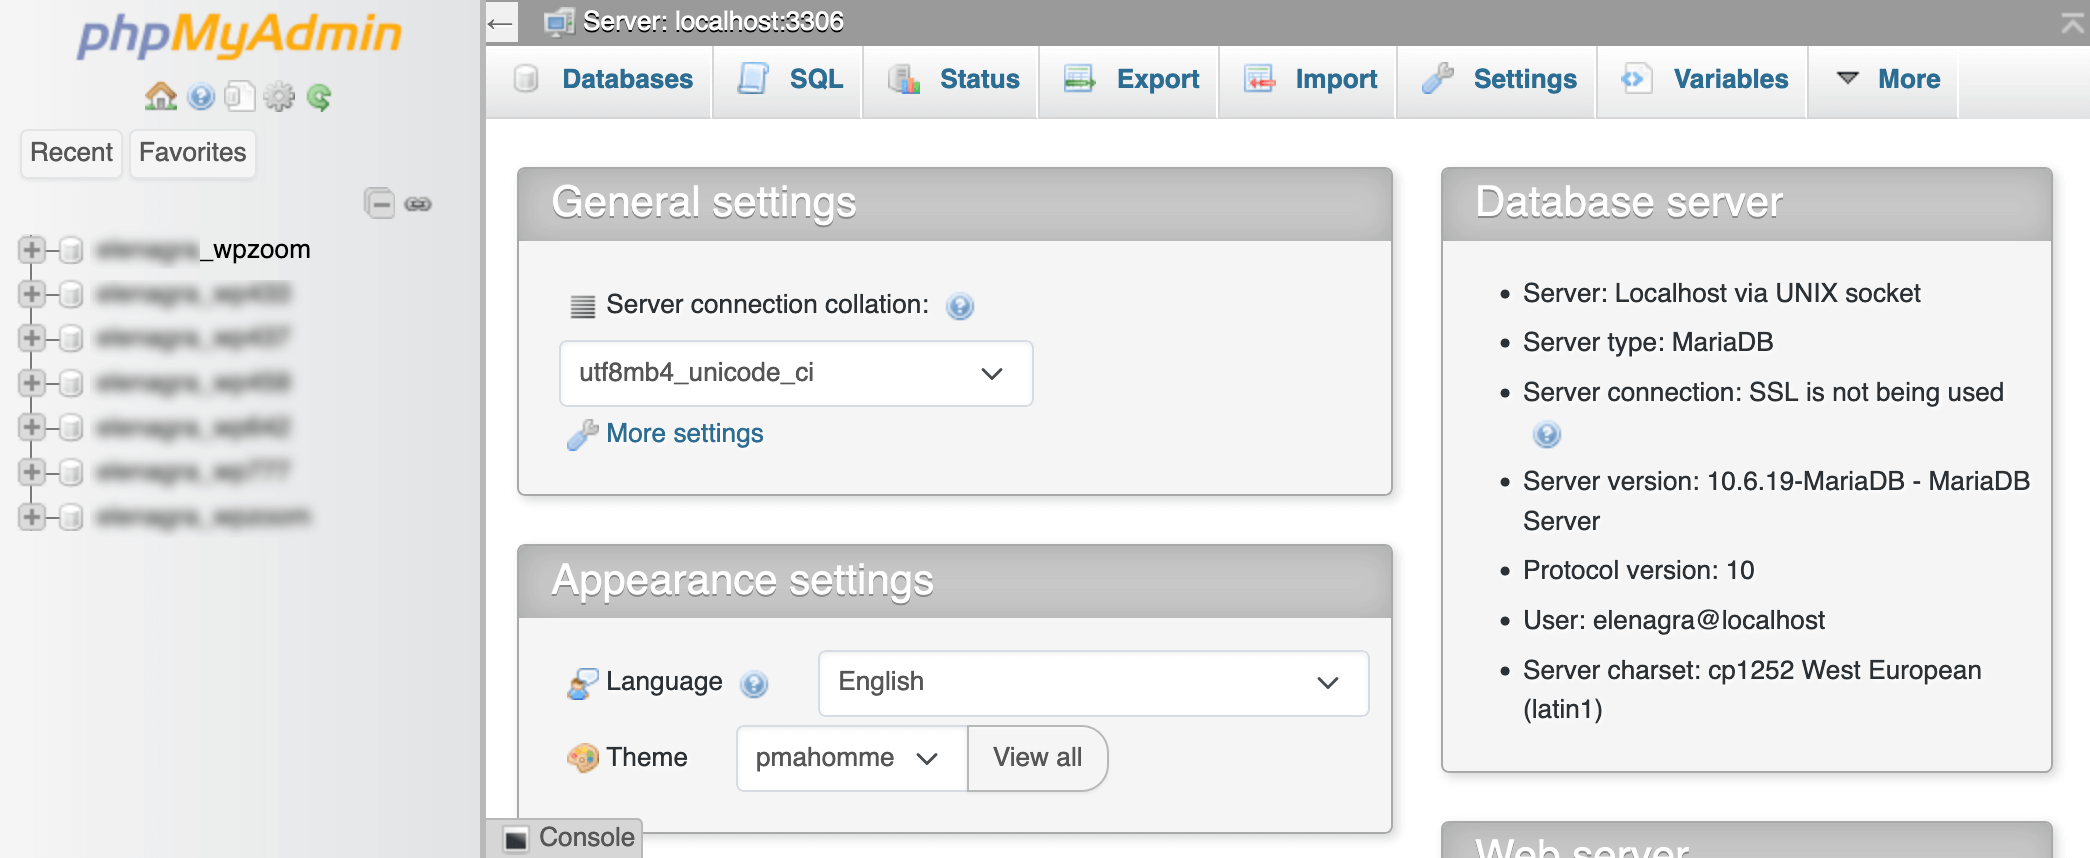

4. The database should exist but be empty (WordPress will create the tables during installation).
Upgrade Your Website with a Premium WordPress Theme
Find a theme that you love and get a 20% discount at checkout with the FLASH20 code


Step 6: Run the WordPress Installation Script
Now you’ll run the WordPress installation wizard, which will guide you through setting up your database connection and creating your configuration file.
1. Open your web browser and visit your website URL to automatically start the installation process:
- If you installed in the root directory: https://yourdomain.com
- If you installed in a subdirectory: https://yourdomain.com/subfolder
If the installation doesn’t start automatically, try accessing it directly:
- Root directory: https://yourdomain.com/wp-admin/install.php
- Subdirectory: https://yourdomain.com/subfolder/wp-admin/install.php
2. The first screen you’ll see asks you to select your preferred language:
Choose your language from the dropdown menu and click “Continue” to proceed
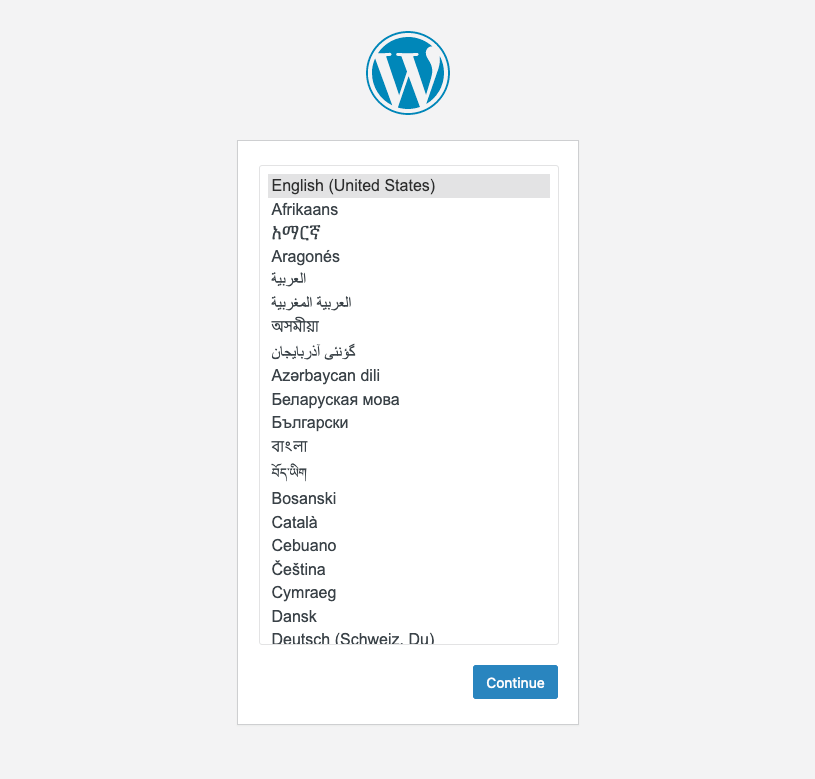

3. You’ll now see a welcome screen explaining what information you’ll need. Click “Let’s go!” to proceed to the database setup page.
4. Enter your database information:
- Database Name: Enter the name you created in Step 4
- Username: Enter your database username
- Password: Enter your database password
- Database Host: Usually “localhost” (use what your host provides)
- Table Prefix: Leave as “wp_” or change it for security (especially if you have multiple WordPress installations in the same database)
Click “Submit” to connect to your database.
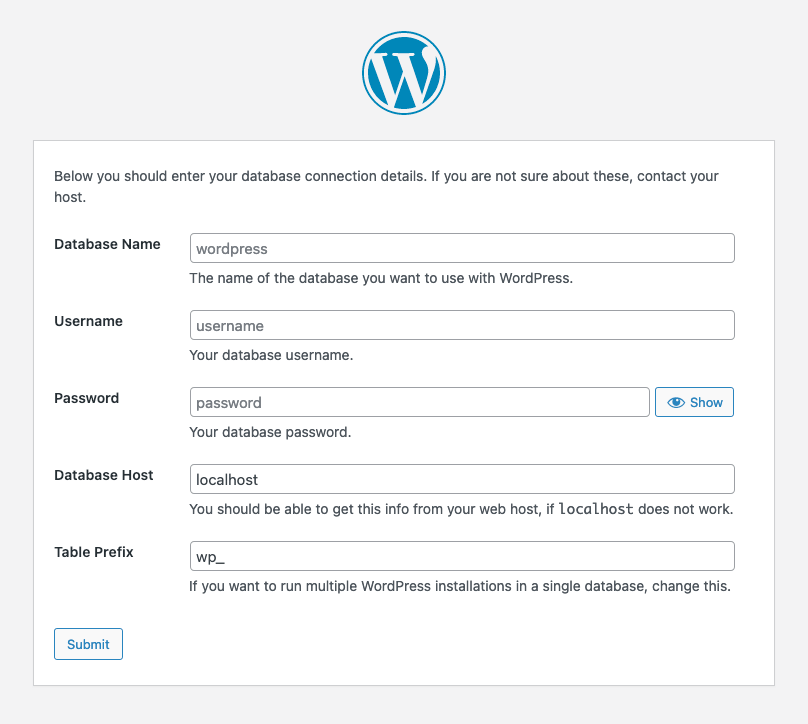

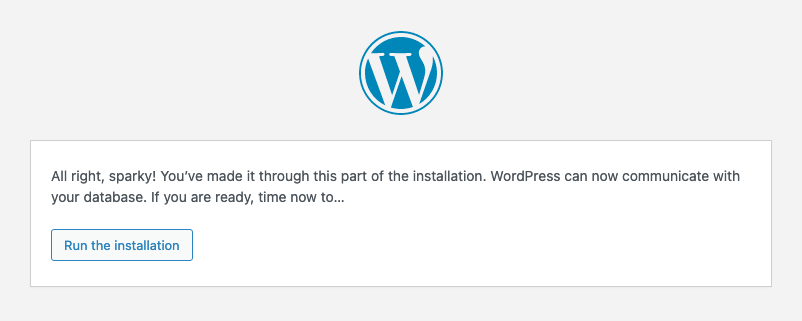
WordPress will test the connection to your database:
- If successful, you’ll see a “Success!” message.
- If unsuccessful, double-check your database details and try again.
6. Click “Run the installation” to continue.

Step 7: Complete the WordPress Installation
You’ve reached the final step! Now it’s time to set up your WordPress site information and create your administrator account.
On the welcome screen, you’ll need to fill out several essential fields:
- Site Title – Enter the name of your website. Don’t worry. You can change this later if needed.
- Username – Create a username for the administrator account. For security reasons, avoid using “admin” as your username, as this is commonly targeted in brute force attacks.
- Password – WordPress will suggest a strong password, or you can create your own. The strength indicator will show how secure your password is. Make sure to use a strong password with a mix of letters, numbers, and special characters.
- Your Email – Enter a valid email address. This is where you’ll receive notifications about your site and can recover your password if needed.
- Search Engine Visibility – Check this box if you want to discourage search engines from indexing your site. You might want to do this while developing your site, then uncheck it when you’re ready to launch.
Click the “Install WordPress” button at the bottom of the page.
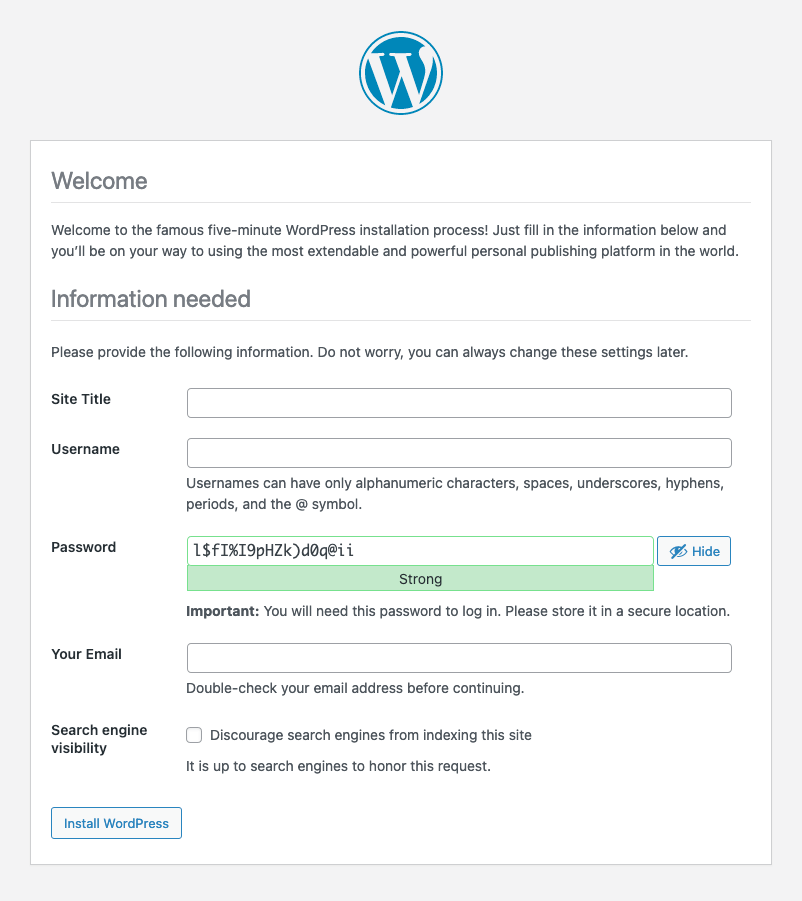

Wait a few seconds while the WordPress installer creates all necessary database tables.
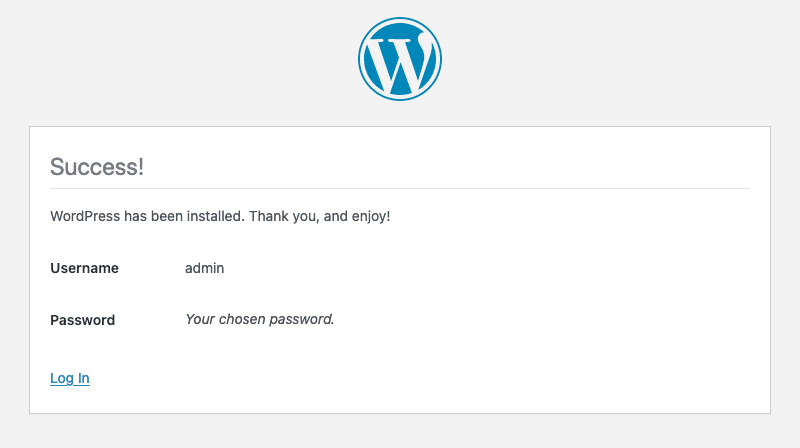
Success! You’ll see a confirmation screen that says “WordPress has been installed. Thank you, and enjoy!”
Logging In to Your Dashboard
After installation is completed:
1. Click the “Log In” button on the success page.

2. Enter your username and password on the login screen and click “Log In” to access your WordPress dashboard.
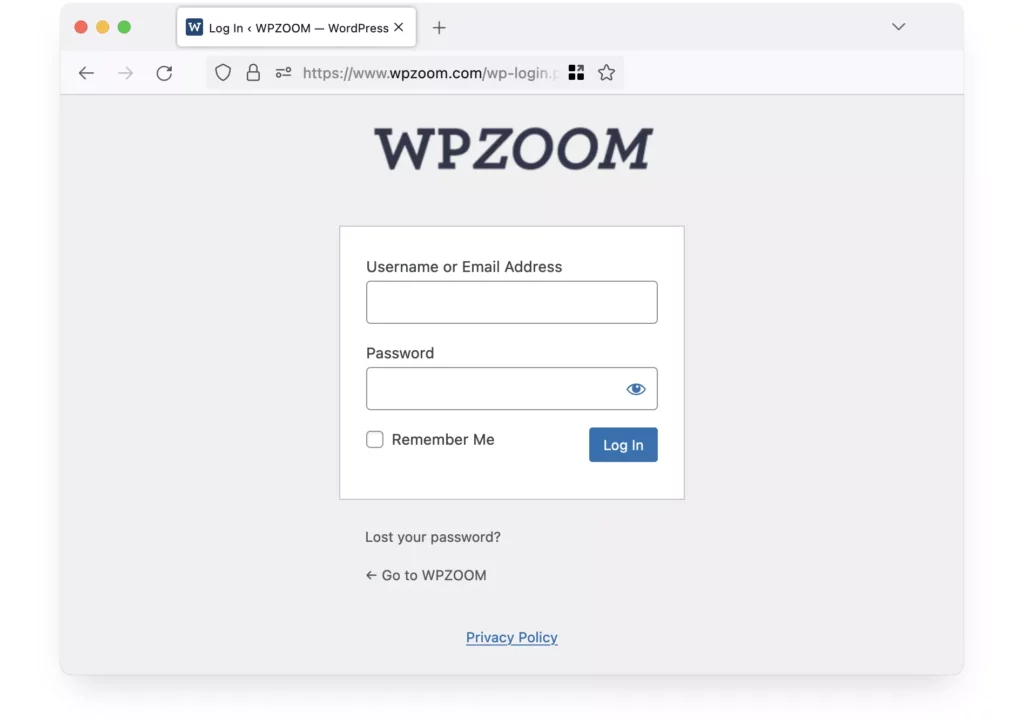

Congratulations! You now have a fresh WordPress installation running on your server.
Common WordPress Installation Issues and How to Fix Them
Even with careful preparation, you might encounter a few bumps during the WordPress installation process. Here are solutions for the most frequent issues:
Database Connection Errors
Problem: You see “Error establishing a database connection” when trying to access your site.
Solution:
- Verify your database name, username, and password in wp-config.php
- Confirm the database server name (usually “localhost”)
- Check if your database user has sufficient privileges
- Try resetting your database password through cPanel
Blank White Screen After Installation
Problem: Your site displays a blank white page with no errors.
Solution:
Permission Issues
Problem: WordPress can’t create directories or write files during installation.
Solution:
- Set correct file permissions: directories to 755, files to 644
- Contact your hosting provider if you need help adjusting permissions
- Check if your server has PHP safe mode enabled
WordPress Files Not Found
Problem: You get 404 errors or “Page Not Found” messages when trying to access admin pages.
Solution:
- Verify that all WordPress files were uploaded correctly
- Check if your .htaccess file needs updating
- Make sure your site URL is correctly set in your database
- Try re-uploading the /wp-admin/ folder
Missing Images or Broken Links
Problem: After installation, your site has missing images or broken links.
Solution:
- Check that your site URL is correctly set in Settings > General
- Update your permalinks by going to Settings > Permalinks and clicking “Save Changes“
- Verify that your theme is properly installed
If you face persistent issues that you can’t resolve, don’t hesitate to reach out to your hosting provider’s technical support. Most hosts that support WordPress can help you troubleshoot installation problems.
Your WordPress Site is Ready – What’s Next?
Congratulations! You’ve successfully installed WordPress manually on your web server. Ready to take your new WordPress site to the next level?
WPZOOM offers premium WordPress themes designed with both aesthetics and functionality in mind. Our themes help small businesses and WordPress enthusiasts create professional websites without coding expertise.
Browse our collection of WordPress themes to find the perfect design for your project.

