Are you thinking about migrating your WordPress site? Don’t sweat it—we’ll guide you through the whole process step by step.
Maybe your current host isn’t cutting it, or you’re rebranding your site and need to migrate a WordPress site to a new host for a fresh start. Whatever the reason, moving your website can feel like a big deal, but it doesn’t have to be stressful. With a little prep and the right tools, you can keep everything running smoothly.
In this guide, we’ll tackle the process together, whether you prefer a hands-on approach or a quick plugin solution. Let’s make your WordPress migration easy, seamless, and even a bit fun!
Table of Contents
- Preparing for WordPress Migration
- How to Migrate a WordPress Site Manually
- Updating DNS and URLs
- Plugin-Based WordPress Website Migration: An Easier Alternative
- Post-Migration Checklist and Tips
- Troubleshooting Common Issues
Preparing for WordPress Migration
Before diving into the nitty-gritty of how to migrate a WordPress site, let’s set the stage. Preparation is everything!
- First, create a full backup of your WordPress site. This ensures that if anything goes sideways, you’ve got a safety net.
- Deactivate plugins you don’t use and get rid of old themes. Trust me, you’ll thank yourself when the migration moves quicker because there’s less clutter to deal with.
- Got your new hosting account set up and ready to move your WordPress site to a new host? Awesome! Double-check you have all the credentials—things like FTP login info and database access. You’ll also want to make sure your new hosting environment meets the requirements for WordPress.
- Finally, let’s talk checklists. Jot down every step you need to take: backup completed? Check. Credentials ready? Check. Hosting account set? Check! A solid plan keeps things smooth and stress-free.
With everything ready, we’re all set to tackle the actual migration. Don’t worry—we’ll go through it step by step in the next section. Let’s get to work!
How to Migrate a WordPress Site Manually
Learning how to manually migrate a WordPress site might sound intimidating, but think of it as following a recipe. With clear steps, the right tools, and a bit of patience, you’ll have your site moved in no time. Let’s break it down into bite-sized tasks.
1. Export Your Database
Your database stores all your posts, pages, settings, and more.
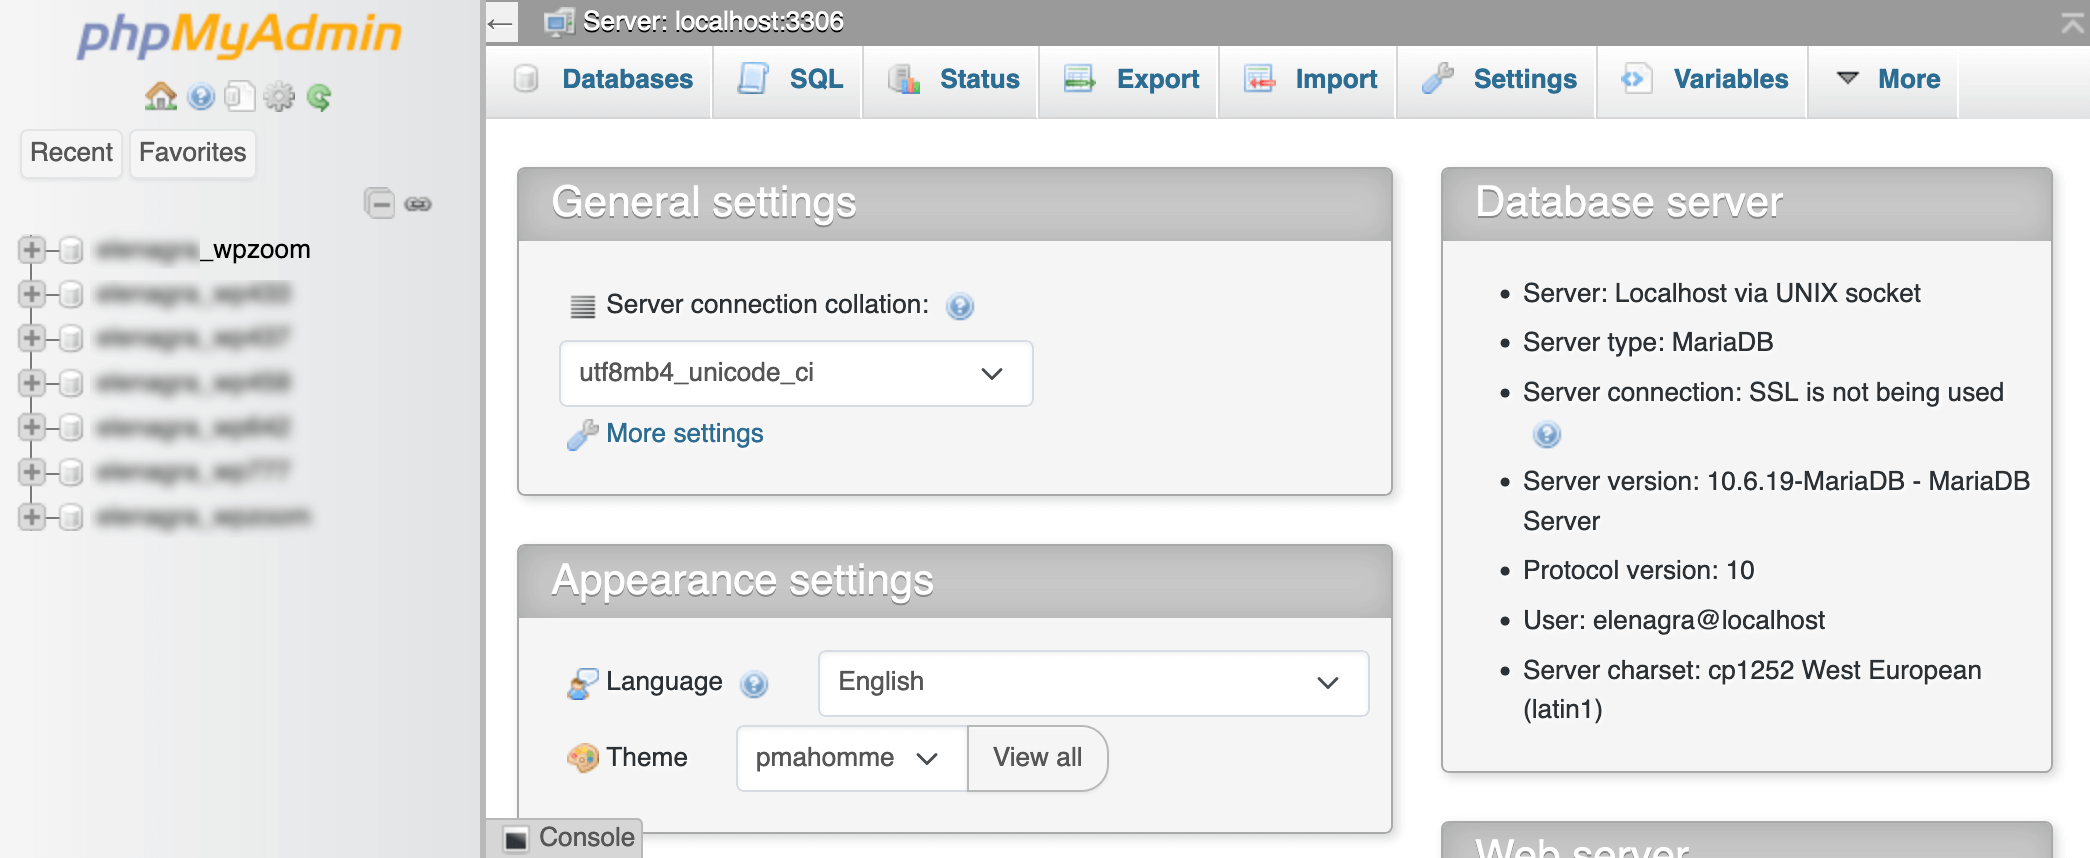
- Log in to your hosting dashboard and open phpMyAdmin (most hosts have it under “Databases”).


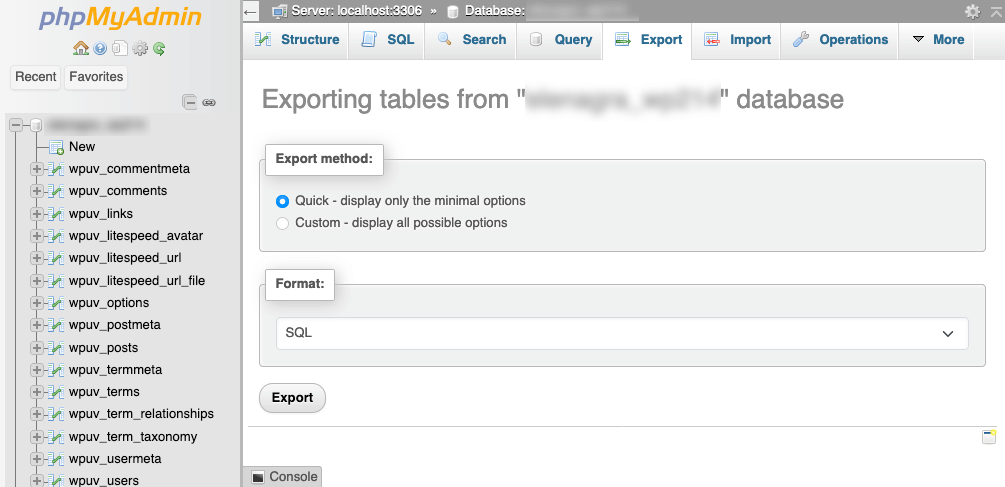
- Select your WordPress database from the left-hand menu.


- Click on the Export tab at the top.
- Choose “Quick” as the export method and make sure the format is set to SQL.
- Hit the Export button, and voilà! Your database will download as a file.


Pro tip: Zip that file for safekeeping. It’s your site’s brain, so handle it with care.
2. Download WordPress Files
Now it’s time to gather your WordPress files—the themes, plugins, and media that make your site unique.
- Fire up an FTP client like FileZilla (don’t have one? It’s free and easy to set up!).
- Enter your FTP details (host, username, password, and port—your hosting provider can help if you’re unsure).
- Once connected, locate your public_html folder (that’s your WordPress home).
- Select all files inside, right-click, and choose Download.
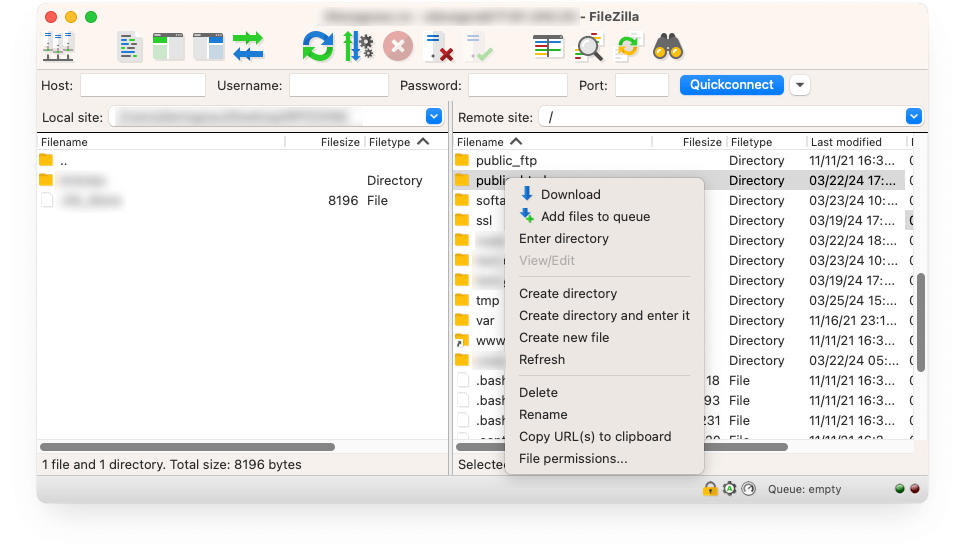

This might take a little while, depending on the size of your site. Once downloaded, zip the files for easy uploading later.
3. Create a New Database on the New Host
Your WordPress site needs a fresh database on its new host. This is where all that exported data will live.
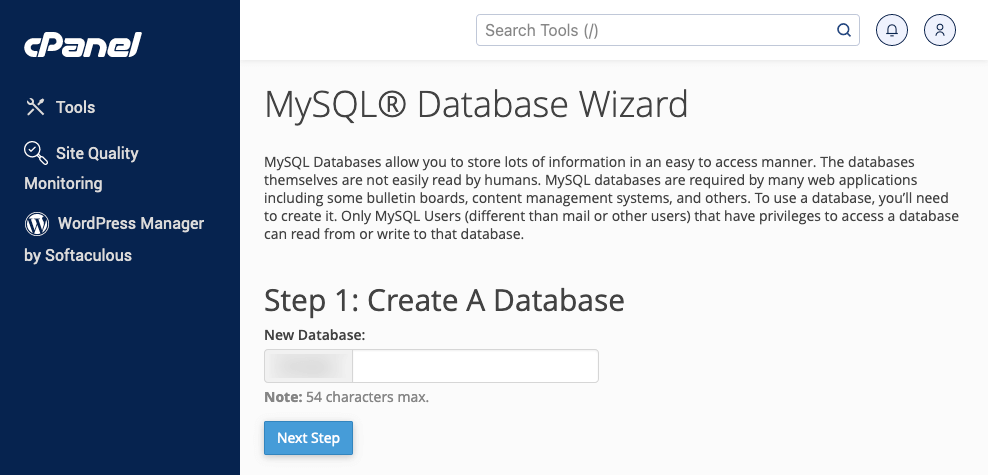
- Log in to your new hosting account and find the Database Management section (usually in cPanel or a similar dashboard).
- Create a new database and name it something unique—something easy to remember.


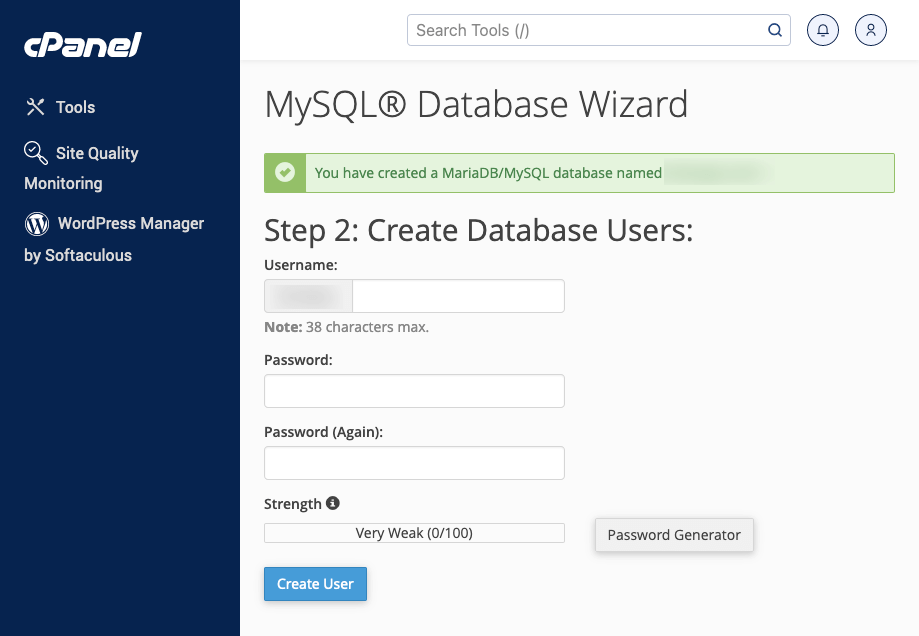
- Add a new user, assign it to the database, and give it full privileges.


Keep the database name, username, and password handy—you’ll need these for the next step.
4. Upload Files to the New Host
Your WordPress files are all packed up and ready for the move! Let’s get them to their new home.
- Connect to your new host using FTP, just like you did with your old host.
- Navigate to the public_html folder (or its equivalent on the new server).
- If there are pre-installed files, delete them to avoid conflicts.
- Upload your zipped WordPress files. Once uploaded, extract them directly in the public_html folder.
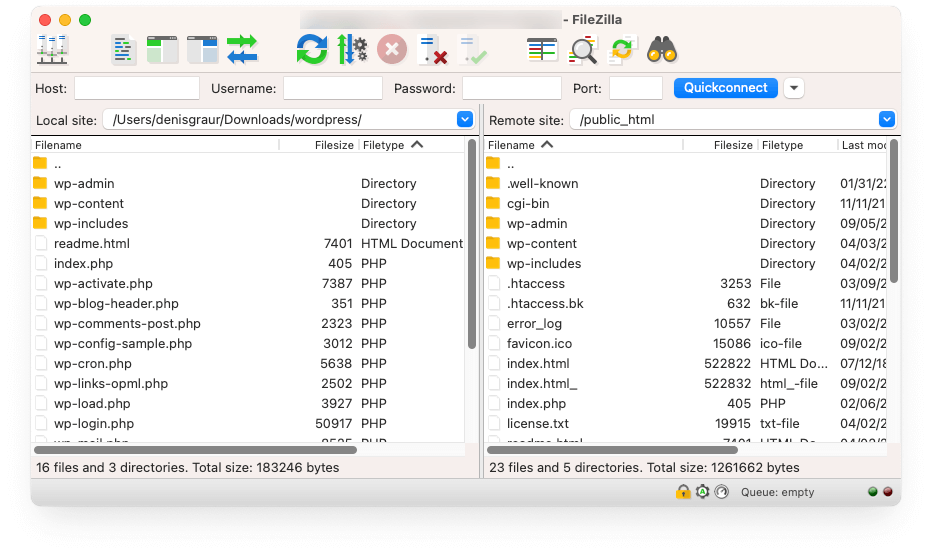

And that’s it! Your site files are officially on the new server. Now, it’s time to link them up with the database.
5. Configure wp-config.php
The wp-config.php file is like your site’s control panel—it tells WordPress how to connect to the database.
1. Locate the wp-config.php file in your uploaded WordPress files.
2. Open it in a text editor (Notepad++ works great).
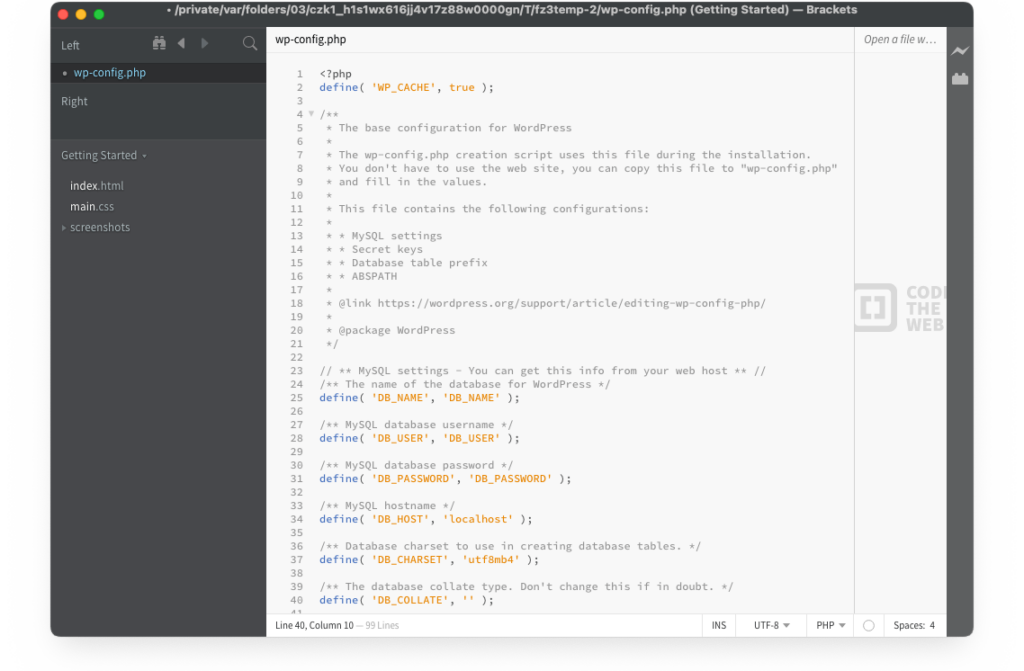

3. Update the following lines with your new database details:
define('DB_NAME', 'your_new_database_name');
define('DB_USER', 'your_new_username');
define('DB_PASSWORD', 'your_new_password');
define('DB_HOST', 'localhost');
4. Save the file and re-upload it to the server.
This step connects your files to the database, making your site functional on the new host.
You’ve officially completed the heavy lifting! Your site is now on its new server. Next, we’ll update DNS and URLs to make it live for the world to see.
Upgrade Your Website with a Premium WordPress Theme
Find a theme that you love and get a 20% discount at checkout with the FLASH20 code


Updating DNS and URLs
Your WordPress site is on the new host—woohoo! But hold up, we’re not quite done. Visitors won’t see the new version until you update your DNS and fix any old URLs still lurking in your database. Let’s handle this like pros.
Updating DNS Records
DNS records are like a map that tells the internet where your site lives. Since you’ve moved to a new host, we need to update the map.
- Log in to your domain registrar’s account (where you bought your domain, like GoDaddy or Namecheap).
- Find the DNS settings for your domain.
- Replace the existing nameservers with the ones provided by your new host (they should look like ns1.newhost.com and ns2.newhost.com).
- Save the changes and wait. DNS changes can take up to 48 hours to fully propagate, so don’t worry if things don’t update immediately.
Pro tip: Keep your old hosting account active during this time to avoid downtime. Visitors will seamlessly reach the site, whether they’re directed to the old or new server.
Fixing URLs
If your site’s domain hasn’t changed, you can skip this step. But if you’ve moved your WordPress site to a new domain (say, from oldsite.com to newsite.com), some cleanup is in order.
- Use a Plugin: Install Better Search Replace from your WordPress dashboard. Go to Tools > Better Search Replace, and enter your old domain in the “Search for” field and the new domain in “Replace with.” Select all tables and run the tool.
- Use a Script: If you’re comfortable with technical tools, try Search Replace DB. Upload the script, run it from your browser, and update URLs. Remember to delete the script afterward to keep your site secure.
- Manually Adjust Settings: In your WordPress dashboard, head to Settings > General and update the WordPress Address and Site Address fields.
These updates ensure all links, images, and internal resources point to your new domain, preventing broken links and missing assets.
With DNS and URLs updated, your site is live and ready for visitors!
Plugin-Based WordPress Website Migration: An Easier Alternative
If manual WordPress migration feels like too much heavy lifting, don’t worry—plugins have your back! These handy tools take care of the technical stuff so you can focus on running your site.
WordPress migration plugins make it easier to transfer a WordPress site to a new host by automating tasks like exporting databases, transferring files, and updating configurations. They’re perfect if you’re short on time or technical skills. Plus, they reduce the risk of human error.
Top WordPress Migration Plugins
If plugins sound like your jam, give one a try and make your migration process quick and stress-free. Let’s explore some top options.
- Duplicator. Duplicator creates a “package” of your site, including all files and the database. Upload the package to your new host, run the installer file, and you’re good to go. Best for sites of all sizes, but it shines with large or complex websites.
- UpdraftPlus. While primarily a backup tool, the premium version includes a migration feature. Create a backup, upload it to the new host, and restore it in a few clicks. Best for users who already rely on UpdraftPlus for backups.
- All-in-One WP Migration. This WordPress migration plugin offers a drag-and-drop solution. Export your site, drag the file into the new host’s dashboard, and let the plugin handle the rest. Best for simple, small to medium-sized sites.
While plugins make things easy, they’re not perfect. Large sites or specific server configurations might still require manual intervention. Always double-check your site after migration to ensure everything works as expected.
Post-Migration Checklist and Tips
You’ve successfully moved your WordPress site—congrats! But before you sit back and relax, let’s double-check that everything’s running smoothly.
- Verify Everything Works. Start by clicking through your website like a visitor would. Make sure menus, buttons, and internal links lead to the right places. Confirm images, videos, and downloads are loading correctly. Test contact forms, e-commerce checkouts, and any interactive features.
- Re-Enable Plugins. If you disabled caching or security plugins during migration, now’s the time to turn them back on.
- Monitor Performance. Migration can sometimes affect site speed. Use tools like PageSpeed Insights or GTmetrix to test performance and address any issues.
- Update Analytics and Search Console. If you’ve switched domains, update your Google Analytics tracking ID and resubmit your sitemap to Google Search Console. This ensures your SEO and traffic data stay intact.
- Tell Your Audience. Finally, let your visitors know the move is complete! Post an update on social media or send an email.
With these post-migration tasks checked off, your WordPress site is ready to shine.
Troubleshooting Common Issues
Sometimes, even with careful planning, hiccups happen when you migrate a WordPress site. Don’t stress—we’ve got solutions for the most common issues.
- Database Connection Errors. Seeing the dreaded “Error establishing a database connection”? This usually means something’s off in your wp-config.php file. Double-check the database name, username, and password. Make sure they match the details from your new host. We have a tutorial on how to fix this database error.
- Broken Links or Missing Media. If your images aren’t loading or links are broken, it’s likely a URL mismatch. Install the Better Search Replace plugin and replace old domain references with your new one. Don’t forget to check your uploads folder on the server to ensure all media files were transferred.
- 404 Errors. Pages not showing up as they should? Head to your WordPress dashboard, go to Settings > Permalinks, and simply click “Save Changes.” This refreshes the permalink structure and fixes most 404 errors.
These quick fixes should get your site back on track. In the rare case you’re still stuck, don’t hesitate to reach out to your hosting provider for support.
What’s Next? Transform Your Site with WPZOOM
And there you have it—your WordPress site is officially migrated! Now’s the perfect time to make your website even better with a fresh design. WPZOOM’s premium WordPress themes are crafted to help businesses like yours stand out. From sleek layouts to customizable features, we’ve got everything you need to elevate your site’s look and feel. Explore our collection and find the perfect theme for your newly migrated website. Let’s make your site shine!


