Your WordPress website needs regular updates to stay secure, fast, and compatible with the latest plugins and themes. Ignoring updates can leave your site vulnerable to hackers, slow down performance, and create conflicts that break essential features.Updating WordPress is easier than you might think.
In this guide, we’ll walk through how to update WordPress safely, covering step-by-step methods, best practices, and common troubleshooting tips.
Table of Contents
- Preparing for a WordPress Update
- How to Update a WordPress Website
- What to Do After Updating WordPress
- Enabling Automatic Updates
- Troubleshooting Common Update Issues
- Understanding WordPress Updates
- Why You Should Update WordPress
Preparing for a WordPress Update
Before updating WordPress, take a few precautions to avoid downtime, broken features, or data loss. A little preparation goes a long way in ensuring a smooth WP core update process.
- Check Your Current WordPress Version. If you’re unsure whether you’re running the latest WordPress version, you can check it quickly. Log into your WordPress dashboard and go to Dashboard > Updates. Look for the current version number at the top of the page. You’ll see a notification prompting you to update if an update is available.
- Check your PHP version compatibility. WordPress runs best on the latest PHP version (which you can update in your hosting control panel).
- Back Up Your Website. Before making any changes, create a complete site backup, including the database and files. If something goes wrong, you can restore your site in minutes.
- Check for Compatibility Issues. Not all plugins and themes are immediately compatible with new WordPress versions. Before updating:
- Review the changelog: Check the release notes of your active plugins and themes for compatibility updates.
- Look for known issues: Visit WordPress.org support forums or your theme/plugin provider’s website to see if others have reported conflicts.
- Test in a staging environment: If your site is critical for business, use a staging site (many hosts provide this feature) to test the update before applying it to your live site.
- Deactivate Caching Plugins. If you use a caching plugin like WP Rocket, deactivate it before updating. Caching can sometimes interfere with updates, causing display issues or update failures.
How to Update a WordPress Website (Step-by-Step Guides)
Now that your site is backed up and ready, let’s review how to update WordPress to the latest version. Whether you prefer a quick one-click update or a manual approach, we’ve got you covered.
Method 1: Updating WordPress via the Admin Dashboard (Easiest Method)
It is the simplest and most recommended way to update a WordPress website.
1. Log into your WordPress dashboard and go to Dashboard > Updates.
2. Click Update to version 6.7.2. WordPress will automatically download and install the latest version.
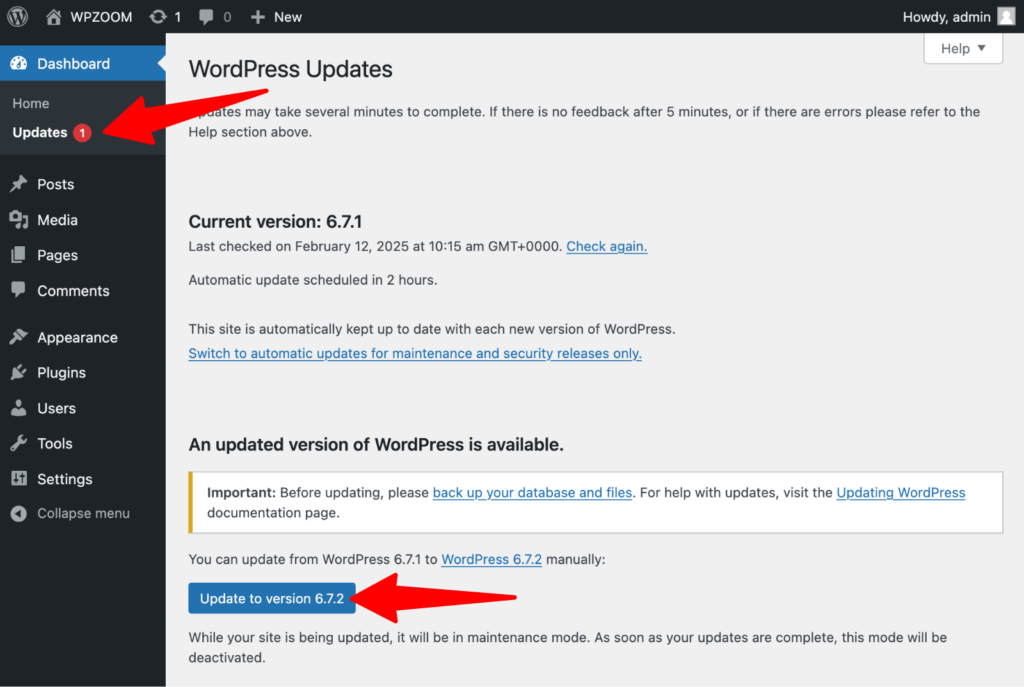

3. Wait for the update to complete. Your site may briefly go into maintenance mode, but this will disappear once the update is done.
4. Verify that everything works. Check your homepage, login page, and key functionalities to ensure nothing is broken.
Pro Tip: Clear your browser and site cache after updating to prevent visual glitches.
Method 2. Updating WordPress via FTP (For Advanced Users)
If the automatic update fails or you prefer a manual update, you can upgrade WordPress using FTP (File Transfer Protocol).
Step 1: Download the Latest WordPress Version
Visit WordPress.org and download the latest WordPress version.
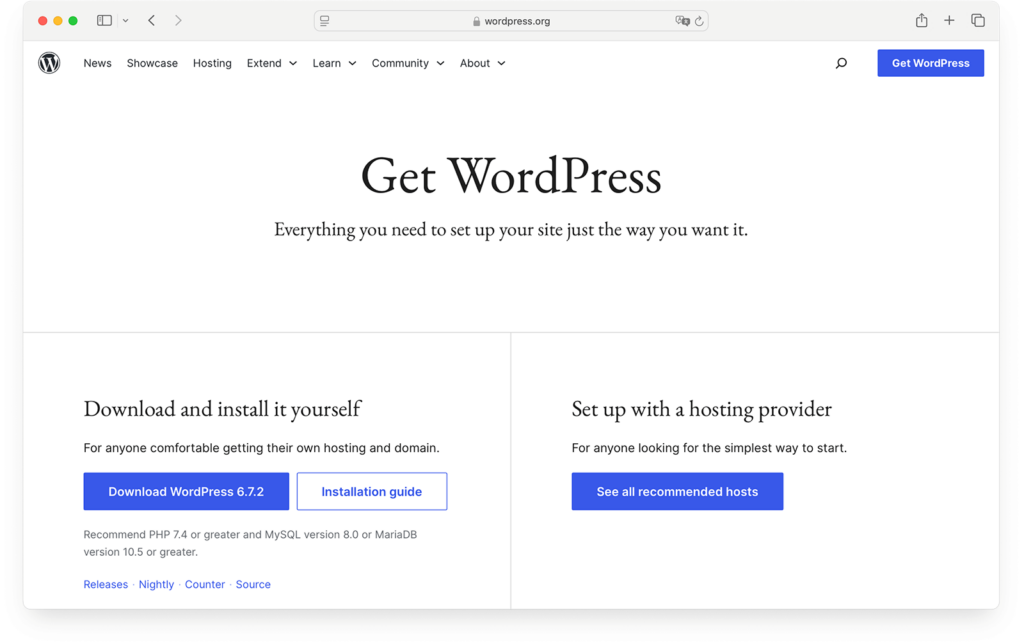

Extract the ZIP file on your computer.
Step 2: Connect to Your Website via FTP
Use an FTP client like FileZilla to access your website’s files. Log in with your FTP credentials (provided by your hosting provider).
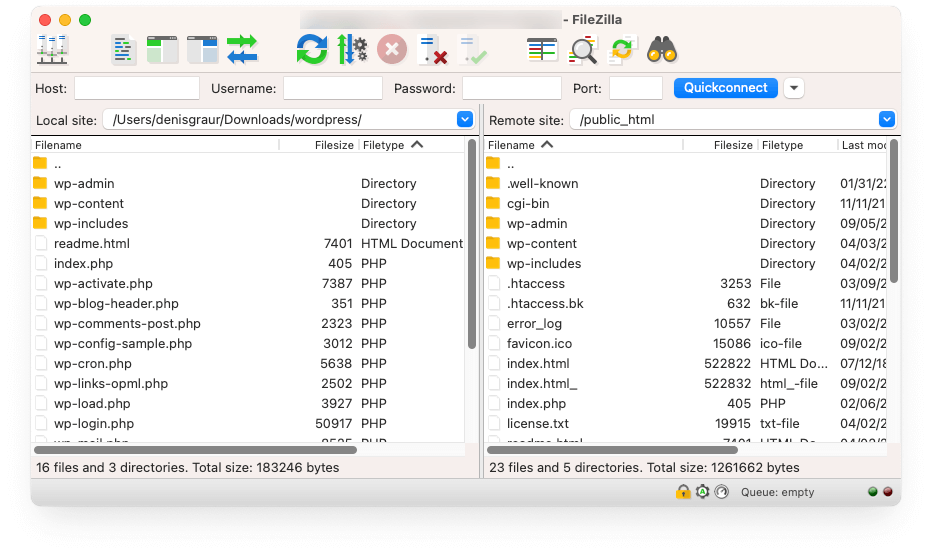

Step 3: Replace the Core WordPress Files
Locate the wp-admin and wp-includes folders in your website’s root directory.
Delete these two folders from your server.
Upload the new wp-admin and wp-includes folders from the WordPress ZIP file you extracted earlier.
Upload and overwrite the remaining files except the wp-content folder (to avoid deleting your WordPress themes and plugins).
Step 4: Check Your Website
Once the WordPress core update is complete, visit your site and log into the dashboard.
If prompted, update the WordPress database by clicking the provided link.
Upgrade Your Website with a Premium WordPress Theme
Find a theme that you love and get a 15% discount at checkout with the FLASH20 code


What to Do After Updating WordPress
Once you’ve clicked the Update Now button and the process is complete, your job isn’t done yet. A few post-update checks will ensure that everything is running smoothly and that your site is stable. Here’s what to do next:
- Verify the Update Was Successful. After the update, look for the success message confirming that WordPress has been updated. You can also check your current version by going to the Dashboard > Updates to ensure the update was applied correctly.
- Update the Database (If Required). Sometimes, WordPress updates include database changes. If prompted with an update notice, click the Update Database button to apply the necessary changes. This ensures compatibility with the new WordPress version.
- Reactivate Caching and Performance Plugins. If you disabled caching plugins before the update, reactivate them. This helps restore site speed and prevents performance issues.
- Check for Plugin and Theme Updates. After a WordPress core update, many plugin and theme developers release updates to ensure compatibility. Go to the Dashboard > Updates and install any pending plugin or theme updates.
- Test Your Website Functionality. To avoid surprises, do a quick site review: browse through key pages and test interactive elements, check forms, e-commerce features, and login functionality, and ensure widgets, menus, and layouts display correctly.
- Perform a Final Backup. If everything works fine, create a fresh backup of your updated website. This way, if future updates cause issues, you’ll have a stable version to restore.
- Monitor for Issues Over Time. Sometimes, problems don’t appear immediately. Over the next few days, monitor website speed and performance, error logs in your hosting dashboard, and visitor reports about broken pages or missing features.
Enabling Automatic Updates
Automatic updates help keep your site secure by applying critical security patches without manual intervention. They also save time by reducing website maintenance tasks. However, they can sometimes cause compatibility issues with plugins or themes, leading to unexpected errors.
If your site depends on multiple plugins, manually testing updates may be safer. For the best balance, enable automatic updates for security fixes while keeping regular backups to restore your site if needed.
If you want WordPress to update itself automatically, you can enable automatic updates for core files:
Option 1: Enable via the WordPress Admin Dashboard
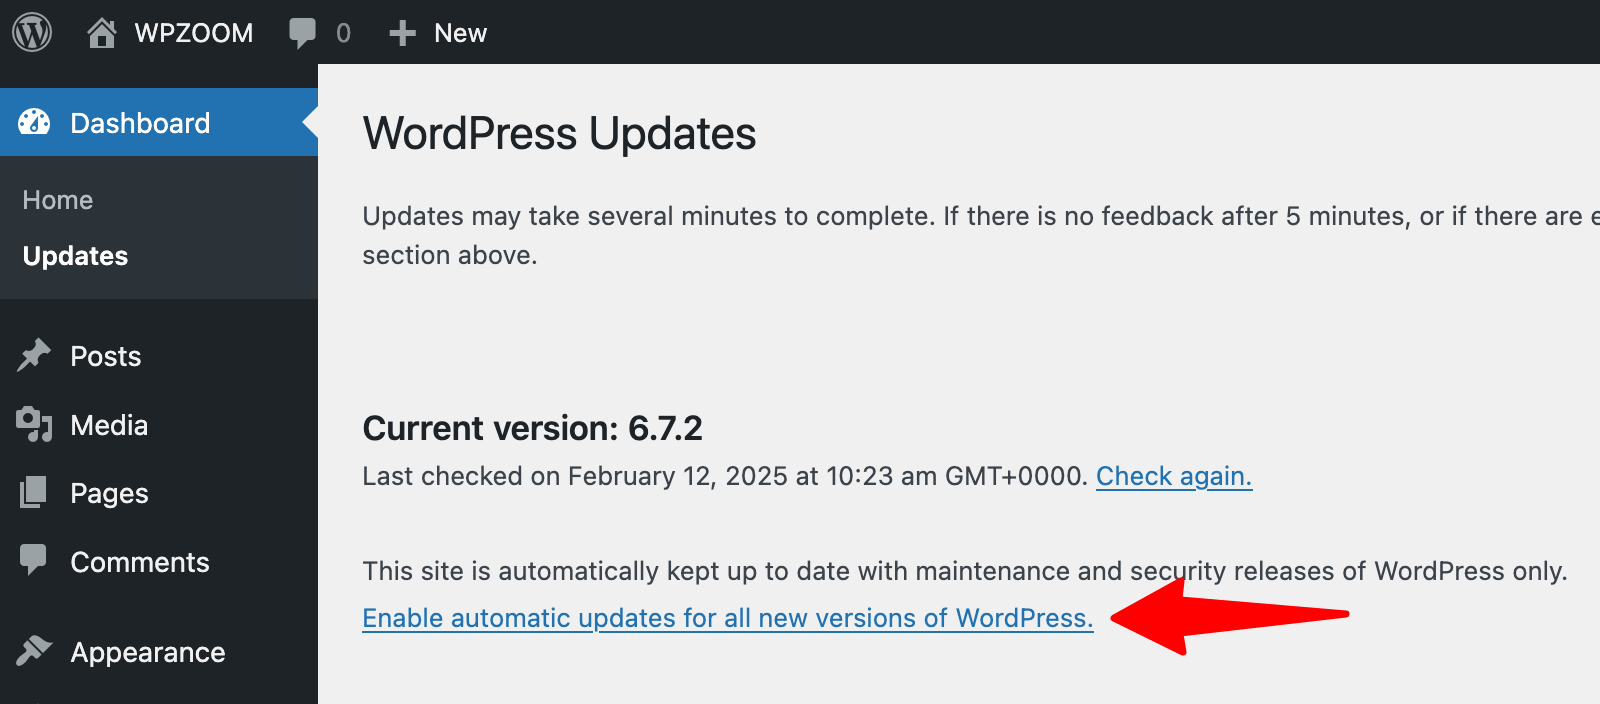
Go to Dashboard > Updates.
Click Enable automatic updates for all new versions of WordPress.

Option 2: Enable via wp-config.php
Connect to your website via FTP or cPanel File Manager.
Open the wp-config.php file in a text editor.
Add the following line:
define('WP_AUTO_UPDATE_CORE', true);Save and upload the file.
Troubleshooting Common Update Issues
Even when following best practices, updates don’t always go smoothly. If something goes wrong after updating WordPress, don’t panic! You can fix most issues with a few simple steps.
Website Stuck in Maintenance Mode
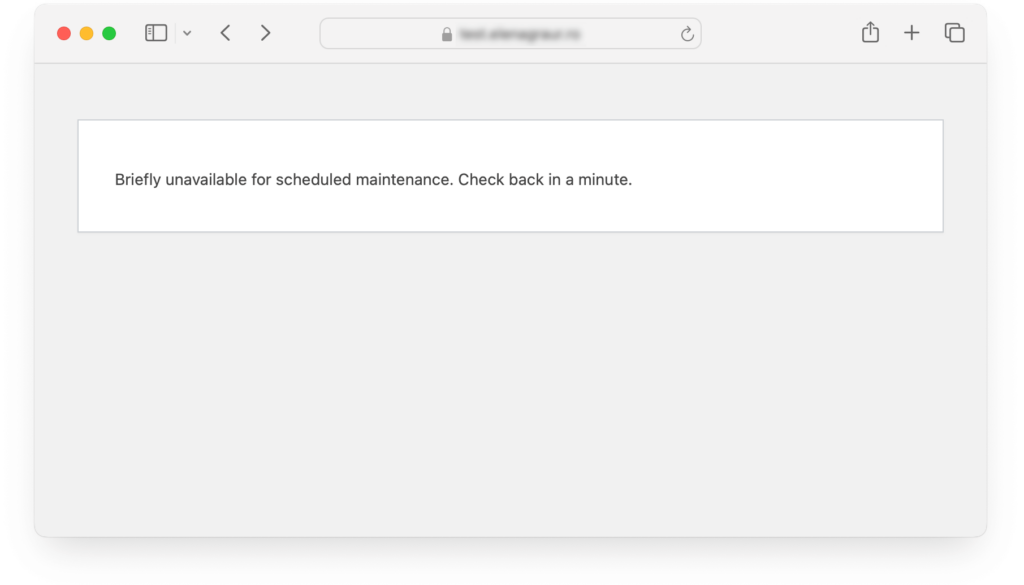
If your site displays a “Briefly unavailable for scheduled maintenance” message, the update process was interrupted.

How to fix it:
1. Access your website files via FTP or cPanel.
2. Locate the .maintenance file in your root directory.
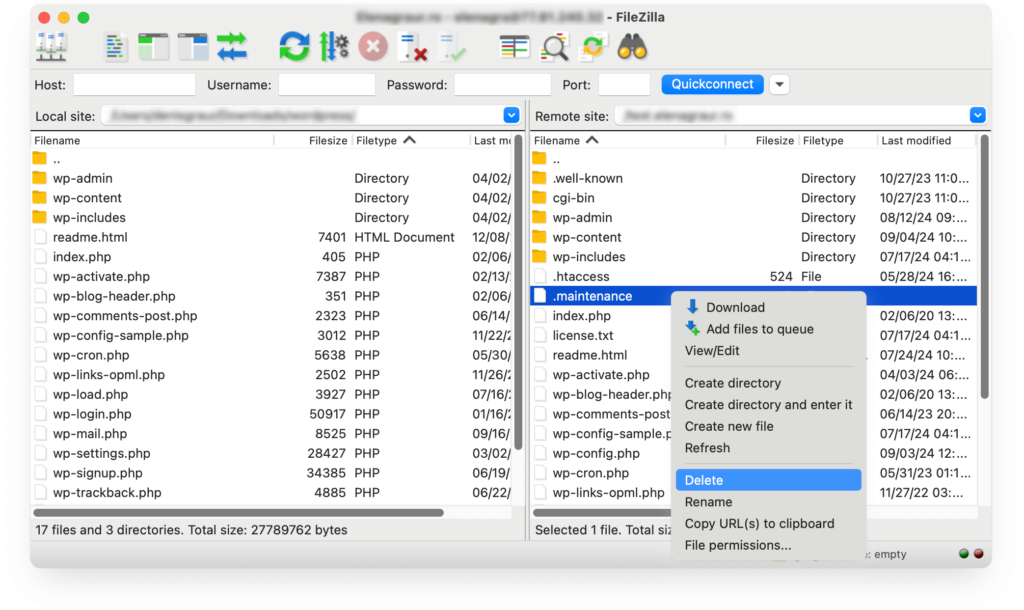

3. Delete the .maintenance file.
4. Refresh your website. Your site should be back to normal.
Pro Tip: To prevent this issue, avoid refreshing the page or navigating away while an update is in progress.
Plugin or Theme Conflicts
After updating WordPress, you might notice broken layouts, missing features, or errors. Incompatible themes or plugins often cause these.
How to fix it:
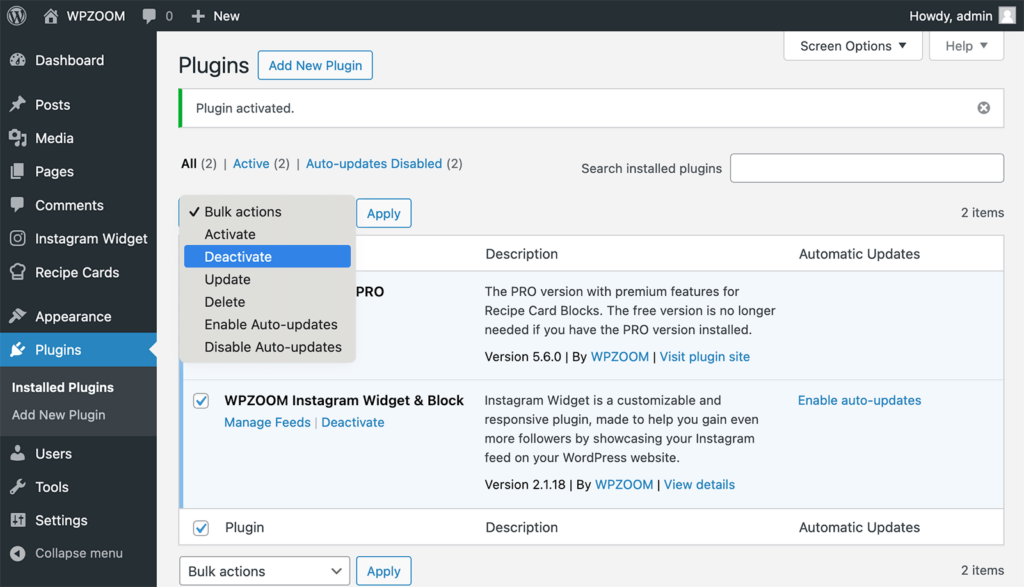
1. Disable all plugins. Go to Plugins > Installed Plugins, select all the plugins, click Bulk actions, select Deactivate and click Apply to deactivate them.

If you can’t access your dashboard, turn off plugins via FTP by renaming the wp-content/plugins folder.
2. Reactivate plugins one by one. It helps identify which plugin is causing the conflict.
3. Switch to a default theme. Go to Appearance > Themes and temporarily activate a default WordPress theme (e.g., Twenty Twenty-Five) to see if the issue is theme-related.
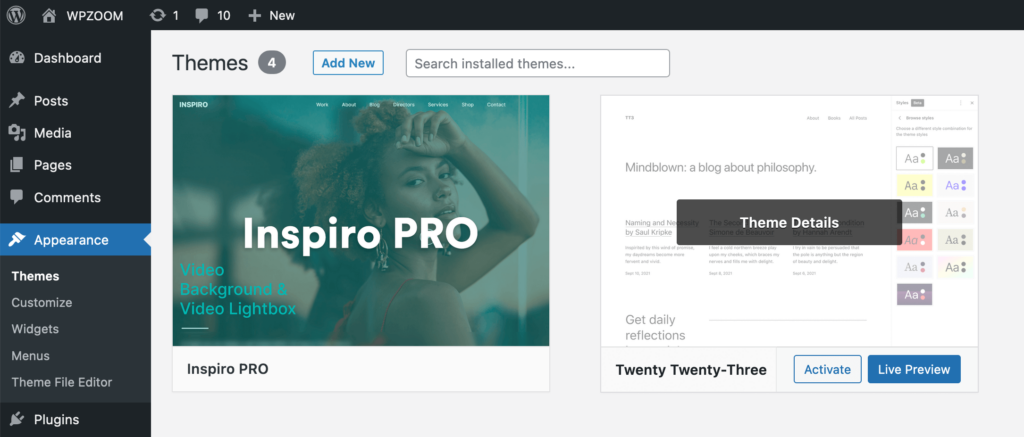

4. Check for updates. Visit your theme and plugin provider’s website to see if an update is available to fix compatibility issues.
Pro Tip: If you haven’t updated a plugin in a long time, consider finding an alternative that supports the latest WordPress version.
What If You Need to Downgrade WordPress?
If troubleshooting doesn’t fix the problem, you may need to downgrade WordPress to a previous version until a fix is available.
Option 1: Restore a WordPress Backup (Easiest Method)
If you’ve backed up your site before updating, the quickest way to downgrade is by restoring your backup. Many hosting providers offer one-click restores, or you can use backup plugins.
Option 2: Manually Downgrade WordPress (For Advanced Users)
If plugins aren’t an option, you can manually downgrade using FTP:
- Download the older version from WordPress.org releases.
- Connect to your site via FTP using FileZilla.
- Delete the wp-admin and wp-includes folders on your server.
- Upload the corresponding folders from the older WordPress version.
- Do not replace the wp-content folder to keep your themes and plugins intact.
- Log into your WordPress dashboard and update the database if prompted.
Pro Tip: Downgrading should only be a temporary fix. Always check for updates from your theme and plugin developers before rolling back to an older version.
Understanding WordPress Updates
WordPress releases different types of updates, each serving a specific purpose. Knowing the difference between major and minor updates helps you decide how to handle them.
WordPress Major Updates (e.g., WordPress 6.0, 6.1, 6.2)
- Introduce new features, design changes, and functionality improvements.
- May include significant code changes that affect themes and plugins.
- Require testing before applying to a live site.
WordPress Minor Updates (e.g., 6.1.1, 6.1.2)
- Focus on security patches, bug fixes, and minor performance improvements.
- Applied automatically by default to protect your site.
- Have minimal impact on themes and plugins.
Pro Tip: Enable automatic updates for minor versions while manually reviewing major updates to avoid potential conflicts.
How Often Does WordPress Release Updates?
- Major updates typically roll out 2-3 times per year.
- Minor updates happen as needed (often monthly) to address website security risks or bugs.
- WordPress regularly announces updates on WordPress.org.
Pro Tip: Follow the WordPress release schedule to stay informed about upcoming updates.
Why You Should Update WordPress
Keeping WordPress updated isn’t just about getting the latest features. It’s essential for WordPress security, performance, and compatibility. Here’s why staying up to date matters:
- Security Improvements. Outdated WordPress versions are a prime target for hackers. Every update includes security patches that fix vulnerabilities, protecting your site from malware, brute force attacks, and data breaches. The WordPress team releases security fixes regularly to patch known threats.
- Performance Enhancements. Each WordPress upgrade includes site performance optimization that make your site run faster and smoother. Updates optimize code and database performance, leading to faster load times. Many updates resolve glitches that could cause errors or slow down your site.
- Compatibility with Plugins & Themes. WordPress plugins and themes are constantly updated to work with the latest WordPress version. Running an outdated version can lead to plugin malfunctions, theme design breaking, errors, or missing features.
- New Features & Better User Experience. Major updates often introduce new tools and improvements that enhance how you manage your site. Every update brings new features to the Gutenberg editor, more control over themes and design settings, and enhancements for usability across all devices.
Keep Your Website Secure with WPZOOM Themes
Regular WordPress updates are essential for security, performance, and compatibility. However, not all themes handle updates smoothly. WPZOOM themes are optimized for seamless updates, ensuring your website stays fast, secure, and fully functional with every new WordPress release.
Don’t let outdated themes slow you down! Upgrade to a WPZOOM theme and enjoy worry-free updates, top-tier performance, and reliable support.

