At some point, you might need to translate and display your website in multiple languages. Whether you’re handling a WordPress blog or a media website, a hotel or a corporate website or even if you’re managing a WooCommerce shop.
In this article, we’ll first describe who you should translate your website for and why then we’ll focus on key elements required for any multilingual website and we’ll finally explain how you can easily do that using the Weglot Translate plugin.
Who Should You Translate Your Website for and Why?
Before getting started, let’s take a look at who you should be translating your website for and why it’s so important that you do.
The WHO
Whether you’re willing to reach a broader audience or to be present internationally, first you need to identify your current visitors and select languages to target.
You already know your audience, good! If you don’t, then use Google Analytics to map who your visitors are and where they are coming from. Based on this analysis draw a list of targeted languages covering your current and future visitors’ languages.
The WHY
Grow your activity! Making your WordPress website multilingual unlocks 3 key growth drivers for your activity:
- Enlarge your addressable audience/market
- Increase your website traffic, supported by relevant acquisition strategy
- Improve your conversion ratio via an enhanced user experience
Bottom-line, it’s all about increasing your revenue or subscriber base at the different levels of your acquisition funnel.
What Are the Key Elements When Going Multilingual?
There are 2 very important aspects to look after when you’re making your website multilingual: (1) SEO and (2) User experience.
Multilingual SEO
There is one thing you want to be sure of: being indexed in your translated languages. Especially when you’re an e-commerce or online service web app. Based on Google SEO guidelines you should ensure that:
- Translated pages have dedicated and unique URL, using sub-directories (mywebsite.com/es, mywebsite.com/fr) or sub-domains (es.mywebsite.com, fr.mywebsite.com) for example.
Do not use query strings like ?lang=es or ?lang=fr - Source code content is translated, otherwise, your translations will never be visible for Google, hence not indexed
Do not use JavaScript solutions that only dynamically translate content without changing the source code - Google can easily know your website is multilingual, by adding hreflang tags or having a sitemap
User Experience
Translated pages should help you to get more visitors and improve your conversion ratio. This is only possible if you pay attention to user experience in your translated versions:
- Automatic detection of visitors’ language, based on their browser’s language
- Selected language should remain while visiting different pages, links have to be adjusted to be sure you’re not going back to the default language
- Monitoring translations quality for your different pages, having professional human translations for most visited pages, and automatic translations for less important ones for example
Weglot Translation plugin automatically handles all the above aspects, offering a powerful multilingual solution to WordPress users, without any code or technical development. Let’s see how it works in a detailed tutorial and learn more about best practices when it comes to translating your WordPress site.
How to Translate Your WordPress Website
How does it work? Once installed Weglot will automatically detect, translate and display the content and pages of your site into different languages. Then, you’ll be able to manage your translations, edit/replace the machine translations provided, or even order pro translations (from pro agencies directly plugged-in Weglot and accessible via the dashboard).
All it takes is 3 steps:
1. Install the Weglot Translate Free WordPress Plugin
Add the Weglot plugin from your WordPress Admin or directly from the Directory: click on plugins > add new plugins in your navigation bar.
Search for Weglot and click on “Install now” and then on “Activate”
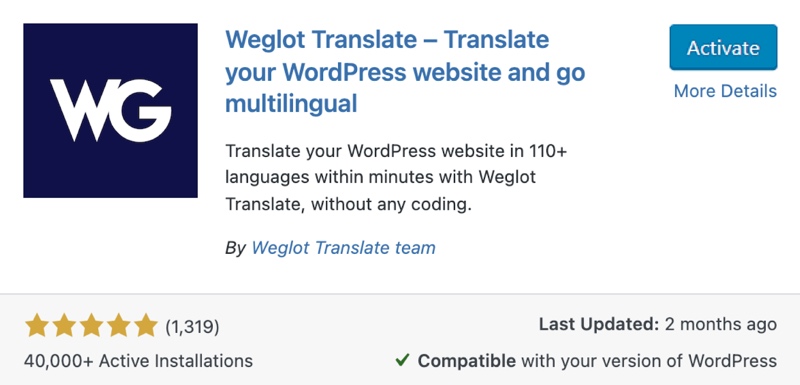
Go to Weglot settings, click on “Weglot” in your WordPress navigation bar and click on the Login link to create a Weglot account.
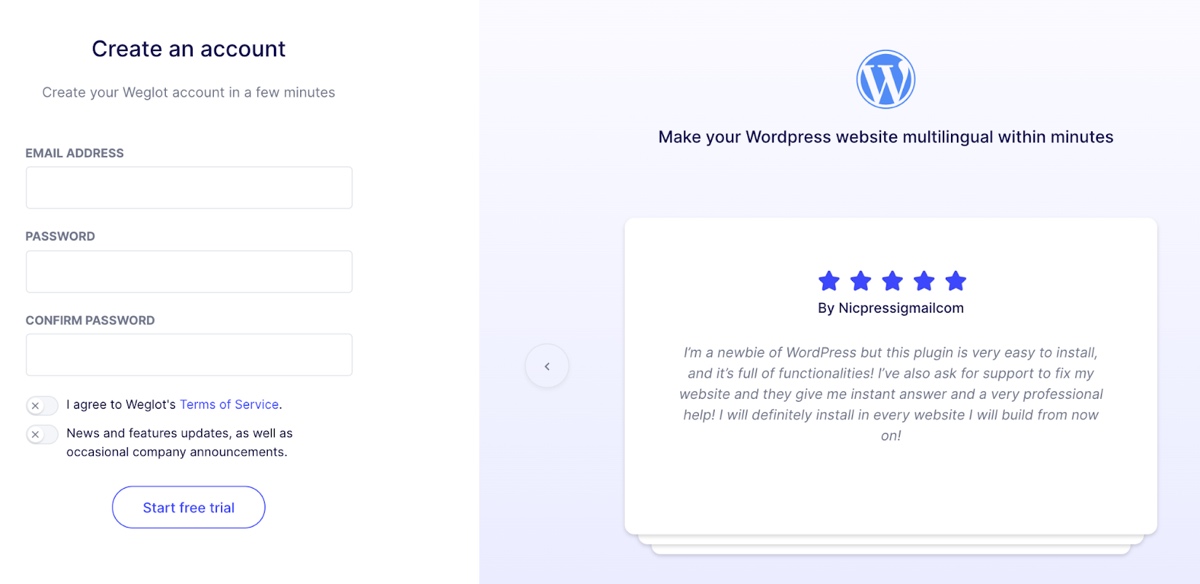
You’ll then get your API key (you only need to put your email and create a password, you’ll receive a confirmation email to validate your account and get your API key).
2. Add Your New Languages
Go to Weglot Translate plugin settings in your WordPress admin. Copy-paste your API key from your Weglot account in the related field displayed below.

Select the original language of your website, using the dropdown.

Then, select the languages you want to add to your WordPress website in the destination language section.

Click save and your translated WordPress website is now live. Weglot gives you a layer of machine translation that you can choose to manually edit to set your own translation quality.
When you head to your website, you’ll notice a language switcher has been added. With Weglot, you also have the option to edit the style and localization of your switcher through your Weglot tab.
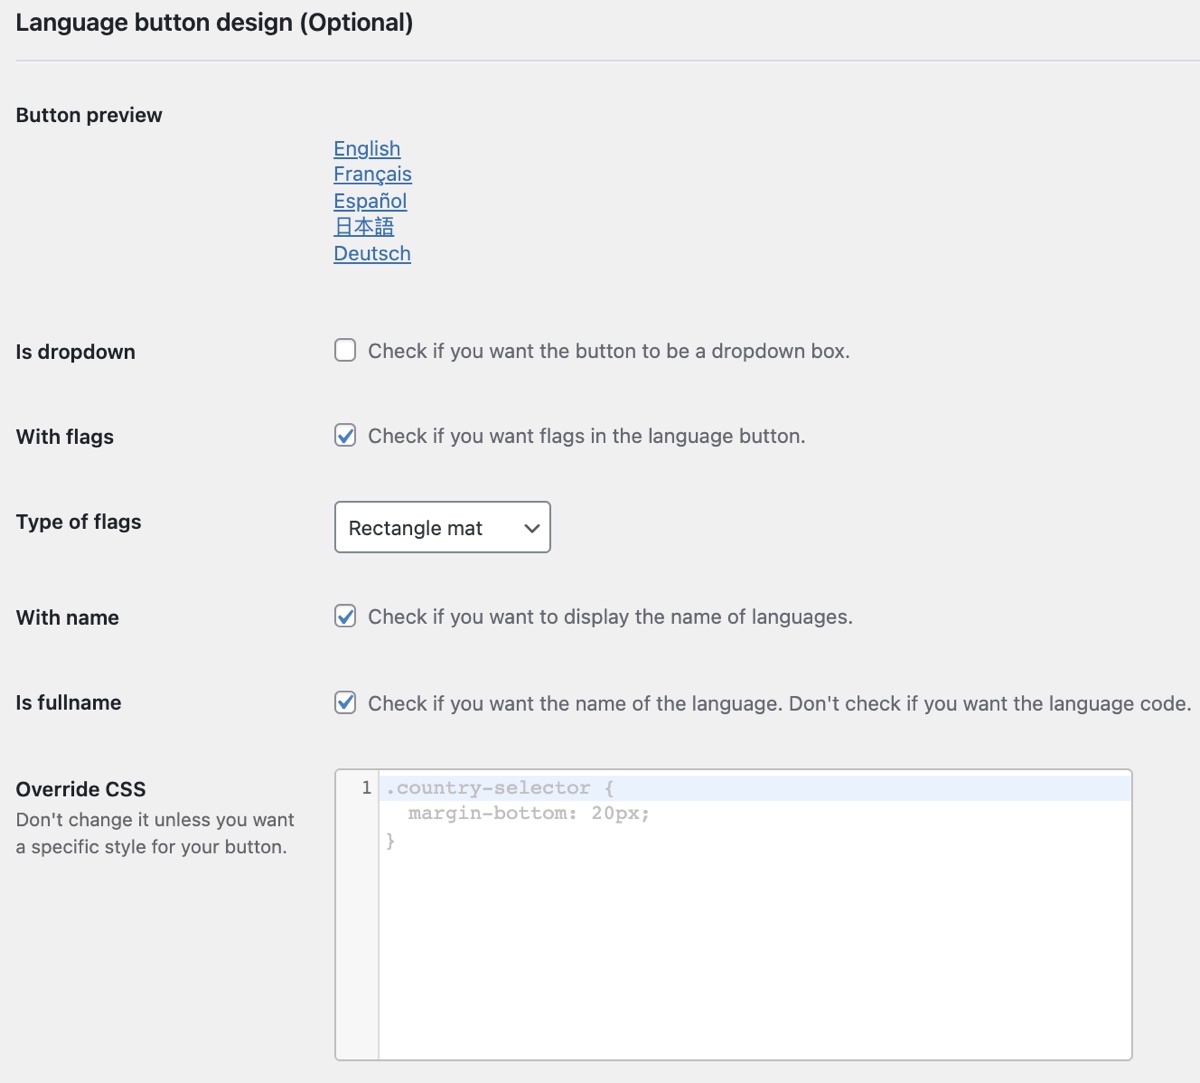
After making any changes, just make sure to click on save to see them live on your site.
Additional useful Weglot features include:
- Excluding certain pages from being translated
- Excluding blocks from being translated
- URL slug translation
- Set glossary rules
- Auto-detection of visitors’ languages’ based on their browser language
3. Managing Your Translations
Weglot automatically provides a first layer of machine translation – you then get full editing control over them by either adding your team members or in-house translators who can edit or improve them, or simply leave the translation as it is. You can also replace them by professional translations that you can order from pro agencies directly plugged-in Weglot.
To manage and edit your translations you can use one or both of the Weglot editing tools directly from your dashboard. You have the choice between visually editing or going through your translations list.
Visual Editor: Edit the translations in a live preview of your website – this gives you the context and design right in front of the eyes.
Simply navigate to the visual editor view and click on the blue pencil icon shown next to your text. Make your changes and then once you click OK, the changes are saved and displayed in real-time.
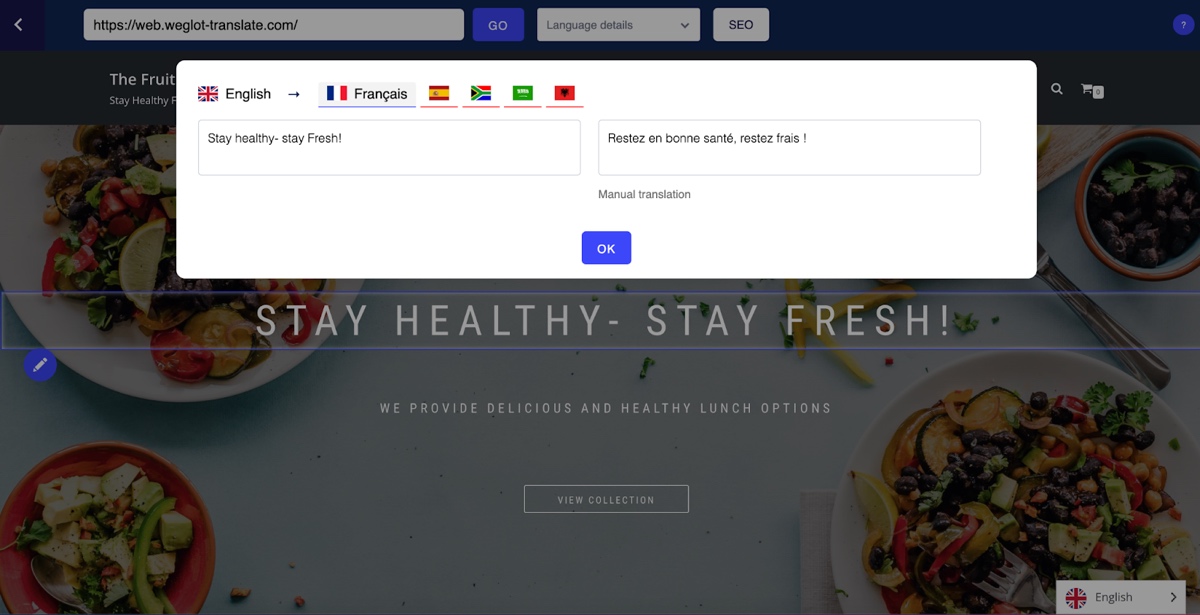
Translations list: On the left side you have your original content and on the right side the translations for the selected language. Translations are sorted by URL. You can make any changes to the translations and they will be automatically saved and displayed.
At the top, use the search bar to easily find content/translations you would like to edit. Make use of the filter to switch between the type of translation, quality, and status.
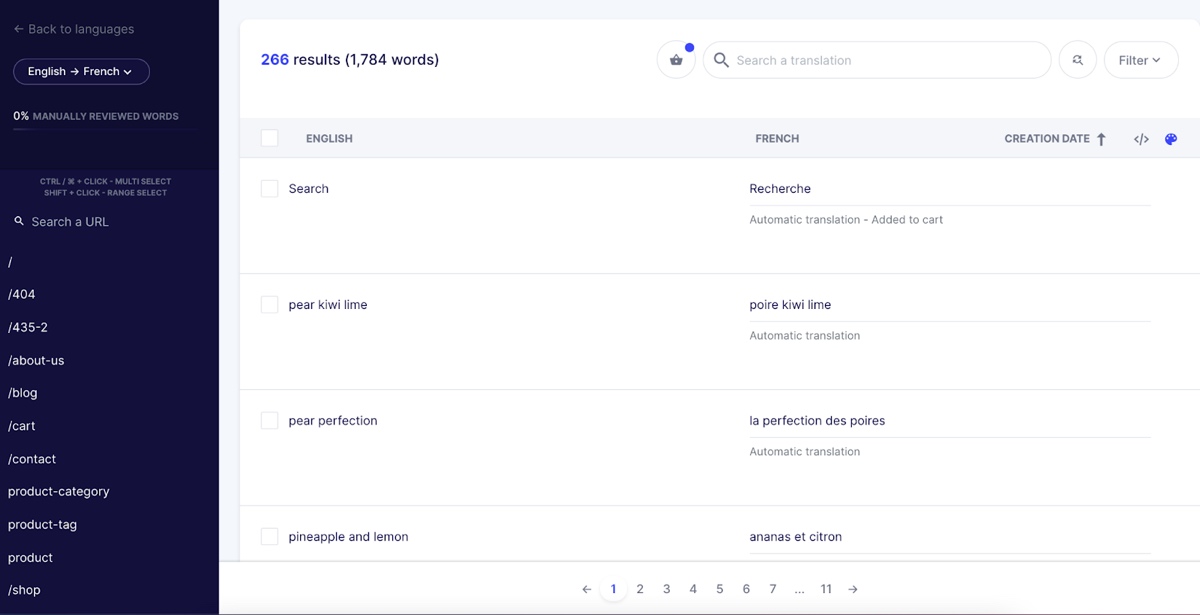
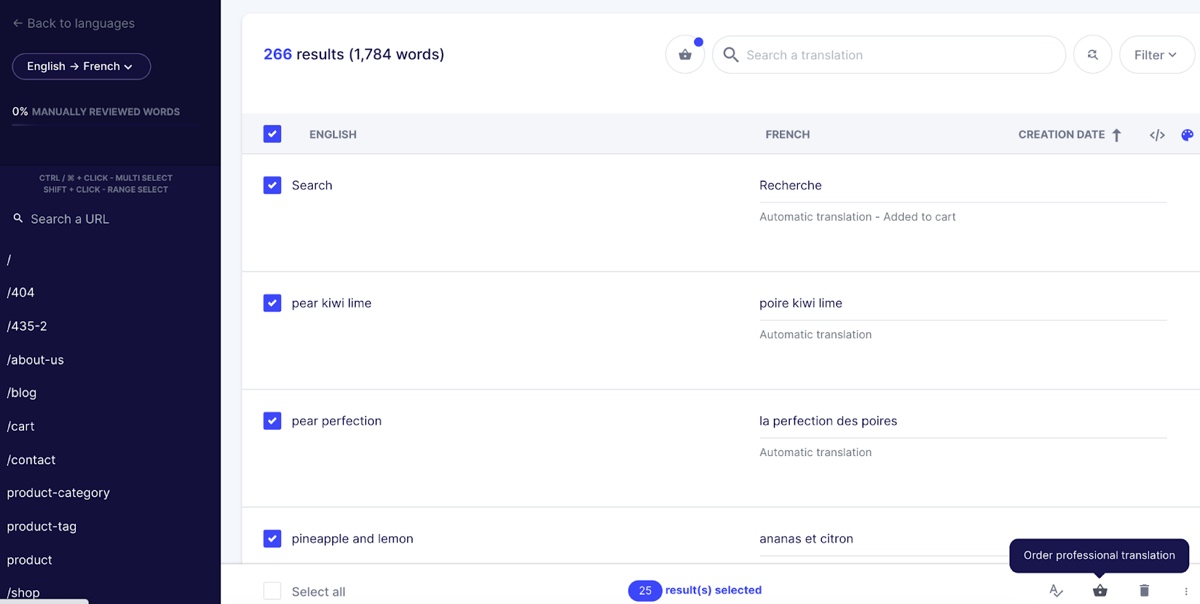
Professional translations: You can also select and order professional translations from pro agencies directly plugged-in to your Weglot Dashboard. Select the translations/pages you would like to professionally translate by clicking on the icon.
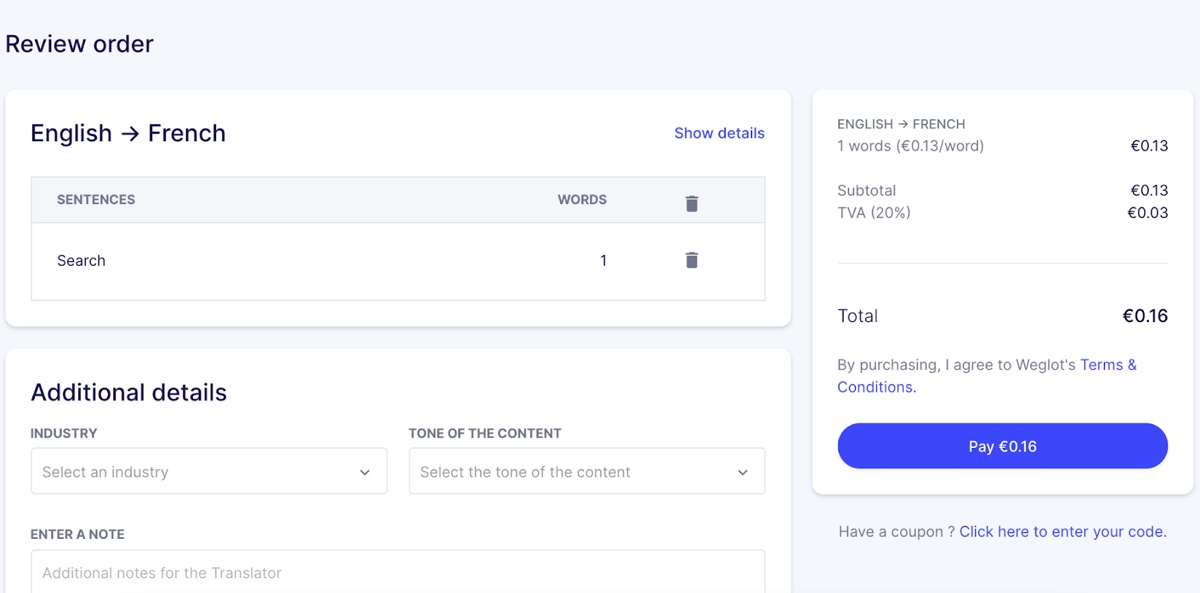
Then, find your order summary in your professional order section.
How much does it cost? Weglot Translate is a SaaS solution with a 10-day free trial and freemium pricing, allowing small websites to enjoy it for free. You can check Weglot plans here, starting at €9.90/month.
Wrapping-up
While there is no doubt going multilingual can be a great strategy to increase your activity, it’s important to do it the right way: choosing a solution like Weglot that also takes care of your multilingual SEO.
The Weglot Translate plugin focuses on providing both a performing and user-friendly solution, automatically handling complex multilingual setup processes and allowing you to fine-tune and refine translations from a first layer of machine translation. As a service, Weglot also offers a responsive and highly-praised support team to help users if needed.
So – what do you think? Do you have more questions about translating WordPress? Or some insights from when you translated your own website? Leave a comment below. We’d love to hear your thoughts!

