If you’ve been surfing the web to find an honest review on the Empowerment WordPress theme, then you’ve found the perfect place!
The Empowerment WordPress theme is lightweight, super fast, fully customizable, and easy to use. It’s ideal for your coaching business, bloggers, trainers, mentors, feminine entrepreneurs, and so on. In this review, we’ll be taking an in-depth look at the most well-liked theme, showing you what it’s capable of doing.
Here’s what’s to come next:
A. Empowerment Review: In a Nutshell
Empowerment is a freemium WordPress theme by Uncode Themes. This is one of the most stylish modern themes with unbelievable features that are here to serve your needs. It inherits all the awesome functionalities that make a complete package to build your website.
Most of all, this theme helps you with lead generation and conversion. This is really great for not just coaching blog sites, but also any type of site.
Now, let’s check out its pros and cons below.
Empowerment’s Pros and Cons (Summary)
| Pros: | Cons: |
| 1. Compatible with Gutenberg and supports most of the popular page builders like Elementor, Beaver Builder, Brizy, etc. 2. Absolutely easy-to-use interface. 3. With its clean code, its performance is highly optimized and is SEO-ready (Search Engine Optimization). 4. Offers advanced WooCommerce features. | 1. There is room to improve customer support. 2. Comes with comparatively lesser starter templates. |
B. Empowerment Review: Overview
Empowerment WordPress theme is a freemium theme that is the best theme for lead generation of your coaching business. You can quickly launch your blog sites with just a few clicks. And that also without touching a single line of code.
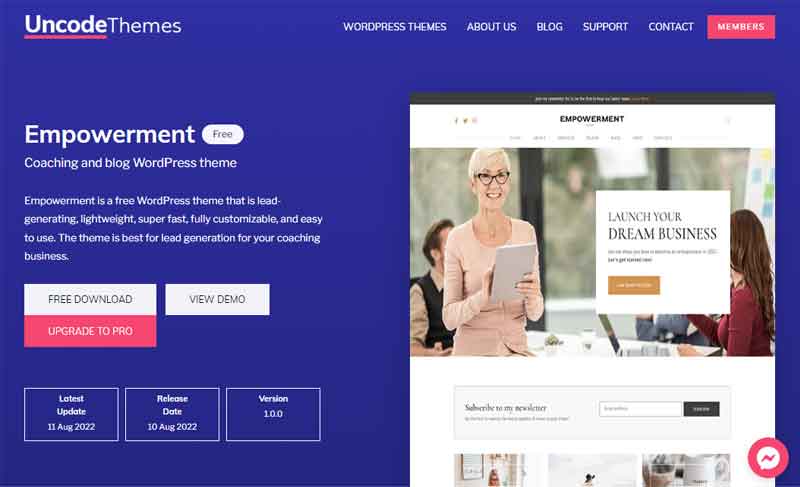
Moreover, this theme comes with pre-built websites. Those sites have a lot of stunning demo sites which gives an excellent start to your next project. All the demo sites are well designed and ready to go within the 1-click installation.
Further, there are also several widgets available that are created for all of the major sections of your site. However, if those don’t satisfy you, then you can tweak them as per your need.
In addition, it offers you advanced typography options to make your content attractive as it’s the most important section. You can select fonts from Google Fonts, Adobe Fonts, and Custom Fonts. This helps to easily build your brand unique.
C. Empowerment Review: Key Features
The Empowerment WordPress theme comes with many features to enhance your website-building experience. Therefore, we’ve compiled a list of Empowerment’s key features.
Let’s look at them now!
Although the Empowerment theme comes with a built-in header and footer, now is the time to be creative. Therefore, this theme gives you full control over the header and footer of your website. It allows you to create a layout for the header or footer by simply dragging and dropping the element you would like to include.
This way, you can use your imagination to create your header and footer, which can be either a static or a slider. Also, with a custom header and footer, you can style and decorate it that suits your website.
2. Advance Customizer Theme Options
The theme has an enhanced interface that allows a wide range of customization. Instead of adjusting the default layout of the WordPress page, you can create a stunning website. Because it brings plenty of possibilities such as access to Google Fonts, logo upload, full-color control, full-screen slider, etc.
Additionally, it supports layout control, a header image, sticky navigation, and many other features. To align the website with your brand, you can also modify the colors or fonts. In conclusion, there are countless ways to customize Empowerment.
3. Integration with WooCommerce
One of the best features that Empowerment has to offer is integration with WooCommerce. This lets you start building your own online store instantly. There are multiple sections, layouts, and inbuilt structure that makes displaying your products easier.
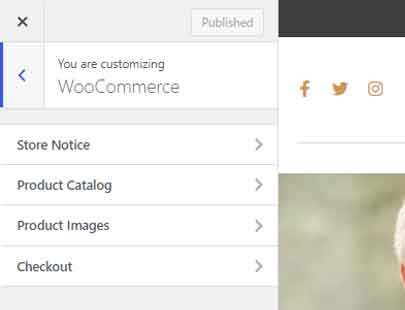
Hence, it’s a matter of minutes before you convert your physical business into an online store using the designs offered by this theme. Also, you can make all the necessary changes and adjustments to your store that keep your customers interested and captivated.
Empowerment provides the most powerful, responsive, and user-friendly mega menu. It simplifies arranging and organizing your submenu content. Plus, you’ll have complete control over the design and structure of your menus.
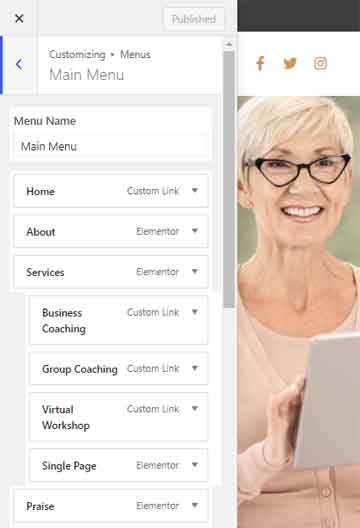
Along with that, you can make your menu more attractive by adding stunning multiple colors and fonts. And the live customizer option will only improve customizations as you can see the changes made instantly.
5. Premium Elementor Addons
Empowerment WordPress themes offer premium Elementor add-ons within their bundle. This will take your web designing experience to a whole new level with access to premium Elementor addons.
Further, you’ll be surprised by how quickly it helps to add every necessary element to your website. Along with that, it comes with different elements like a post grid and list, filterable gallery, image comparison, image Hubspot, weather box, etc.
D. Empowerment Review: Get Started with Empowerment Theme
Now that we’ve known the key features of the Empowerment theme, let’s get started with this theme
So, please follow these steps serially to quickly get started with the Empowerment theme.
Let’s go!
Step 1: Installing Empowerment
As we know, the Empowerment theme comes with both the free and pro version. And the best part is that both versions are quite simple to install.
However, note that both of versions are independent of each other. So, first, we’ll show you how to install the free version, and then we’ll move on to install the pro version.
Stick with us!
I. Install and Activate Empowerment
First of all, log in to your WordPress dashboard, and go to the Appearance option. On that option, there is a dropdown menu called Themes. Click on that menu. After that, you can see the Add New button on the top, just hit that button.
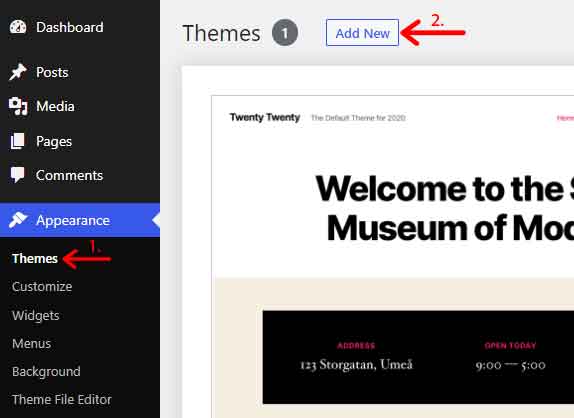
Following that, go to the search bar, and type “Empowerment” to search for the theme. Once you’ve found the theme, click on the Install button.

Now that the installation is completed, click on the Activate button.
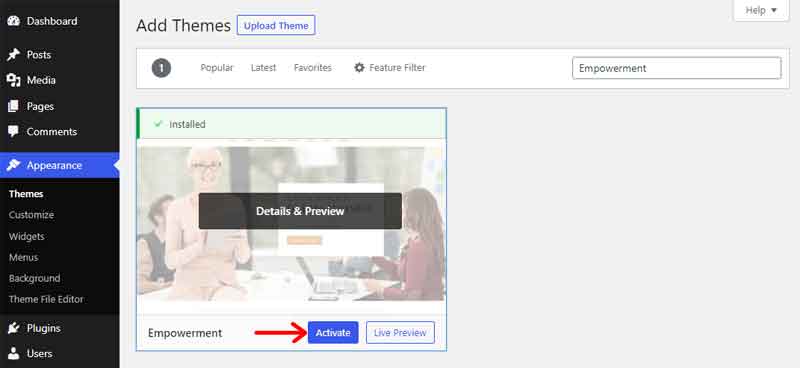
Now, the free version of the Empowerment theme is completely available for you to get started.
II. Install and Activate Empowerment Pro
Since we already know how to install the free version, let’s talk about installing the pro version as well.
Go to the home page of the Empowerment WordPress theme. And click on the See Plans button.
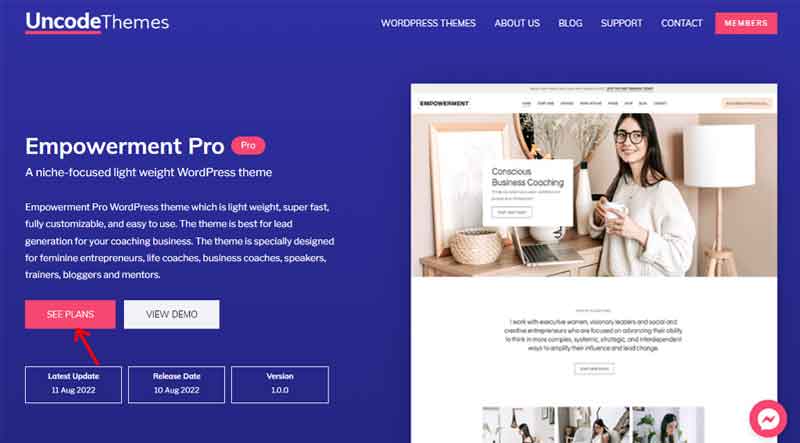
After that, you can see different pricing options. You can choose your ideal plan and click on the Purchase button
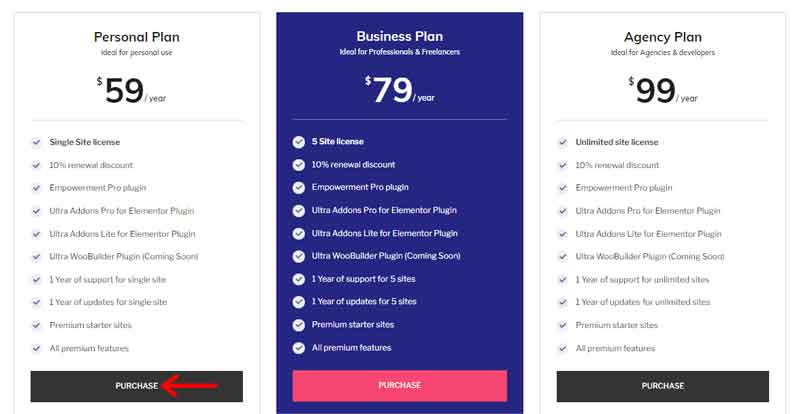
After that, you can download the zip file of the premium version.
Now, go back to the dashboard, and click on Appearance>Themes. Next, click on the Upload Theme button and Choose File to upload the downloaded zip file. Then, first, click on the Install Now button and second on the Activate button.
Once you activate the pro version, you’ll get the Empowerment Pro plugin and Elementor addons within the bundle.
You’re all set to go!
Step 2: Import Starter Sites
Now that you’ve installed and activated the theme, it’s time to import the starter site.
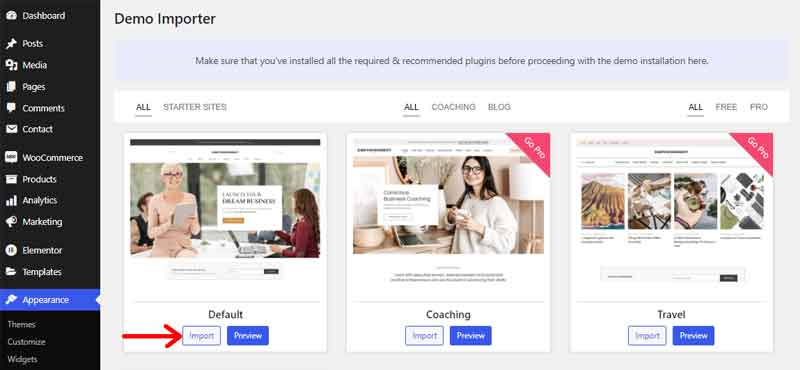
Simply, go to the dashboard menu and click on Appearance>Demo Importer.
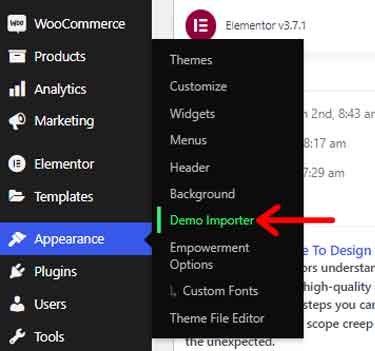
Then, on your right side, you can see all the pre-built websites. You can surf through all the pre-built sites and select one. However, for this review, we’ve selected the Default template. There, you can see the Import button. Just click on that!
Note that, you can first preview the demo site before importing it by simply clicking on the Preview button.
Next, you’ll see the recommended plugins that you need to be installed and activated. If you haven’t done so, then you need to do it right away. Now, click on the Next button.
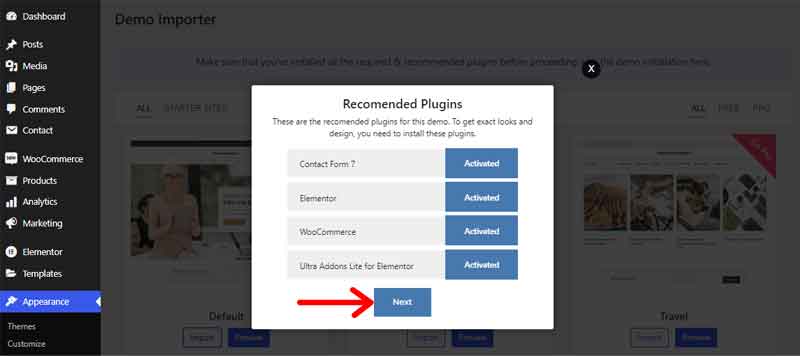
After that click on the Import button.

It might take some time to import so please wait patiently.
After the demo import is completed, just visit your site.
Now, you can quickly begin with customizing your website.
Step 3: Customizing Your Website
After importing the starter site, you can quickly begin with customizing. All you need to do is go to Appearance and click on the Customize option.
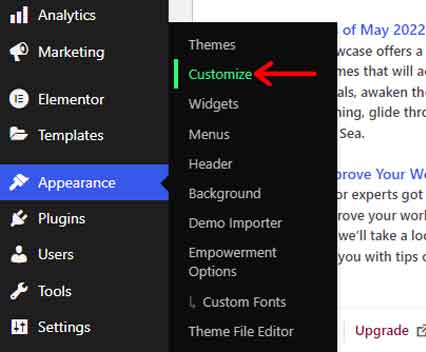
And, you’ll be directed to the customizing page. There, we’ll give a detailed tour of each setting element.
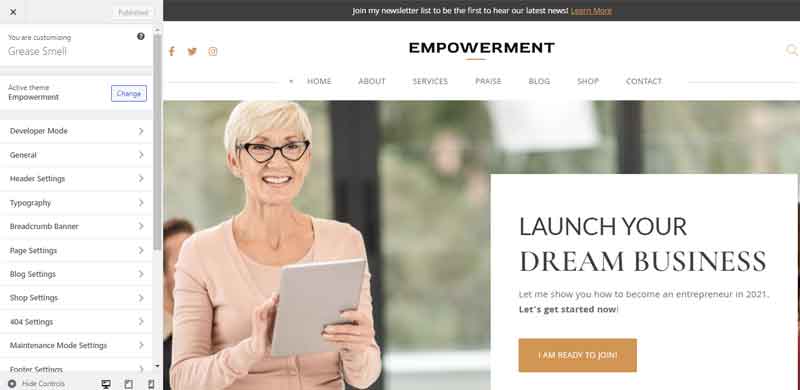
Let’s get into our ride!
I. General
In the General section, you’ll be able to edit different elements related to your entire site. They are:

- Site Identity: You can select the logo, retina logo, sticky logo, etc. Also, you need to edit the site title, tagline, site icon, and so on.
- Colors: Here, it lets you choose the color of your choice for the background color and also for the header text color.
- Background Image: You’ll be able to choose the background image of your choice or you can leave this option.
- Theme Color: It comes with different options like changing the color of the theme skin, primary button, hover color, text color, secondary button, anchor color, etc.
- Additional Settings: This additional feature comes with settings like scroll top settings, display style, the top position, sticky sidebar settings, lazy load settings, etc.
With the header settings, you’ll be able to edit the default header into the most attractive ones. It has various elements that allow you to customize the header as per your preference.
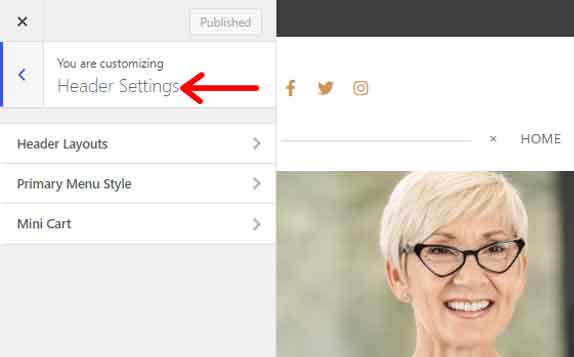
- Header Layouts: There is an option to choose default or custom header, enable/disable transparent header, header container, etc. Also, you can edit the border-bottom color, sticky header settings, and more.
- Primary Menu Style: This option will let you choose the typography of the primary menu, like font size, text color, font family, etc.
- Mini Cart: You can enable/disable showing a mini cart, its display style, cart icon color, product title typography, etc. This is useful for those with online stores.
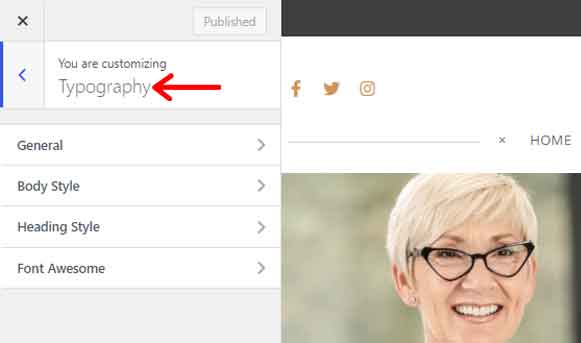
III. Typography
You can edit the typography of the entire website from this option. It comes with: General, Body Style, Heading Style, Font Awesome. Basically, you can customize textual aspects using these 4 options.
IV. Breadcrumb Banner
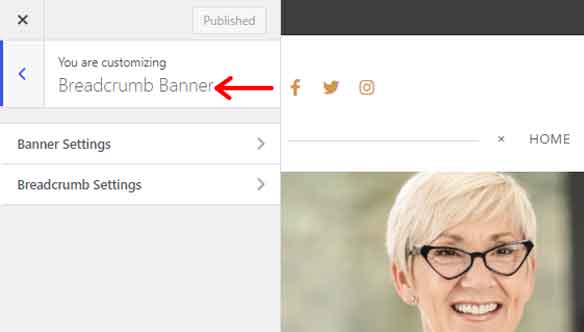
In this option, you can display banners, change color, font size, content position, background image, banner height, etc. Along with that, you can also display breadcrumbs, change separator color, nav hover color of breadcrumb, and more.
V. Page Settings
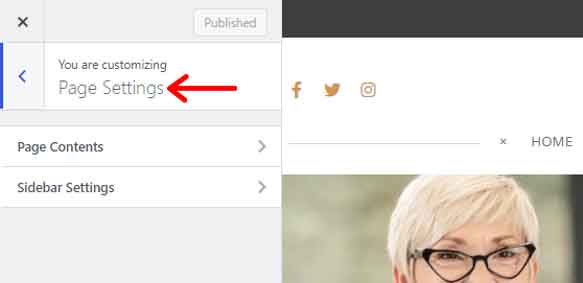
It comes with Page Contents and Sidebar Settings options. On those options, you can simply choose to display a banner, page title, feature image, etc. Also, you choose the sidebar layout rather than using the default ones.
VI. Blog Settings
There are 5 different settings in this section to simply make blogging easier:
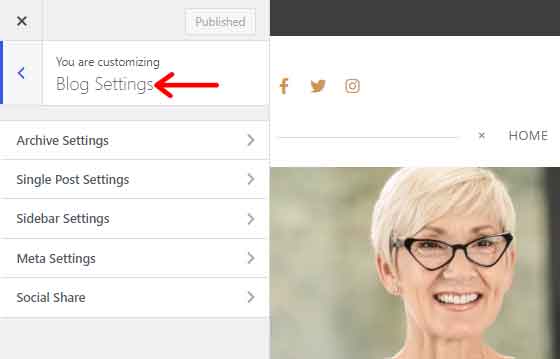
- Archive Settings: It comes with archive layout options to choose from, edit excerpt length, button type, content order, pagination layout, pagination type, etc.
- Single Post Settings: This setting also offers single post layout, post content order, sidebar layout, title styles, letter spacing, line height, related post styles, etc.
- Sidebar Settings: You can simply choose the sidebar layout in the option.
- Meta Settings: Here, you can show meta, meta icon, edit meta styles like font family, text transform, meta link color, hover color, etc.
- Social Share: It comes with sharing options on different platforms like Facebook, Twitter, LinkedIn, Email, etc. You can also customize color, hover color, border, and more.
VII. Shop Settings
If you’ve got an online business, then this setting is a handful. Here, you can choose the shop layout, column number to display products, number of products per page, pagination type, sidebar layout, etc.
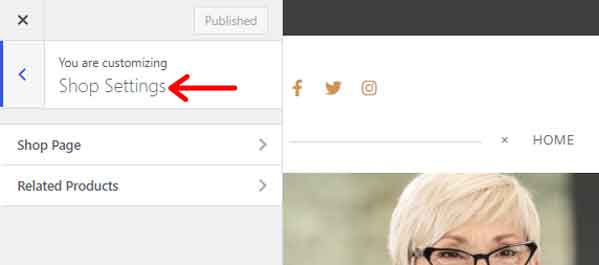
Along with that, you can also customize related products like the number of products, column number, etc.
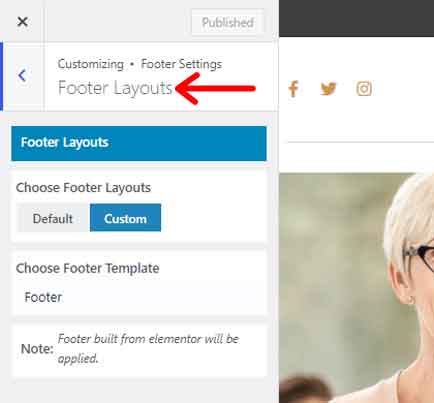
In this setting, it lets you choose the footer layout, write your one copyright text, edit background color, text color, and so on.
IX. Homepage Settings
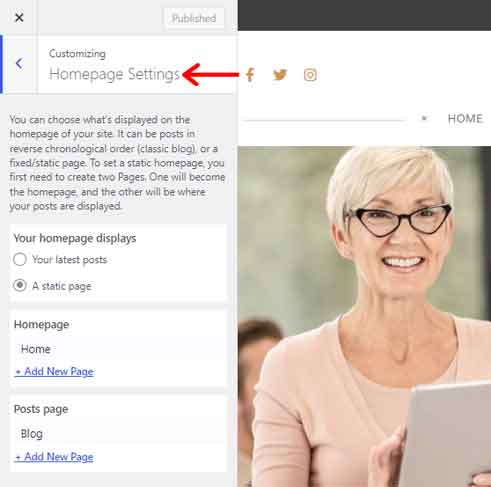
Here, you can choose what to display on the homepage of your site. It can be either posts or static pages. The choice is simply yours.
With this setting, you can create the menu right away. All you need to do is create a menu, assign it to a location, add menu items like links to pages, etc. And there, you’ll end up with multiple menus in different areas.

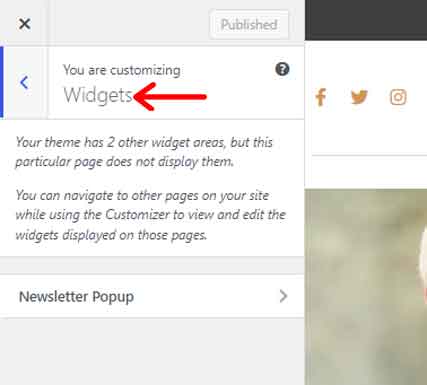
XI. Widgets
The theme comes with different built-in widgets. And depending on the templates you’ve chosen, the number of widgets varies. So, you can customize each part of the widgets you’ve on your template.
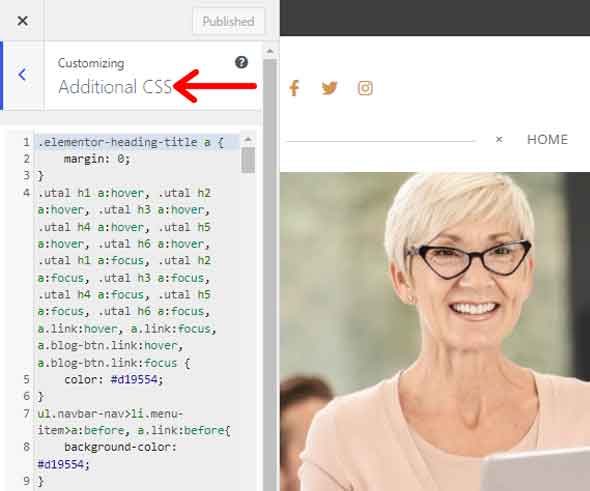
XII. Additional CSS
With this feature, you can add your custom CSS. This helps to design the appearance and layout of specific sections. Plus, you can add an attractive style that can make your section eye-catching.
Step 4: Additional (Empowerment Options)
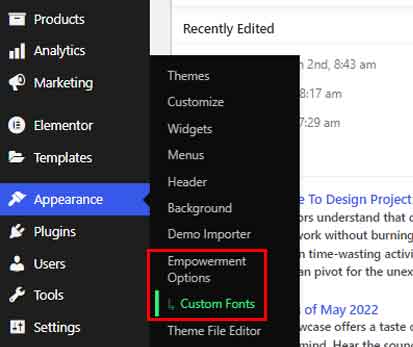
This section is additional as well as optional settings. Here, you’ll get the specific option provided by the Empowerment WordPress theme.
To access this option, go to your dashboard and click on Appearance>Empowerment Options. Within the Empowerment Options menu, you can access Custom Fonts.
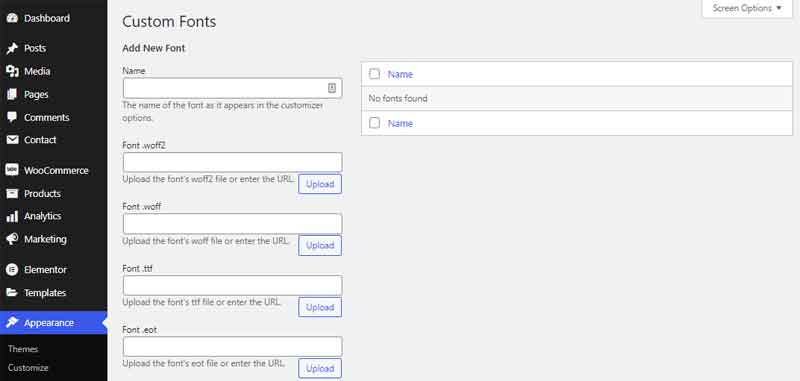
There, you can upload a custom font, and fill in all the details of that font. After filling in all the details, you can click on the Add New Font button. And later on, you can use the uploaded font directly on your website.
E. Empowerment Review: Customer Support
In addition to all these features, the customer support of the Empowerment WordPress theme is also good.
Although it’s easier to use for all types of users, you could really use help for certain confusing things. Therefore, the support system of this theme is free for all types of users.
There is a large community of support forums where you can discuss a certain topic, clear confusion, ask questions, and so on. You can access this support from its official website by clicking on the Support menu. This ultimately redirects you to the WordPress support forum.
Along with that, you can always check out the documentation of the Empowerment WordPress theme. It comes with a lot of guides and documentation where you can get a full tutorial of all the settings and options of this theme. This helps you quickly get started with building your website and even if you are stuck somewhere, you can always use them as references.

However, for the pro users, it comes with 1 year of premium support via live chat. This way, solving the issues becomes quicker and much easier. And also, explaining your queries and problems and understanding their response makes it effortless.
Hence, this support can be pretty good as it can solve common issues easily.
F. Empowerment Review: Pricing
Empowerment WordPress theme comes in both free and paid versions. You can download the free version from WordPress.org. Or, directly install it from the WordPress dashboard. Alternatively, you can get its free version from the official website as well.
However, the premium version of the Empowerment WordPress theme, it offers 3 different pricing plans:
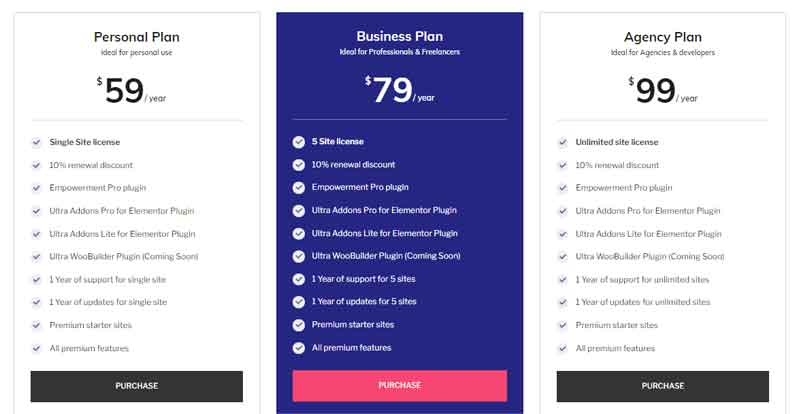
- Personal Plan: Costs $59/year. It includes a single site license, pro plugins, premium starter sites, 1 year of support and updates for a single site, etc.
- Business Plan: Costs $79/year. It includes 5 sites license, 10% renewal discount, all premium features, 1 year of support and updates from 5 sites, etc.
- Agency Plan: Costs $99/year. It includes an unlimited site license, Ultra Addons Pro for Elementor Plugin. Ultra Addons Lite for Elementor Plugin, etc.
G. Final Verdict of Empowerment Theme – Is it the Best WordPress Coaching Theme?
In conclusion, the Empowerment theme is a multipurpose responsive theme that is jam-packed with cutting-edge features. It’s highly flexible and versatile enough to create any type of coaching business. Along with that, it’s suitable for any type of business whether it be small, or large.
Further, it offers a ton of handy features even in its free version that helps to launch your blog site right away. You can create a website exactly how you want it thanks to the abundance of customization options and element selections.
Along with that, it comes with all of the important elements for your coaching site. Such as booking appointments, conducting workshops for lead generation, different services, partners, and much more.
It is additionally SEO-optimized. This implies that search engines will make it simple for your potential audience to reach your website.
Thus, this theme is without a doubt worth looking into. Also, there is no risk in trying it out because it comes with a free version as well.
Conclusion
It’s a wrap! We hope you like the Empowerment WordPress theme and for sure you are using it for your next site.
The Empowerment theme is truly an outstanding theme that comes with tons of features. This will help you set up the online presence of your coaching business quickly by building the website.
Also, check out our article on Fairy Theme review & ProductX review.
Do follow us on Facebook and Twitter for similar types of content.
Still, do you’ve any questions? Then leave a comment below.

