I think you will agree when I say: managing a WordPress website is no easy job. There are hundreds of tasks to complete at any given time, and things can quickly get out of hand if you run multiple sites. It’s a challenging task even for the best of us.
But did you know that you can save a lot of time and resources by automating tasks? Yes, you can, thanks to plugins such as Uncanny Automator, the subject of today’s review. Instead of doing tasks manually, you can connect your plugins, websites, and external apps to run automatically so you can focus on business.
In today’s review, we cover the features and all the nice things that make Uncanny Automator a powerful tool to have in your toolkit. We will also cover pricing, support options, and finally, test the plugin so you know what to expect. At the end of the day, you’ll have all you need to add value to your WordPress site(s).
Without wasting another second, let us dive right in and have fun. Please don’t leave without sharing your thoughts in the comment section at the end of the post.
What is Uncanny Automator?
First things first, what is Uncanny Automator? Well, it’s quite simple. Uncanny Automator is a nifty automation plugin for WordPress. The plugin allows you to connect WordPress plugins, websites, and external apps so you can streamline your workflows.
The plugin is brought to you by Uncanny Owl, a reputable global leader in eLearning and automation solutions for WordPress. They are the same guys who brought you popular addons for LearnDash, including the Uncanny Toolkit. The company is based in Toronto, Canada, and they have been in the WordPress business for over 9 years.
Uncanny Automator is much like Zapier or Integromat, but for WordPress sites. If you’ve ever used Zapier before, you’re already familiar with the idea of task automation. If not, it’s not rocket science. Even if you’re an absolute beginner, the concept of automating tasks shouldn’t beat you.
The Uncanny Automator plugin uses what we call “Recipes,” which are composed of two parts: triggers and actions. A trigger is what gets the ball rolling, and the action is what happens when all the conditions are met. For example, let’s say you sell online courses on LearnDash.
Let’s also say you’d like to add every student that purchases your LearnDash course to a specific Woo Memberships plan for that course. You can try adding each student manually but that will probably drive you insane, waste a lot of time and flush resources down the drain. Or you could build your own integration, but that can get expensive.
That’s where Uncanny Automator comes in…
The plugin allows you to automate that entire LearnDash-to-Memberships process. When a student purchases the course, that becomes the trigger. When Uncanny Automator adds the student to the Woo Membership plan, that’s the action.
The entire automated process is what we call the recipe, and it can have multiple triggers and actions depending on your needs. So that is basically what Uncanny Automator does. It helps you to automate everything in WordPress without writing code.
Why is it important to automate tasks? Well, automated tasks help you to free up time, eliminate custom development costs, and improve user experience. It’s an incredible tool to have no matter the type of WordPress site you have. Plus, they have a completely free version to test the waters.
Now that we know what we are working with, let us see what we have in the features department.
Uncanny Automator Features
While Uncanny Automator is packed to the brim with powerful features, it’s incredibly easy to use. You have all the options you need to create a billion recipes to automate every area of your website be it marketing, administration, onboarding, and so on. You can put your site(s) on autopilot.
Here are the key features to expect:
- Beginner-friendly editor – Whether you can’t code to save your life or not, you will have a great time with Uncanny Automator. The plugin ships with an intuitive and easy-to-use UI that makes creating recipes the stuff of fourth-graders.
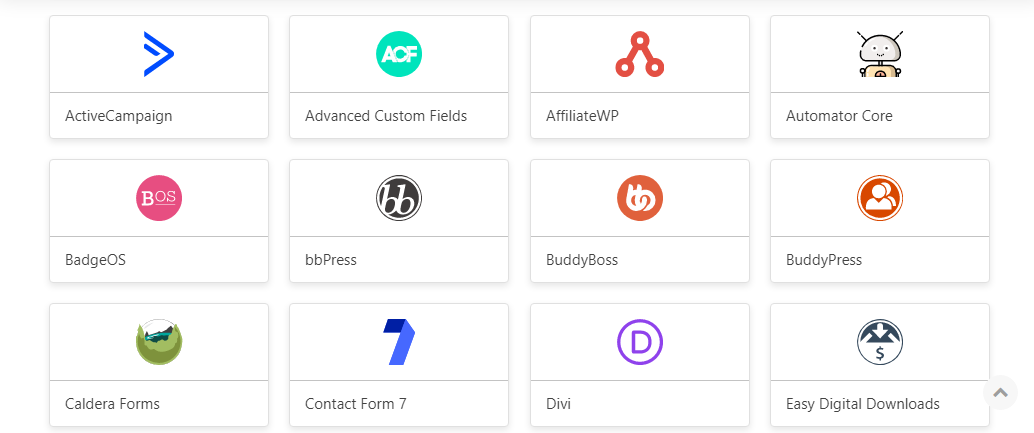
- A ton of integrations – At this time, Uncanny Automator has over to 80 plugin and non-WordPress integrations including WooCommerce, Contact Form 7, AffiliateWP, Zoom, Mailchimp, Integomat, and many more. See all 80+ integrations.
- Zapier integration – You can easily integrate Uncanny Automator with Zapier, which means you can connect to over 3000 Zapier apps! How sweet?
- 400 triggers/actions – Uncanny Automator offers well over 400 triggers/actions, meaning you can automate every area of your WordPress website.
- Unlimited recipes – There is no limit to the number of recipes you can create. This allows you to create an unlimited number of trigger-action scenarios to suit your needs.
- Awesome world-class support – The folk over at Uncanny Owl ensure all your integrations play well together. This means you don’t need to contact many developers if you ever need support. The Uncanny Automator support team has your back. Think of it as having one support team for all of your WordPress plugins. How truly convenient?
And there’s more…
- Reports – You have a ton of reporting, logging, and debug tools to understand exactly what’s happening.
- Reasonably affordable pricing – Compared to automation services such as Zapier, Uncanny Automator is way cheaper.
- Own your data – Since you install Uncanny Automator on your website, you own all your data. This makes it even easier to stay GDPR compliant and protect user records.
- Multiple data sources – You can work with user meta, post meta, ACF data, order data, whatever you want in recipes.
- Site-to-site recipes – You can connect WordPress sites (e.g. buy a product in Woo on site 1, unlock the course for that user account on site 2, add the user to a membership group on site 3, etc.)
- Conditional logic – Use conditional logic to create recipes that do exactly what you want (e.g. “only run this recipe on users that bought XYZ and have an example.com email address”)
- Ability to delay or schedule actions – Run actions at exactly the right time.
- Create recipes for logged-in and logged-out users – Any user can trigger a recipe whether they have an account on your site or not.
- And a ton of admin options – You have a ton of admin options to create recipes you want. For instance, you can set the number of times a specific user triggers a certain recipe, choose specific products, add multiple triggers/actions, etc.
In terms of features, support, and ease of use, Uncanny Automator doesn’t disappoint. Even if you’ve never used a task automation tool before, you’ll quickly get the hang of it. Additionally, they have a helpful knowledge base and FAQ to boot.
The team [was] really lovely when I reached out for some support & their plugin is working excellently! Really happy with everything. Highly recommend buying! – mindthebleep
With that impressive list of features, you’re probably wondering how much all this costs. How much will Uncanny Automator set you back?
Come with me to the next section.
Uncanny Automator Pricing
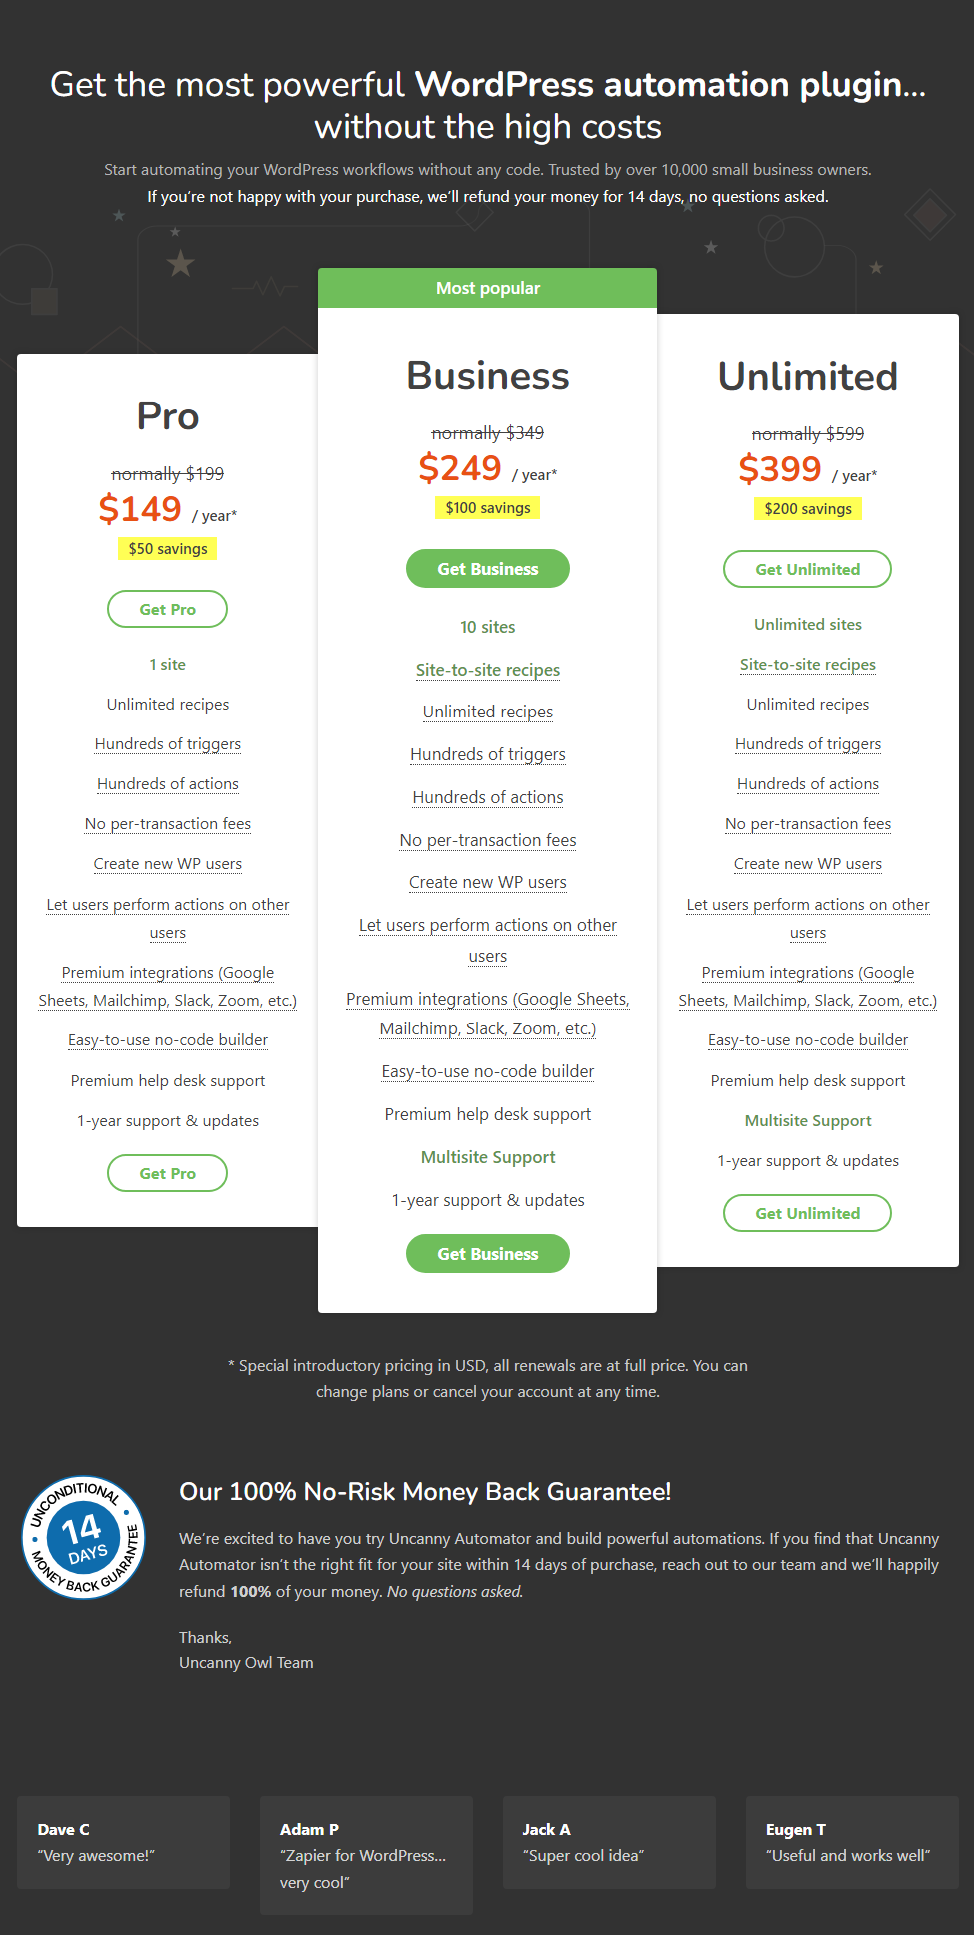
Uncanny Automator comes in three premium flavors:
- Pro – The plan costs just $199 per year for a single site. You get all the features except site-to-site recipes and multi-site support.
- Business – Their most popular plan, Business will set you back $349 annually for a 10-site license and all features.
- Unlimited – For just $599 per year, you will get everything Uncanny Automator has to offer for unlimited sites.
For all the features you are getting and all the time and money you’ll save, I would say this is a fair deal.
With the basics out of the way, let’s take this thing for a spin.
For illustration purposes, I will create an imaginary situation where we’re selling a course via LearnPress, and then automatically add the student to a BuddyPress group via Uncanny Automator. I have already installed the required plugins and created a dummy course and group.
My dummy course is titled “Uncanny Sample Course,” and the BuddyPress group is “Uncanny Sample Course Group.”
Now, let us install Uncanny Automator and go on from there.
How to Install Uncanny Automator
You must first install the free version of Uncanny Automator. The plugin is available in the official WordPress repo, which means you can install it inside the WordPress admin dashboard.
Installing Uncanny Automator Free Version
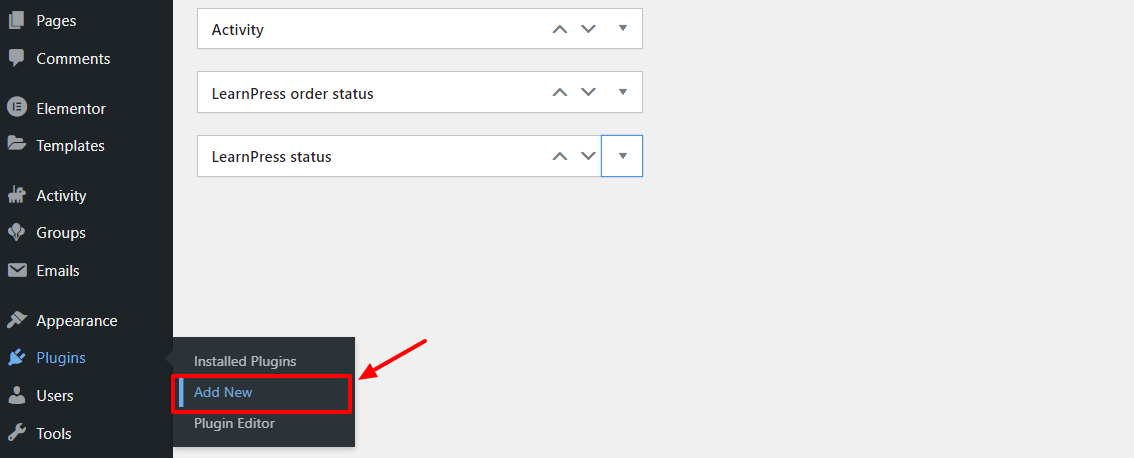
Log in to your WordPress admin dashboard and navigate to Plugins > Add New, as shown below.
Next, enter “Uncanny Automator” in the keyword search box and click the Install Now button:

If all goes well, you should be on the following screen. To create an account and unlock more features in the free version, you can create a free Uncanny Automator account. This is optional and not needed for the recipe, but we’ll go ahead and create the account to use more features later.
Click Connect your site to register a free account, as shown below.

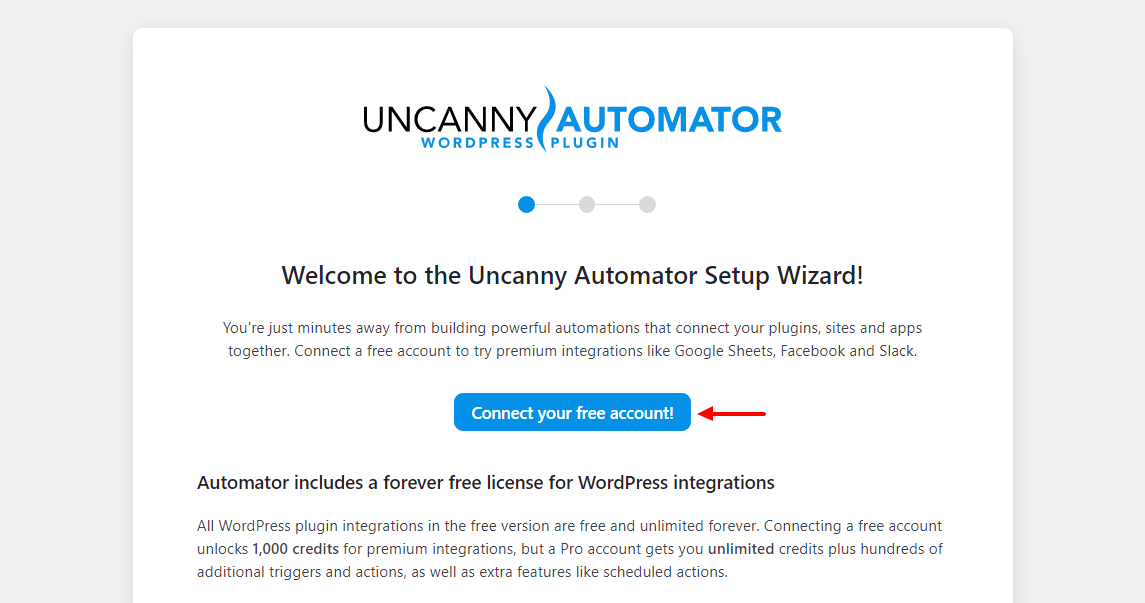
Next, click the Connect your free account button:
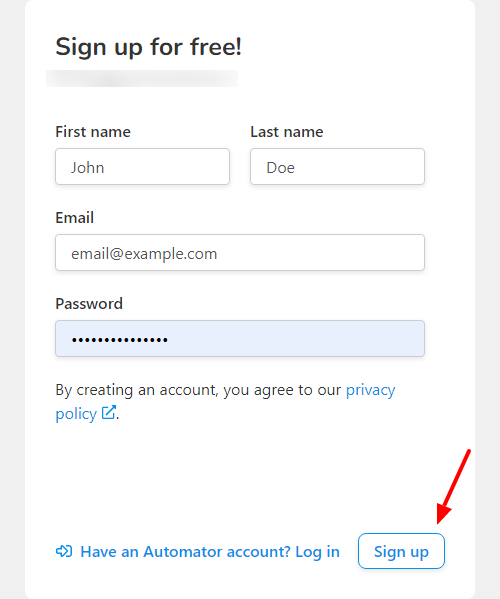
On the popup that appears, fill out your info and click Sign Up:
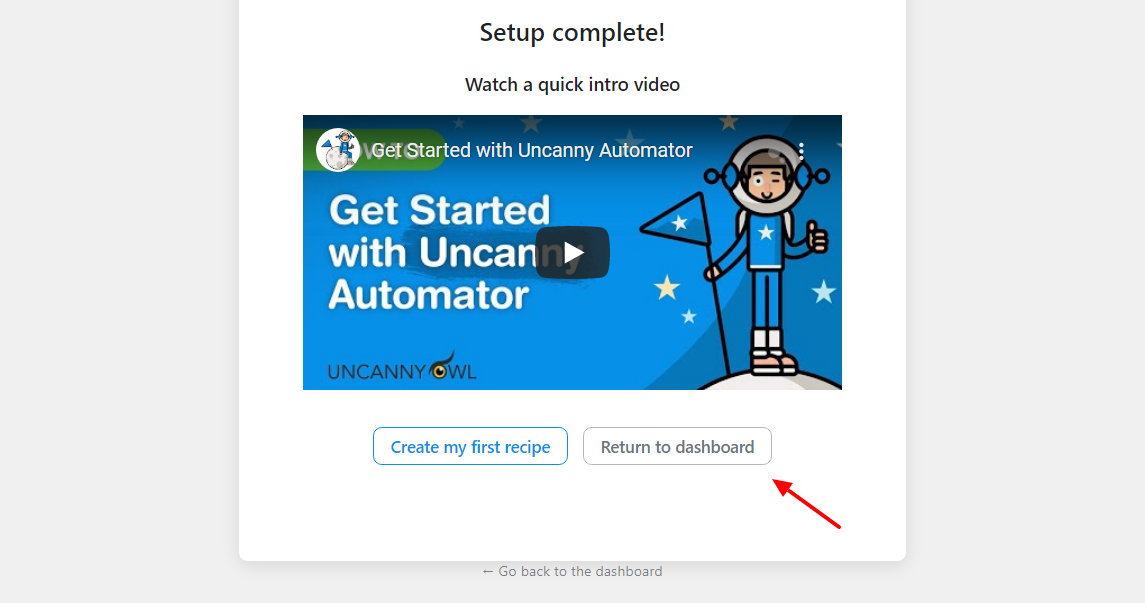
Once your site is connected to Uncanny Automator free account, click Return to Dashboard:
Now that the Uncanny Automator free version is ready, let us install the premium version, which you buy on the official website. You can test the free version but for the full range of features, we highly recommend the pro version.
Installing Uncanny Automator Pro Version
Download Uncanny Automator Pro from your account and save it on your computer. Next, navigate to Plugins > Add New in your WordPress admin dashboard:

After that, click Upload Plugin, choose the Uncanny Automator .zip file on your computer, and click Install Now, as we highlight below.

Next, activate the plugin:

After activating your license (you’ll see a nag message at the top of the screen prompting you), it’s time to create our example recipe.
Creating Uncanny Automator Recipe
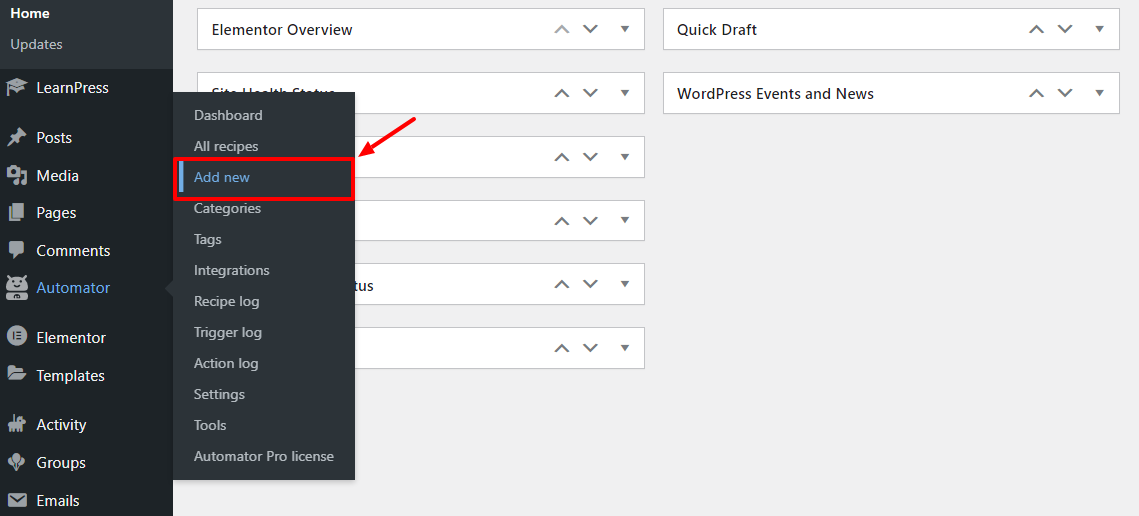
To create your first recipe, navigate to Automator > Add New, as shown below.
Next, choose Logged-in users and click Confirm, as highlighted below.
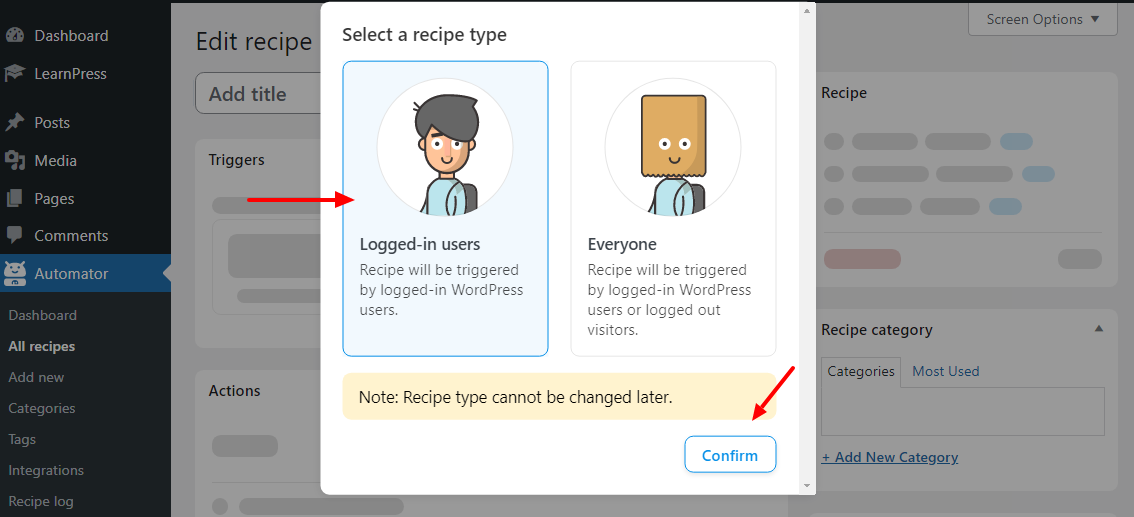
Note: You can also choose Everyone, but for our example, I’m going with Logged-in users.
Moving on swiftly.
On the next screen, give your recipe a title. In our example I’m using “LearnPress Course to BuddyPress Group,” so I can identify it easily should I create many recipes:

Next, you need to choose your trigger. In our example, I will choose LearnPress. The trigger fires when the user enrolls in the “Uncanny Sample Course.” So, choose the trigger and the specific course, and click the Save button:

Next, let us add an action, which in our case is adding each enrolled student to our BuddyPress group. Here, choose BuddyPress, the specific group, and click Save, as shown below.

Finally, toggle on the Live switches, as we highlight in the following screengrab.

There you have it – your very first automated task thanks to Uncanny Automator!
And just to be safe, here’s a nice video by the developers showing you exactly how to create a recipe.
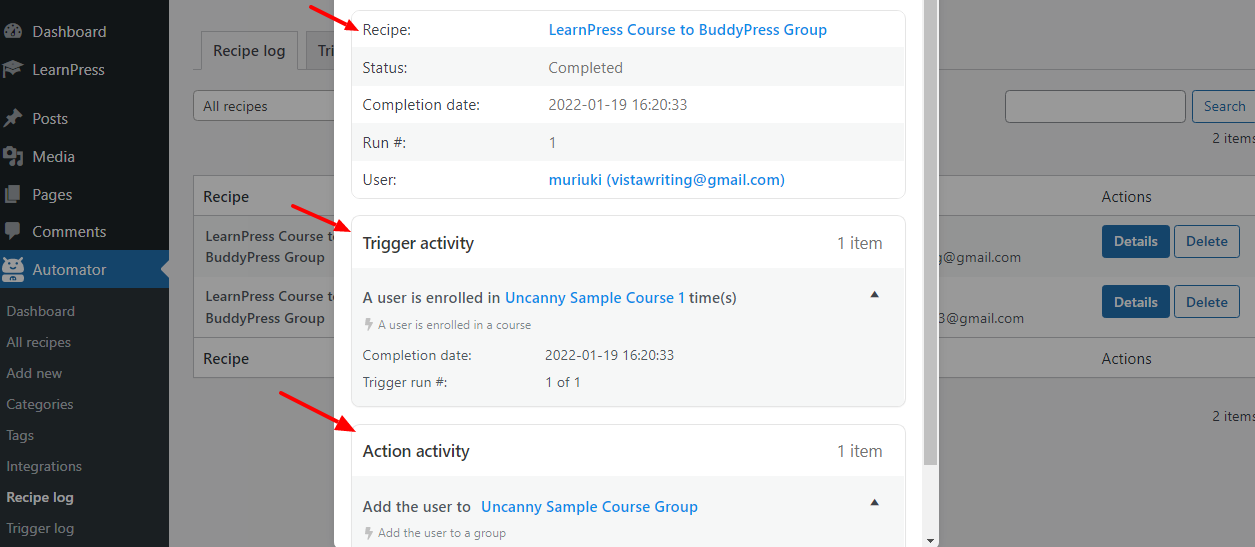
So, after everything, I tested my recipe by enrolling a student. When I checked out my recipe log, it appears everything is working just fine, as seen below 🙂
Remember, Uncanny Automator integrates with Zapier, and Zapier integrates with more than 3,000 apps. Additionally, you can include unlimited variables (or “tokens”) in your recipe actions, such as emails or zaps. Captured variables can then be used to create user-specific media (such as a personalized email) or passed on to Zapier for further use in a Salesforce Zap you’ve established. The opportunities are endless! Thanks to this fact and Uncanny Automator built-in features, you can automate your entire online business, not just your WordPress site.
Conclusion
Are you in the market for a task automation plugin for WordPress? If so, look no further than the Uncanny Automator. The plugin is extremely easy to set up and use. What are you waiting for? Uncanny Automator helps you to connect your plugins in ways never seen before.
The plugin is compatible with many popular WordPress plugins already, meaning you’ll be up and running in minutes. Have you automated your WordPress tasks before? Have any tips to share? Perhaps you have a burning question. Please share with us in the comments below.

