Luckily, there’s a fairly easy way to sidestep this, and in this tutorial I’m going to show you how. Afterwards, I’ll demonstrate how you can add your new avatar picture to your posts in two different ways (depending on the type of theme you’re using). Let’s get started.
Easy way to set your WordPress avatar without Gravatar
As is often the case with WordPress workarounds, the fastest way to get from point A to point B is by using a plugin. In this case, that plugin is called Basic User Avatars:
First, install the plugin via the WordPress dashboard like you would any other plugin:
- Go to Plugins → Add New Plugin.
- Then search for “basic user avatars.”
- Once it populates, click on Install → Activate.
Afterwards, using the same WordPress dashboard menu, find Users and click on All Users. Locate your user profile on the list and tap on Edit:
Next, scroll all the way to the bottom of your user profile until you see the Upload Avatar section. Then click on Choose File. This will open up the usual popup window that’s linked to your hard drive. Find the photo you’d like to use for your avatar and upload it.
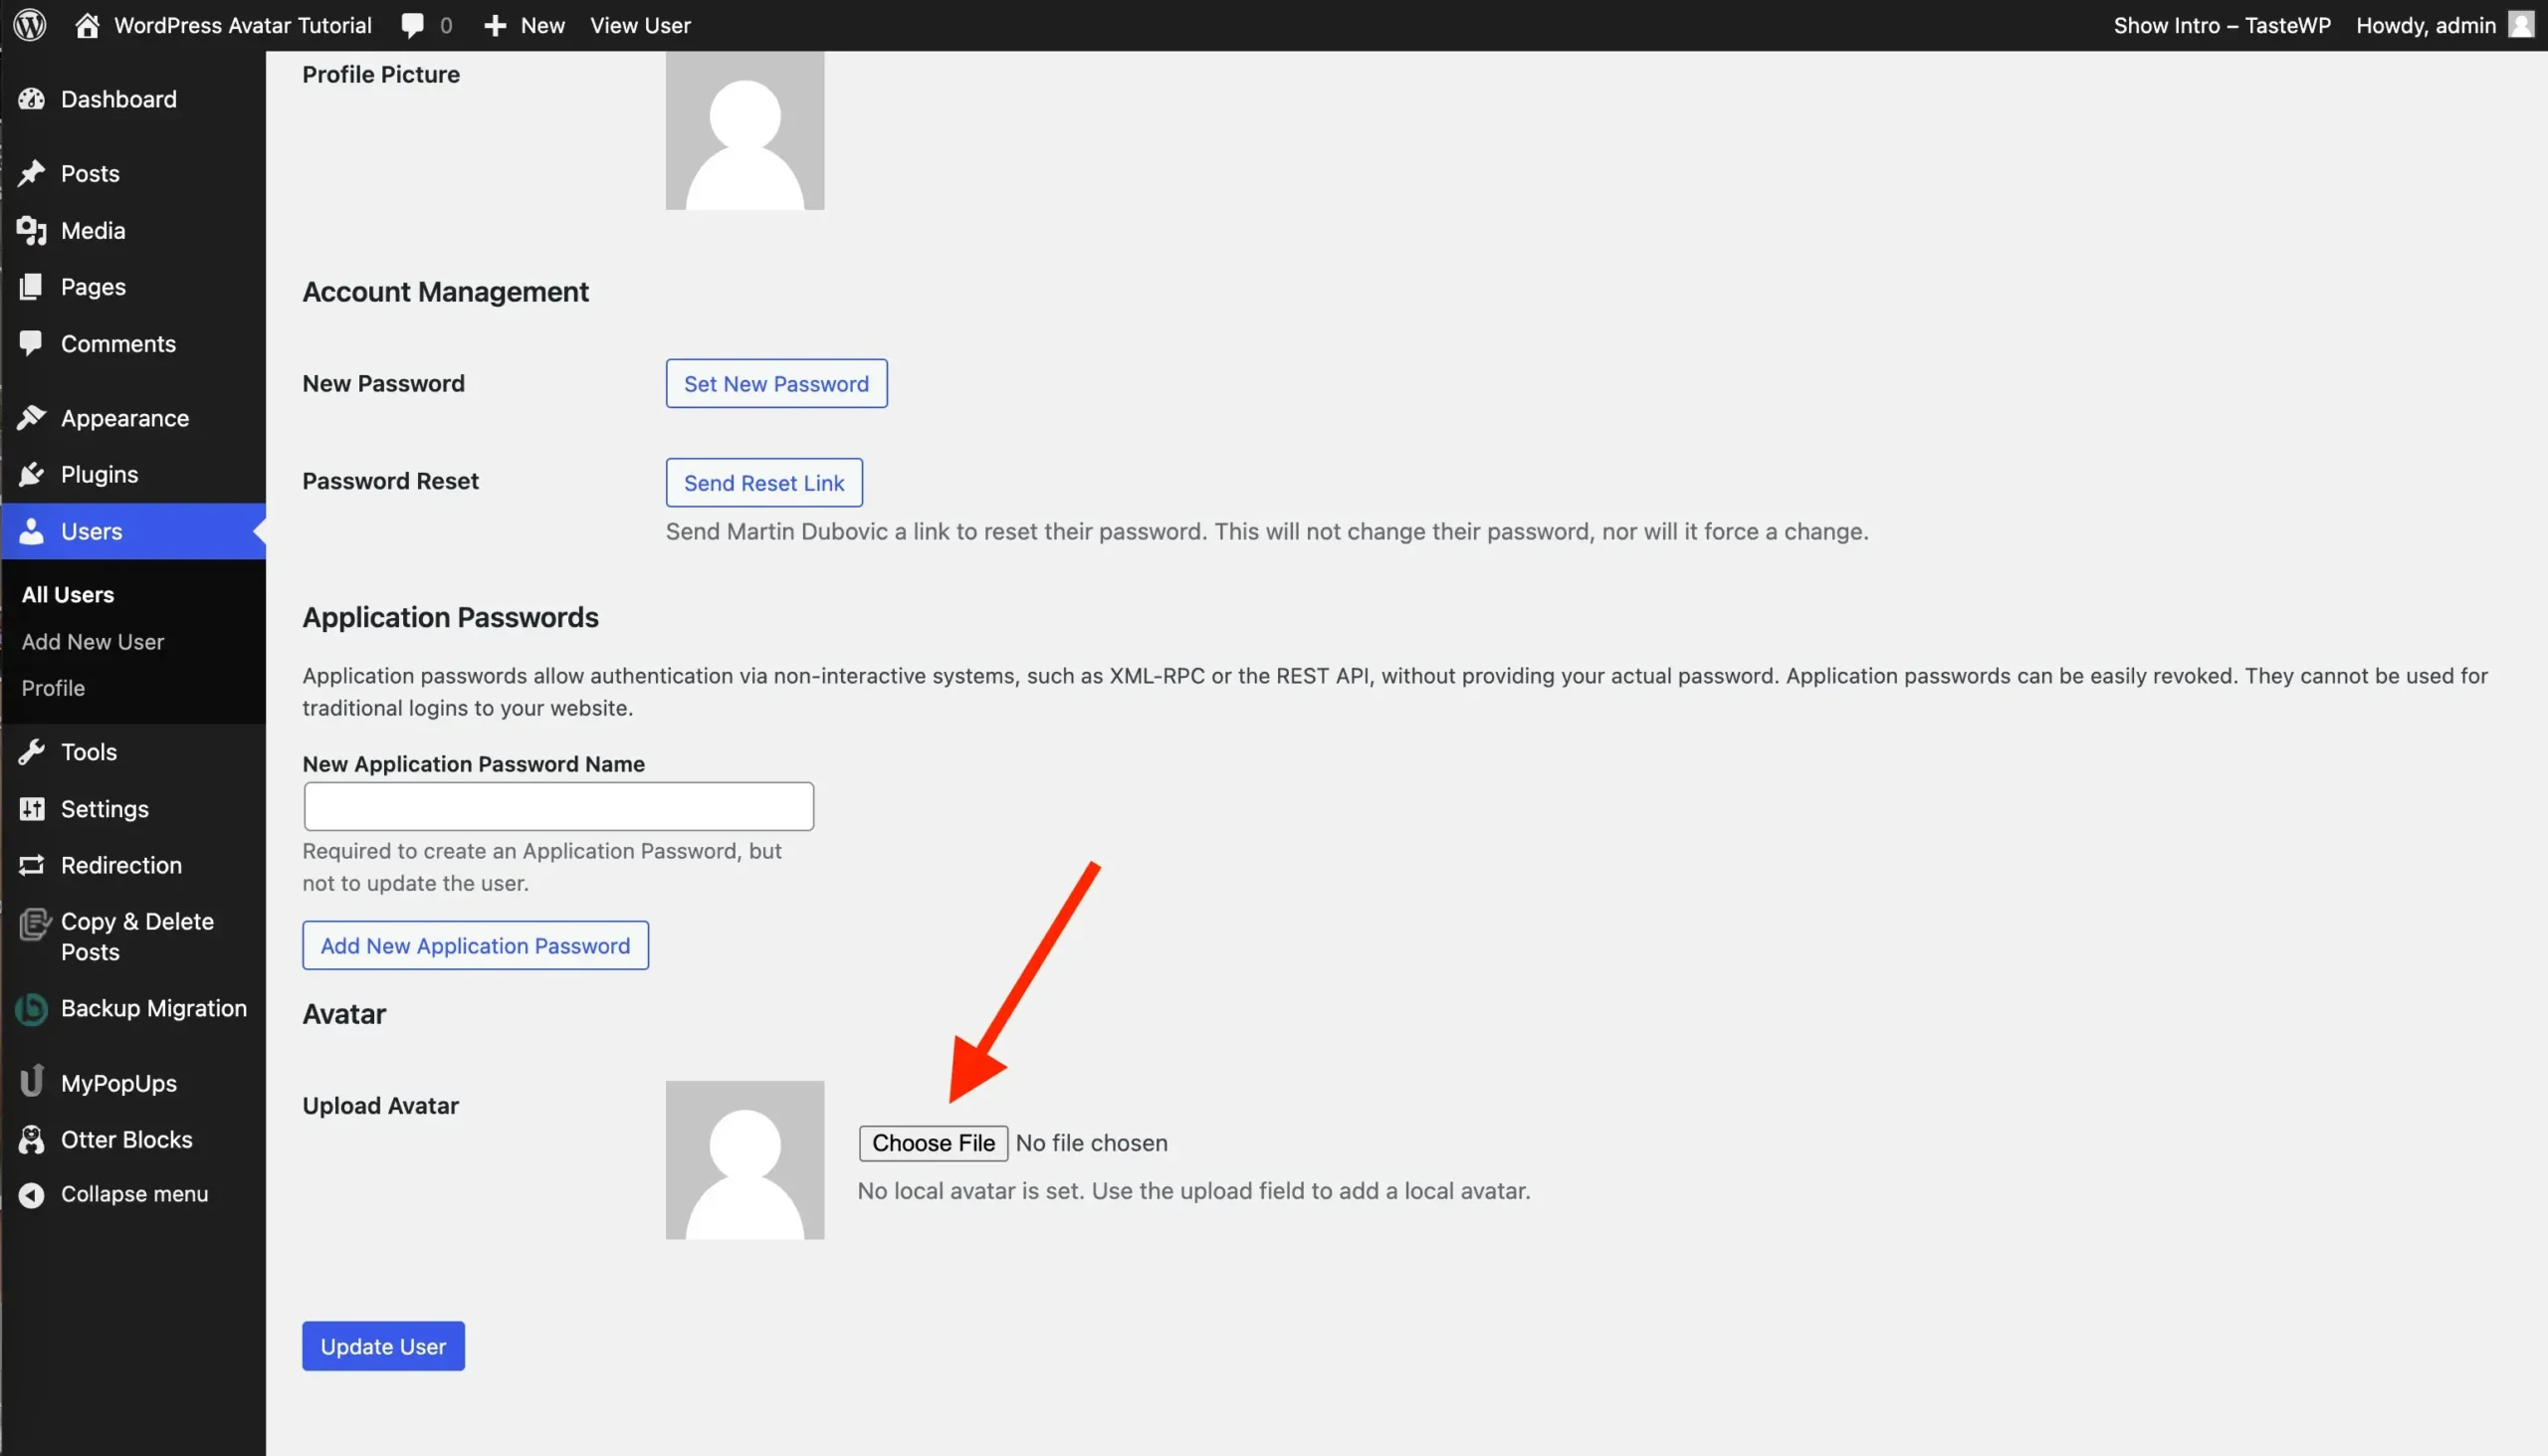
Once you’ve done so, the part that says No file chosen (next to Choose File) will change to whatever the file name of your photo is:

Click the Update User button at the very bottom of the page and the blank placeholder will change to your image:
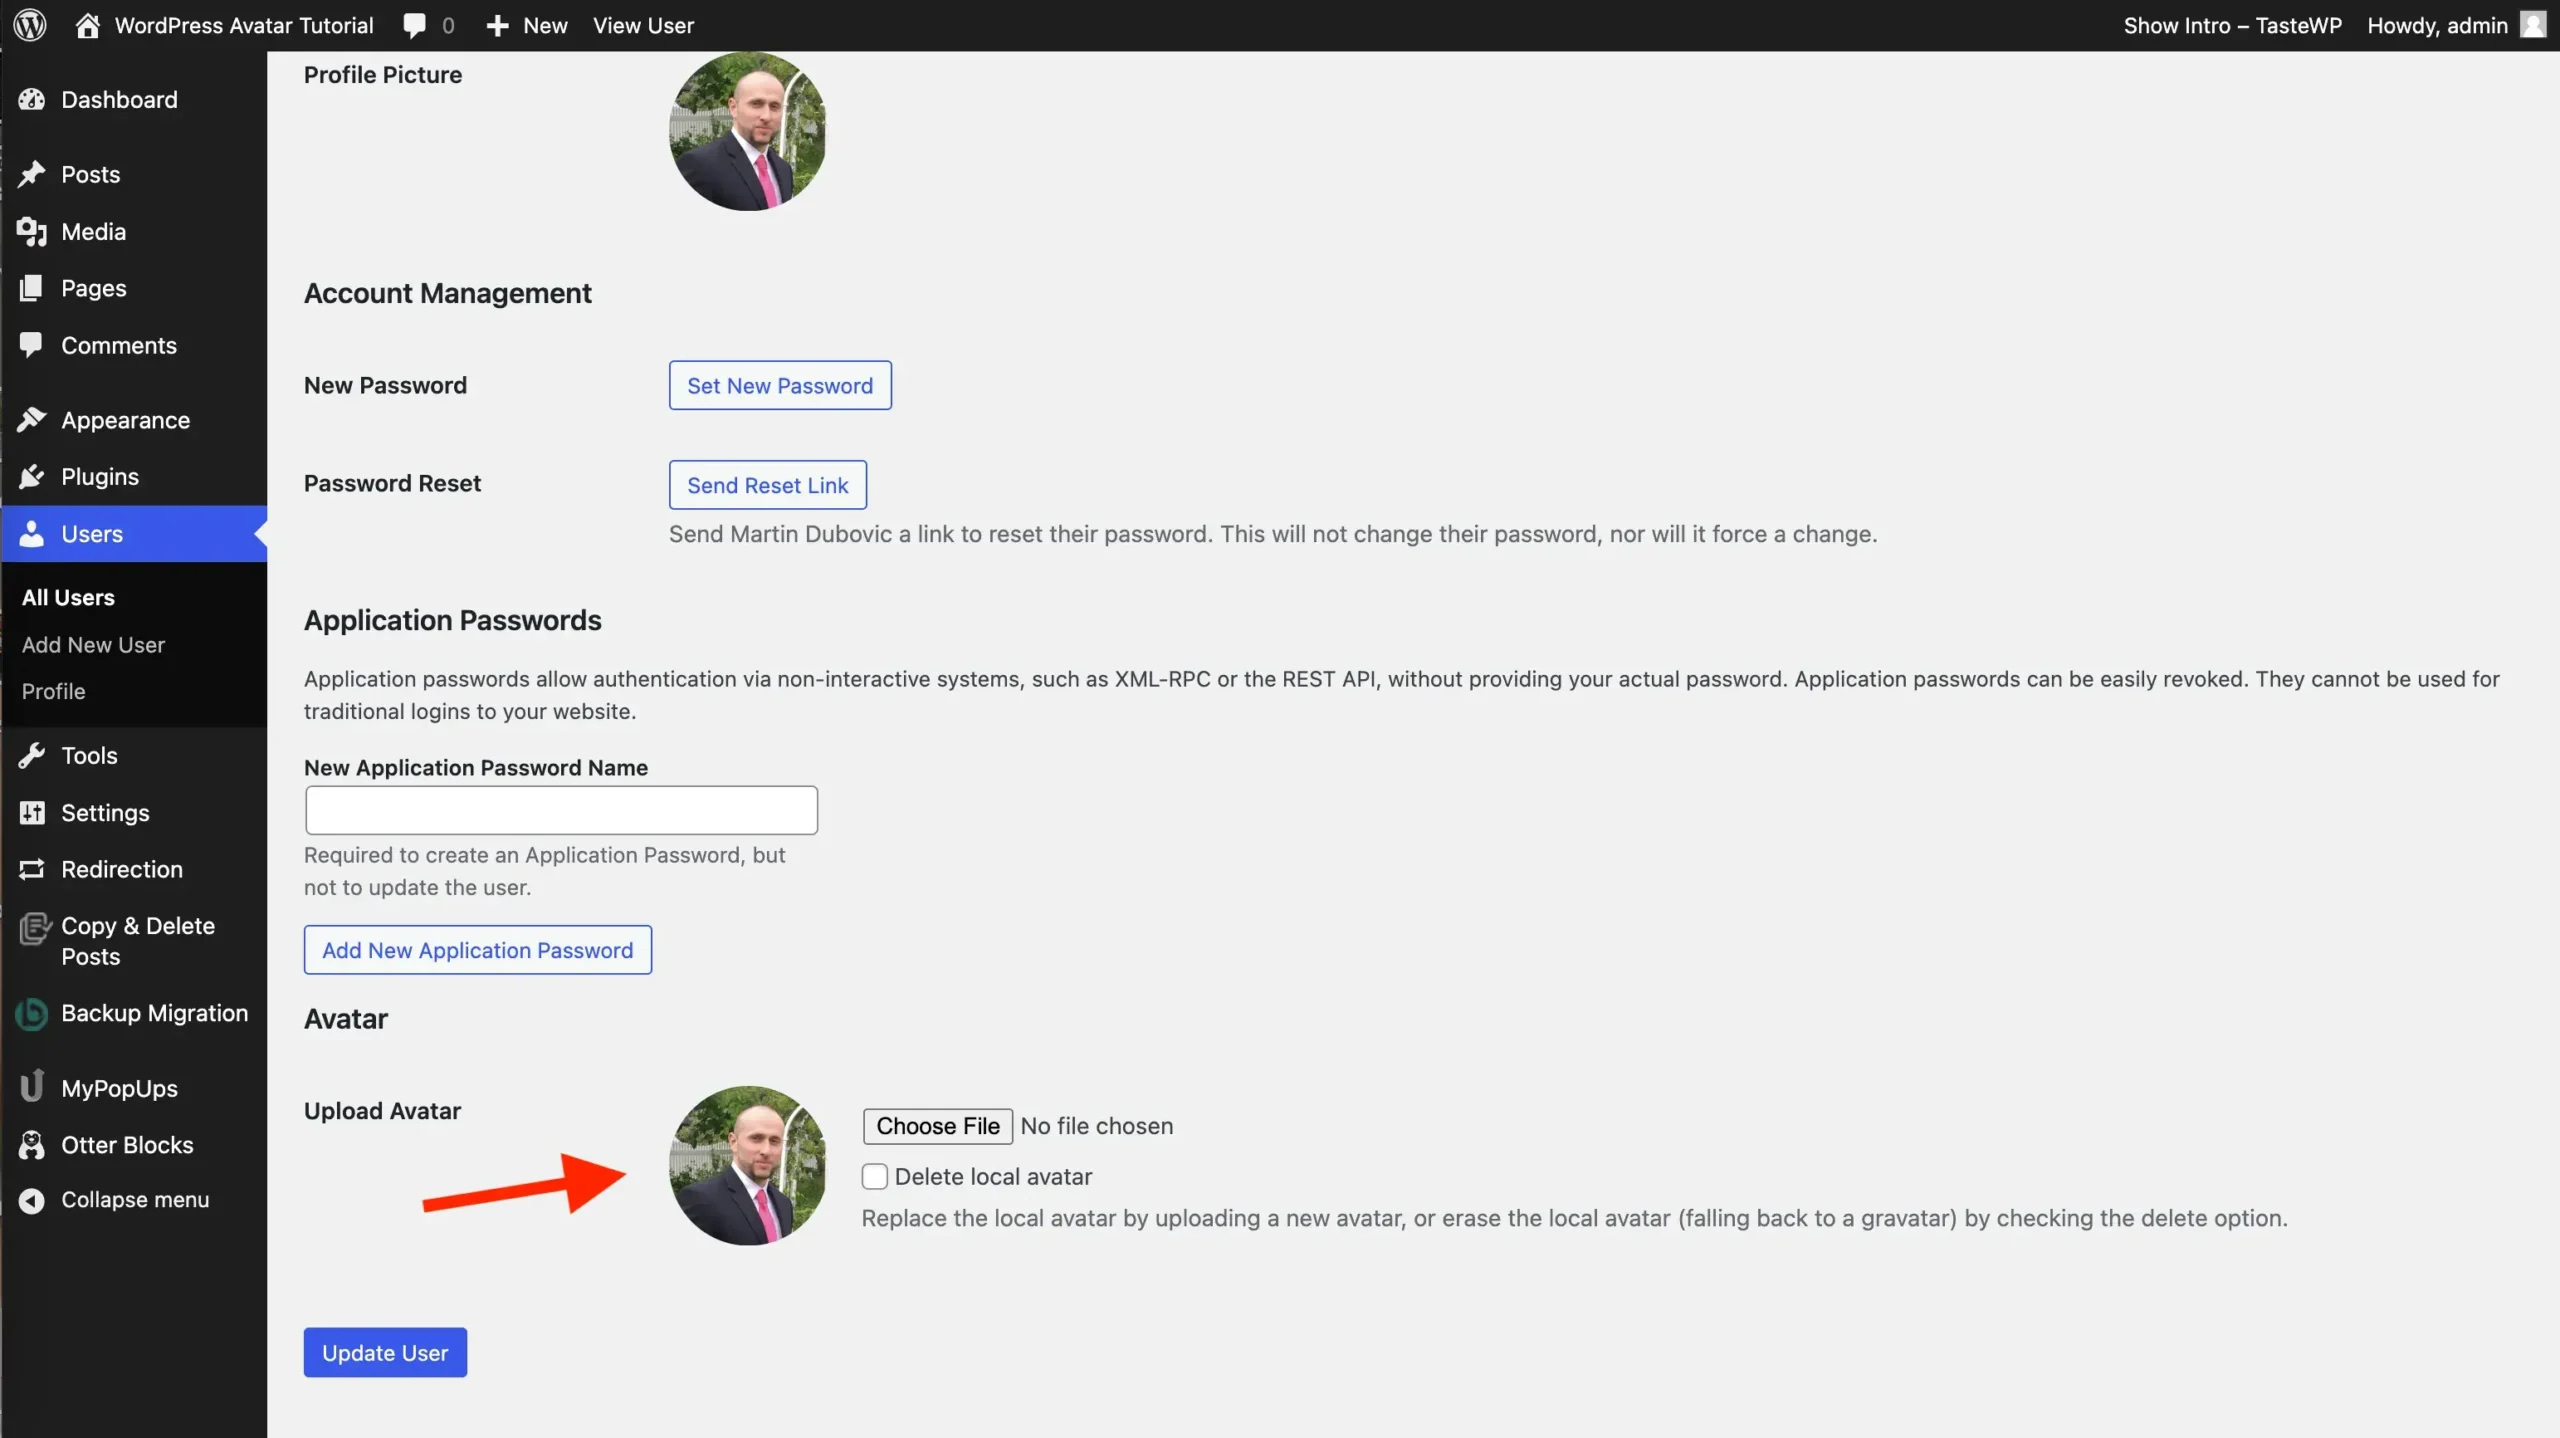
You’ll notice that it will also update the placeholder image in the Profile Picture section, which is where the Gravatar link would be if you weren’t using the Basic User Avatars plugin.
Not too bad, right?
How to add your new avatar image to posts
Now that you have your avatar picture all set up, you’re probably wondering how you can add it to your posts.
Unfortunately, this is one of those scenarios where the answer is “it depends.”
To be specific, it depends on the theme you are using. This is because the theme is going to control how you can customize your page layout, which includes where and how you can add author information.
To help get you moving in the right direction, I will show you how to do it in Neve, using the WordPress Customizer. Afterwards, I will give you a rundown of how to do it using Neve FSE, using the full site editor (FSE).
The rationale behind this is that Neve is a classic WordPress theme, while Neve FSE is a newer block theme. Classic themes and block themes function a bit differently from each other. By showing you an example of each, you should be able to figure it out even if you’re using a different classic theme or block theme.
Example of how to do it using a classic theme
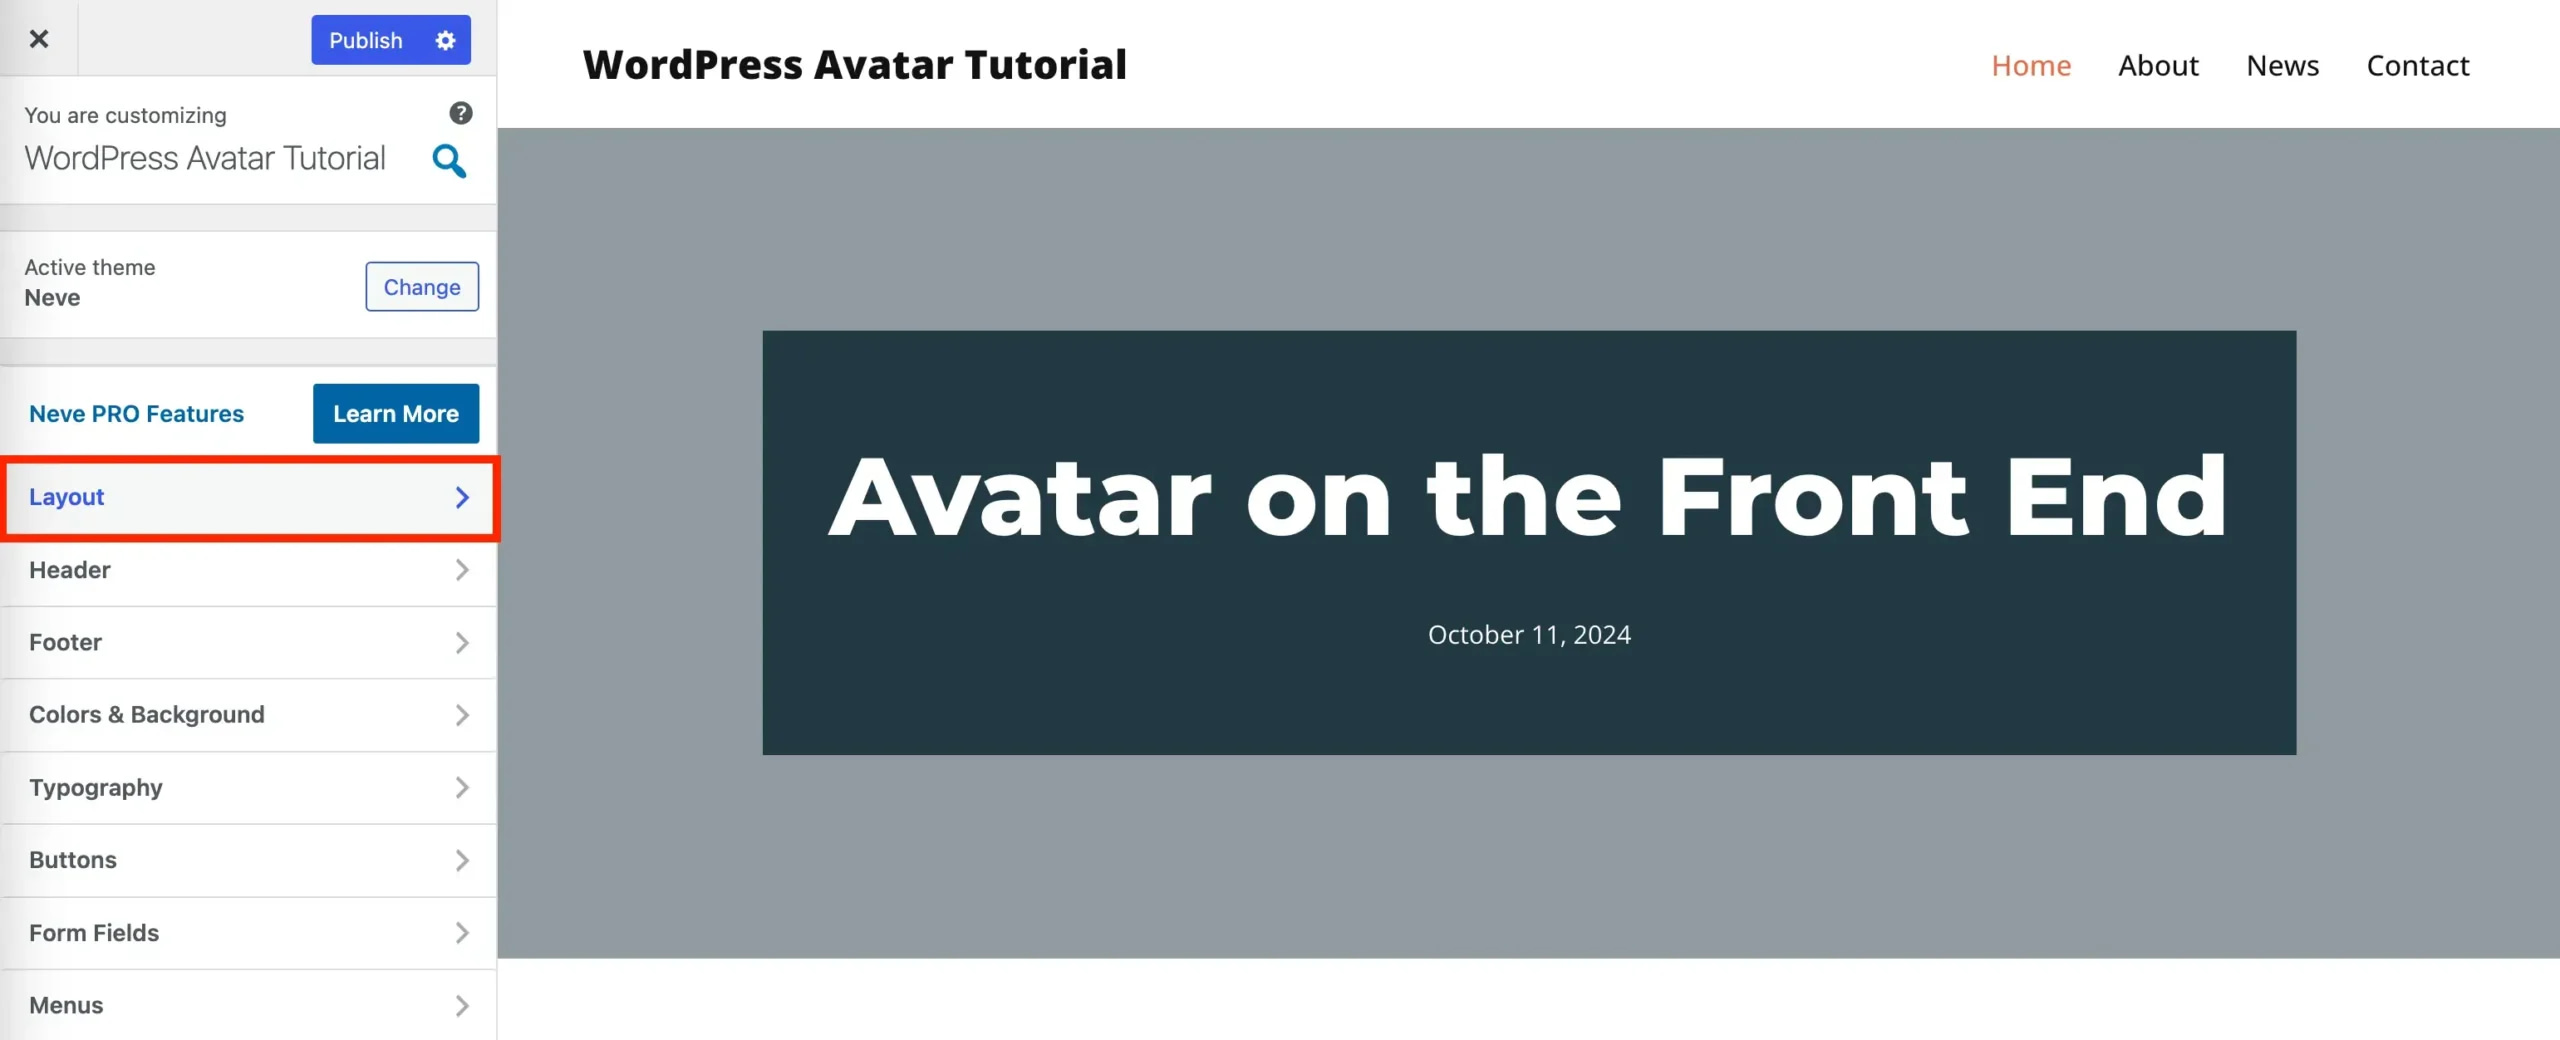
To begin, from the WordPress dashboard, go to Appearance → Customize.
Next, click on Layout:
Then tap Single Post:
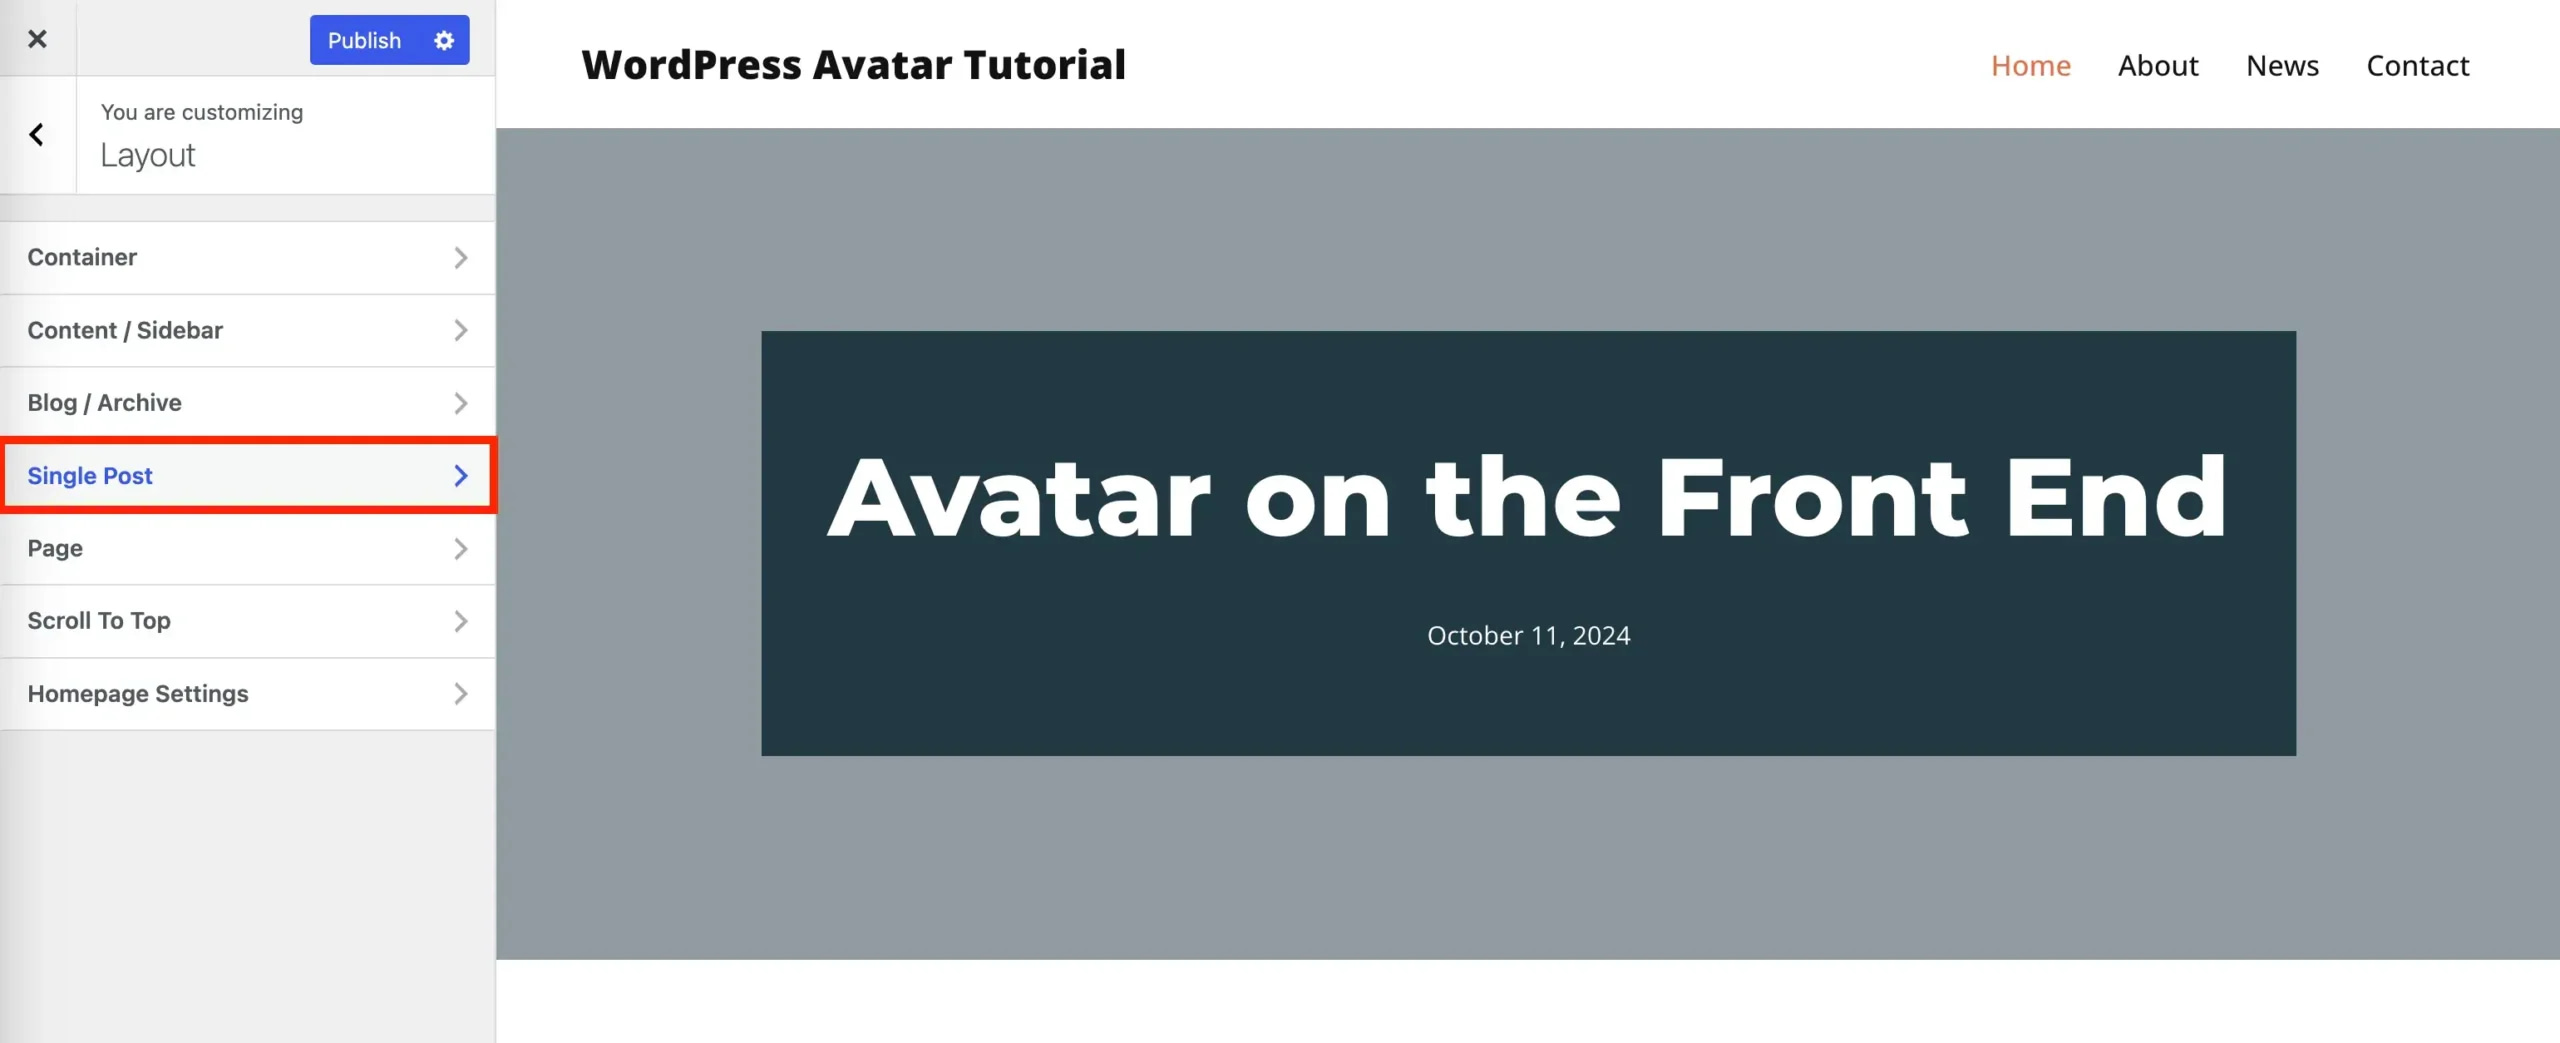
This will bring you into the area where the magic happens.
Scroll down until you see POST META. Then look for the section that says Author. Tap on the eyeball to make it visible. Below that you will see a toggle option that says Show Author Avatar. Make sure it’s on.
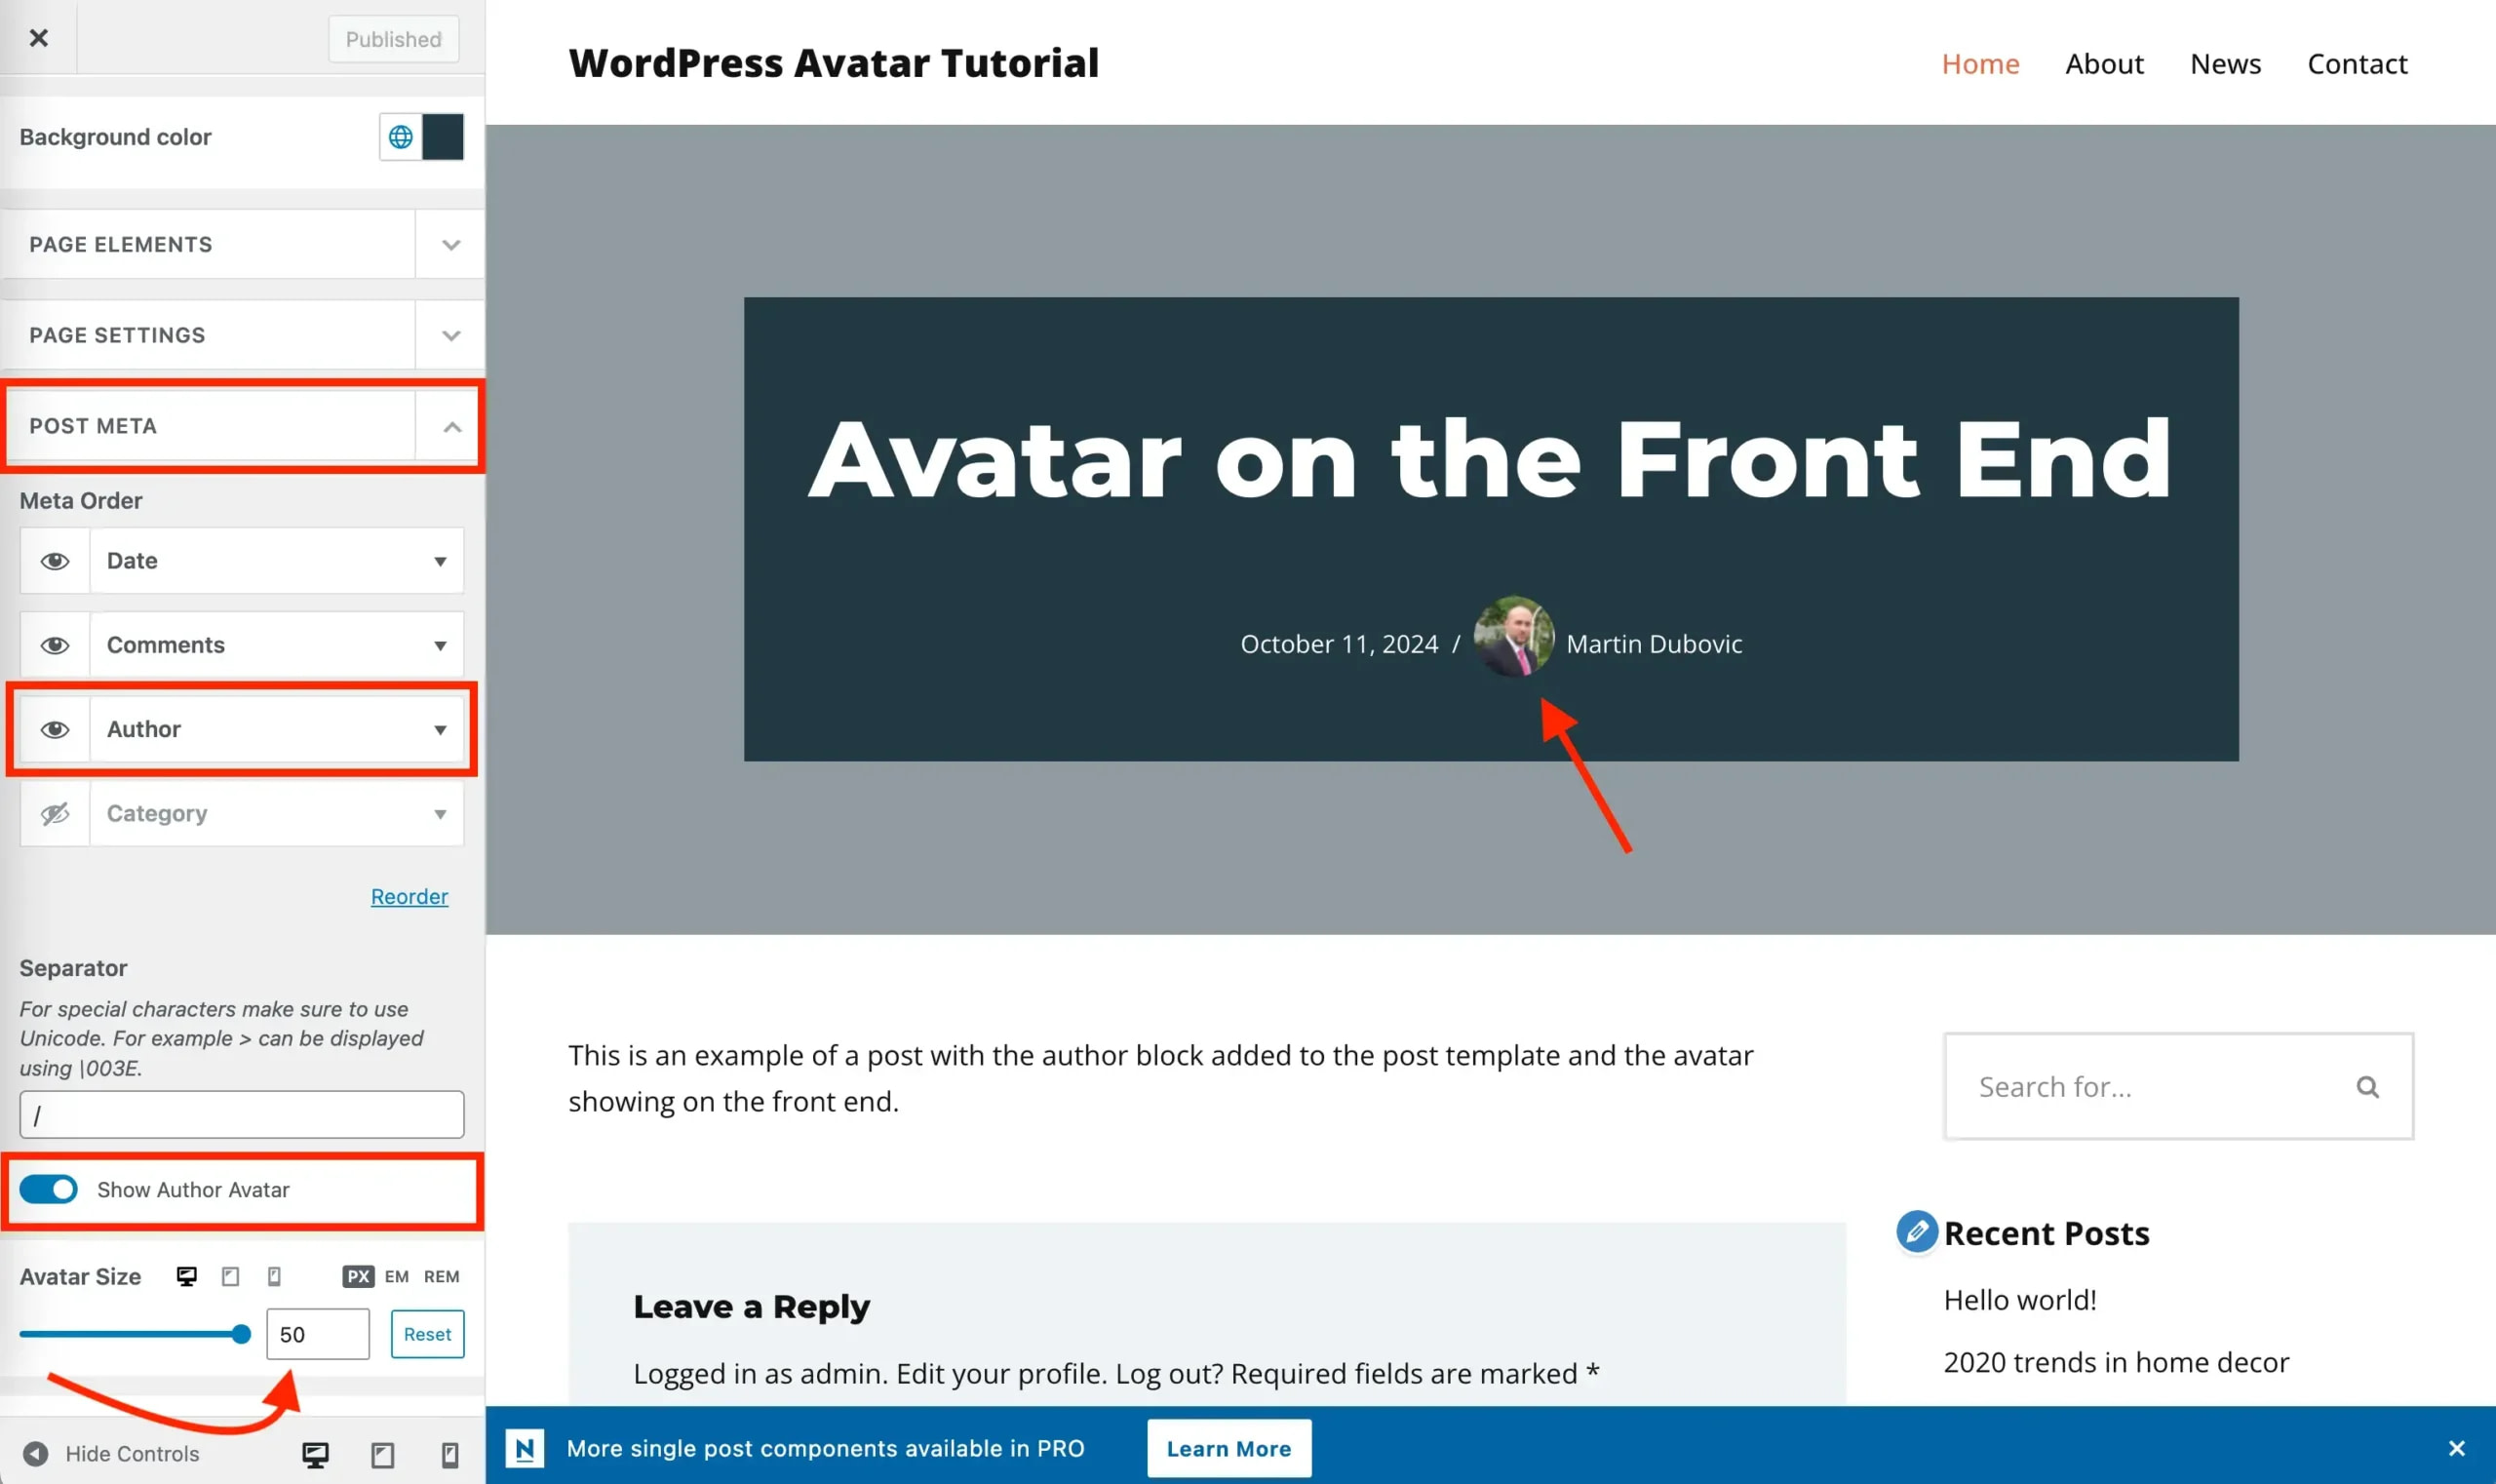
Just underneath that, you’ll be able to adjust the size of the avatar image. In the example above, I made mine 50 pixels. Note that you can also customize the size on tablet and mobile devices separately.
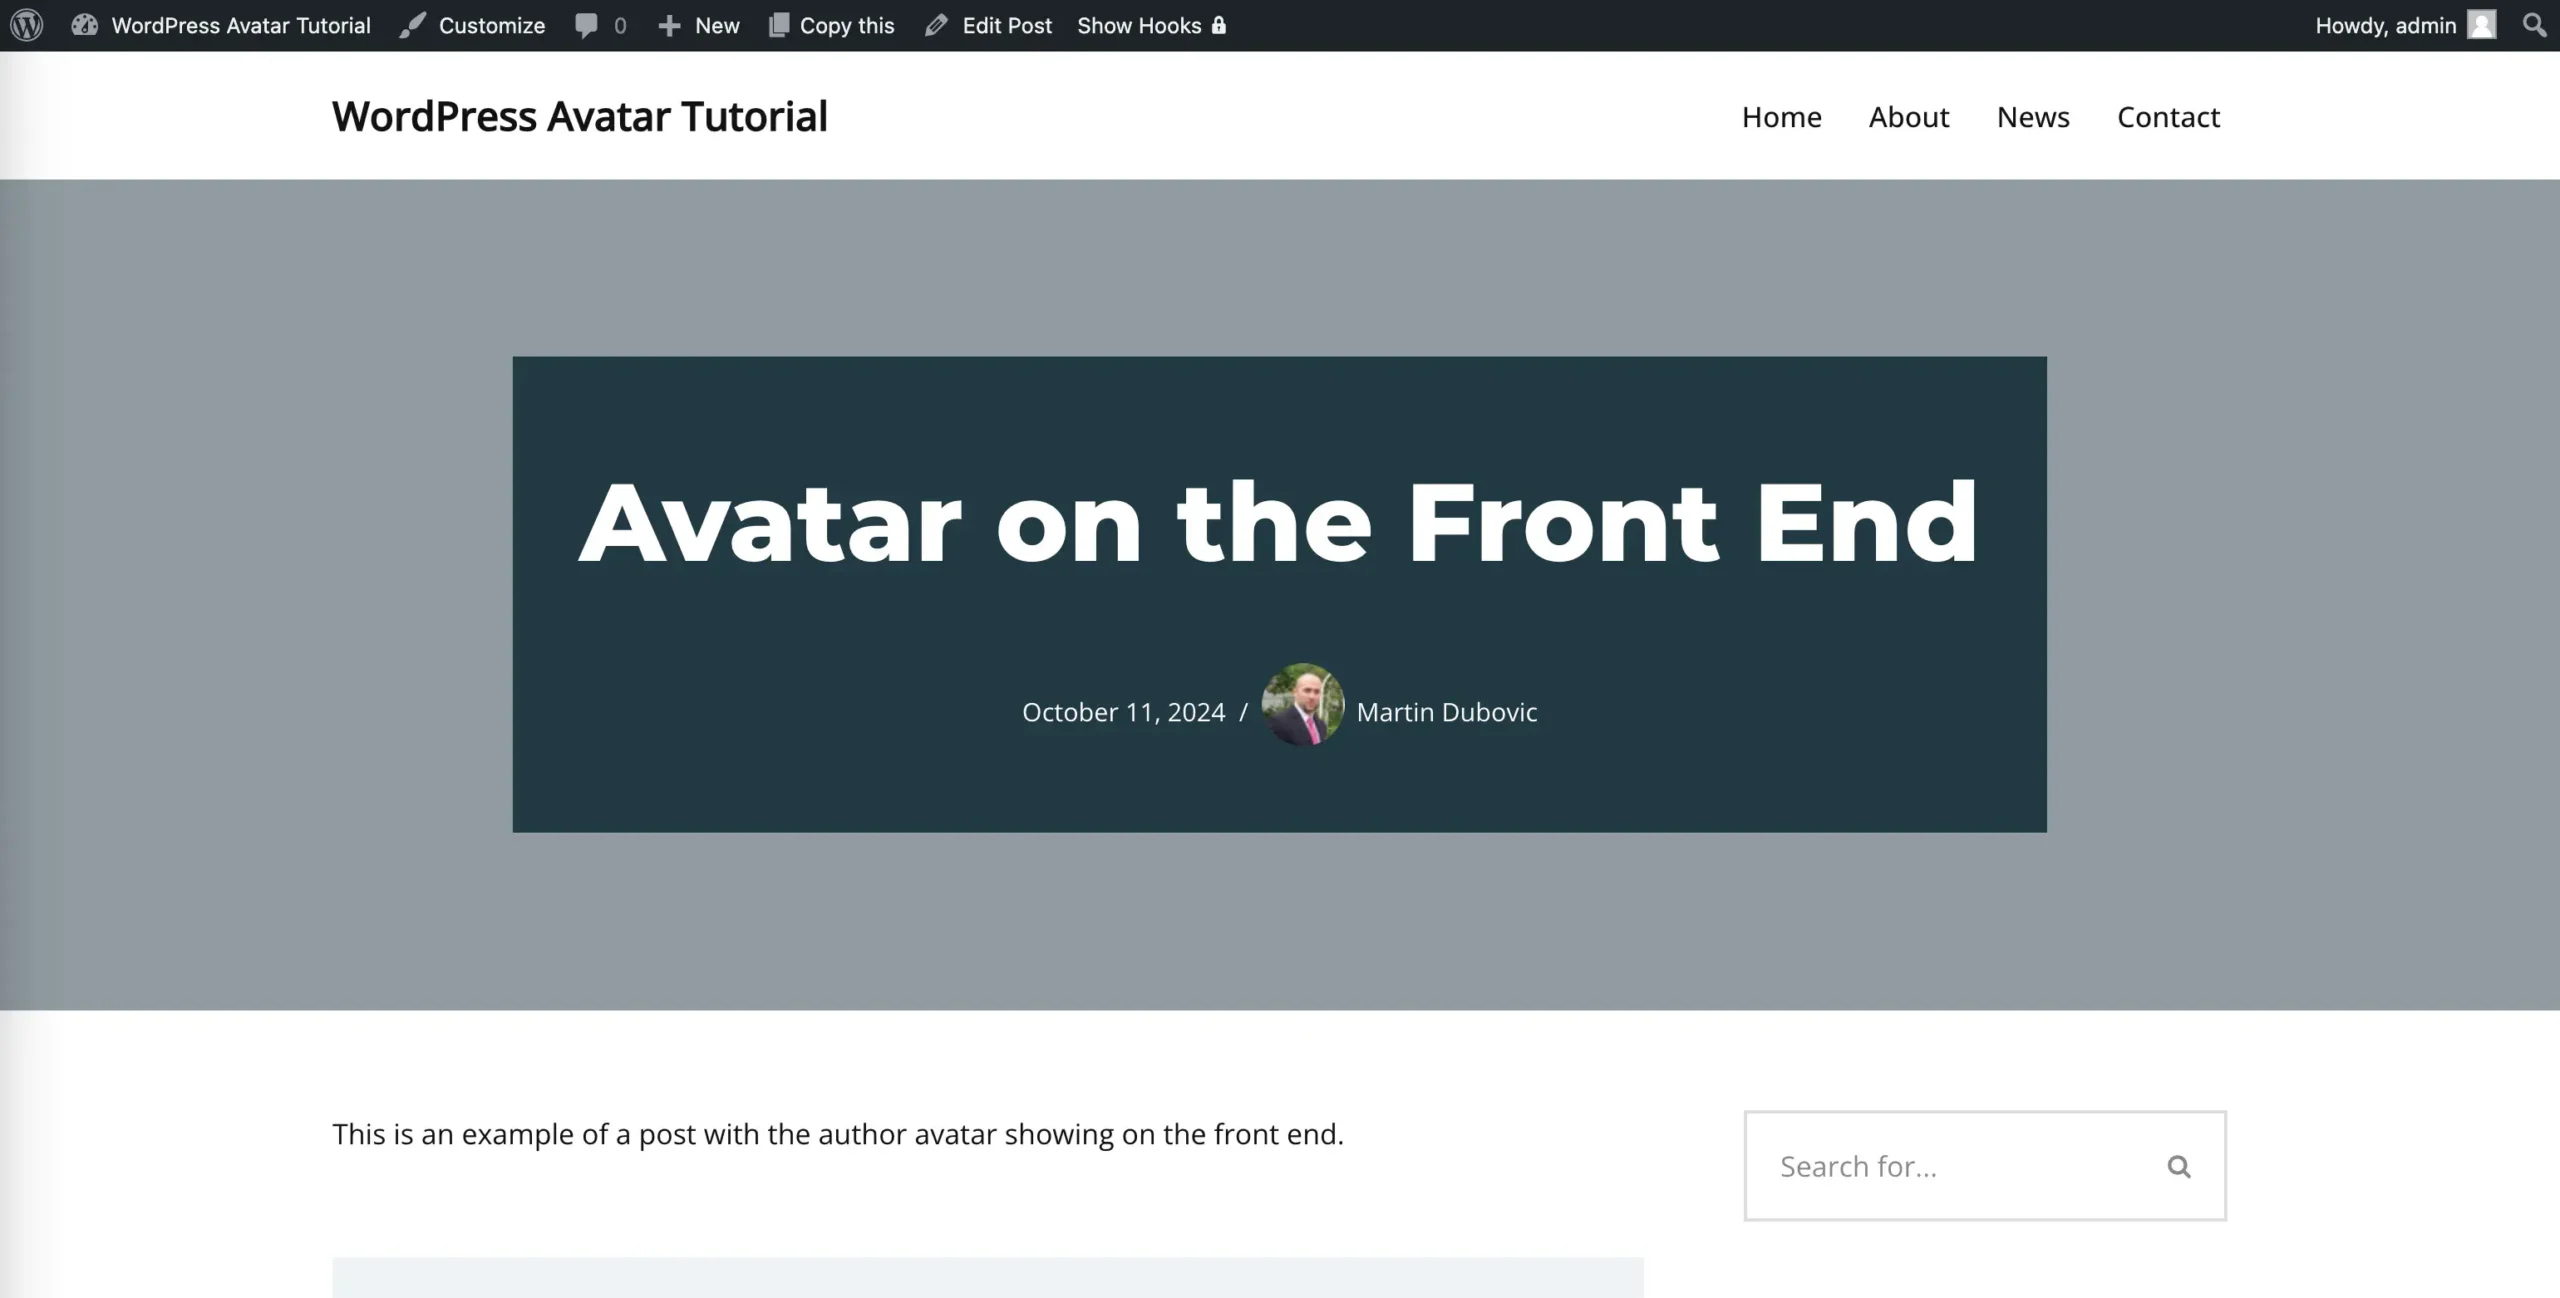
When everything looks the way you like, click the Publish button at the top of the lefthand side menu. You can then check any posts that you are the author on and you should see your new avatar profile picture there:
Example of how to do it using a block theme
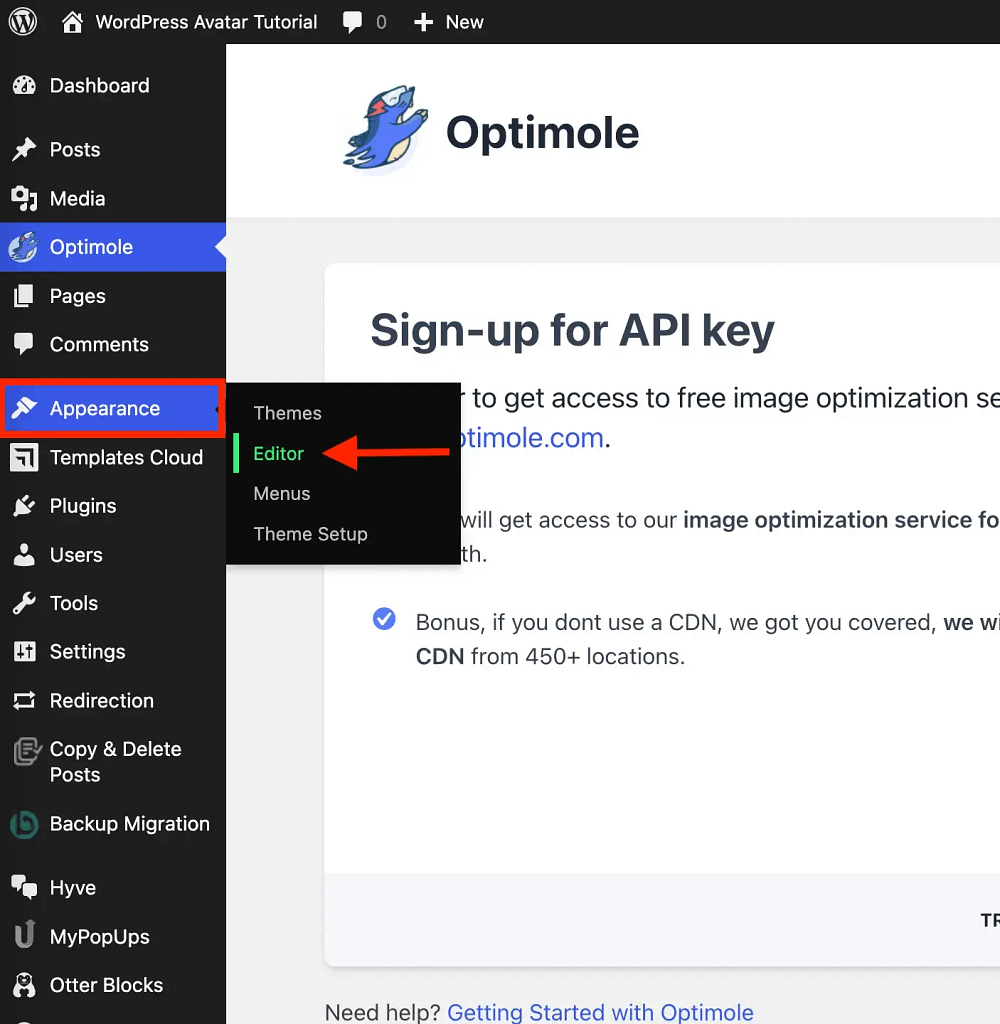
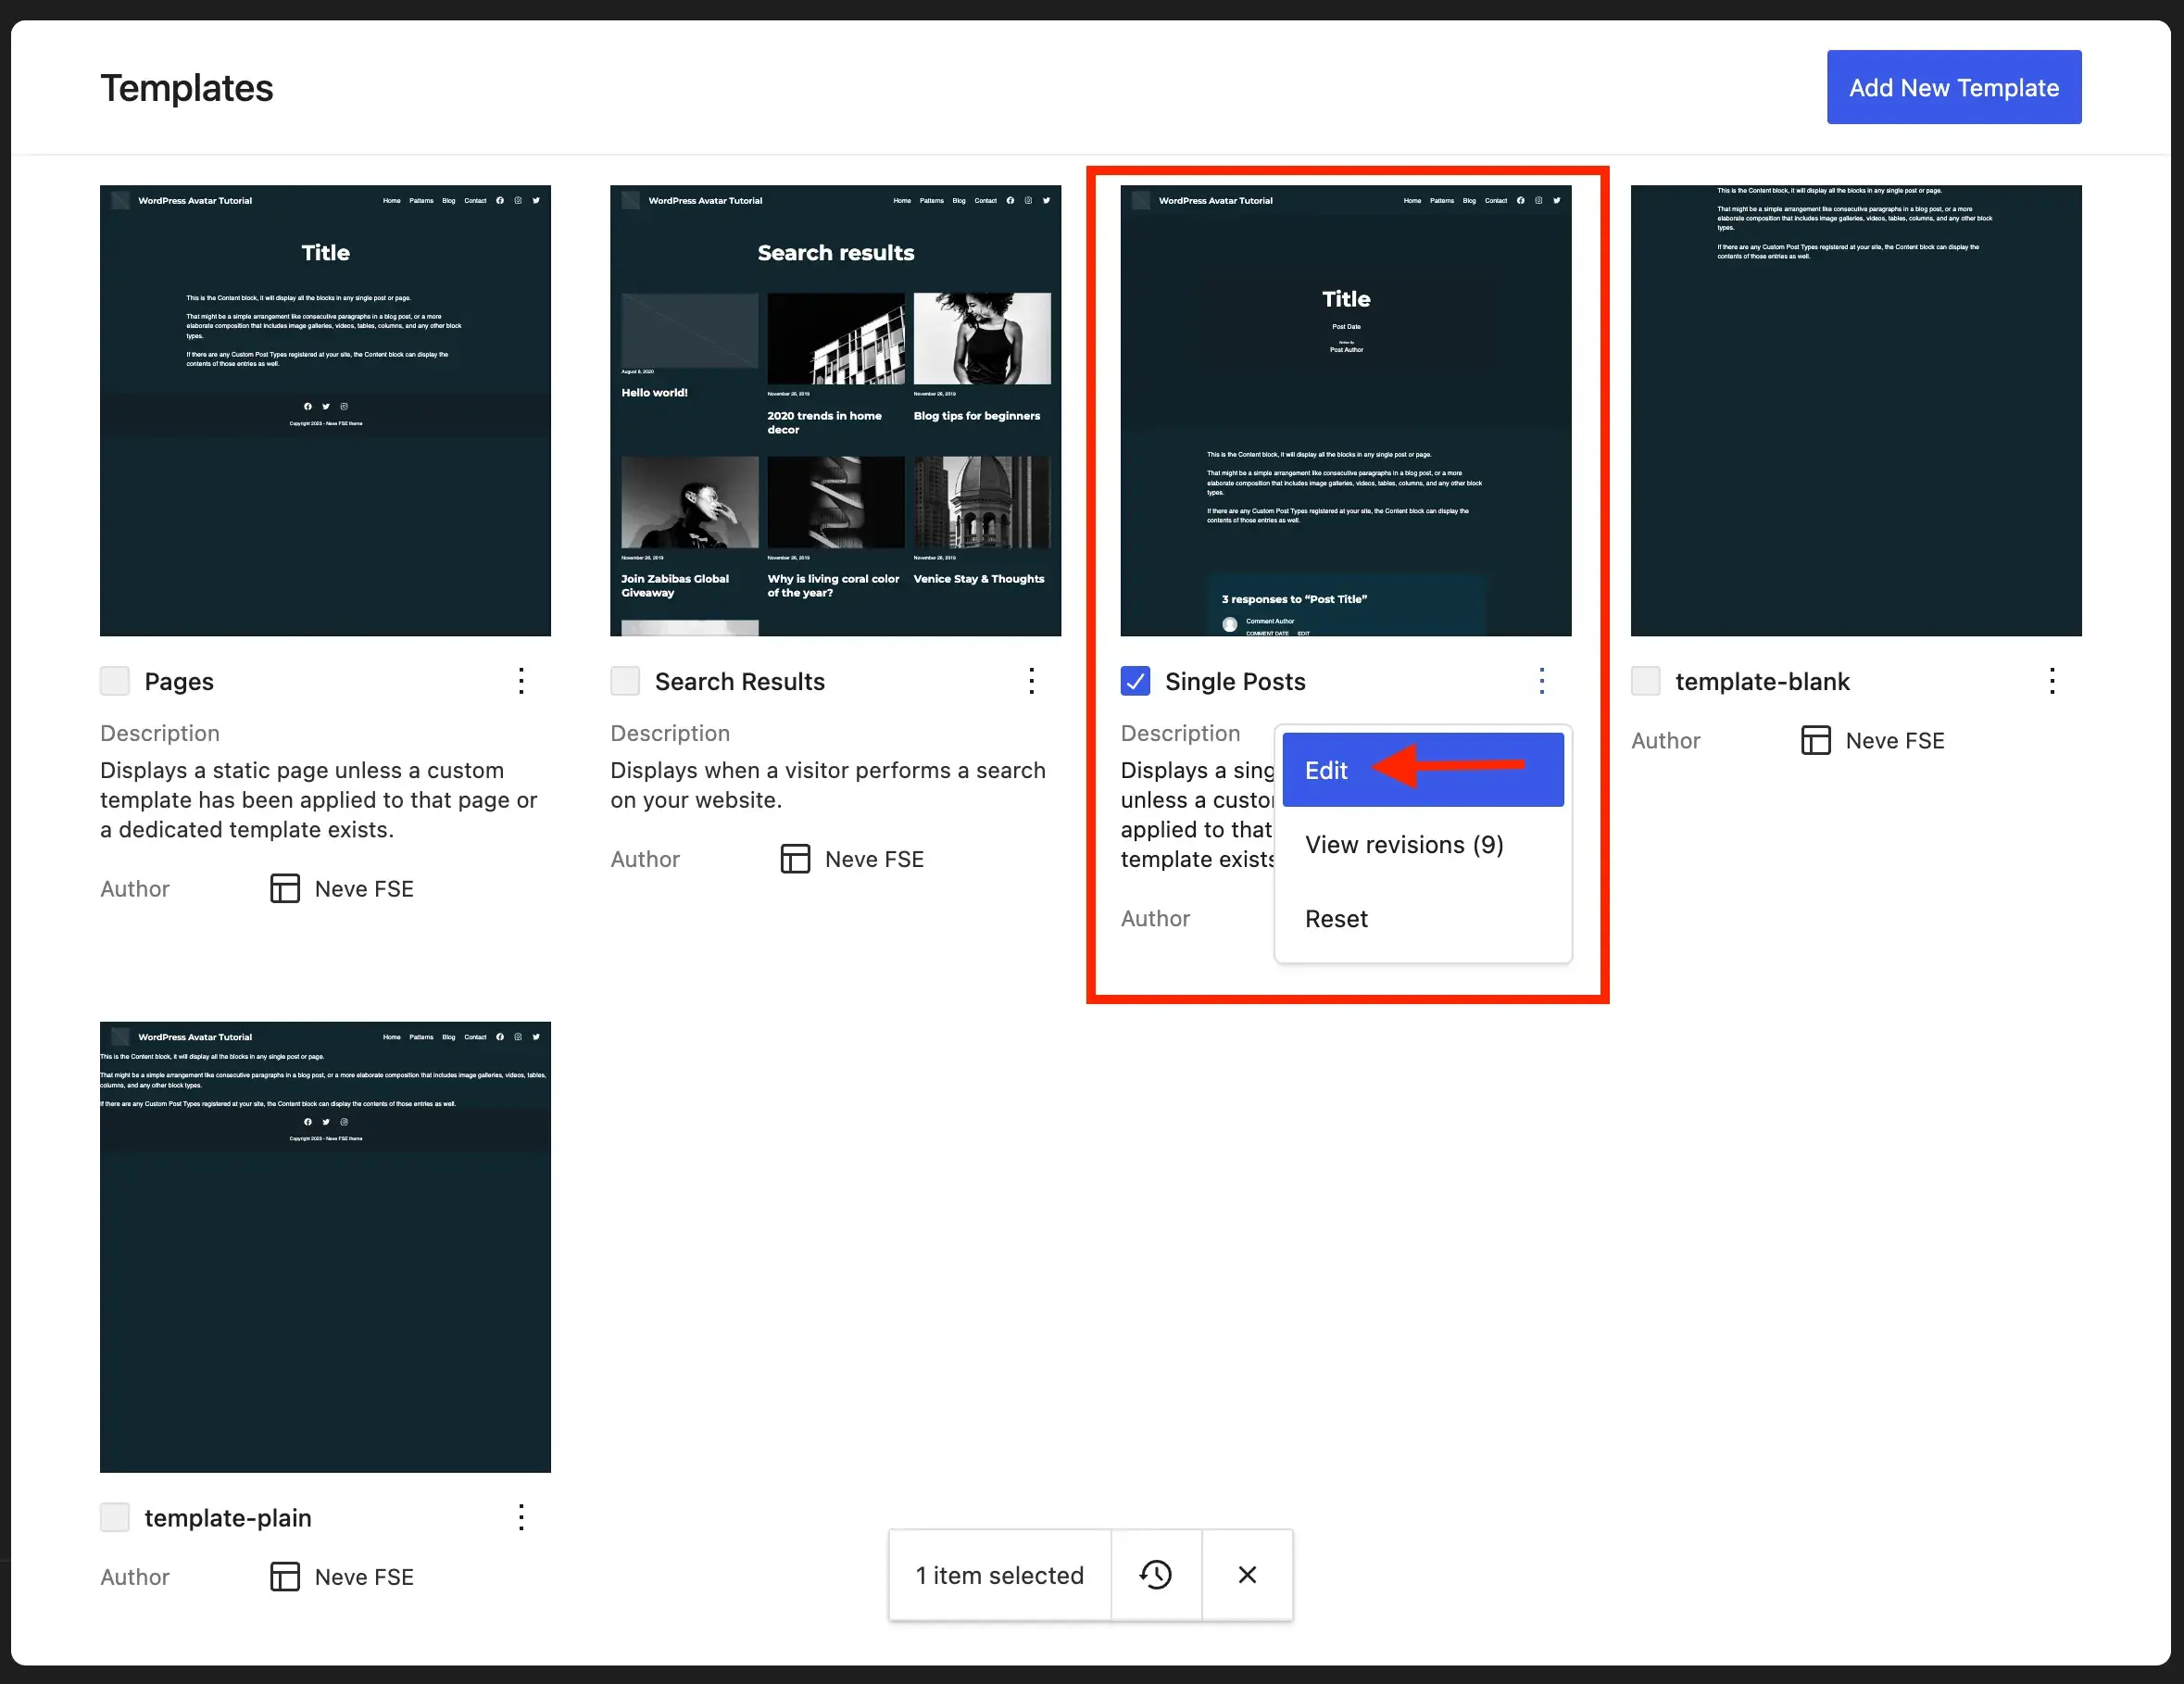
From the WordPress dashboard, go to Appearance → Editor. This will bring you into the full site editor (FSE). Click on Templates:
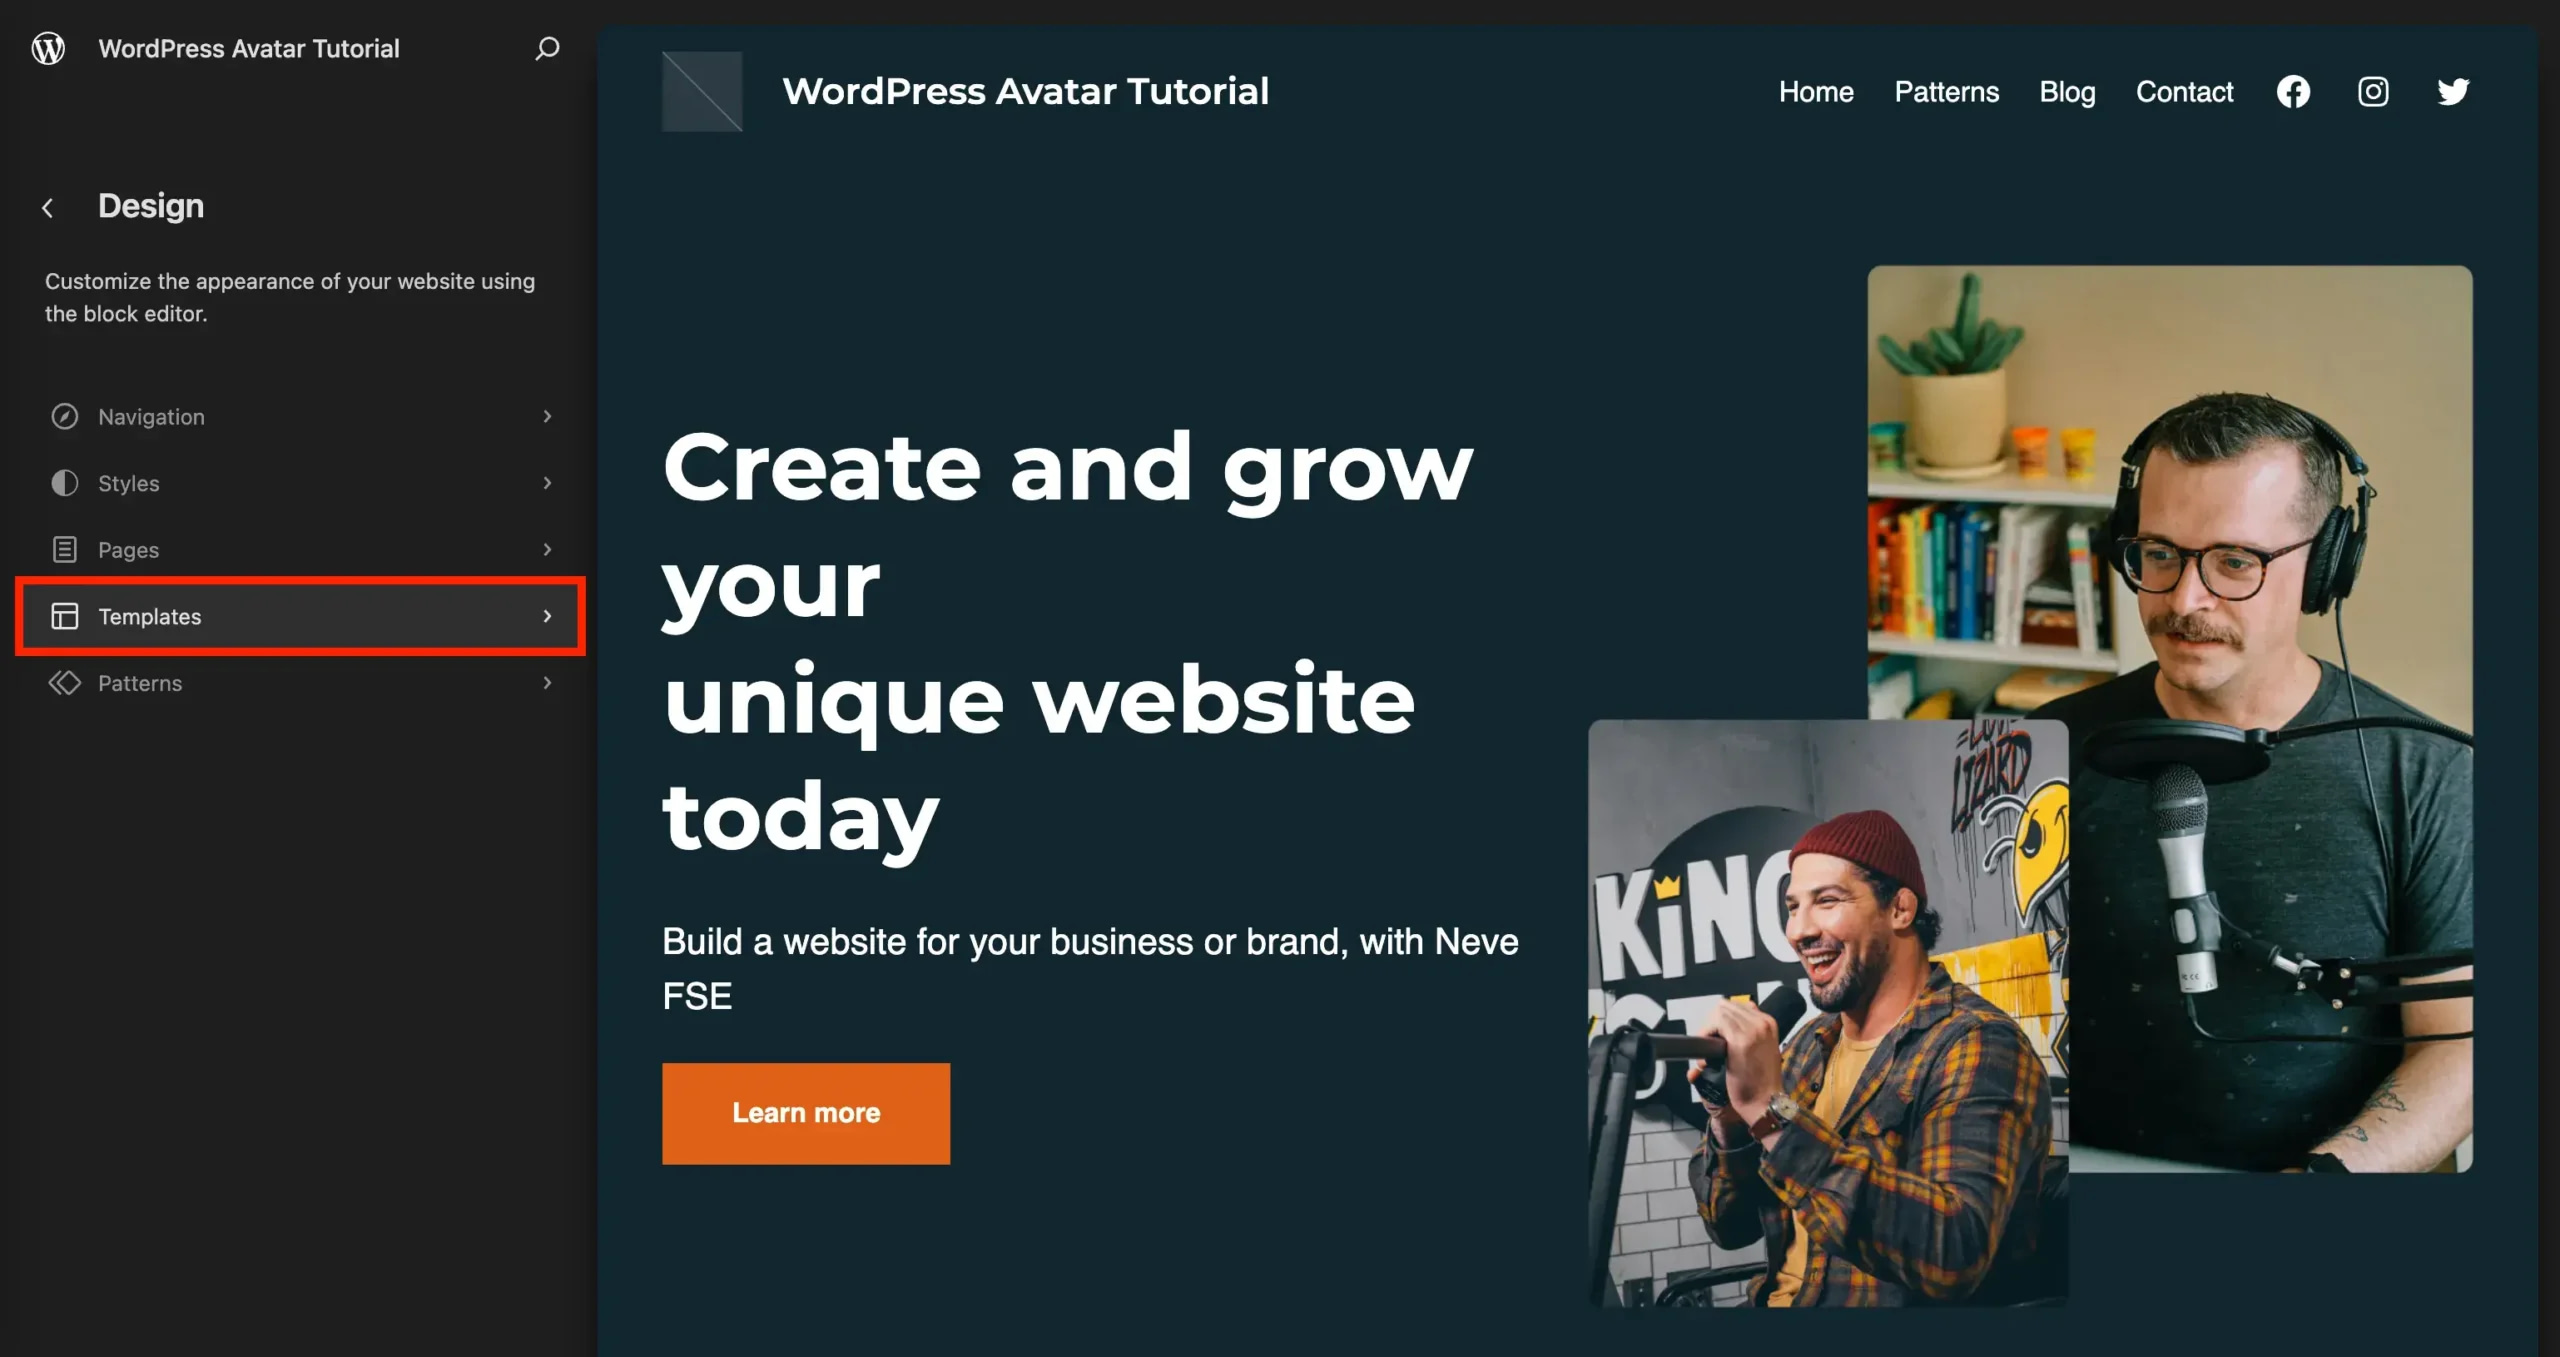
Select Single Posts. Then tap the three little dots to the right of it and choose Edit:
Here’s where things might seem intuitive at first, but are actually a bit tricky. So pay close attention.
There is an Author block you can add to the template. This block will show the display name of the author assigned to the post. That Author block also happens to have a toggle that says Show avatar. If you’re thinking “perfect, let’s turn it on,” I wouldn’t blame you. It seems like the logical next step to take. But alas, it is not.
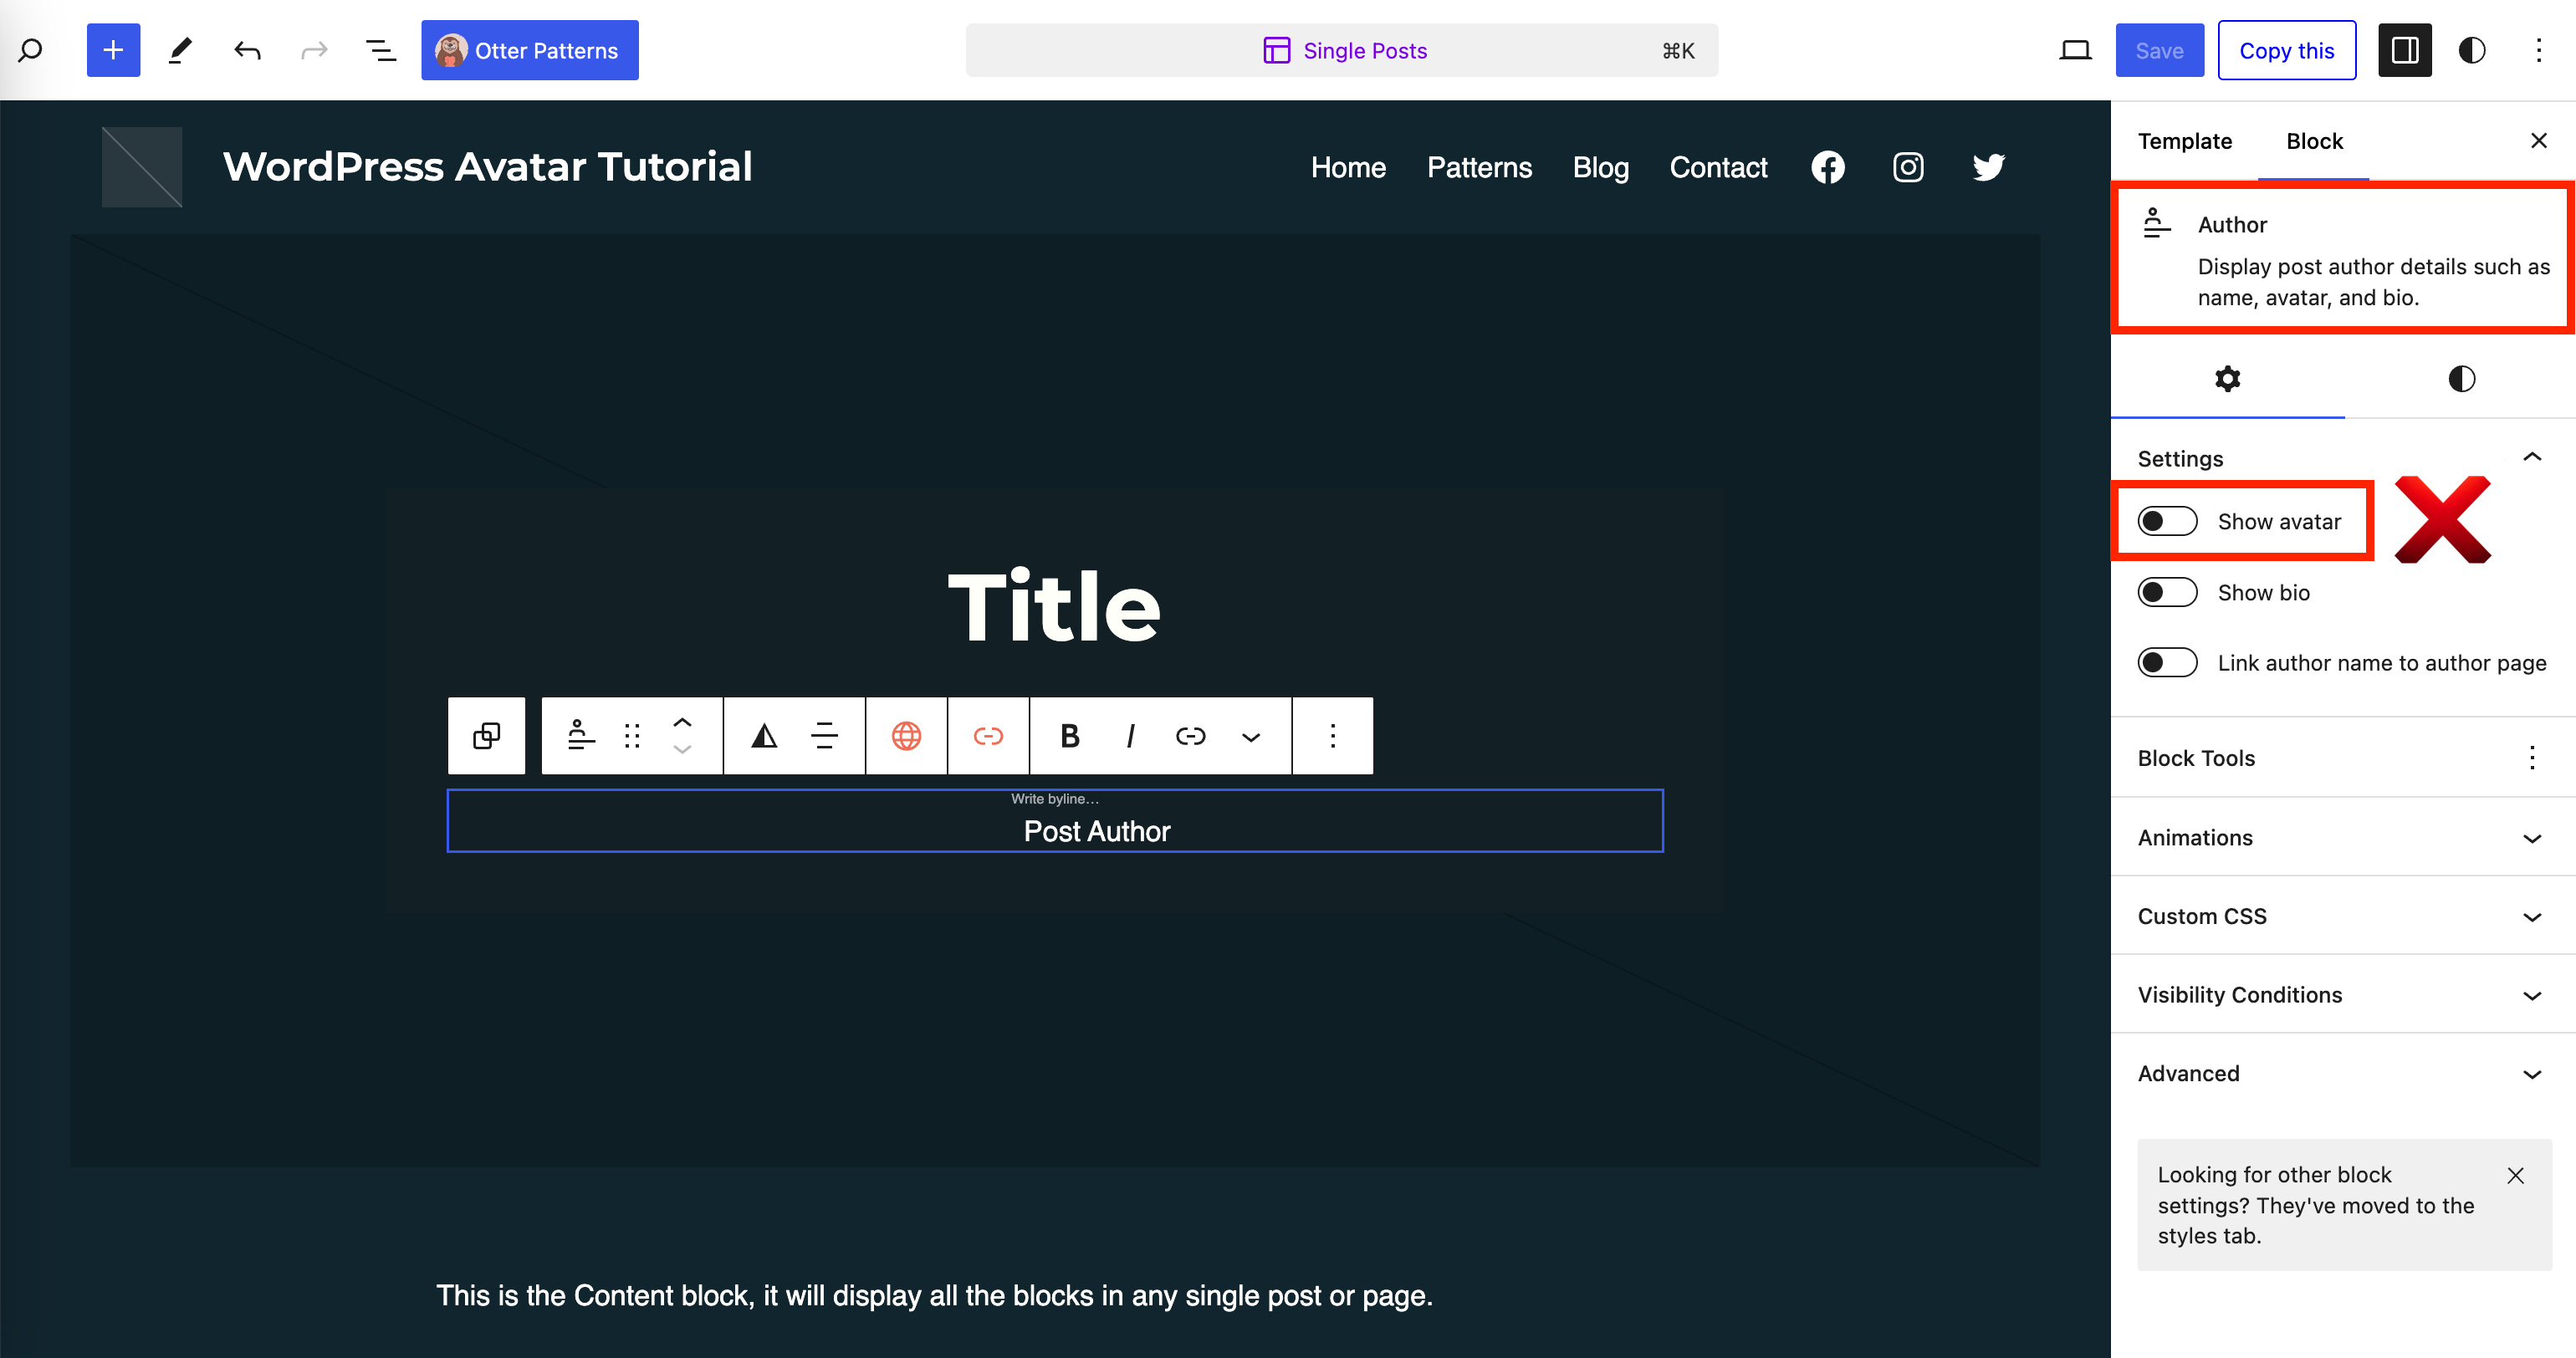
As of the time of this writing, there appears to be a strange bug with the feature, which causes an extreme gap between the author name and the avatar profile photo when viewed on the frontend.
But there’s no need to worry. You can still make it work by using a separate Avatar block:
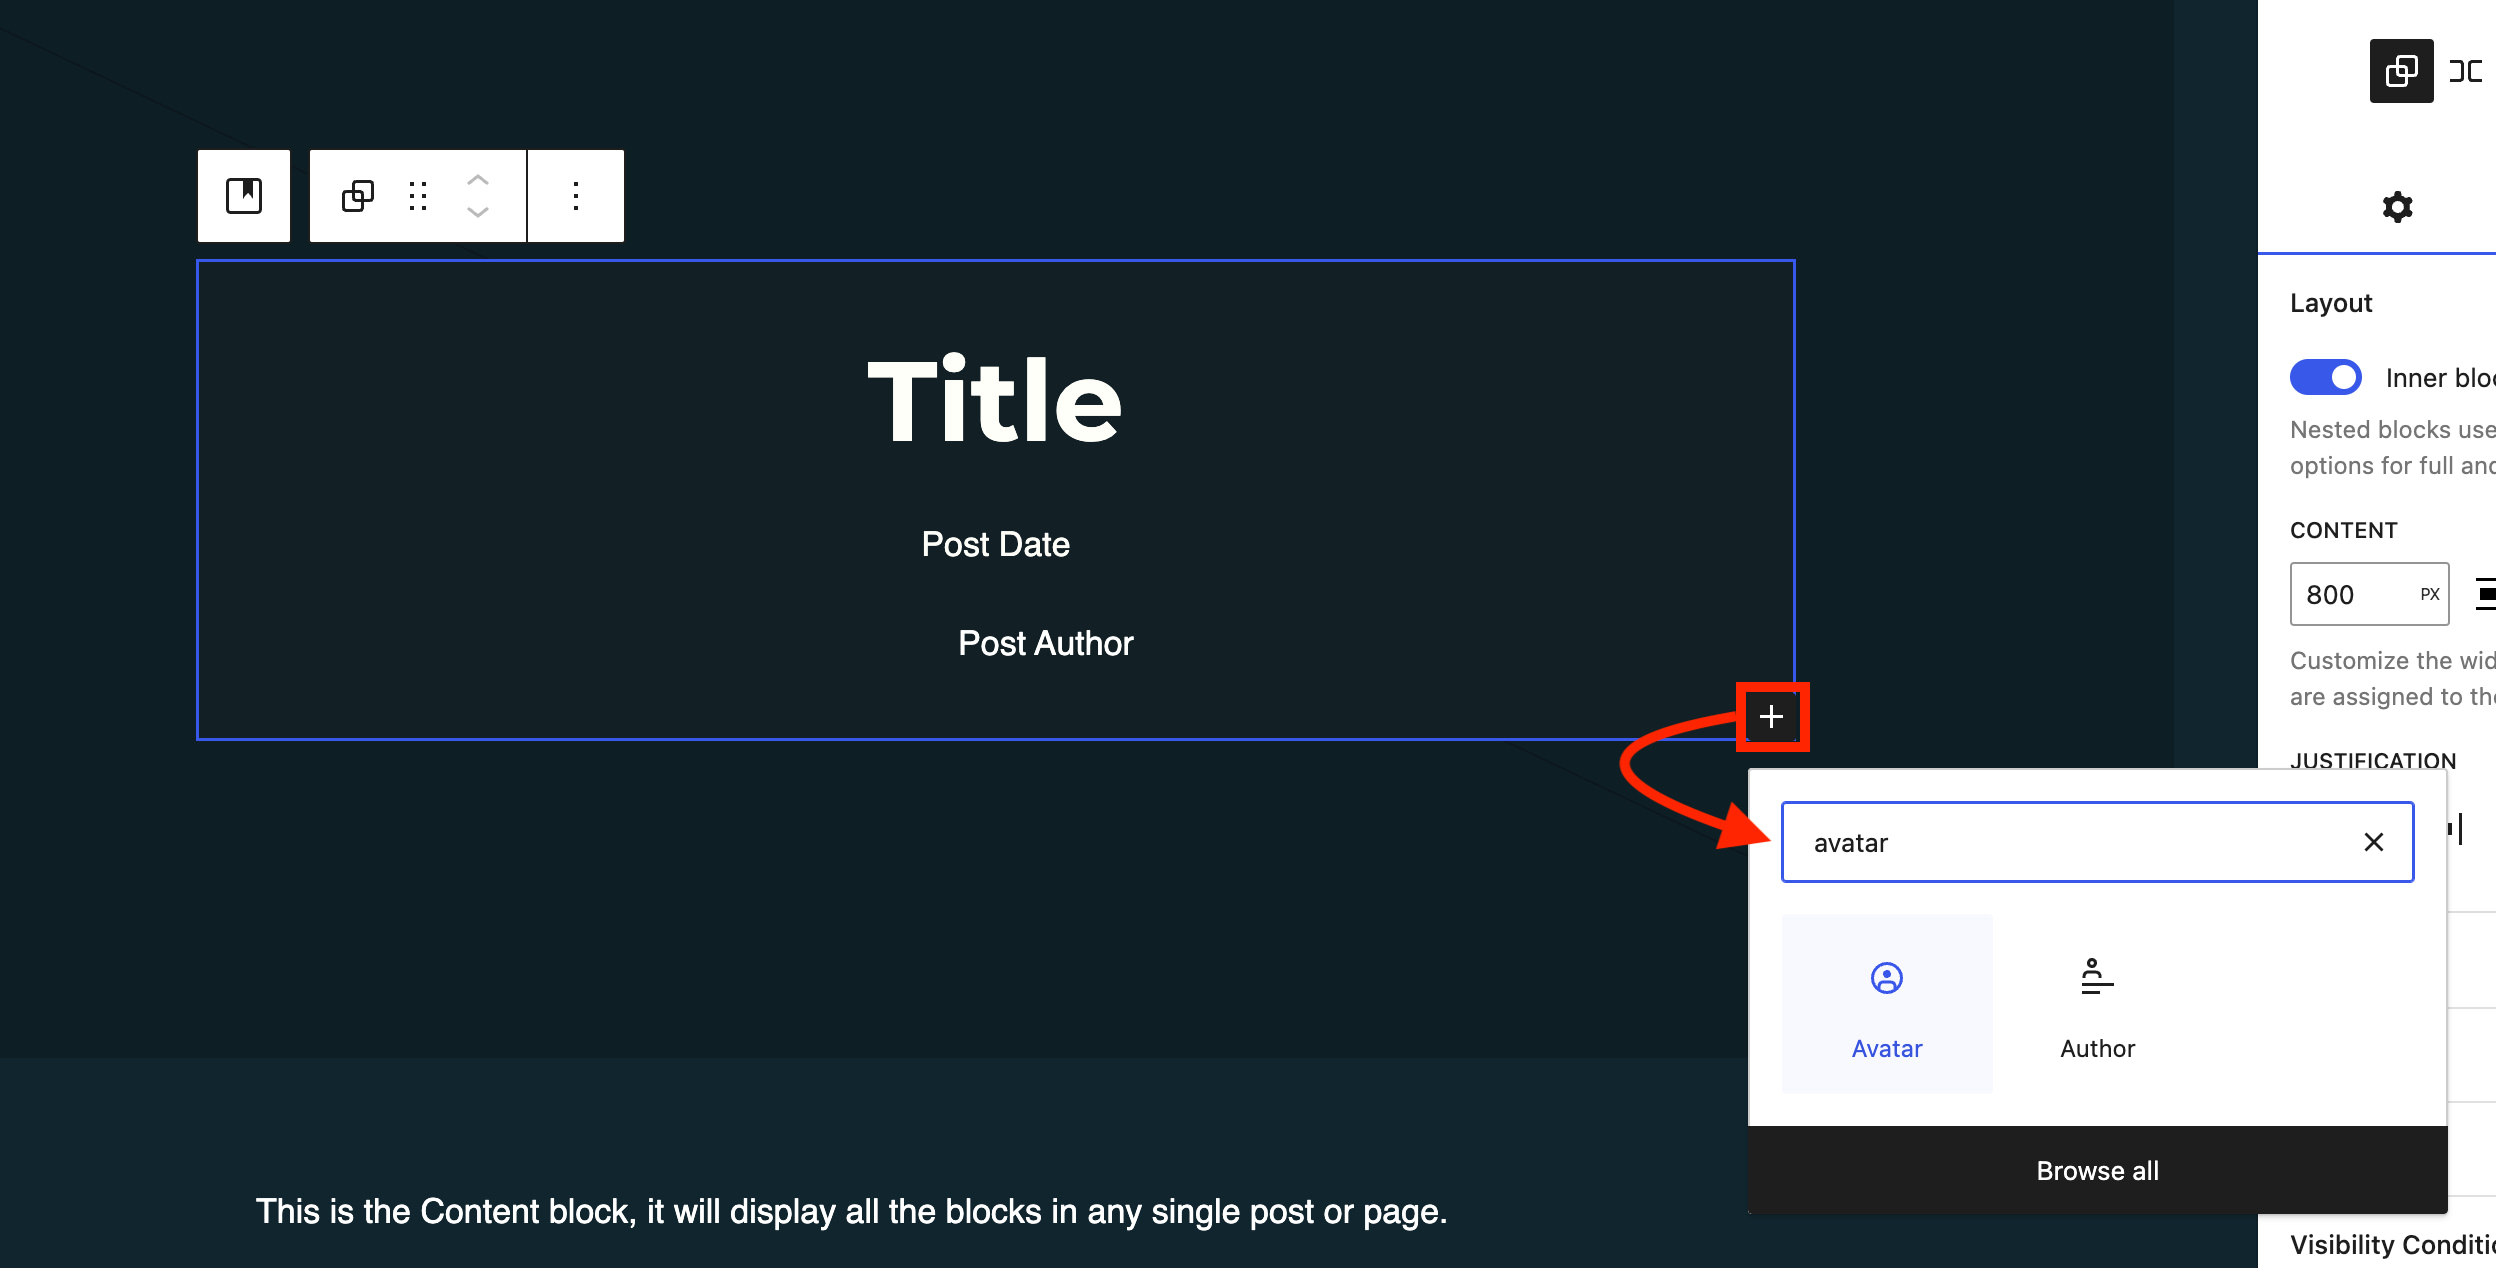
Once you add it to where you want it to go, you need to assign your user profile to it. You can do that on the righthand side menu, where you’ll also find the option to adjust the size of the image:
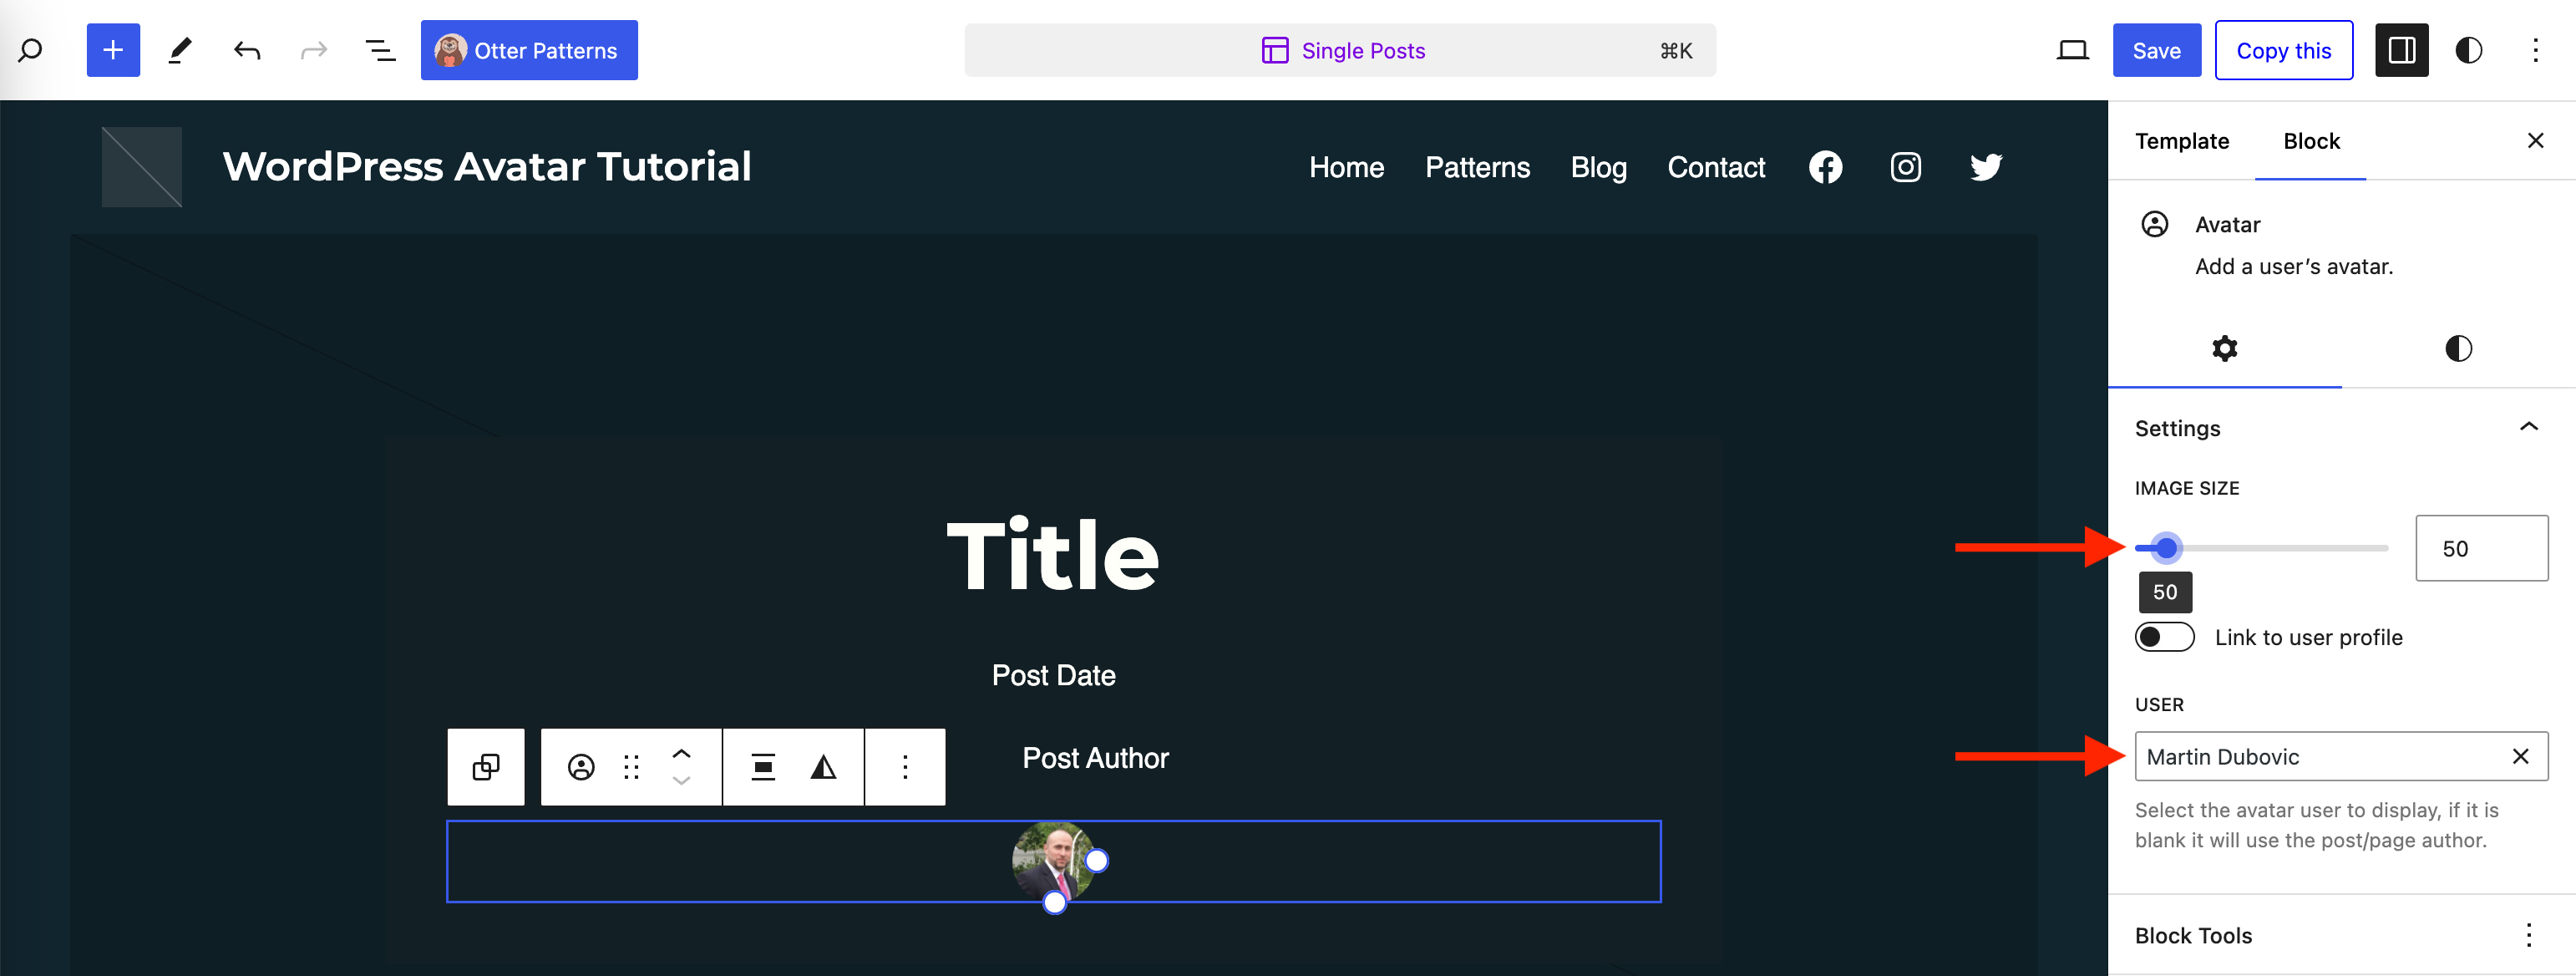
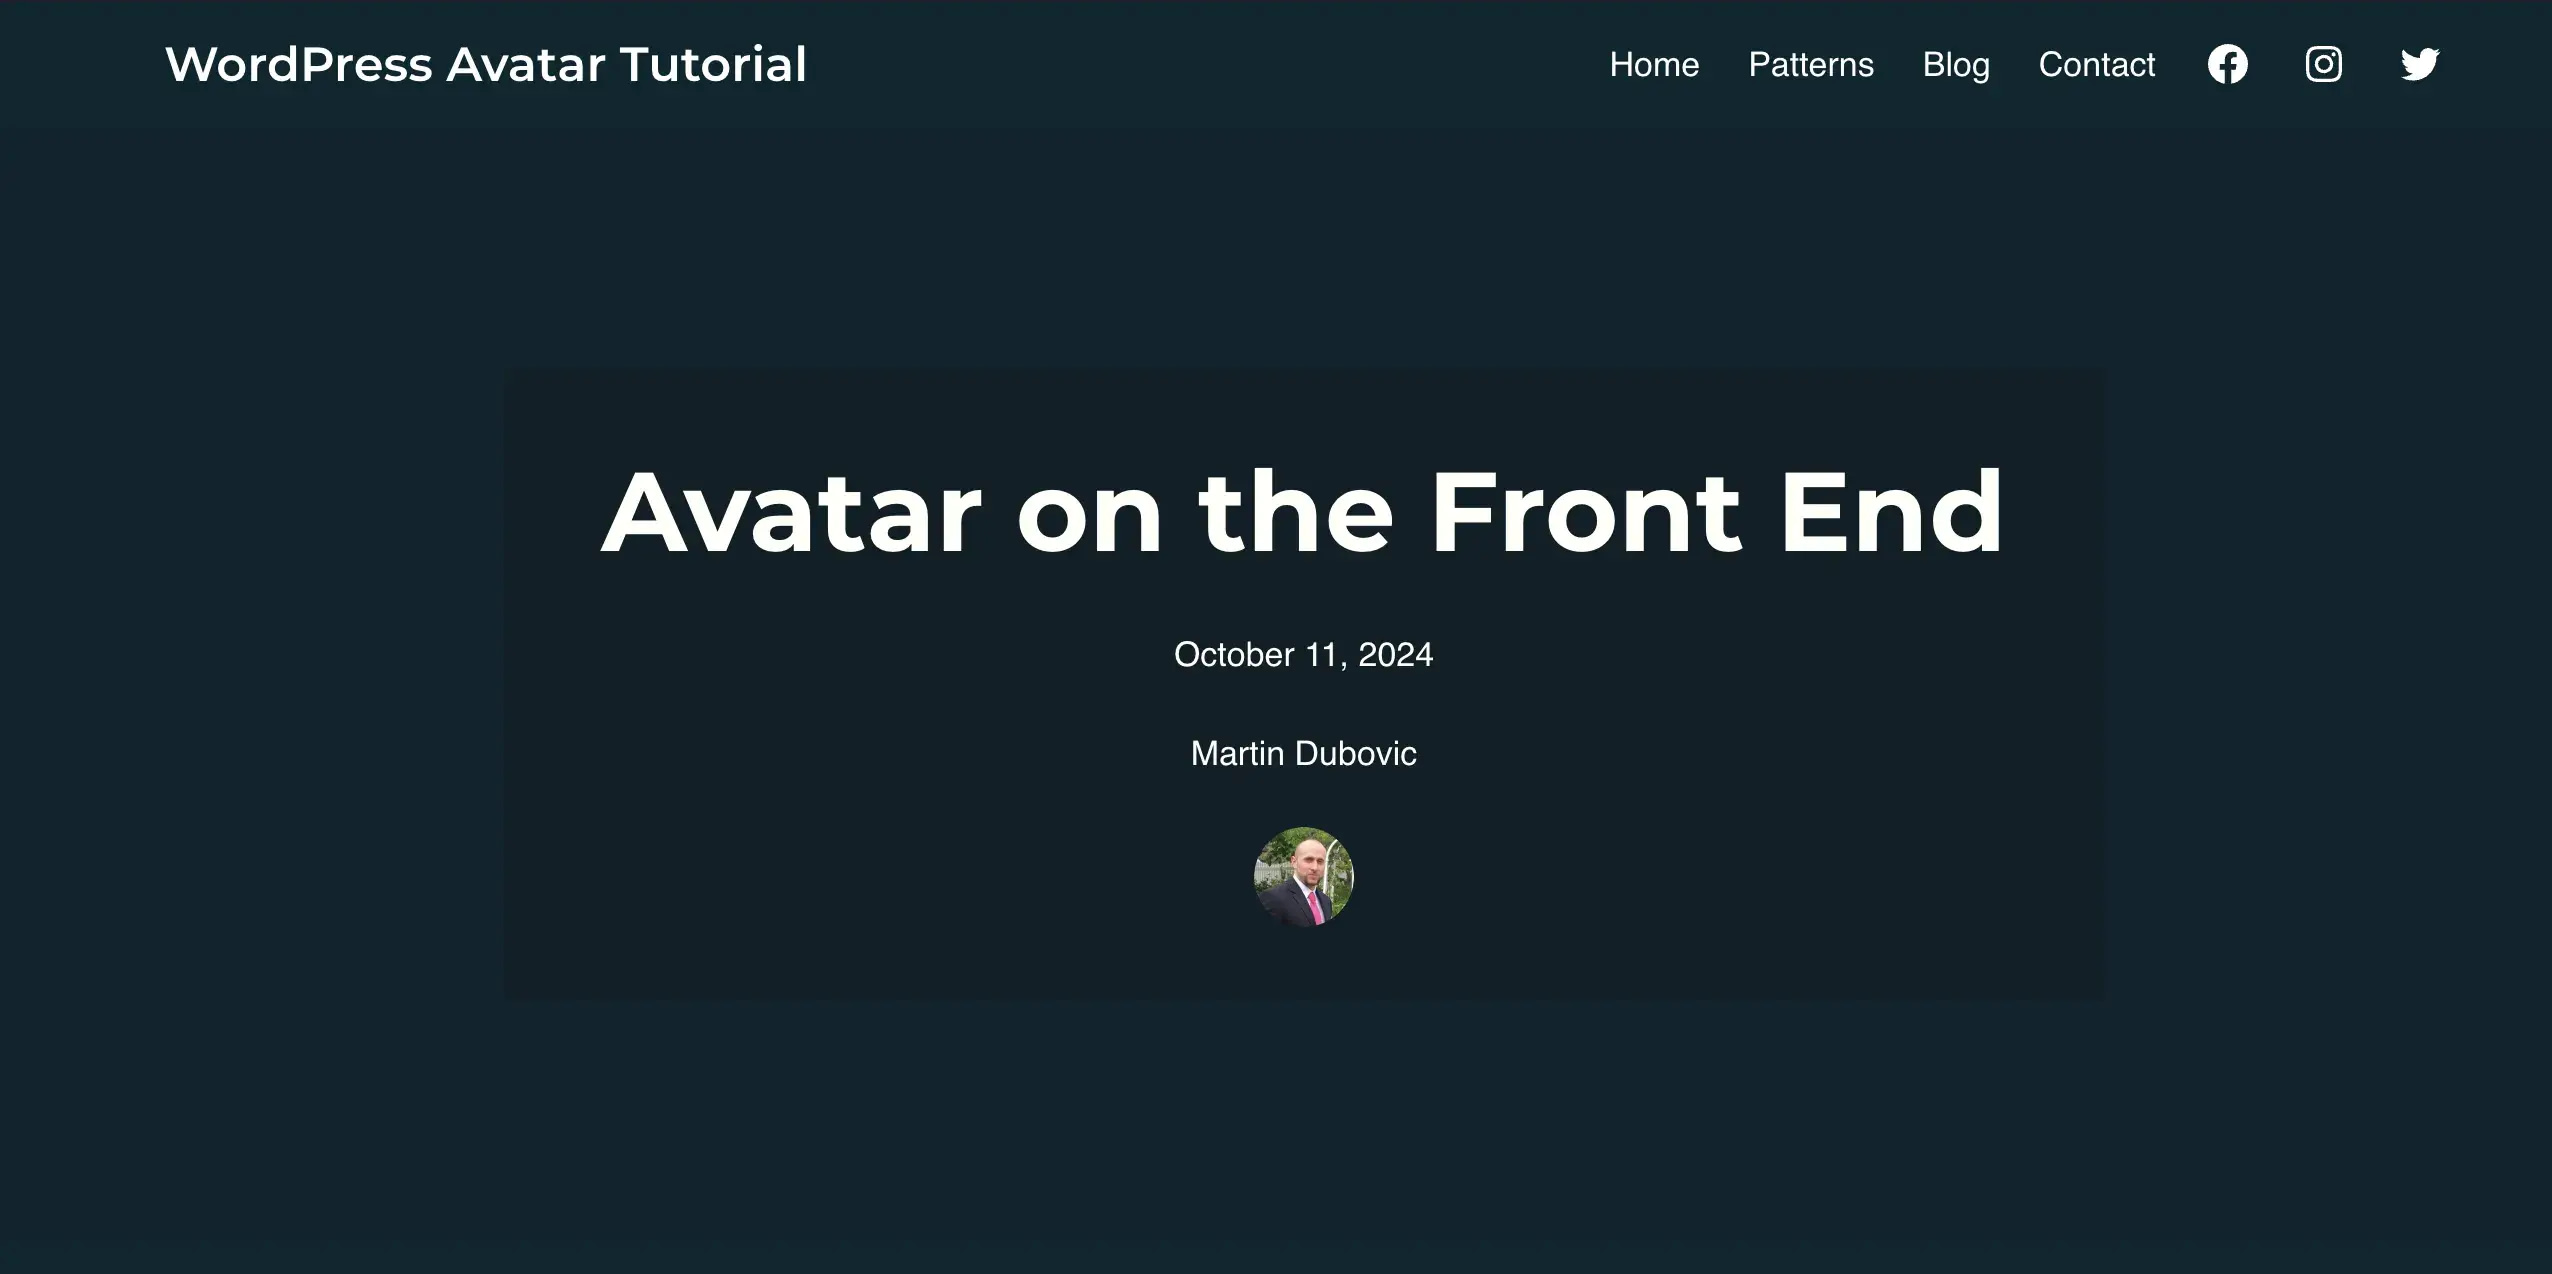
When you are ready, click Save on the top right and check one of your posts to make sure everything looks good:
Final thoughts
In the grand scheme of things, being coerced into using Gravatar to change your avatar user photo is a relatively minor issue. Nonetheless, it can feel annoying. At least I happen to think so. I’m assuming that if you’ve read this far then you agree with me. But, if you have read this far, then you now have a quick and simple workaround: the Basic User Avatars plugin.
Do you have any questions about what I covered here? Let me know in the comments below. I’ll be glad to help you if I can.

